Use a range of AI models to improve video quality by elevating resolution to 2K or 4K, restoring facial features, adding color to black and white videos, enhancing color, reducing visual noise, and optimizing frame rates by 2X and 4X. Download and try it now.
Whether you encounter the similar situations below?
"I have some old and precious videos that appear blurry. Is there any way to enhance their clarity and resolution?”
"There are some black and white videos saved on my computer. Can your software help colorize them?"
If you just encounter the similar situation above, don’t worry. You can try AnyEnhancer to enhance video quality with 7 types of AI models, including Intelligent Enhancement, Resolution Enhancement, Face Restoration, Colorize Model, Color Enhancement, Denoise Model, and Frame Interpolation. Let's take a look at how to enhance video.
Computer System Requirements
Windows OS
Windows 10, 11 (64bit)
macOS
macOS 11 and later
Supported Formats of Videos
MP4, MOV, WEBM, FLV
Different Benefits between Free & Activated Version
Benefits
Free Version
Activated Version
Enhance Video with AI Models
Export Enhanced Video
Step 1. Download and Install.
Before you start to enhance the video, get the tool downloaded onto your computer. Please make sure the network is stable while downloading and installing AnyEnhancer on your computer.
Step 2. Upload the Original Video.
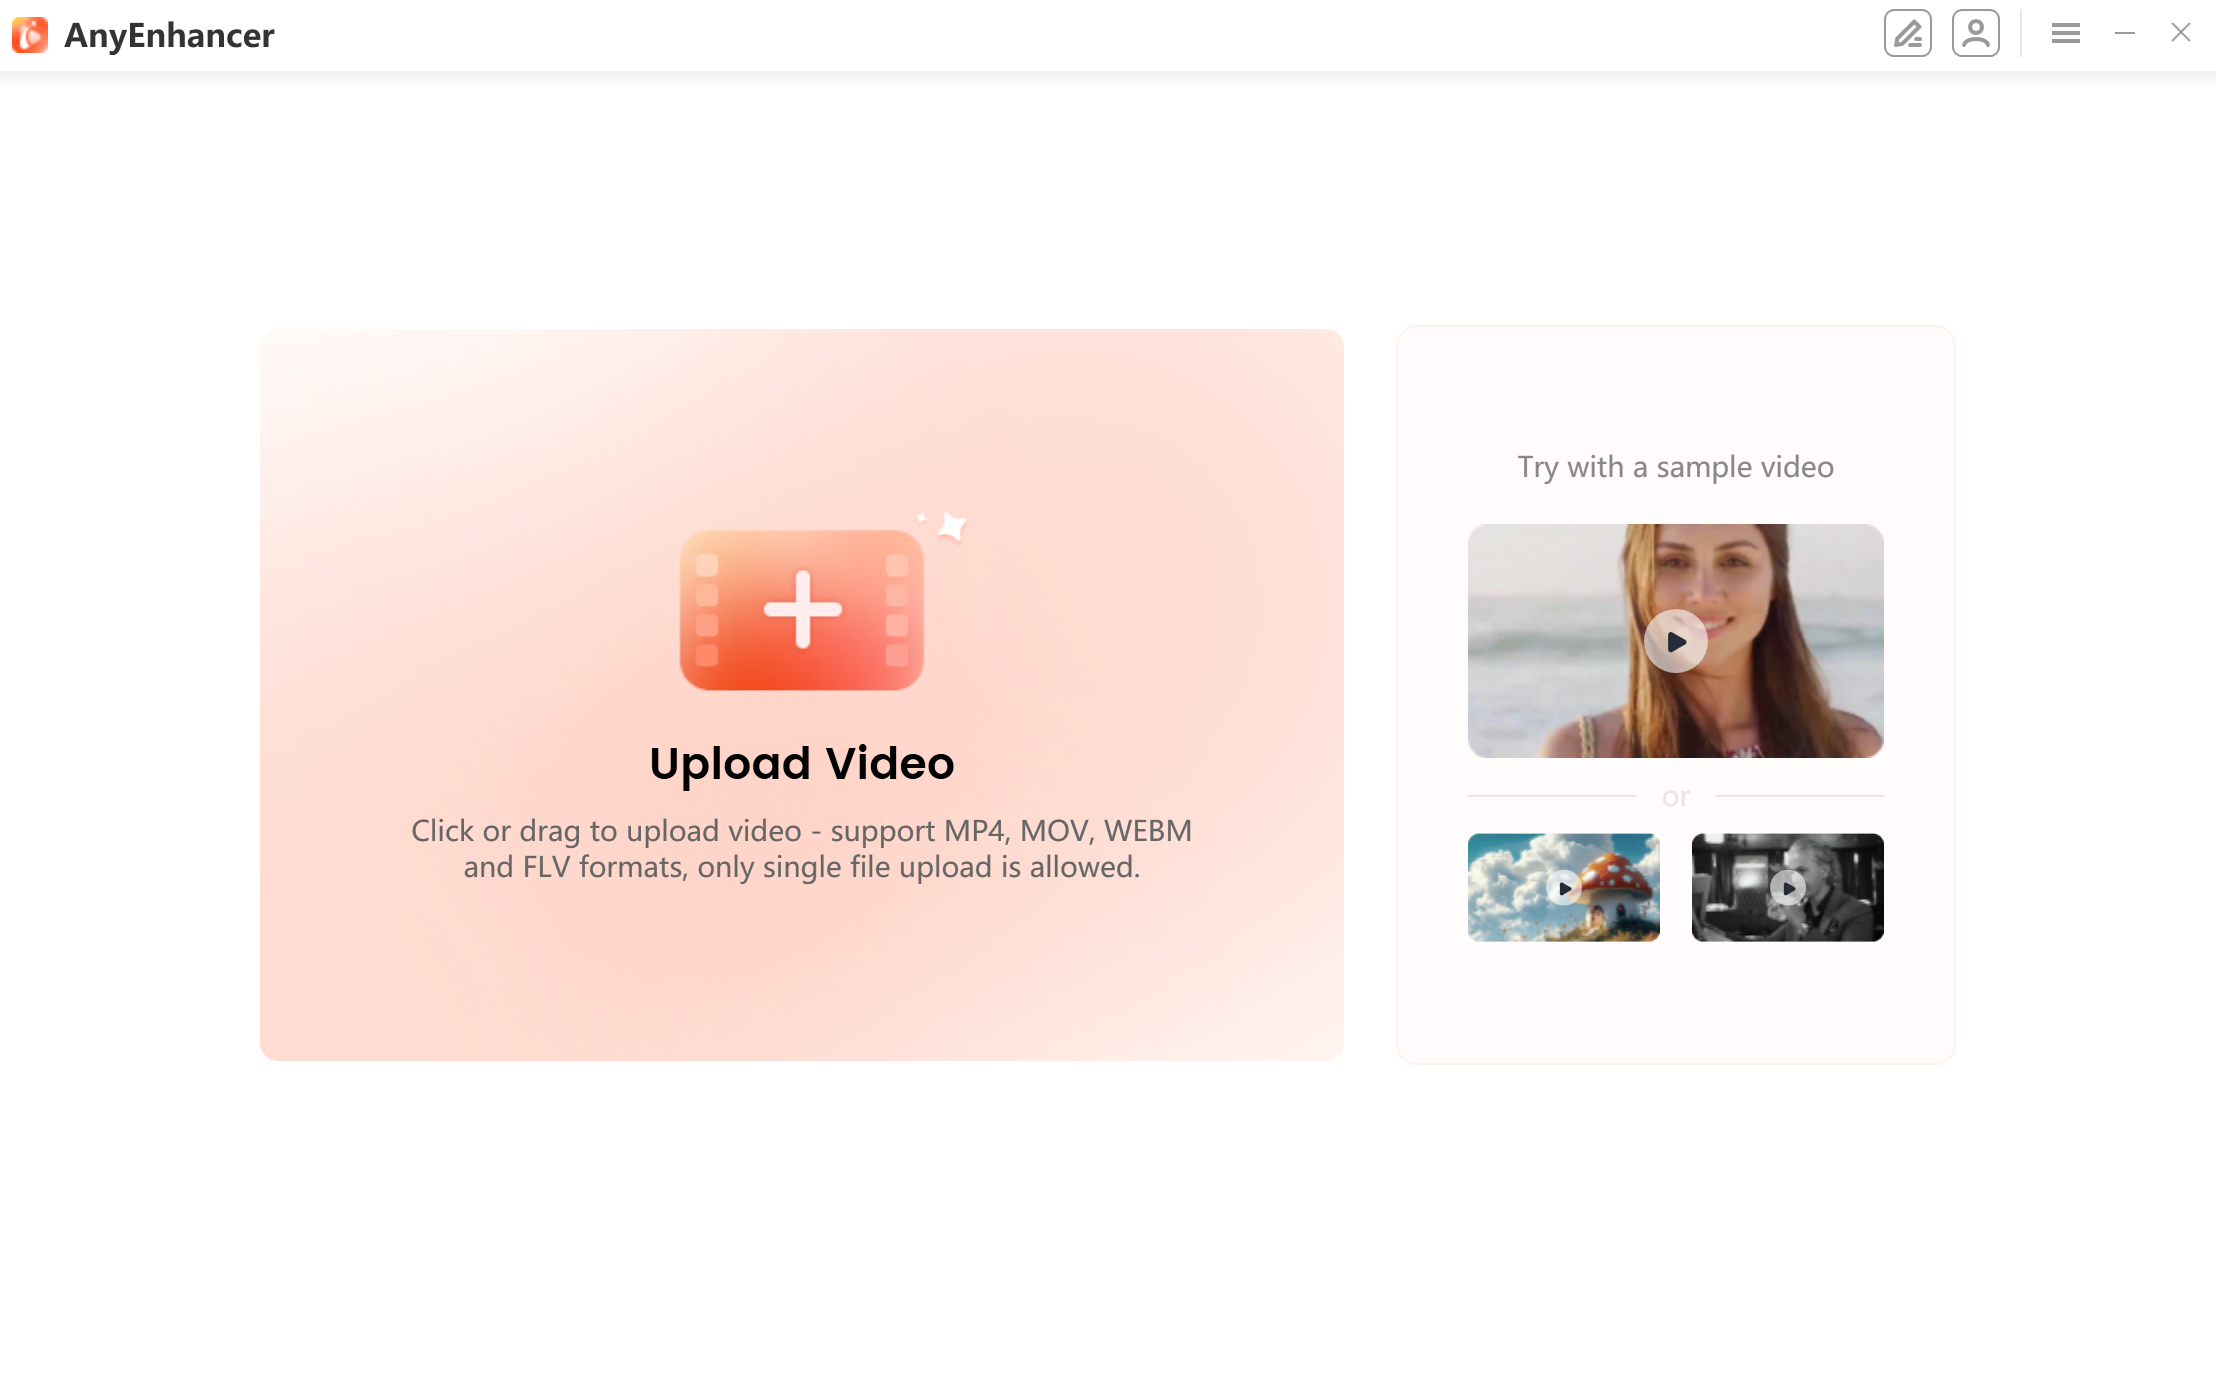
After AnyEnhancer is installed on the computer, please launch the program. Then, you will enter the main window of AnyEnhancer displayed as below. Please click the Add button or drag to upload the original video.
Upload the Original Video
Step 3. Choose An AI Model.
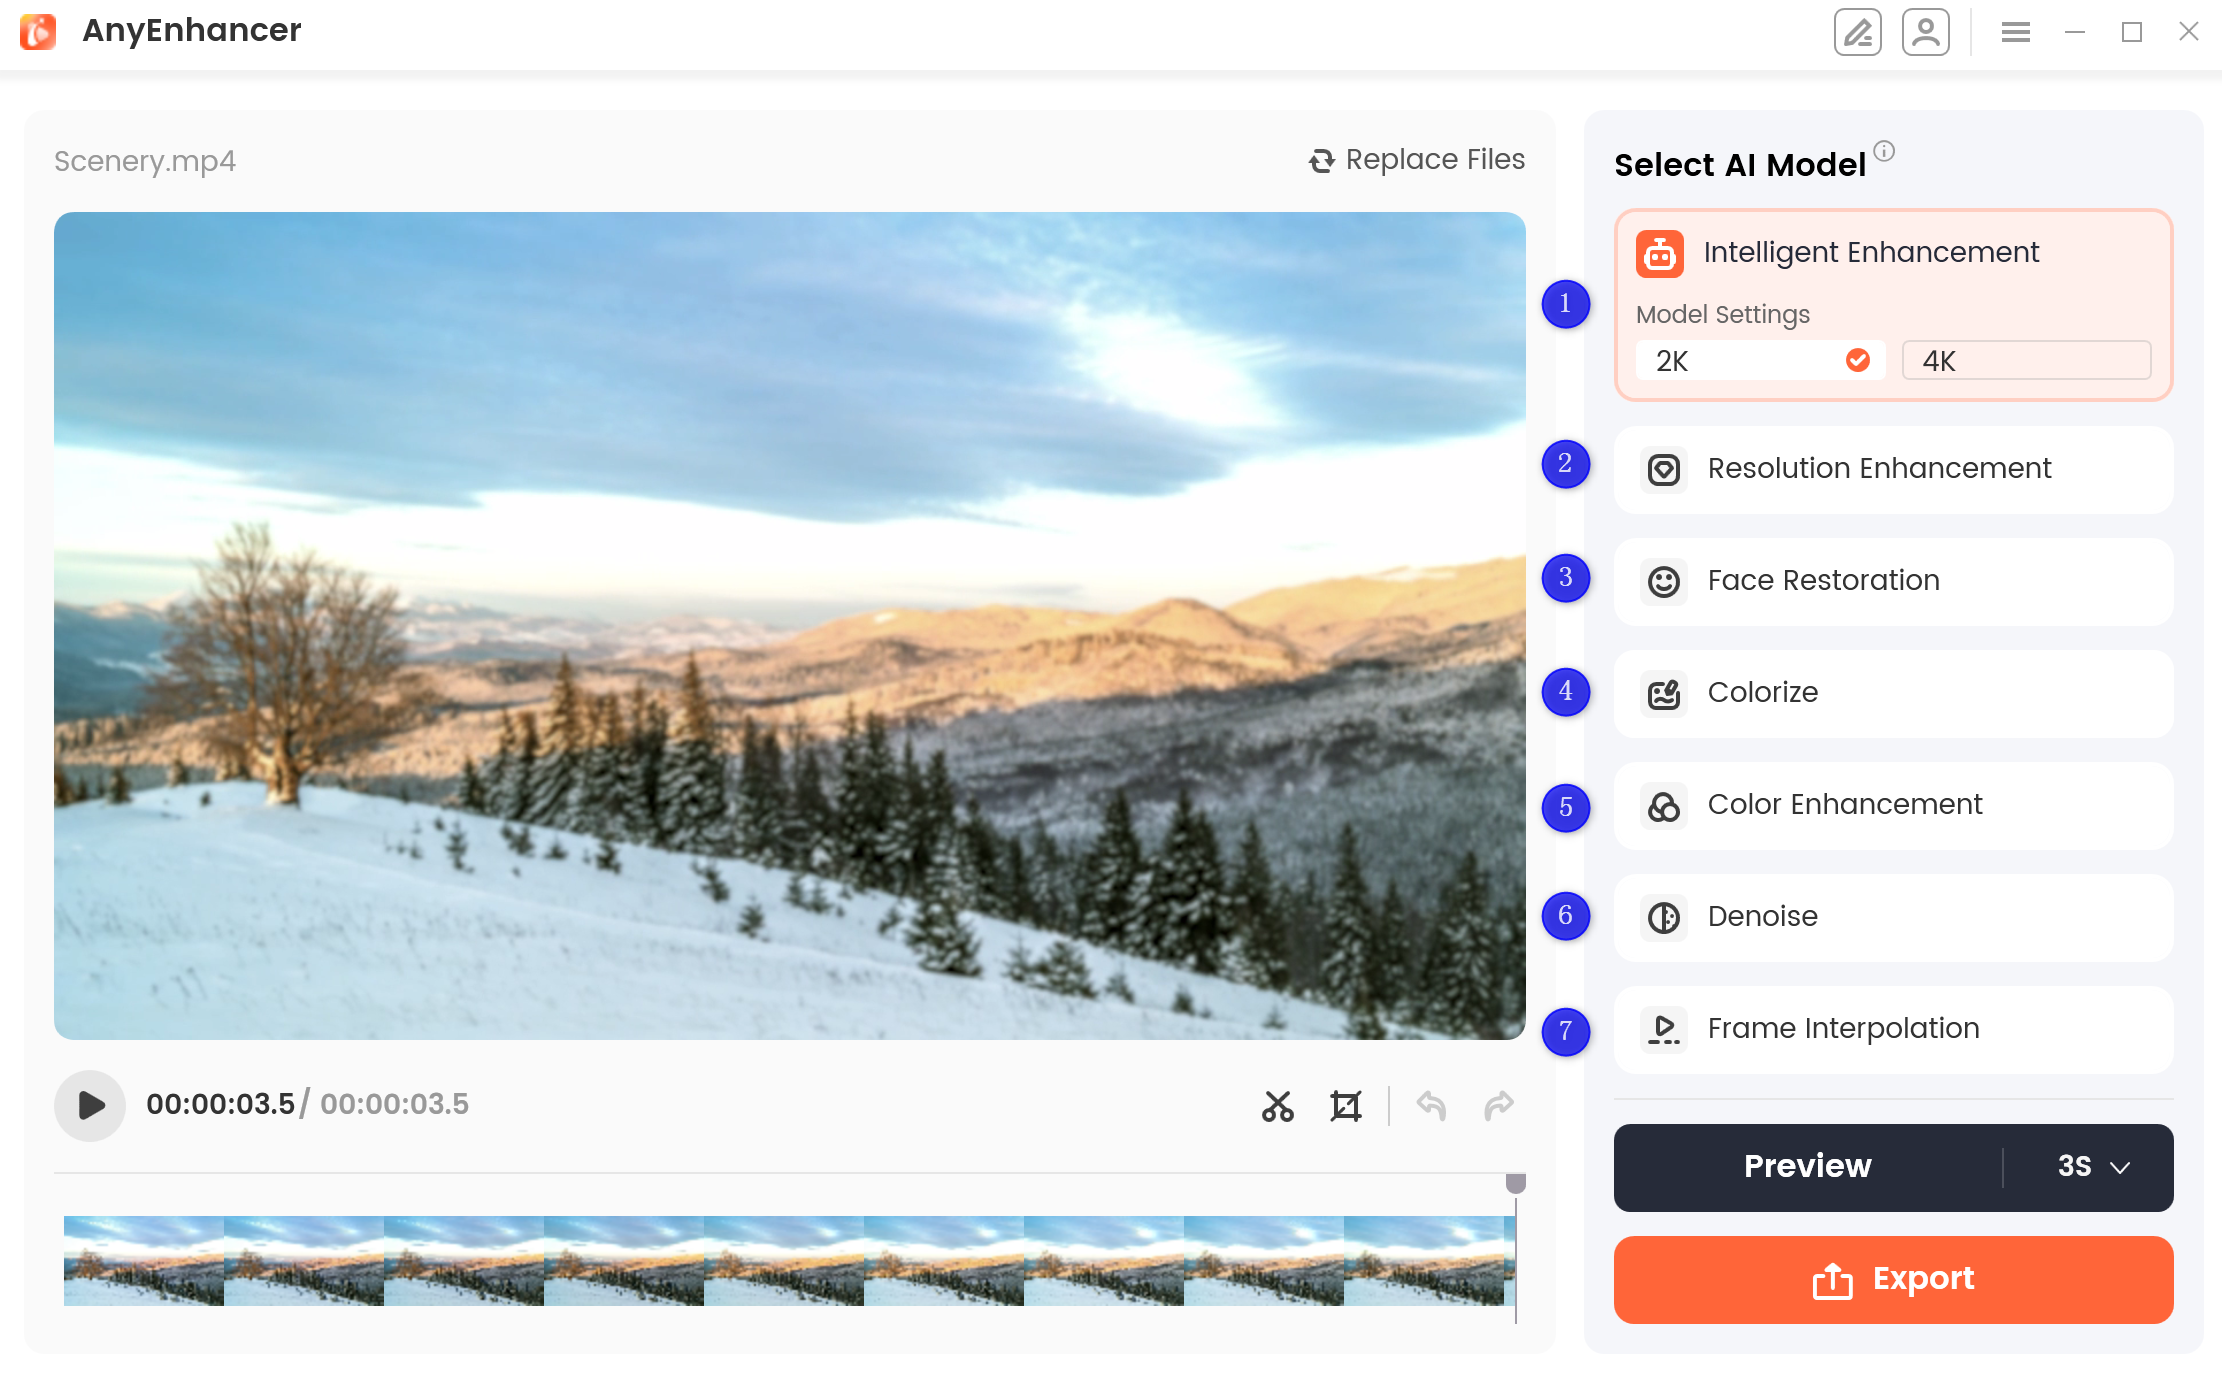
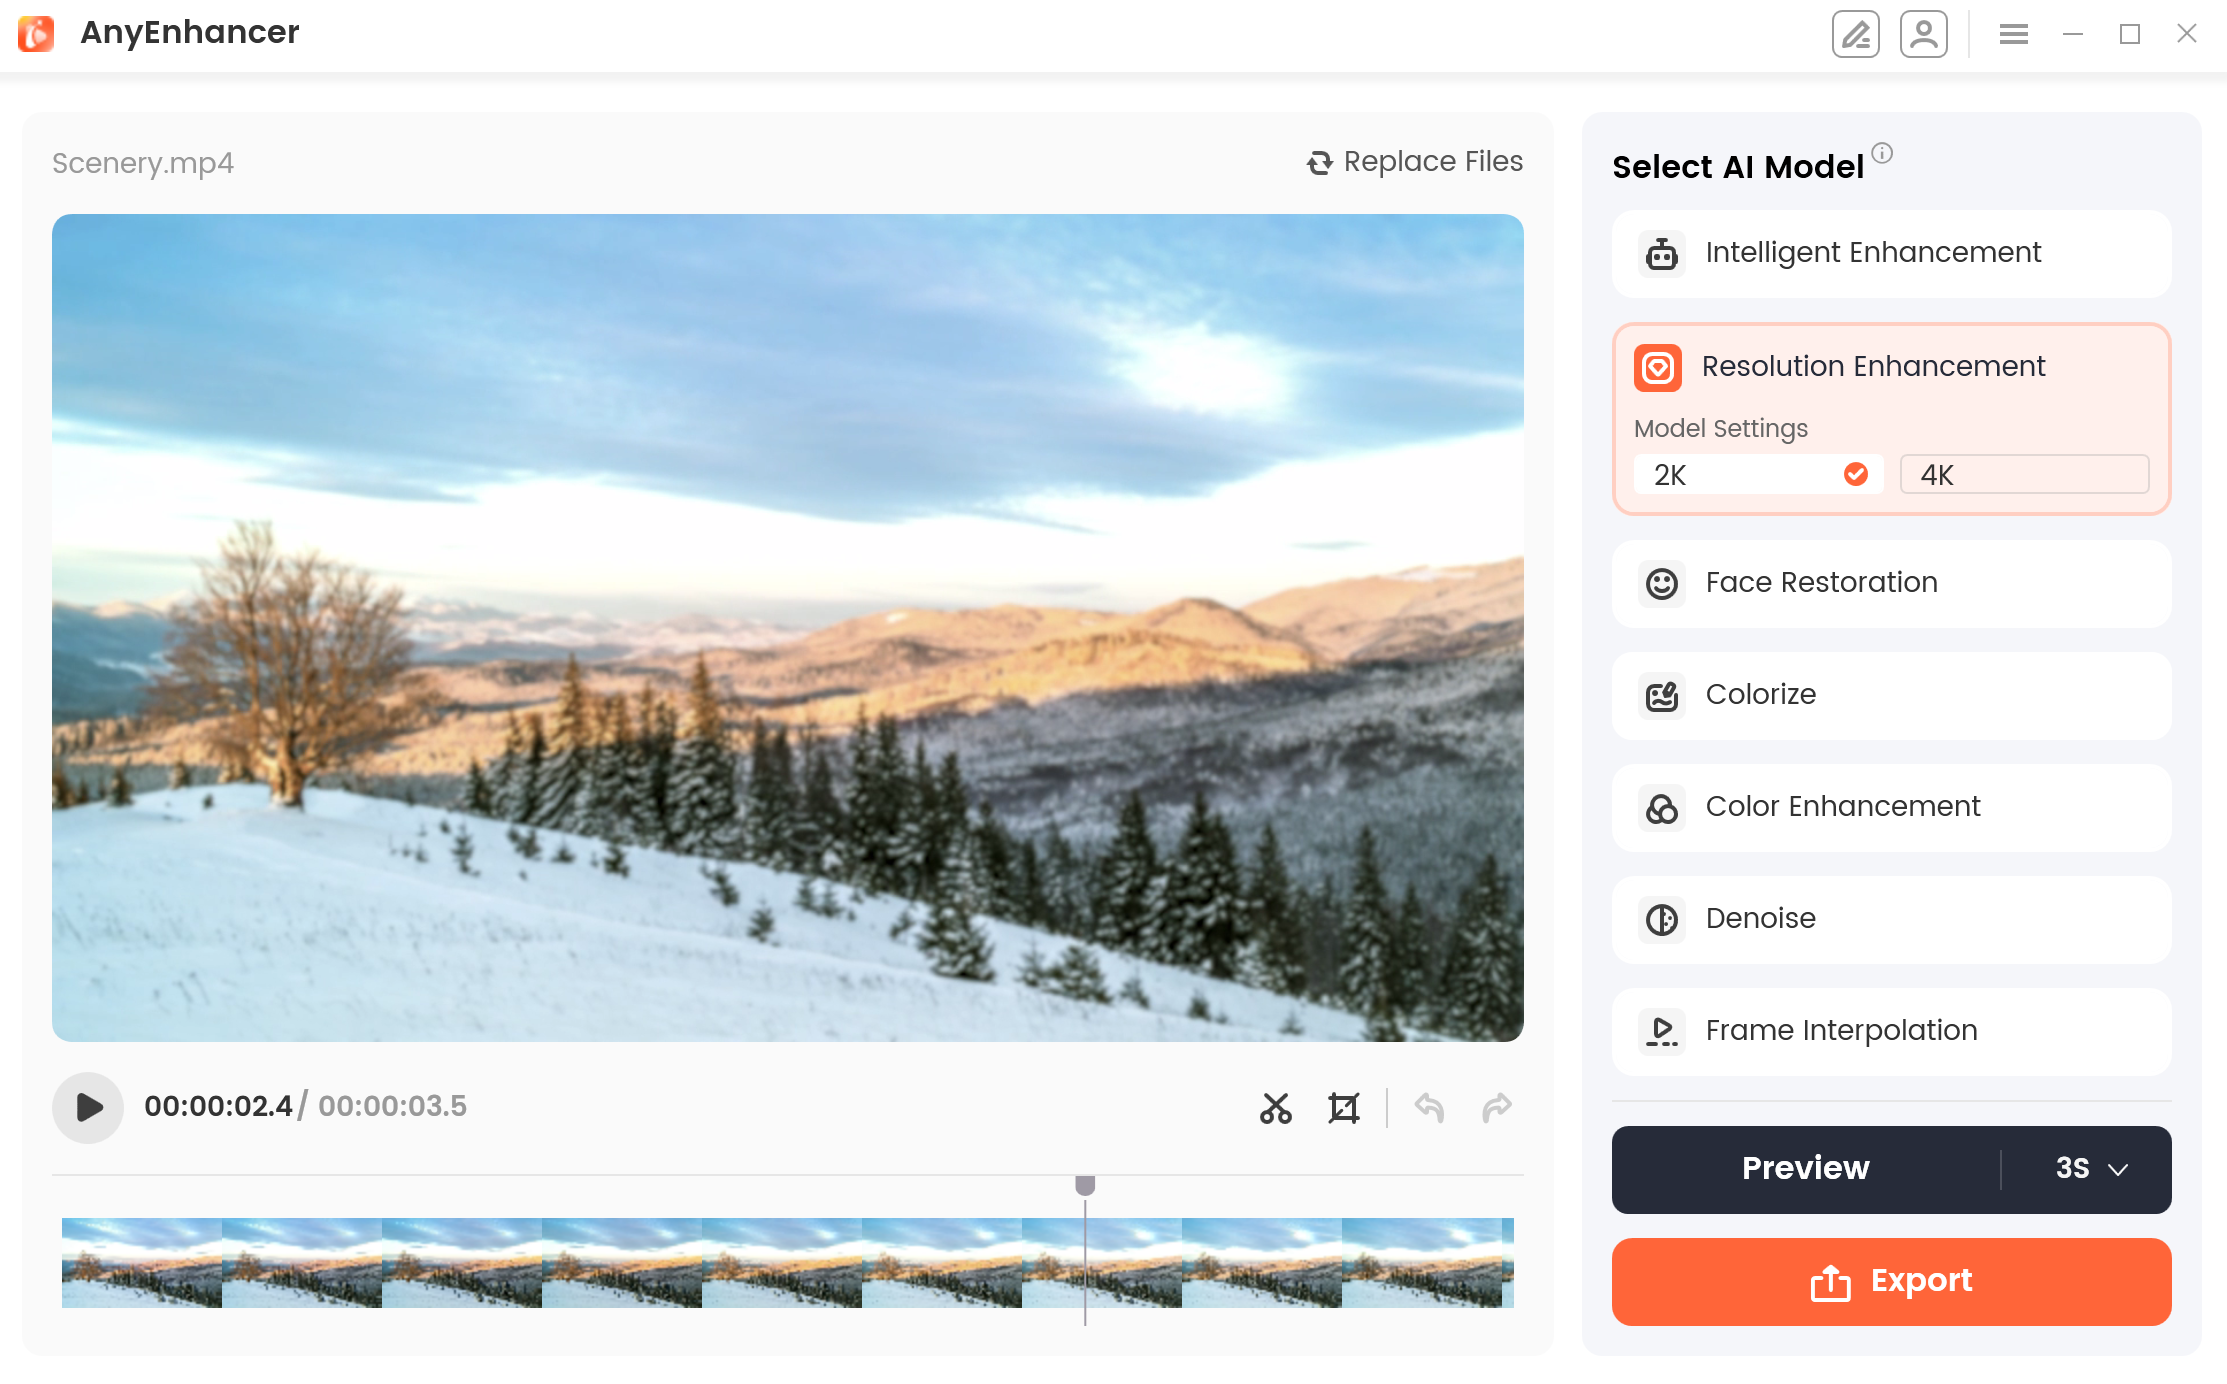
After you upload the video, please choose an AI model based on your video type to achieve enhancement effect. AnyEnhancer offers 7 types of AI models to enhance effects of the video: Intelligent Enhancement, Resolution Enhancement, Face Restoration, Colorize Model, Color Enhancement, Denoise Model, and Frame Interpolation.
Choose An AI Model
1Intelligent Enhancement: Apply super-resolution and facial enhancement to the video simultaneously, making the details of the people clearer and achieving an enhancement effect.
2Resolution Enhancement: Improve the quality and clarity of a video, resulting in a vibrant and colorful effect. This model provides 2K and 4K model settings.
3Face Restoration: Recognize faces in blurry videos perform restoration and enhance facial details.
5Color Enhancement: Enhance the colors of low-quality videos, increasing their overall brightness and saturation.
6Denoise Model: Reduce noise from video to improve visual quality.
7Frame Interpolation: Increase the frame rate of the video, resulting in smoother motion and improved visual quality.
1. To know more information about the 7 types of AI models, please refer to this detailed guide.
2. If you need to clip, crop ,or replace the video, please refer to this detailed guide.
Step 4. Preview the Effect and Export.
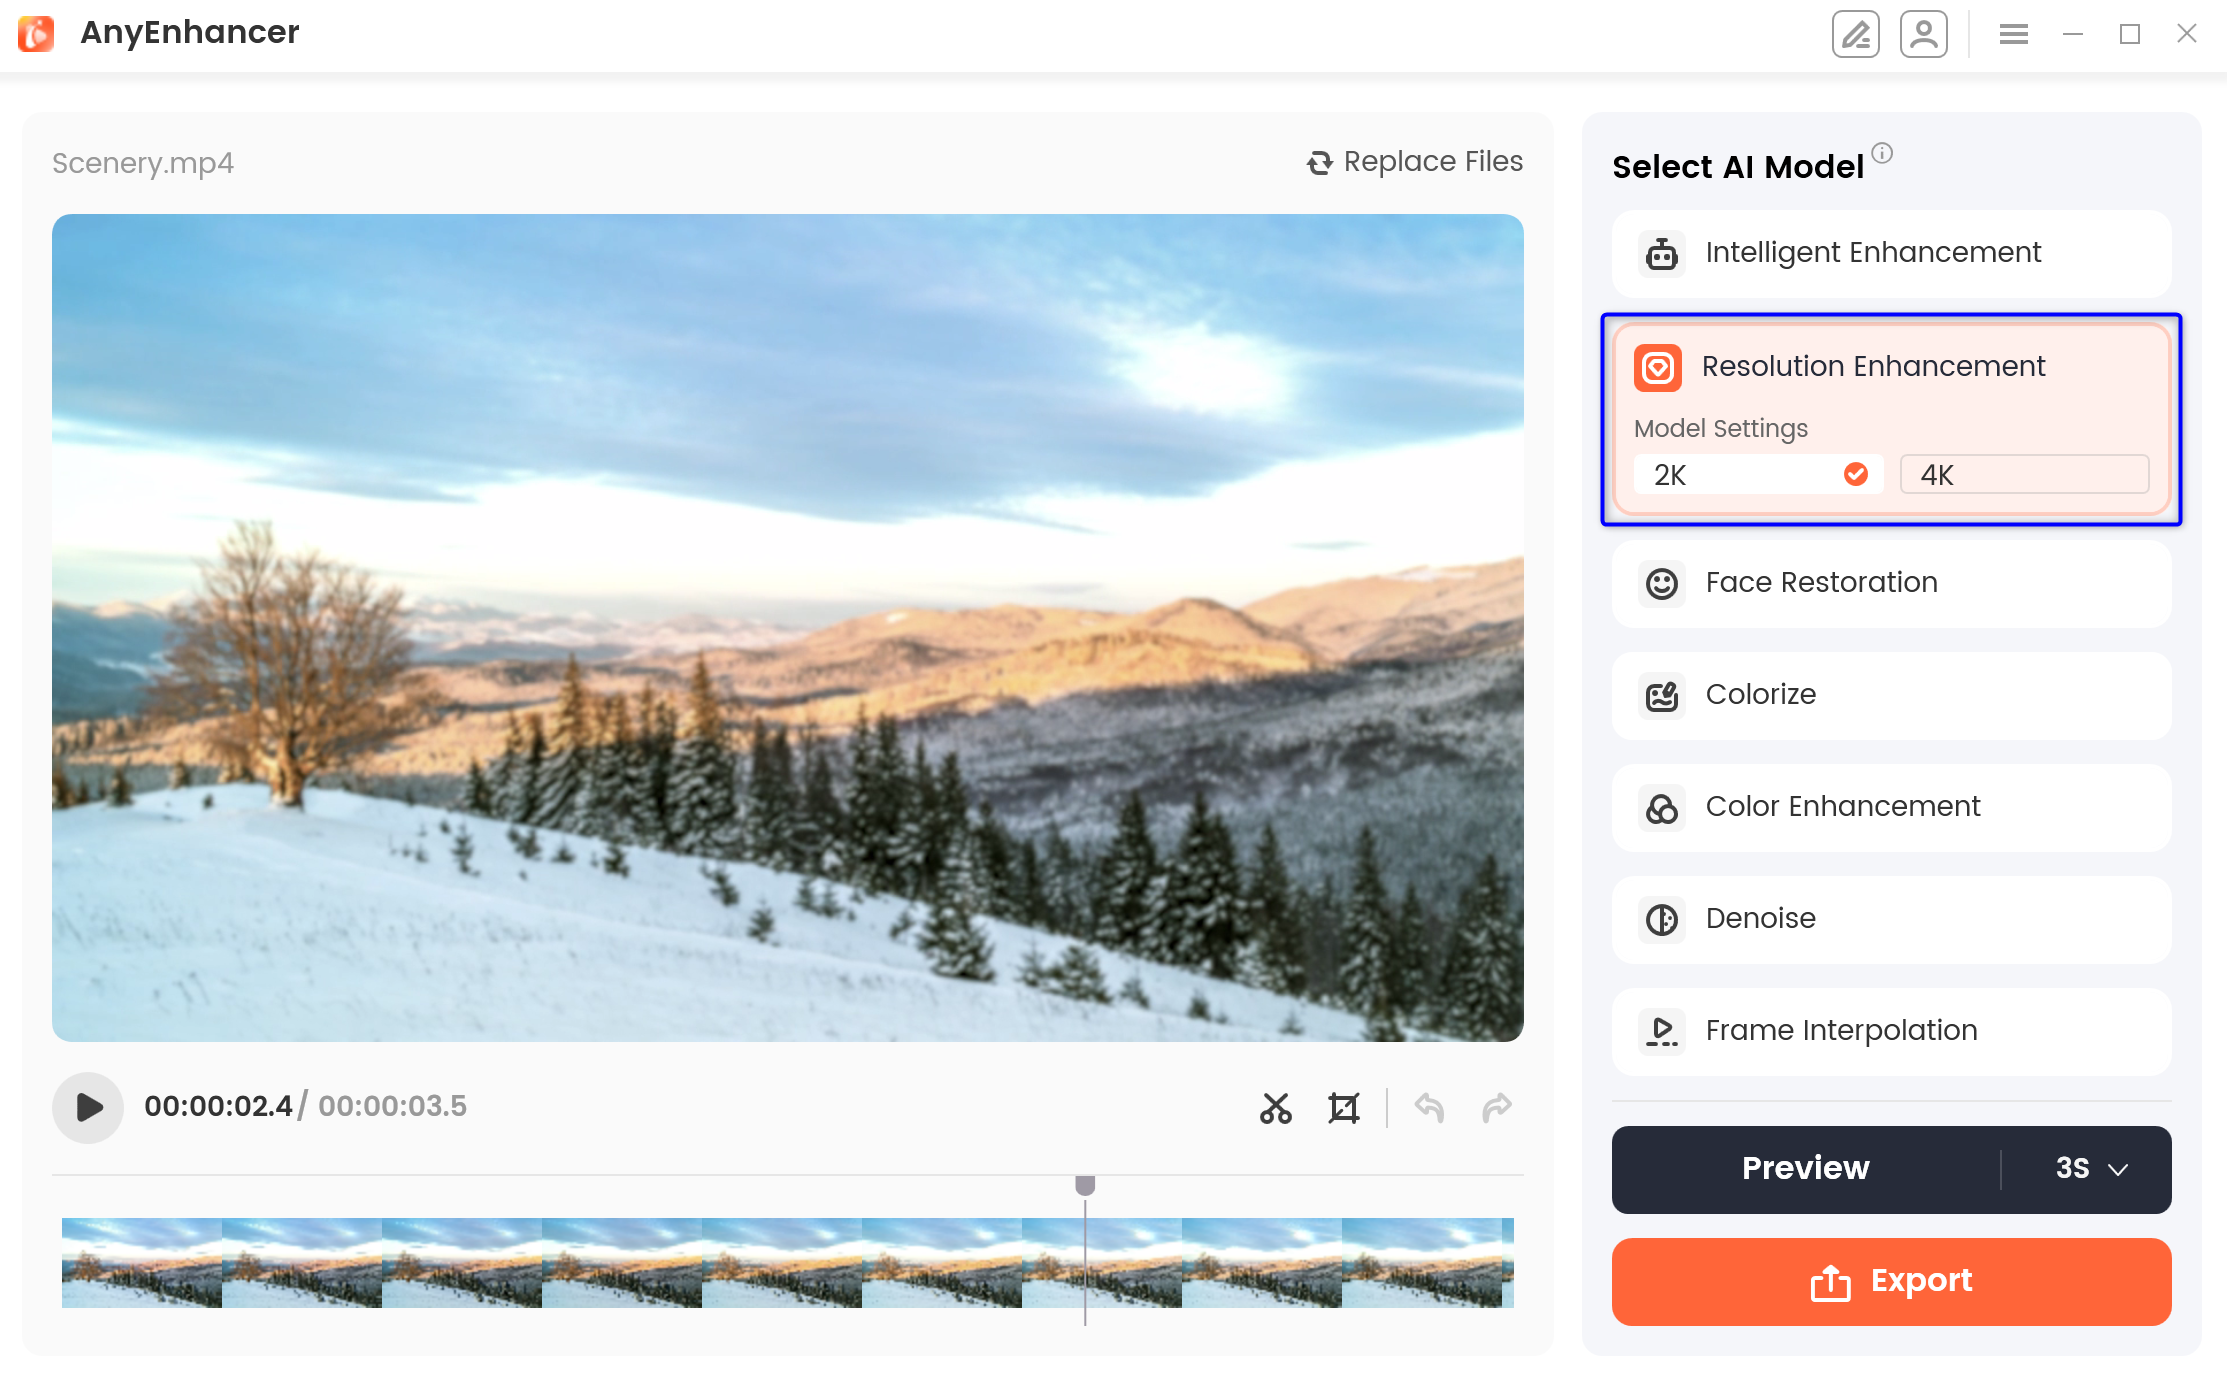
This guide will take using Resolution Enhancement to enhance video as an example. Please select Resolution Enhancement and choose a model setting (2k or 4k) based on your needs.
Select Resolution Enhancement
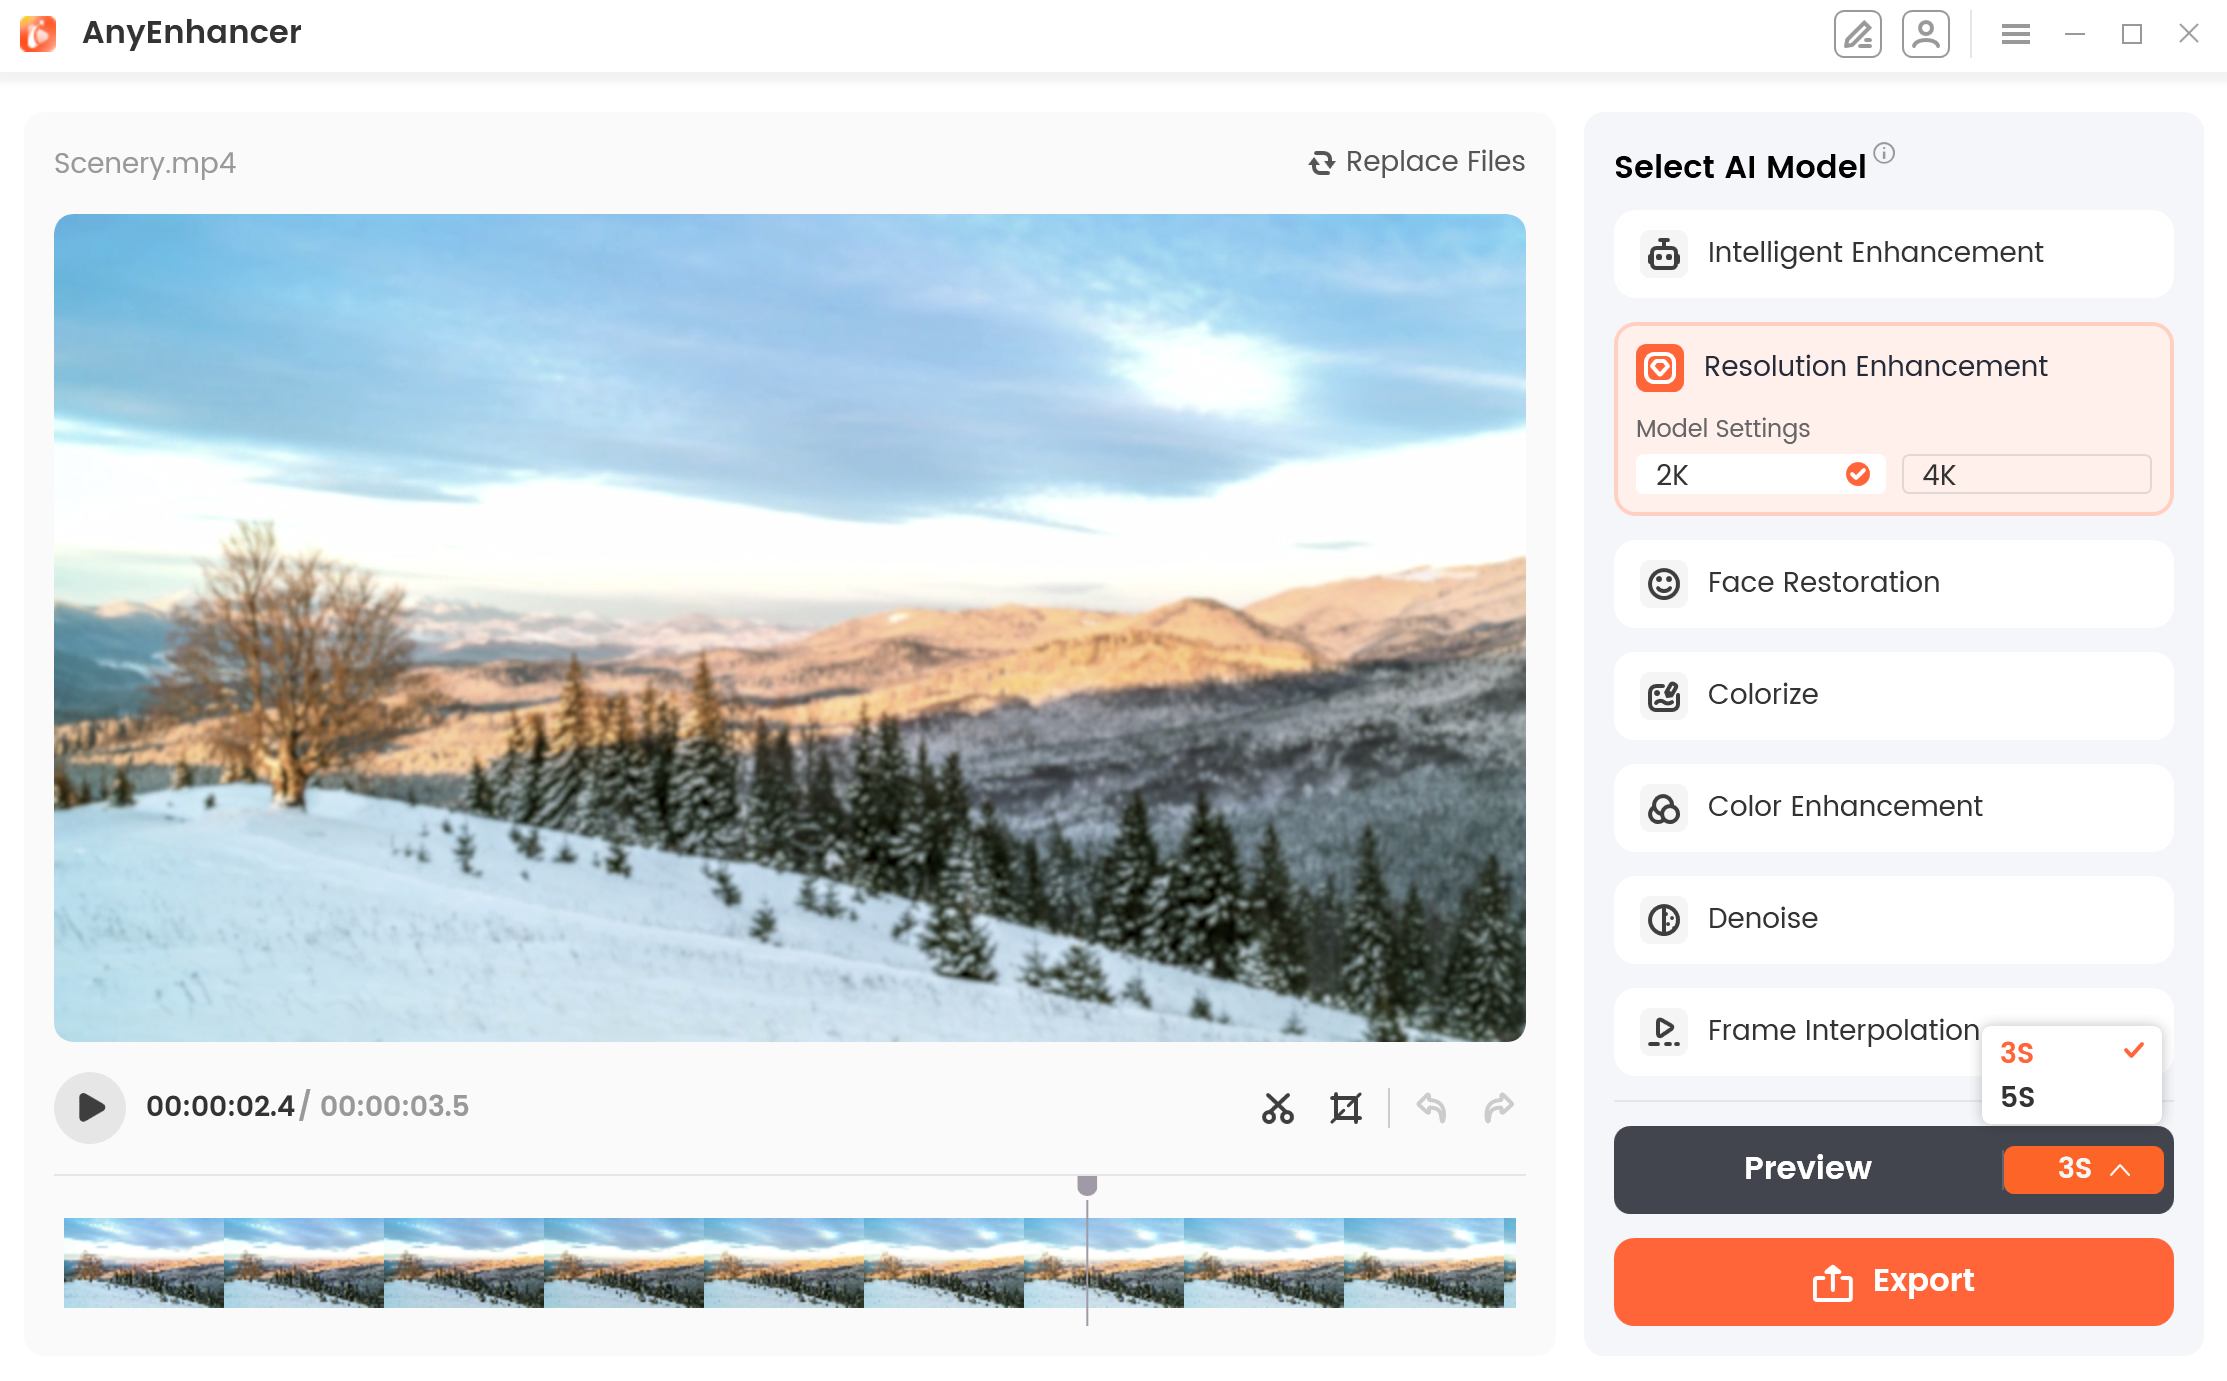
After that, please click the Preview button to process the video.
Click the Preview Button
By default, the preview duration is set to 3 seconds. Currently, you have the option to choose either 3 seconds or 5 seconds for the preview duration based on your requirements.
Choose the Preview Duration
1. You can preview the partial effect of the video using the AI model. After exporting the video, you will be able to preview the entire enhanced video.
2. The video enhancement effect depends on your computer's configuration. The actual enhancement effect will vary based on the computer's specifications and the video content.
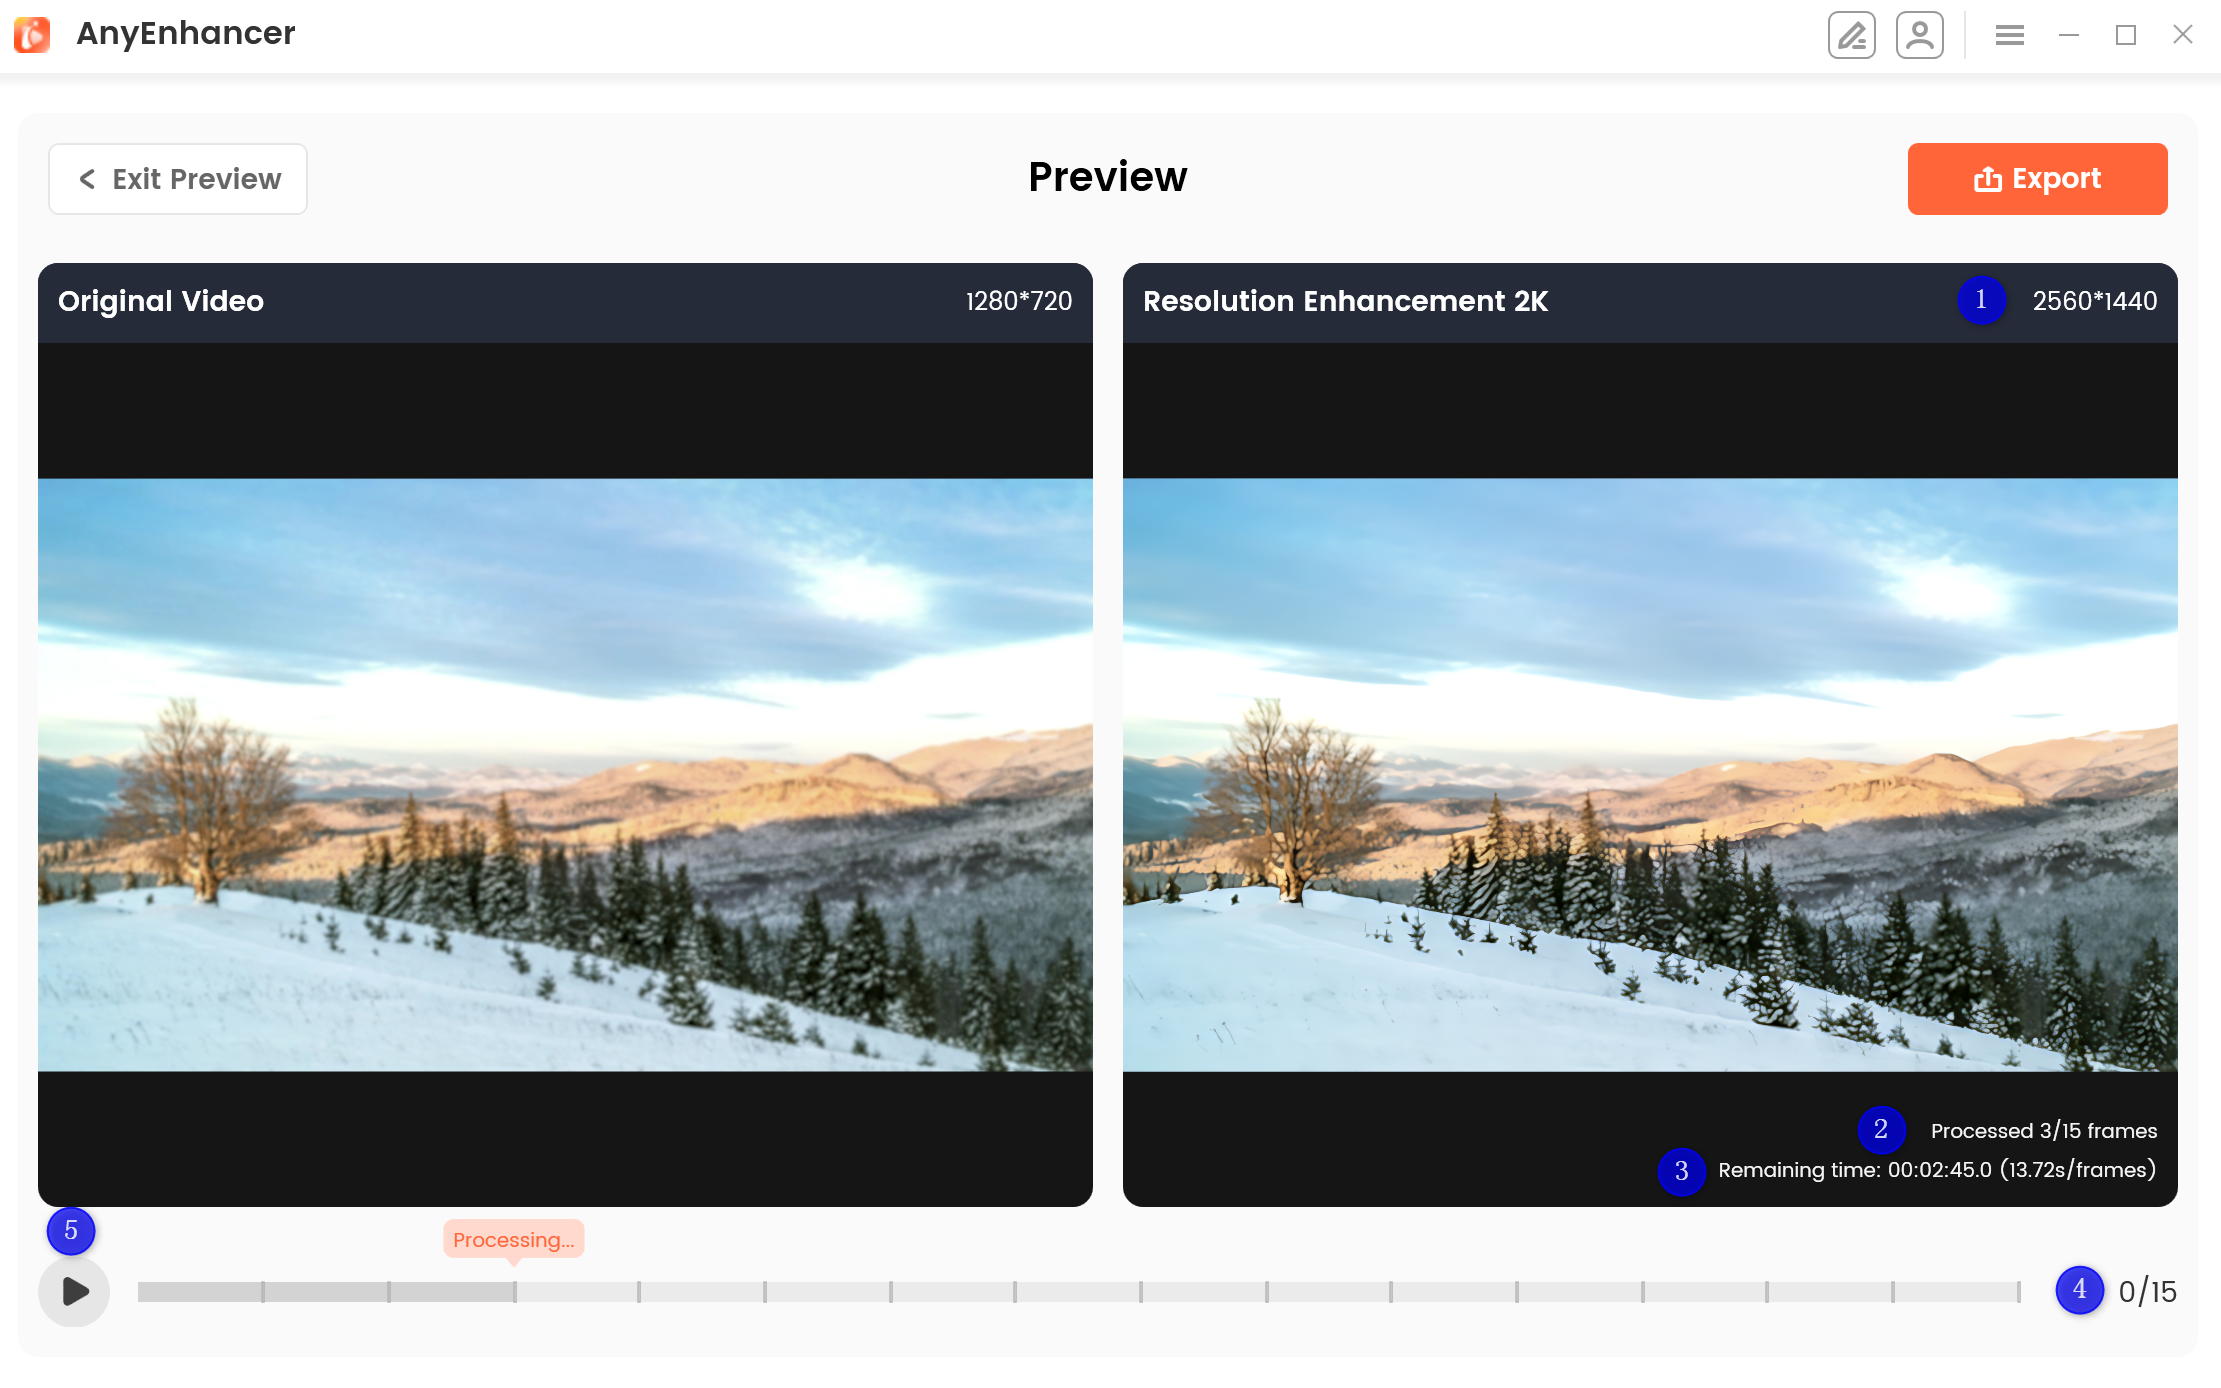
After you click the Preview button, you will see a comparison between the original video and the processed video interface. The left side shows the original video interface, while the right side displays the processed effect interface by the selected AI model.
Enter the Preview Page
In this preview interface, it also displays:
1The resolution of the video.
2The progress of the processed frames.
3The remaining processing time.
4The playback bar is displayed in the form of frame count.
5Play or pause the processed video.
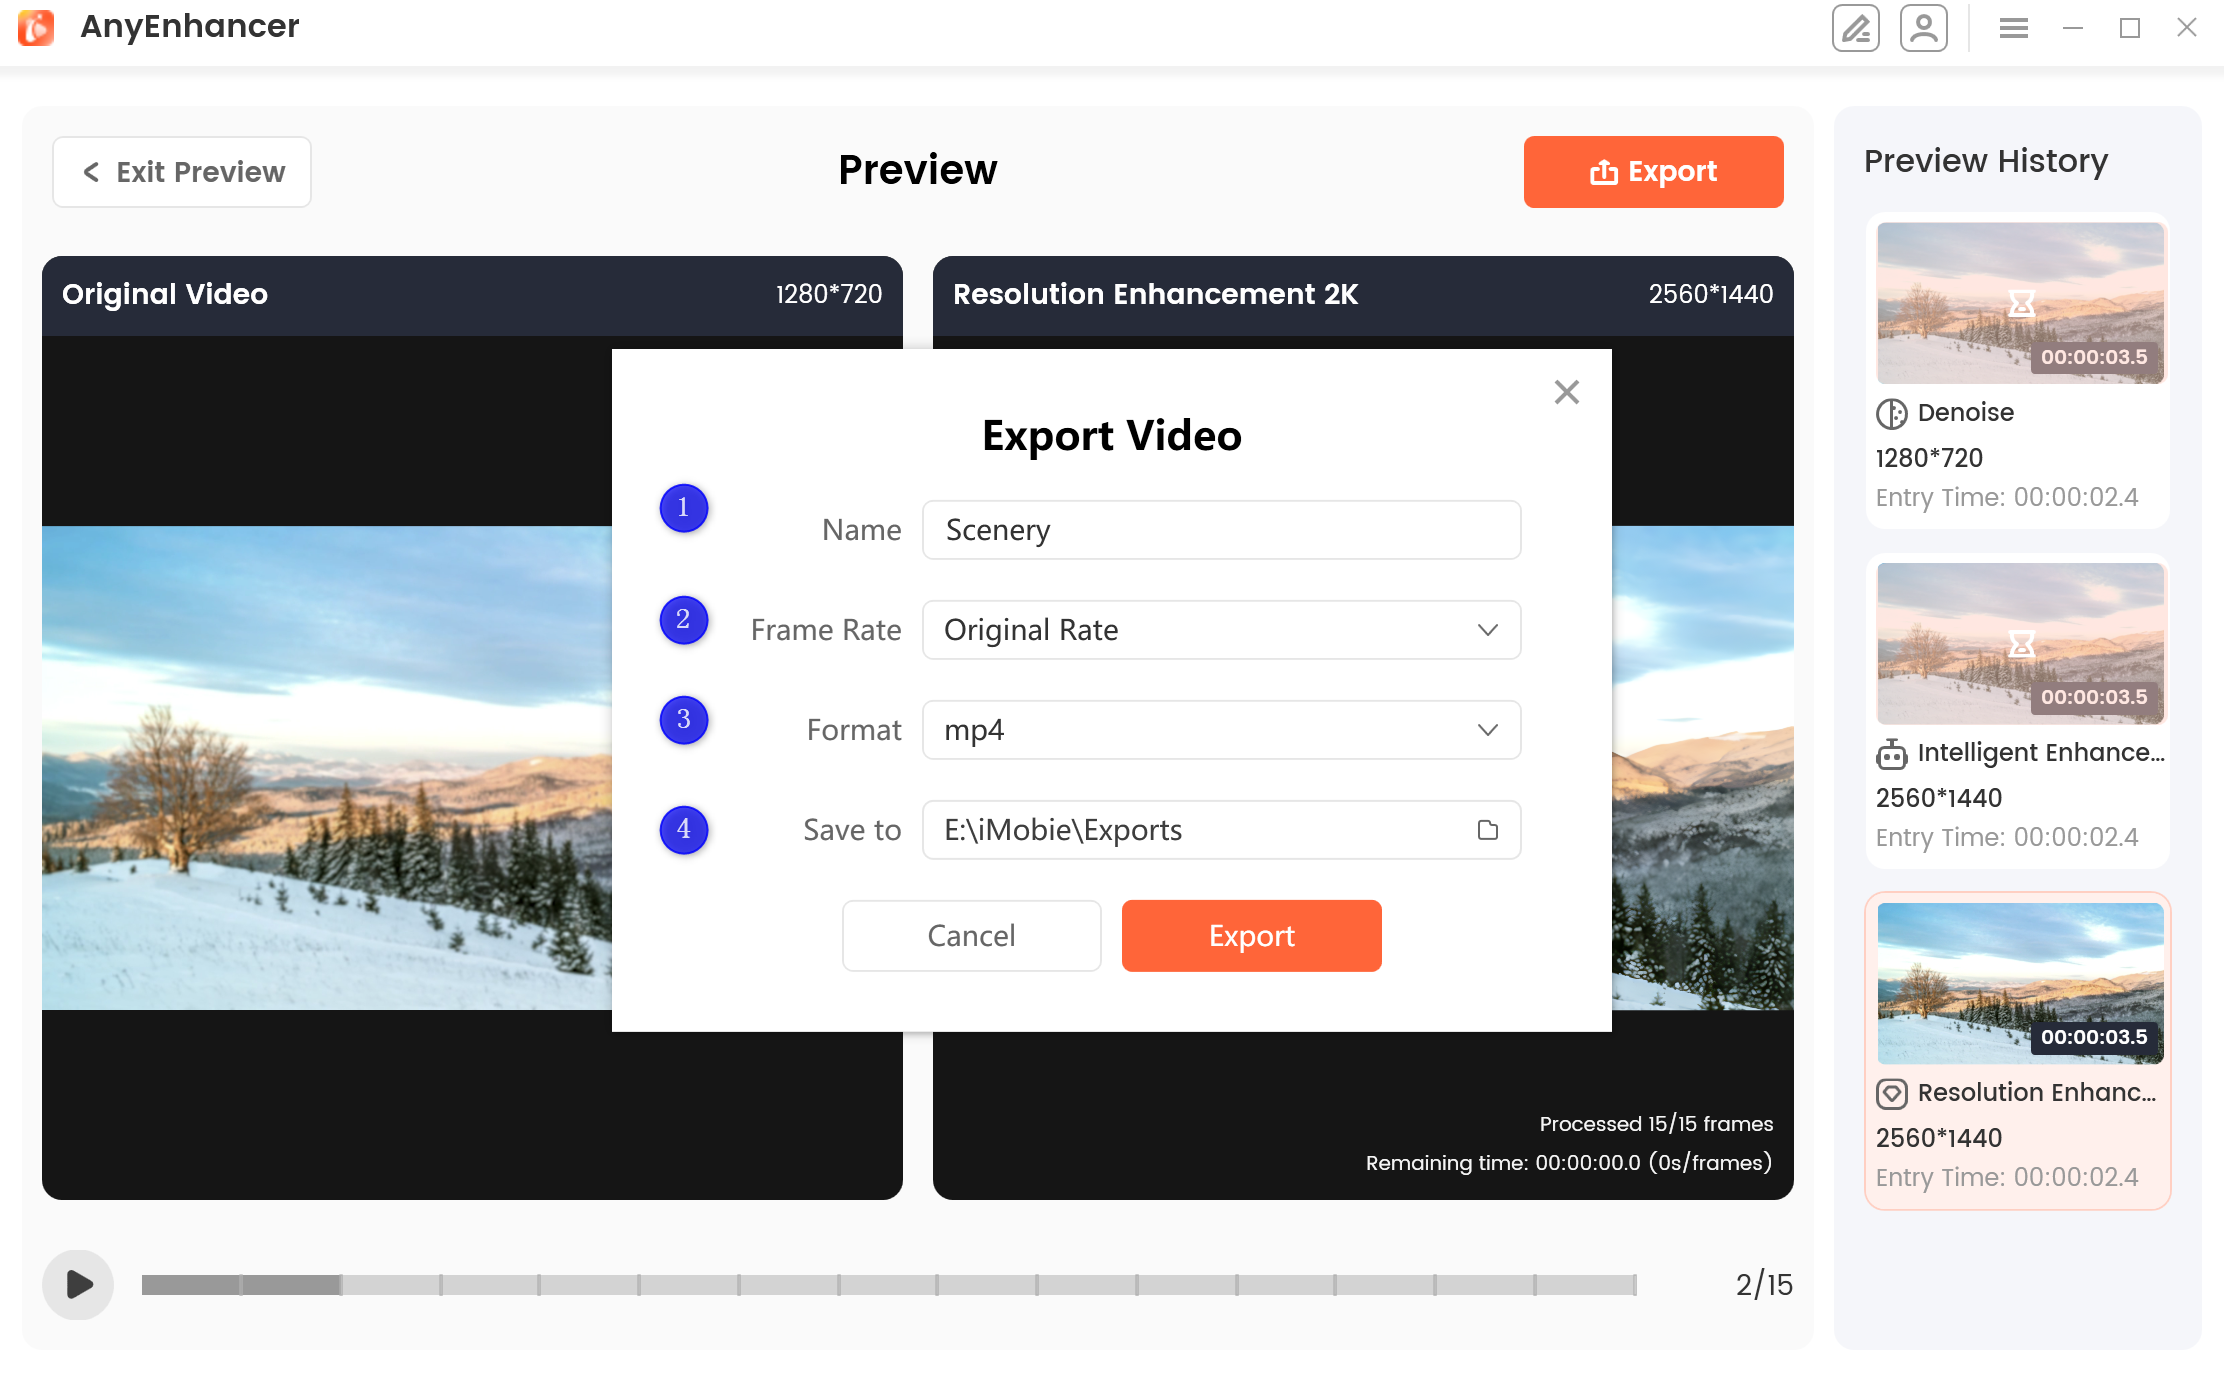
If you access the preview interface more than twice, a preview history list will be displayed on the right panel.
Preview History
On the preview history, it displays:
1The total duration of the current preview video.
2The preselected AI model.
3The resolution of the video.
4The time of entering the preview.
After previewing the effect, if you are satisfied with the enhancement effect, you can click the Export button to save the enhanced video.
Click Export Button
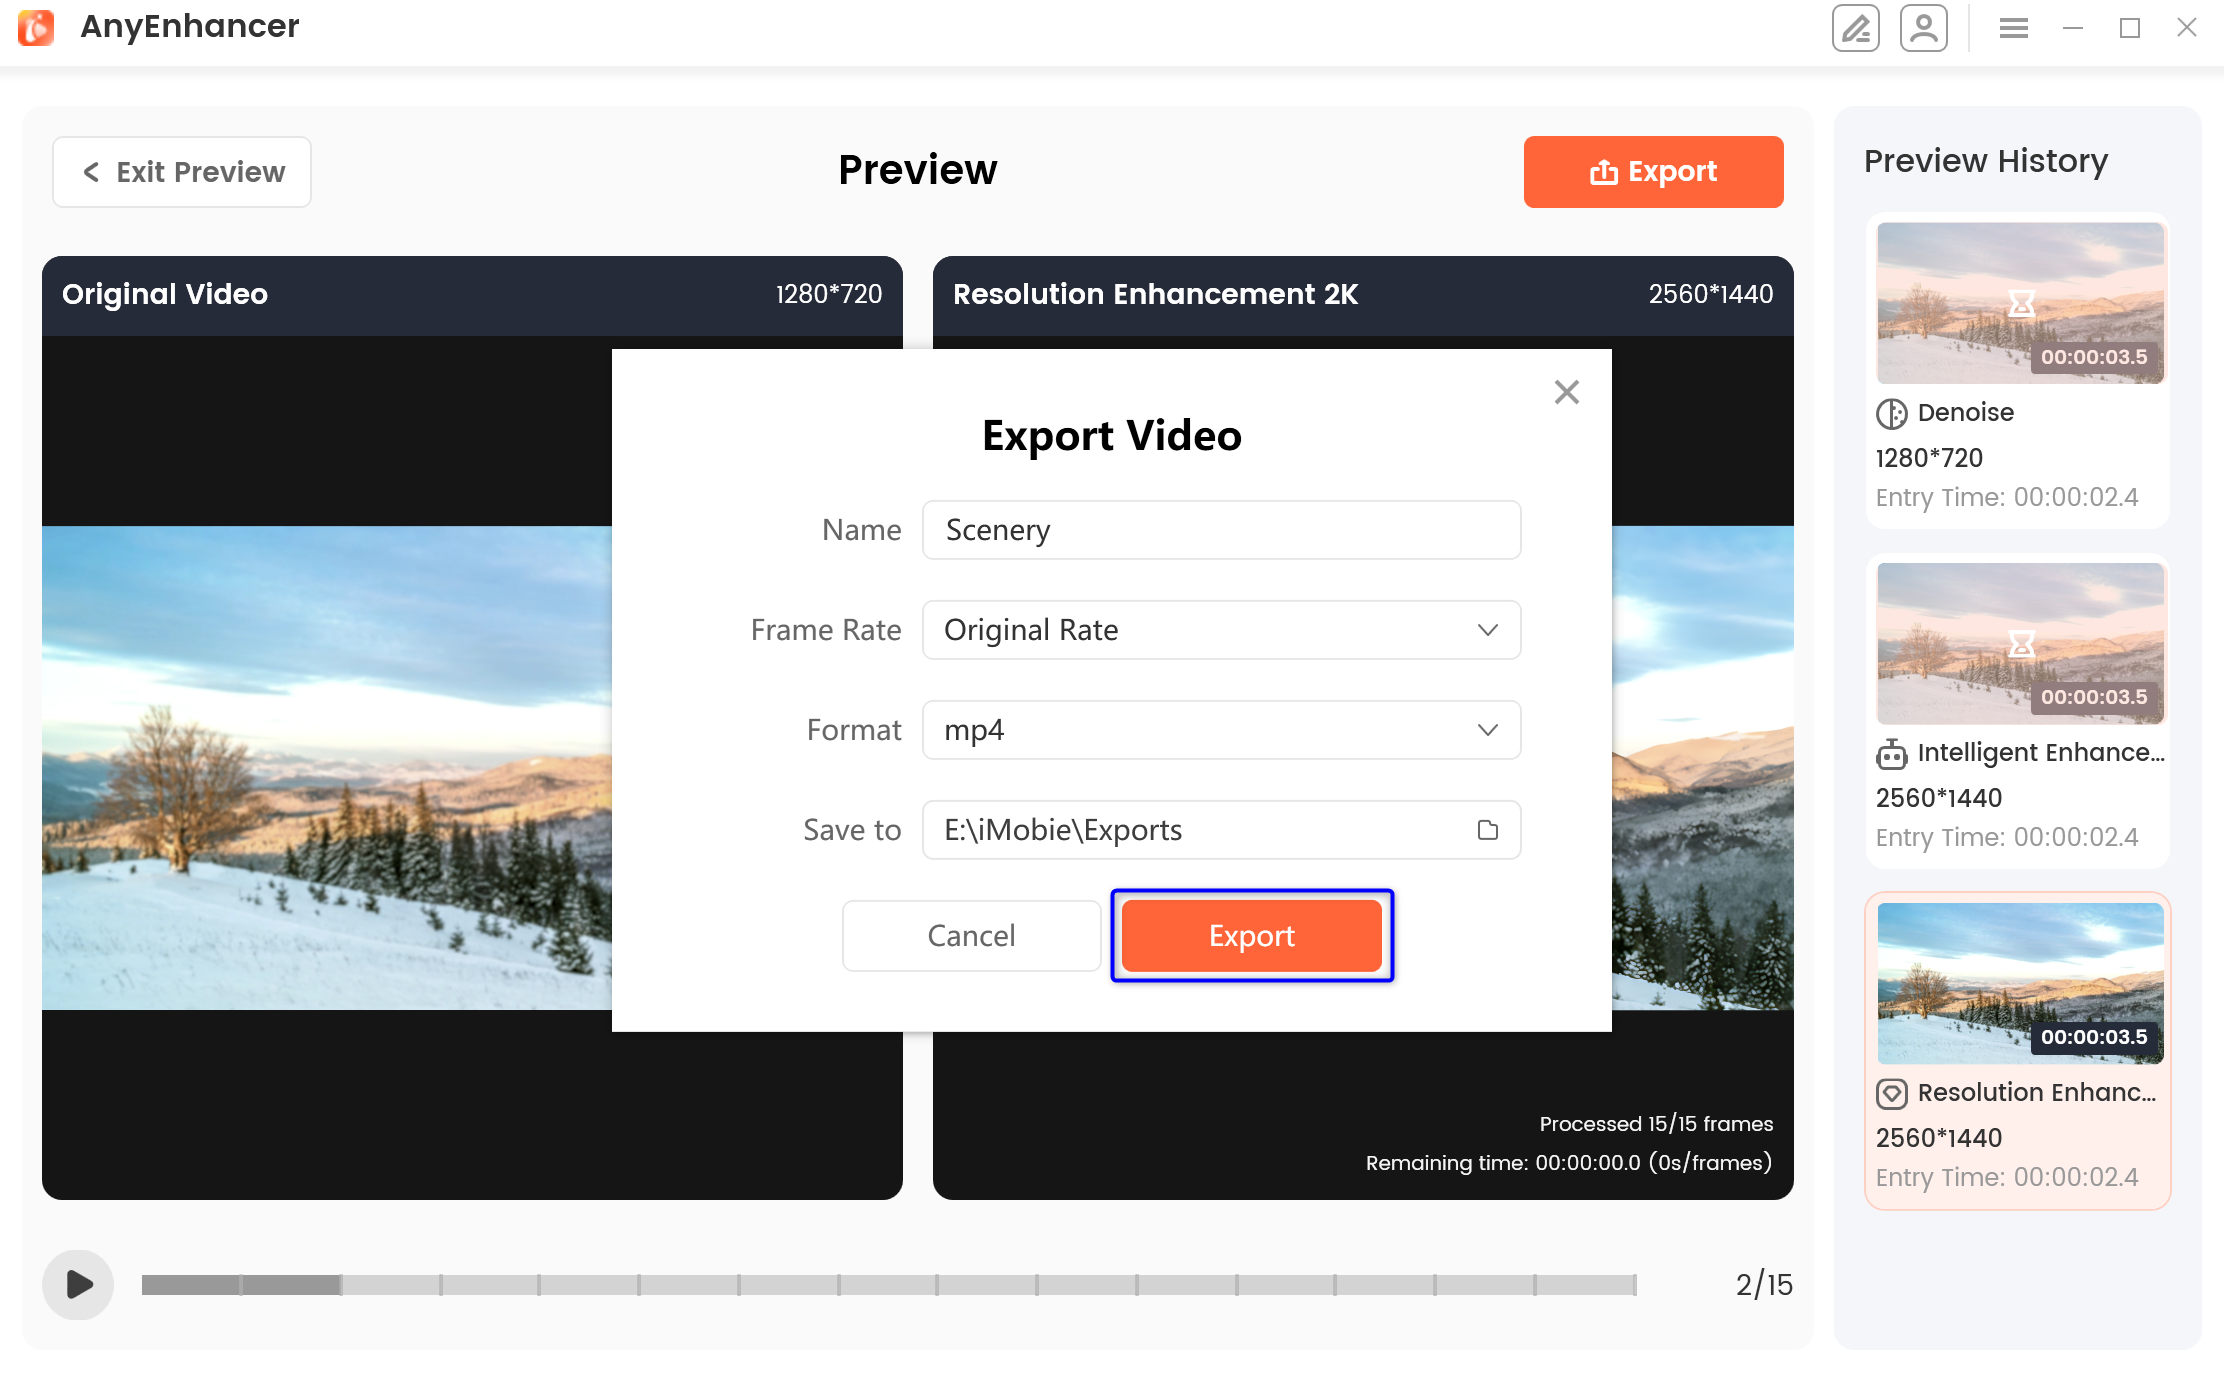
After clicking the Export button, the following interface will be displayed.
Setting Page
On this setting page, you can:
1Rename the video file.
2Select the frame rate.
3Select the supported format.
4Select the export path.
If the Frame Interpolation is selected for export, there is no frame rate option setting.
After completing the relevant settings, please click the Export button again to export the video. And the processing time of the video is determined by the size of the video. Please wait patiently.
Click the Export Button
Then, the enhanced video will be exported successfully. You can also click the Exit Preview button to go back to the home interface.
Video Will be exported Successfully
If you still have questions after reading this guide, please refer to FAQs page to check more solutions. Or you can contact our Support Team to get further help. We are here to help you!
iMobie Self-Service
Welcome to iMobie Self-Service. Choose a category or input keywords for swift solutions!😊
End conversation
Do you want to end the conversation? If you need further help , please submit a ticket to get efficient solution soon.
 Screenify
 AnyEnhancer
 FocuSee
 Vozard
 AnyMiro
 AnyMirror