Use a range of AI models to improve video quality by elevating resolution to 2K or 4K, restoring facial features, adding color to black and white videos, enhancing color, reducing visual noise, and optimizing frame rates by 2X and 4X. Download and try it now.
Through video editing, you will gain the capability to seamlessly replace existing videos, adjust their duration and sizes with greater ease, thereby enhancing creativity and crafting more compelling visual narratives.
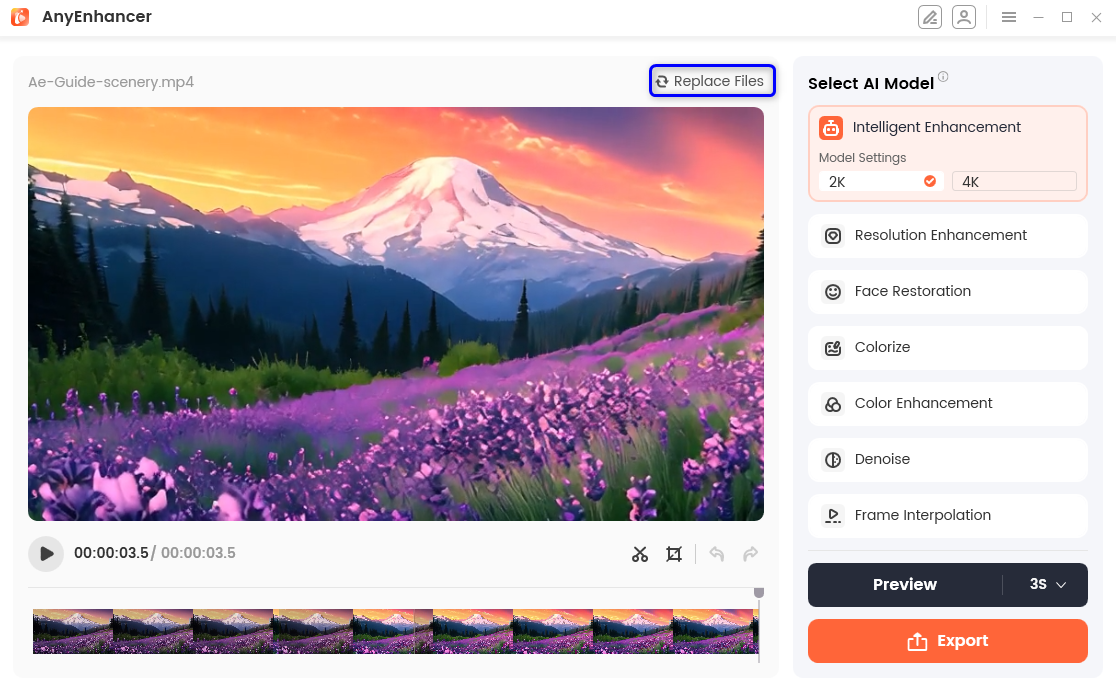
The Replace the Video function allows you to substitute the existing video with a new one. With a few simple steps, you can ensure that your video content remains up to date and meets your needs. Please click Replace Files button to upload new video to edit.
Click Replace Files
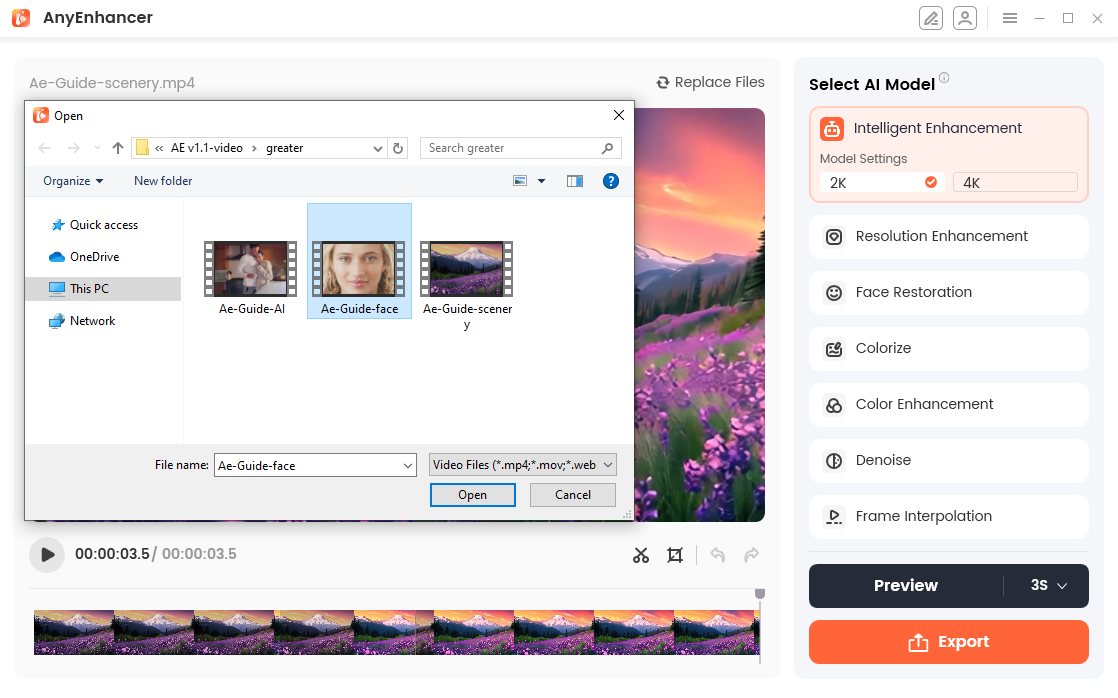
Select the target video you want to replace.
Select Target Video
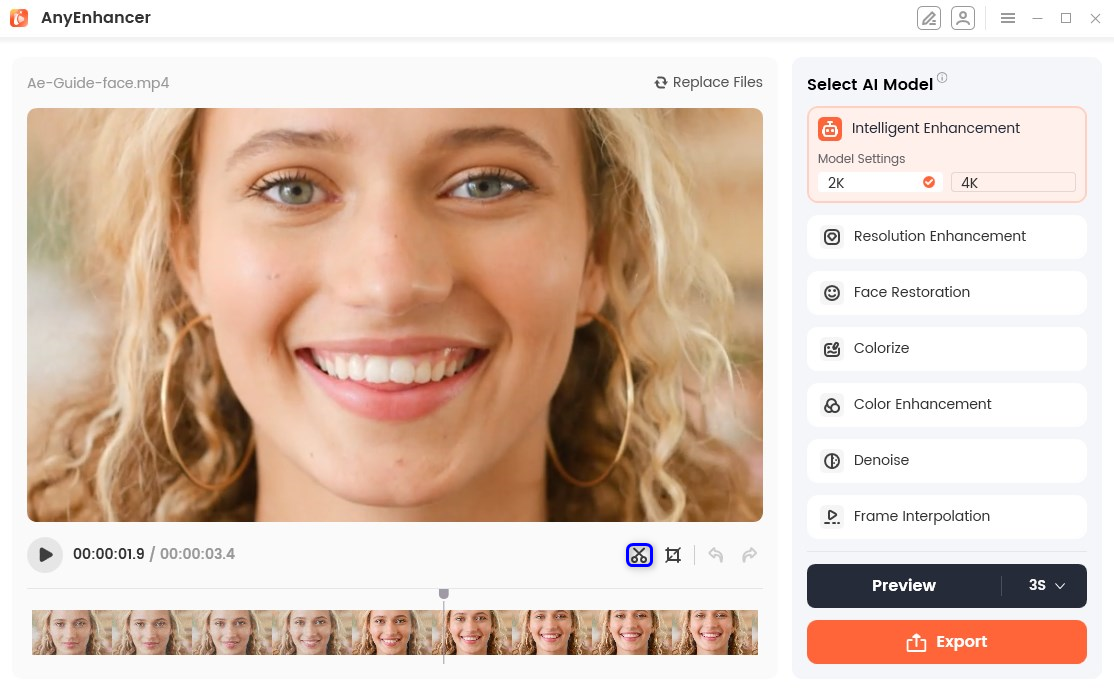
If the upload is successful, the current video will be replaced and the AI model selected last time will remain unchanged.
Part 2. Clip the Video
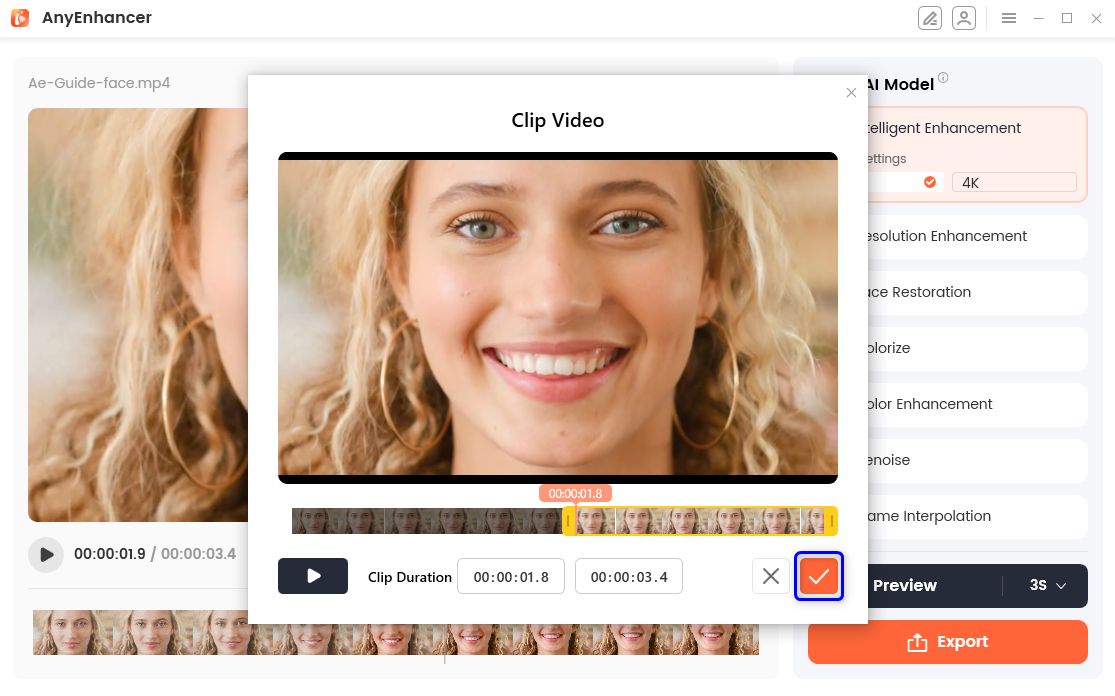
The Clip function helps you adjust the start and end points of a clip and customize its duration. Clipping the video gives you the flexibility to control the duration and content of the final video output. Please click the Clip (scissors-shaped icon) button to pop up Clip Video function.
Click the Clip
Please select the video on the timeline you want to clip, click and drag the edge of your clip forwards or backwards to trim off the unwanted video. Clip Duration will show the time of the clipping and change as the duration changes.
Clip Video in Timeline
The duration of the video should be more than one second. If the video you uploaded is too long to be edited, you can enter the time to edit it. If it is less than or equal to 1 second, the function button will not be clickable.
When the clipping is completed, please click [√] button.Then apply the current clipping to the operation interface display.
Finish Clipping
Part 3. Crop the Video
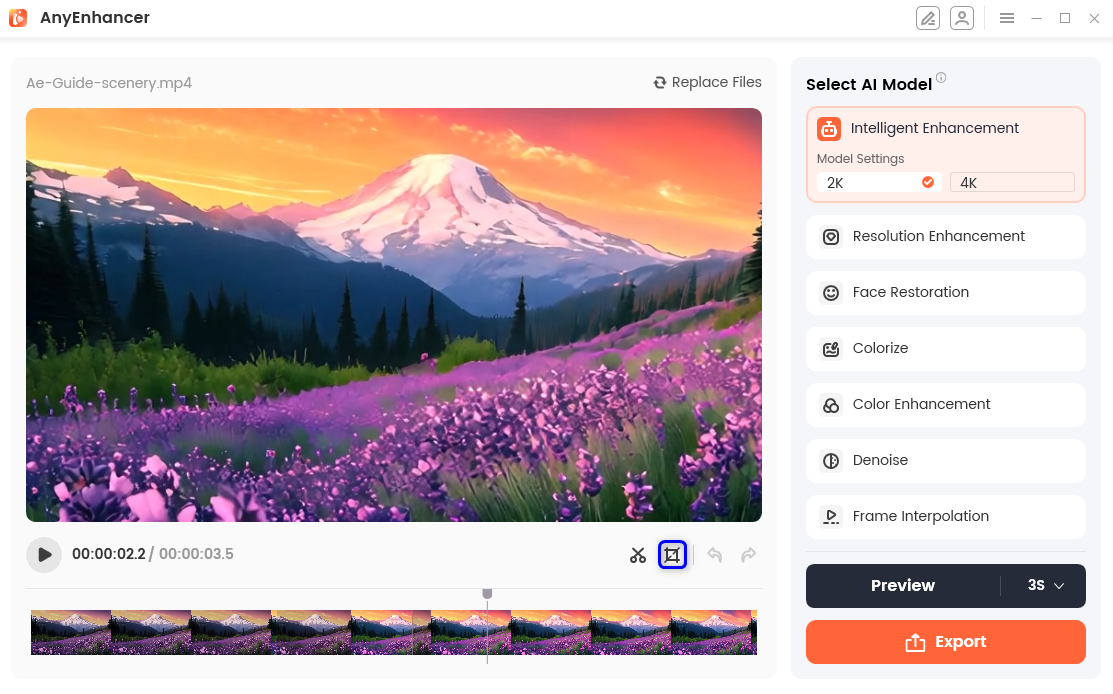
The Crop function helps you flexibly adjust the size and content of the video. Please click the Crop (Screenshot-shaped icon) function to pop up the Crop Video function.
Click Screen Cropping
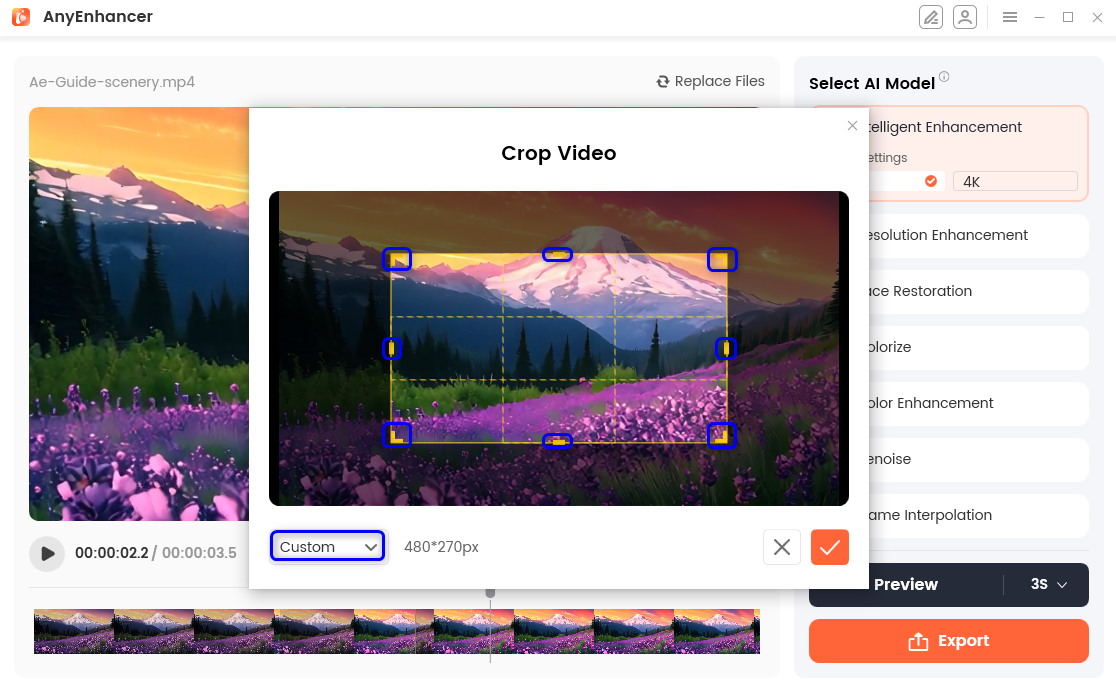
There are two available cropping modes that you can utilize to resize your video screen: Custom and Proportional cropping modes. You can choose any mode according to your preferences and specific needs.
Custom Cropping
Please click the Custom button, where you can crop the video size according to your preference. Please drag the 4 sides or 4 corners of the video to crop the video size.
Click Custom
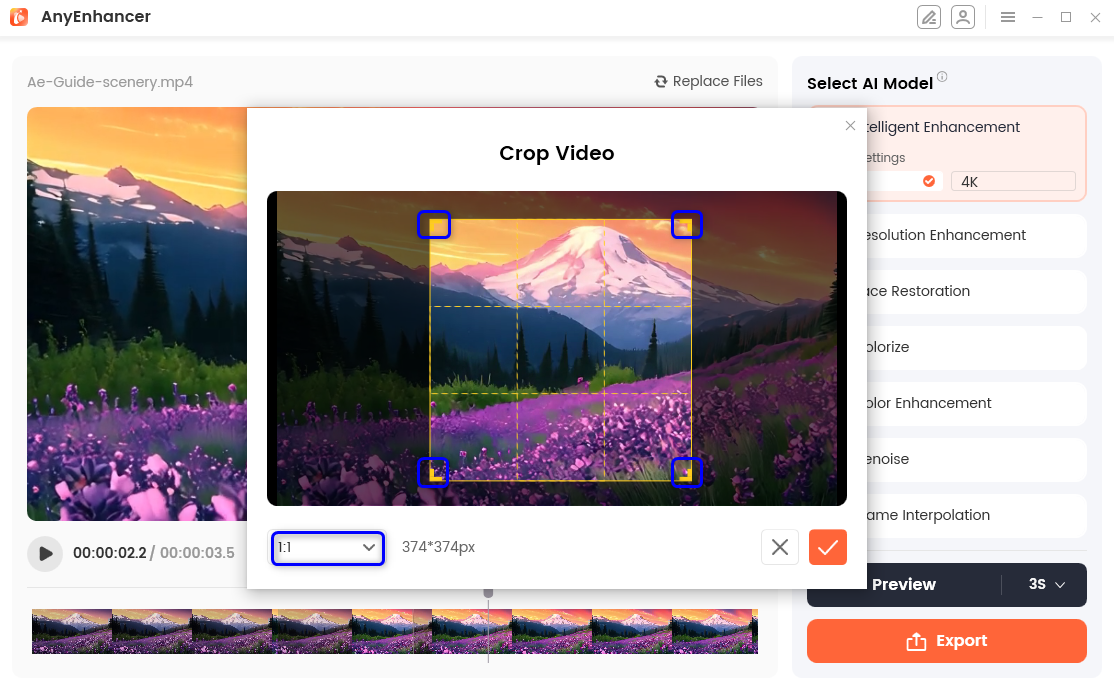
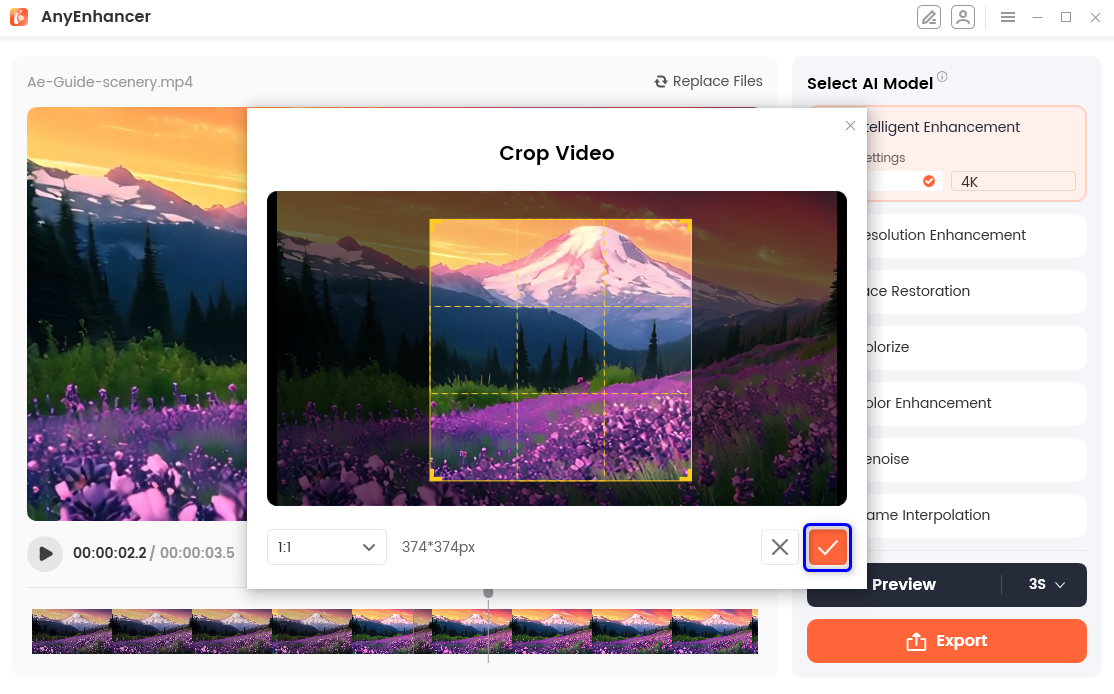
Proportional Cropping
Please click on Custom to unfold the supported ratios, where you can choose the desired cropping ratio. Please drag the 4 corners of the video, and the cropped video will be enlarged or reduced proportionally.
Select the Ratio
When the cropping is completed, please click the [√] button to apply the current cropping to the operation interface display.
Finish Cropping
If you still have questions after reading this guide, please refer to FAQs page to check more solutions. Or you can contact our Support Team to get further help. We are here to help you!
iMobie Self-Service
Welcome to iMobie Self-Service. Choose a category or input keywords for swift solutions!😊
End conversation
Do you want to end the conversation? If you need further help , please submit a ticket to get efficient solution soon.
 Screenify
 AnyEnhancer
 FocuSee
 Vozard
 AnyMiro
 AnyMirror