Fix Laptop Camera Not Working in Windows 11 [7 Ways]
“Since few month back, my MSI laptop Webcam stopped working, i attached USB webcam, it is also not working, tried 3 different usb webcam. How can i resolve this issue without formatting windows 11. Any Idea?” A user asked on Reddit.
The invention of the PC with a built-in camera has made remote conversations, virtual meetings, conferences, online education, and live streaming possible. However, if your laptop camera not working on Windows 11 or Windows 10, it can be quite frustrating. Fortunately, there are seven up-to-date ways to fix the issue, covering various scenarios such as when the camera is not recognized, when the camera app fails to open, or when the camera is not working in a particular app. By following these solutions, you should be able to get your camera up and running again in no time.
Why Is My Laptop Camera Not Working in Windows 11
This part will briefly go through the reasons why the laptop camera not working on Windows 11. Then, the troubleshooting solutions will be provided for you in the next part. Come on, please be ready to check the problems of your laptop camera one by one.
- Hardware Issues
Physical problems with the camera or its connections.
- Switch Button
Some laptops have a physical switch or button to enable or disable the camera.
- Software Conflicts
Other applications or software might be using the camera exclusively, preventing it from working with other programs.
- Operating System Updates
Ensure that your operating system is up-to-date. Sometimes, updates can include fixes for hardware-related issues.
- Application Permission
Sometimes, a couple of apps may need to acquire permission to access the camera.
- Driver Issues
Outdated or missing camera drivers can cause problems.
- Antivirus or Privacy Software
Some antivirus or privacy software might block access to the camera for security reasons.
7 Effective Ways to Fix Laptop Camera Not Working
After finding the causes of your laptop camera not working on Windows 11, you need to fix it according to the situation. Follow the steps of the below 7 methods. The overall guide will finally solve the problems frustrating you.
Method 1. Change the USB Port and restart the PC
Changing the USB port and restarting your PC won’t directly impact your laptop’s built-in camera. However, if you are using an external USB camera, you might try the following steps:
Step 1. Unplug the current USB cable from the current USB port and plug it into a different one. Sometimes, USB ports can have issues, and switching to another port can help.
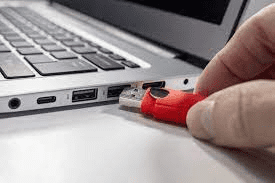
USB Port on Laptop Windows 11
Step 2. After changing the USB port, restart your computer.
This method is quite easy for dealing with an external USB camera.
Method 2. Check the Camera Switch Button
If your laptop has a physical camera switch button or slider, here’s how you can check and ensure it’s in the correct position.
Step 1. Locate the Camera Switch Button. Usually, it’s on the top of the laptop or the sides.
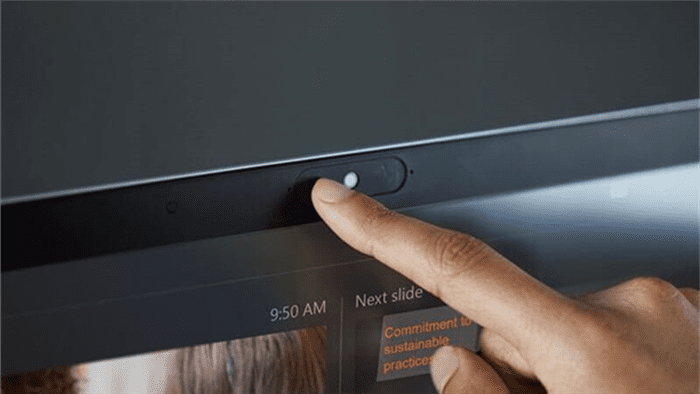
Locate the Camera Windows 11
Step 2. Inspect the switch or button and make sure the switch is in the “on” position or the button is not pressed, depending on the design.
Step 3. If the switch or button is in the “off” position, toggle it to the “on” position. If it’s a button, pressing it should activate the camera. Some laptops might have an LED light associated with the camera, and it should turn on when the camera is enabled.
Method 3. Run Camera Troubleshooter in Windows 11
You can also solve the camera problem by seeking help in the Windows Help Center. It provides you with a comprehensive and targeted solution for you to choose from. When your camera isn’t working in Windows 11, it might be caused by various reasons such as missing drivers, an antivirus program, or non-access to the camera under the privacy settings. To find the specific reason, you can run the camera troubleshooter in the Get Help.
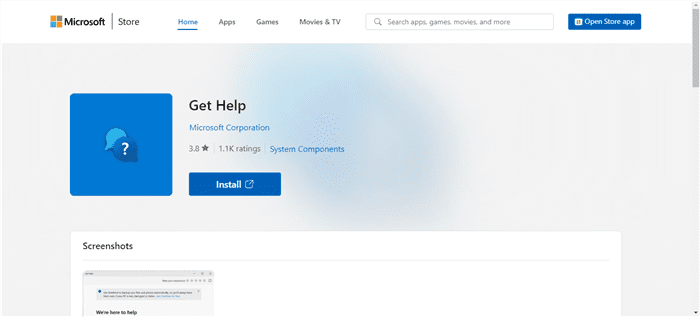
Get Help App Windows 11
Method 4. Update Windows System
Sometimes, the outdated system leads to the malfunction of the camera on your laptop. You just simply update the Windows system. Then the camera can be fixed automatically. Follow the flow of setup to get a new system:
Step 1. Select Start in the left corner of your screen
Step 2. Then choose Settings.
Step 3. Go to Update & Security.
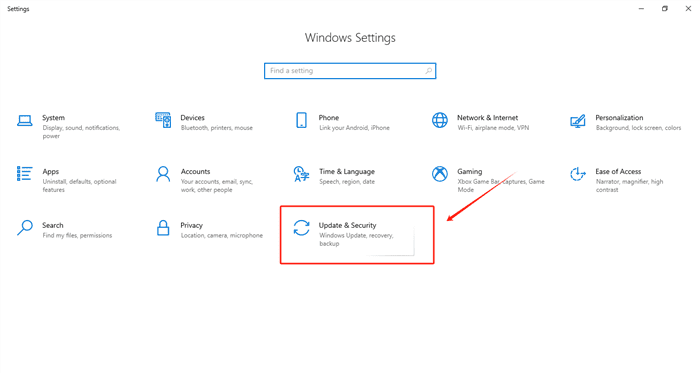
Update and Security Windows 11
Step 4. At last run the Windows Update, and then select Check for updates. If updates are available, install them.
Please note that if your update was interrupted, you can restart the update process when you are ready.
Method 5. Allow Access to Your Camera
If your laptop camera not working Windows 11, you may need to ensure that the camera has the necessary permissions to operate. Here’s a step-by-step guide on how to allow access to your camera in Windows 11:
Step 1. Open Settings by pressing Win + I. Select “Privacy” and then “Camera” on the left-hand side.
Step 2. Now, turn on the Allow apps to access your camera button.

Access to the Camera Windows-11
Step 3. Then you review the list of apps and ensure that the apps you want to use with the camera have permission. Toggle the switches accordingly.
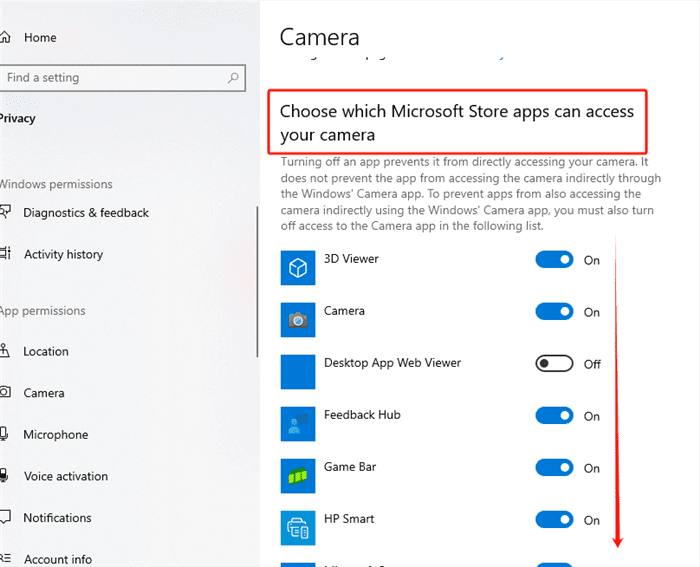
Choose App forPermission Windows-11
Note: If you are facing issues with the camera in a web browser, check the browser’s settings. Turn on the button in “site permissions” under “cookies and site permissions”.
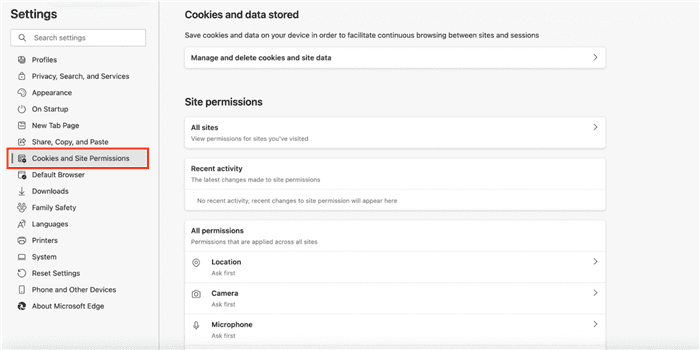
Allow Permissions Windows 11
Method 6. Update the Camera Drivers
Windows automatically updates drivers for devices via Windows Update. If you want to manually update or reinstall a camera driver, here’s how:
Step 1. In the search box on the taskbar, enter Device Manager, then select Device Manager.
Step 2. Select a category to see the names of devices, then right-click (or press and hold) the camera to update.
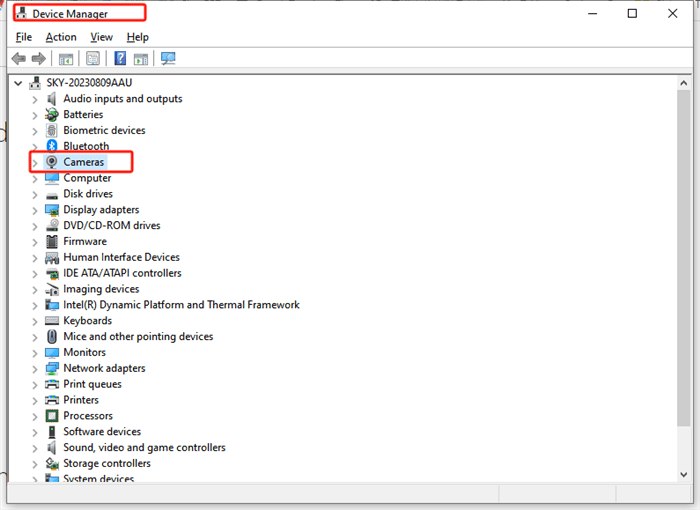
Device Manager Windows 11
Step 3. At last, choose update driver if your camera driver awaits an update.

Update Camera Driver Windows 11
Method 7. Check Antivirus Settings
To troubleshoot issues with your laptop camera, check antivirus settings, add the program to the whitelist, or temporarily disable antivirus software. But remember, antivirus software protects your computer, so disable it only temporarily and for troubleshooting.
Step 1. Look for the antivirus program on your computer. It’s often an icon in the bottom-right corner of your screen.
Step 2. Click on the antivirus icon and find settings. Look for terms like “whitelist” or “exceptions.”
Step 3. Add your camera application to the “whitelist” or “exceptions” list in the antivirus settings.
Step 4. If you can’t find the whitelist option, look for “Real-time protection” or similar. Temporarily turn it off.
Step 5. Restart your computer.
Step 6. Open your camera app and see if it’s working.
Step 7. Turn your antivirus protection back on after testing.
Tips: Don’t leave antivirus off for too long, and update your antivirus regularly.
Conclusions
If your laptop camera not working on Windows 11, there could be multiple reasons for it. We’ve outlined various sources that could be causing this problem, including hardware and software conflicts, outdated drivers, privacy settings, and more. Follow the troubleshooting steps of the seven methods mentioned above to identify and address specific problems contributing to the camera malfunction. This approach provides a comprehensive guide to resolve the issue and restore the proper functioning of the laptop camera on Windows 11.

Senior writer of the iMobie team as well as an Apple fan, love to help more users solve various types of iOS & Android-related issues.
Product-related questions? Contact Our Support Team to Get Quick Solution >
