How to Color Correct a Video – AI Video Color Correction
Looking for ways how to color correct videos? No matter if you’re a professional editor or a novice who loves aesthetically pleasing footage, color correction is the basic technique for this purpose. Adjust the brightness, contrast, and hues and transform faded hues into lifelike colors using the AI-powered AnyEnhancer, Hollywood’s favorite DaVinci Resolve, or simple color correction filters.

Whether you’ve indulged in professional photography or videography, you might have faced situations where the color of visuals looks faded and dull. Faded and improperly colored visuals can ruin the overall aesthetics and will not set the vibe you need for a scene. That’s where color correction comes in! By adjusting the contrast, brightness, and hues, you can seamlessly capture the audience’s attention by enhancing the visual appeal of your videos.
Wondering how to color-correct video? There are various ways to perform color correction on a video to enhance mood, vibe, and tone, such as color correction filters or manually adjusting the hues in editing tools. Among various tools, AI-powered video enhancer – AnyEhancer and video editor DaVinci Resolve stands out the most due to its comprehensive editing capabilities. This detailed guide will explore three ways to color-correct a video for beginners and professionals. Let’s delve into further details!
Table of ContentsHide
What is Color Correction?
Before we move on to our next section to explore ways to color-correct a video, let’s first unfold the concept of color correction. Color correction is a post-production editing procedure used to enhance the colors of video footage to make it look aesthetically pleasing. However, color correction must not be confused with color grading, a creative way to set the tone and vibe of visuals by applying filters and effects.
Color correcting a video provides users various benefits, from achieving professional-quality visuals to enhancing even the minor details. Here are some of the advantages of color correction.
- Visual Appeal – Color correction enhances the visual appeal and adds an element of consistency, improving your brand identity.
- Mood and Vibe – To set a specific tone and vibe for a video, color correction plays a major role. You can manipulate brightness, contrast, and hues to induce feelings of warmth and intimacy.
- Color Harmony – A harmonious balance in video colors is necessary to captivate an audience. Color correction improves the artful balance, creates depth, and adds a soothing effect to your videos.
Way 1. Color Correct Video via AI-Powered Color Correction
Video footage needs to be exceptionally eye-catching and appealing to your audience. Adjusting the color tones and correcting the hues can help you enhance the visual appeal and improve storytelling by creating an emotional depth. We recommend using an AI-powered tool, i.e., AnyEnhancer, for this purpose! AnyEnhancer is responsible for setting the tone and color vibe of footage to create visual cohesion. It serves users with various AI models, such as AI video color correction, to manipulate video quality and convert low-quality visuals into cinematic masterpieces.
With its brilliant Resolution Enhancement AI mode, professionals can elevate the resolution from 360p or 480p to 4K without distorting pixels. Additionally, you can utilize the Color Enhancement model to transform your dull-looking footage into a vibrant-colored video. This model can automatically identify objects and people to restore lifelike colors.
Free Download for all windows & 100% safe Free Download for all mac & 100% safe
Free Download100% Clean & Safe
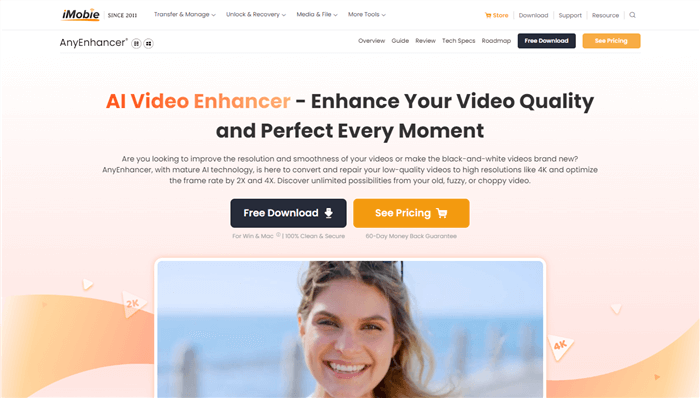
AnyEnhancer Webpage Interface
Key Features
- AnyEnhancer can help you colorize the black-and-white video with its Colorize AI model.
- Enhance the saturation, hues, and brightness of the video with the Color Enhancement model.
- Boost resolution to 4K and enhance the details of your videos with the Resolution Enhancement AI model and restore face details side by side with Intelligent Enhancement.
- Make your content stand out with our Denoise AI model by reducing the visual grain and noise.
- Add a touch of smoothness to your fast-paced action videos with Frame Interpolation and optimize FPS by 4X.
- Enhance colors and optimize saturation, brightness, and contrast using the Color Enhancement model.
Follow the step below to color correct a video and improve hues by AnyEnhancer:
Step 1. Download AnyEnhancer on your Windows or Mac PC. Install and launch it, and click “Upload Video” to import your raw footage. Also, you can drag and drop the video file onto the AnyEnhancer window.
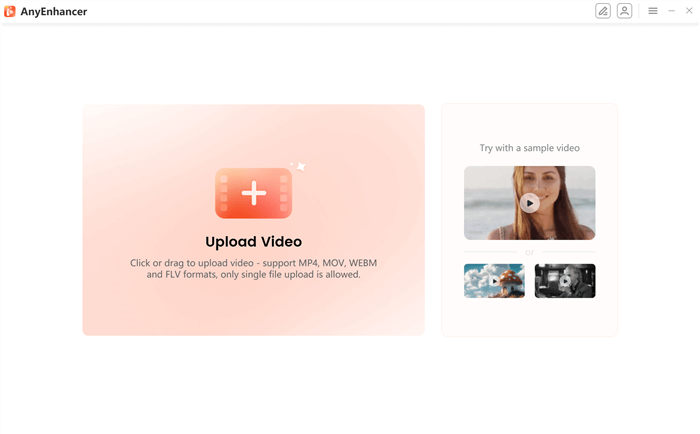
Upload the Original Video
Step 2. Choose the “Color Enhancement” AI model from the right pane to enhance the colors and add a visual appeal to your videos. This model can even bring your dull-colored footage to lifelike colors in seconds.
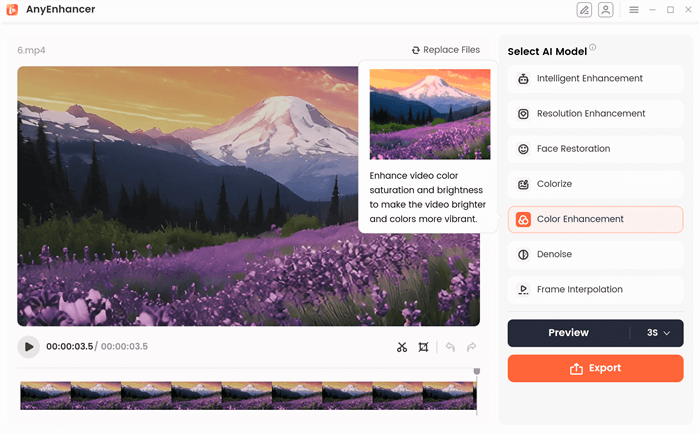
Choose the Color Enhancement Model
Step 3. Click on “Preview” to start the colorizing process. You can set the duration of the preview as 3 or 5 seconds. You’ll be able to review the before-and-after clips.
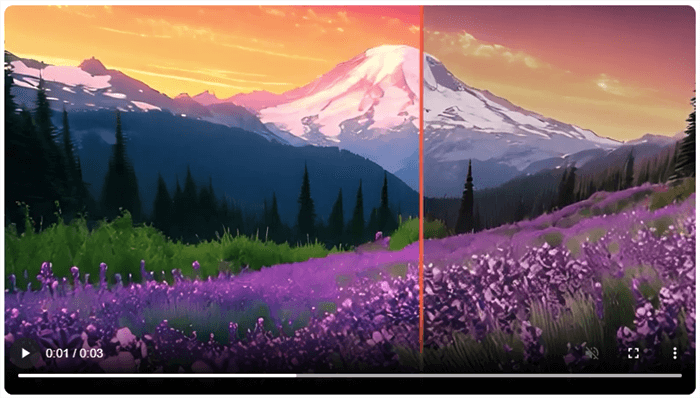
Preview the Color Correct Effect
Step 4. Click on the “Export” button to save the color-corrected video. You can adjust the Frame Rate, Format, and Save Location from the settings.
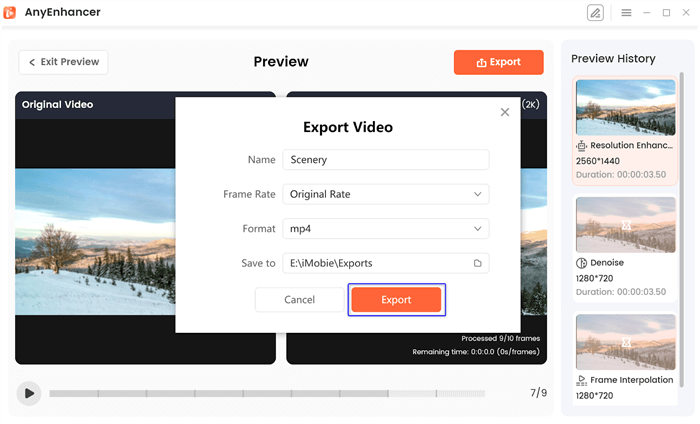
Export the Video
Way 2. Color Correct Video Using Video Editing Software
There are plenty of video editing software available to color-correct videos, but DaVinci Resolve has made it to the top of the list with its advanced-level editing capabilities. The developers claim it to be the only tool that combines color correction, editing, visual effects, and even motion graphics alongside audio editing in a single tool. DaVinci Resolve serves professional editors with super-fast editing and rendering speed.
DaVinci Resolve also offers multiple AI tools such as text-based editing, UltraNR noise reduction, Fairlight Audio panner, ColorSlice vector, and more to enhance the overall video quality. The tool has a brilliant dual-monitor design, drag-and-drop editing, automatic trimming, and key shortcuts for a seamless experience. Hollywood’s most loved color correction features in DaVinci Resolve 19 include the advanced color corrector, control sliders, adjustable contrast, temperature, midtones, details, saturation, and more.
Here’s how to color correct a video using DaVinci Resolve:
Step 1. Launch DaVinci Resolve on your PC. Drag and drop video footage to DaVinci Resolve and place it on the timeline. Navigate to the “Color” tab first, then click “Color Wheel Panel”. Click on “Auto” to adjust the color balance of your video automatically.
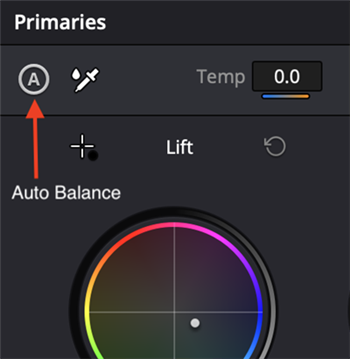
Click Auto Balance
Step 2. You can also manually adjust the brightness of your footage with the help of color wheels. There are various color wheels to help you color correct videos. “Lift” can manipulate the shadows, “Gamma” can adjust the midtones, and “Gain” can help you adjust the highlights. You can use the master wheel for a collective effect.
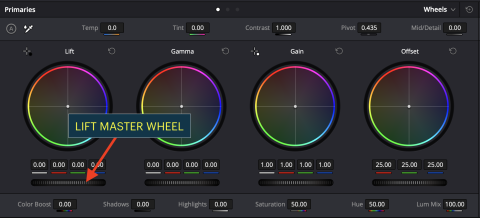
Color Wheels
Step 3. The next step is to utilize the “Scopes” portion of DaVinci Resolve to adjust the colors and make your videos look consistent. Scopes refer to the actual representation of exposure and tonal range. Navigate to “Scopes > Waveform” and check if the waveform is below zero or above to see the dark and bright parts. You can adjust the waveform to brighten or darken the parts of a video.
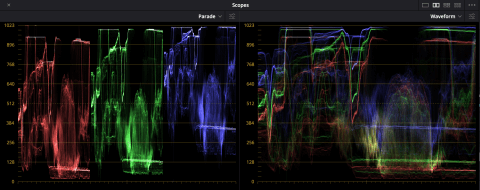
Navigate to Scopes
Step 4. To adjust the color balance, navigate to “Color Wheel” and then manipulate the “Lift” to adjust the colors.
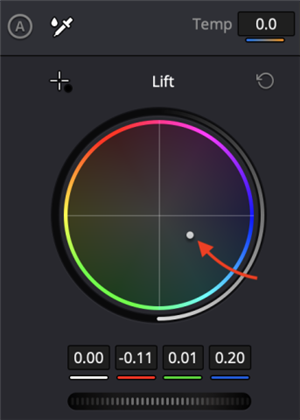
Choose Lift Option
Way 3. Color Correct Video by Applying Color Correction Filters
Various tools have pre-defined or pre-set color filters that enable you to adjust the warmth. These filters have pre-set values for brightness, contrast, exposure, and hues so that users can transform the visuals into flawless quality footage with a single click. Most tools have categories for color correction filters depending on the tone and vibe you need in the color spectrum.
FAQs about Video Color Correction
How to do color correction in a video?
Several ways and tools are available to perform color correction in a video. We recommend using the AI-powered AnyEnhancer, which offers a Colorize AI model to bring lifelike colors to footage.
How are videos color corrected?
Editing tools have pre-set color correction filters and manual sliders to adjust the brightness, contrast, exposure, saturation, and more to make the footage look vibrant and aesthetically pleasing.
Final Words
Color correction is a basic yet crucial technique for transforming dull-looking raw footage into vibrant visuals. Color correction involves adjusting the brightness, contrast, white balance, or saturation depending on the needs. We recommend using AnyEnhancer, an AI video color corrector that offers brilliant resolution enhancement and colorizer models to improve visuals. You can also utilize DaVinci Resolve to tweak the white balance, contrast, and hues manually.
AnyEnhancer – AI Video Enhancement
Download AnyEnhancer to enhance your video quality to 4K resolution, remove grain, smooth motion, and add color to black and white videos with just one click.
Product-related questions? Contact Our Support Team to Get Quick Solution >
