How to Stabilize Video in Adobe Premiere Pro
Dealing with shaky footage can be a real buzzkill for viewers and might make your video look less than professional. It often happens with handheld shots, windy drone footage, or even when using gimbals that are not perfectly set up. Luckily, Adobe Premiere Pro’s Warp Stabilizer effect can help! All you have to do is […]

Dealing with shaky footage can be a real buzzkill for viewers and might make your video look less than professional. It often happens with handheld shots, windy drone footage, or even when using gimbals that are not perfectly set up.
Luckily, Adobe Premiere Pro’s Warp Stabilizer effect can help! All you have to do is simply apply stabilization and watch your shaky clips transform into smooth, polished sequences, boosting the overall quality of your project.
In this guide, we will walk you through the detailed steps on how to stabilize video in Adobe Premiere Pro.
What is the Warp Stabilizer Effect in Premiere Pro?
When it comes to stabilizing shaky video clips, Adobe Premiere Pro is one of the best tools available.
Its Warp Stabilizer effect is a powerful tool that analyzes your clip, detects unwanted camera movements, and intelligently fixes them.
Features of Adobe Premiere Pro Warp Stabilizer
Here is a breakdown of the key features and capabilities of Adobe Premiere Pro’s Warp Stabilizer Effect:
- Automatic Detection of Jitters
You can drag and drop the Warp Stabilizer onto your shaky video footage. Premiere Pro then analyzes the clip, identifying the areas that need correction.
- Smart Smoothing Capability
The Warp Stabilizer effect uses AI to remove shakes and jitters from the video. It can reposition, scale, and even crop the image slightly to achieve stability.
- Customization Options
While Warp Stabilizer does its job well automatically, you have several customization options, too! You can choose between stabilizing the entire frame or focusing on a specific area you want to remain perfectly still.
Overall, Warp Stabilizer is a user-friendly and effective way to transform shaky footage into professional-looking videos within Premiere Pro.
Step-by-Step Guide: How to Stabilize Video in Premiere Pro
Here are the comprehensive steps on how to stabilize footage in Premiere Pro:
Step 1. Launch Adobe Premiere Pro, click on “File > Import,” and select the video clip you want to fix.
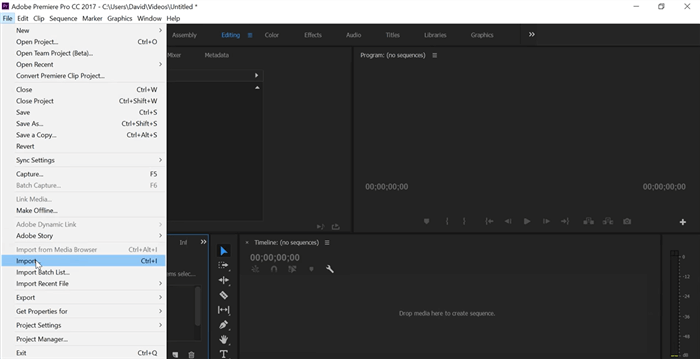
Import the Video Clip
Alternatively, you can also simply click on “Import Media to Start” on the left corner of the interface to import your footage.
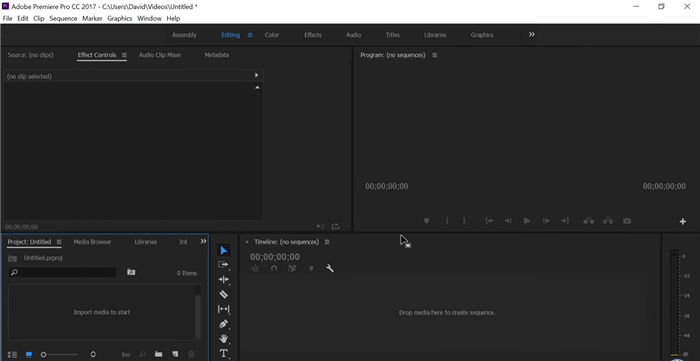
Click on Import Media to Start
Step 2. Once the file is imported, drag it to the timeline.
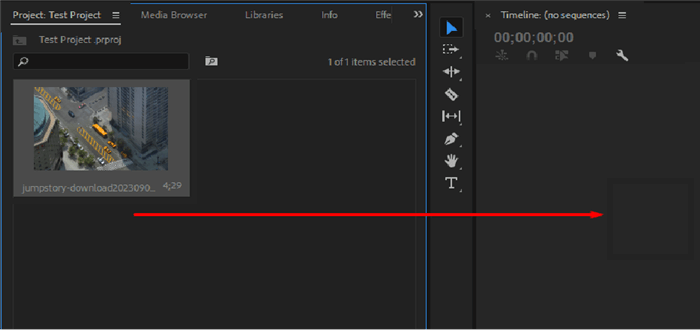
Drag and Drop Video Footage to the Timeline
Step 3. Now, click on “Effects > Distort,” and double-click on “Warp Stabilizer” from the options that appear.
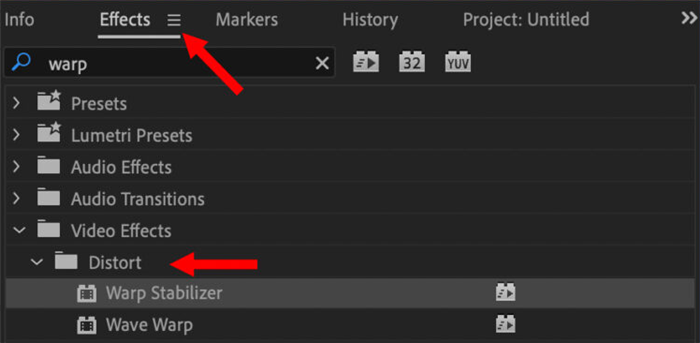
Warp Stabilizer Effect
Step 4. Adobe Premiere Pro will start analyzing your video to detect shakes and will do its magic to stabilize it.
And that is how to stabilize video in Premiere Pro using its Warp Stabilizer effect. However, did you know that there are several other methods for stabilizing footage in Premiere Pro?
Alternative Video Stabilization Methods in Premiere Pro
While Warp Stabilizer is a great first choice, Premiere Pro offers 3 alternative methods for tackling shaky footage. In this section, we will discuss them.
1. Legacy Warp Stabilizer
This is the older version of the Warp Stabilizer effect, which is still available for compatibility with older projects. It offers less customization but can be useful in specific situations.
2. Motion Tracking
For precise control, consider using motion tracking. You can manually track specific points in the clip and define how they should move to achieve stability. This is more time-consuming; therefore, we recommend that only pro video editors go for it. However, it offers superior results for complex camera movements.
3. Camera Shake Deblur
The Camera Shake Deblur effect is designed to reduce blur caused by camera shake, not full-on stabilization. It can be a helpful companion to Warp Stabilizer, especially for footage with both shakiness and minor blur.
Third-Party Video Stabilization Solution (Recommended)
If you think that Adobe Premiere Pro is not your cup of tea and are looking for an easy tool to stabilize videos, we recommend going for iMobie AnyEnhancer.

AnyEnhancer Webpage Interface
Free Download for all windows & 100% safe Free Download for all mac & 100% safe
Free Download100% Clean & Safe
This software not only gets rid of shakiness but also enhances your videos in several other ways.
Features of AnyEnhancer
- AI Enhancement: Using the power of AI, AnyEnhancer helps you breathe new life into low-resolution videos with impressive upscaling capabilities.
- Video Denoising: AnyEnhancer’s AI denoising cleans up your videos, revealing crisp details.
- Colorize Video: With AnyEnhancer’s colorizing feature, you can bring black and white footage to vibrant life.
- Video Frame Interpolation: Lastly, there is the video stabilization feature, Frame Interpolation. By creating new frames between existing ones, Frame Interpolation smooths out shaky videos, resulting in a polished, professional look.
These are just a few of AnyEnhancer’s many capabilities. With its user-friendly interface and powerful AI technology, AnyEnhancer is perfect for both beginners and experienced video editors alike.
So, take your video editing to the next level and try AnyEnhancer today to experience the difference it can make in your projects!
Step-by-Step Guide: Stabilize Video in AnyEnhancer
Here is a complete step-by-step tutorial on how to stabilize your shaky videos using AnyEnhancer:
Step 1. Free download and install AnyEnhancer on your Windows or Mac PC.
Free Download for all windows & 100% safe Free Download for all mac & 100% safe
Free Download100% Clean & Safe
Step 2. Click on “Upload Video” from the interface to import the shaky footage.
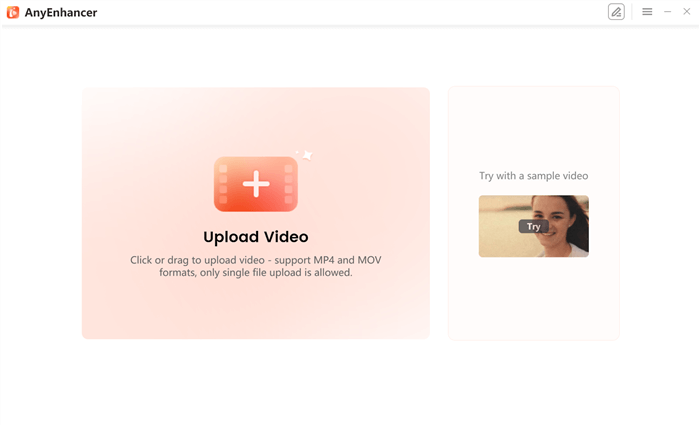
Upload Your Video to AnyEnhancer
Step 3. Click on “Frame Interpolation” from the AI models on the right.

Click on Frame Interpolation
Step 4. Select the model settings 2x or 4x, and then click “Preview” to see the changes. AnyEnhancer will show you the before and after footage, after which you can click on “Export” to save the stabilized video to your PC.
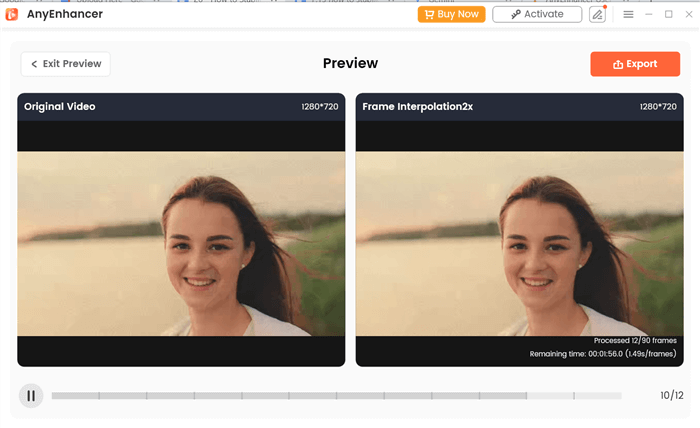
Preview and Export
See how simple it is to stabilize shaky footage using AnyEnhancer!
FAQs on Stabilize Video in Adobe Premiere Pro
Q. What is Warp Stabilizer?
Warp Stabilizer is a useful effect in Adobe Premiere Pro that helps smooth out shaky footage by detecting and fixing shaky camera movements.
Q. How do I use Warp Stabilizer?
To use the Warp Stabilizer effect, simply go to “Effects > Distort” and double-click or drag the effect onto your clip. Premiere Pro will analyze the clip and stabilize the image automatically. You can fine-tune settings for further control.
Q. Are there any downsides to Warp Stabilizing?
Sometimes, stabilization comes with a slight video crop. You can adjust settings to minimize this, but a small crop is unavoidable if your video has significant shakiness.
Q. What are some alternatives to Warp Stabilizer?
Premiere Pro offers 3 alternatives to Warp Stabilizer. First, we have the Legacy Warp Stabilizer, which is the older version of Warp Stabilizer. Then, we have Motion Tracking for more precise control and Camera Shake Deblur to reduce the blur caused by the shake.
Q. Can I stabilize footage before editing in Premiere Pro?
Yes, some cameras and external editing software offer built-in stabilization options. You can also use third-party AI tools like AnyEnhancer for stabilization and additional video enhancements.
Final Words
Is wobbly footage ruining your videos? Worry not because Premiere Pro’s Warp Stabilizer analyzes and smooths them out. In this guide, we have discussed how to stabilize video in Premiere Pro. We have also explored alternative methods like Motion Tracking.
However, if you are looking for an easy-to-use tool, we recommend using AnyEnhancer, an AI tool that stabilizes and enhances videos with features like upscaling and denoising.
So, don’t let shaky videos hold you back! Polish your videos and impress your audience with AnyEnhancer!
Product-related questions? Contact Our Support Team to Get Quick Solution >
