How to Sharpen Video in Premiere Pro – 4 Easy Ways
Want to make your videos look sharper and more defined? This guide explores the different sharpening techniques available in Premiere Pro, including Unsharp Mask, Detail, and Smart Sharpen. You’ll learn how to apply these effects, adjust their parameters, and achieve professional-looking results.
Sharpening your video footage in post-production can significantly enhance its visual appeal, making it look crisp, detailed, and professional. Premiere Pro, Adobe’s industry-leading video editing software, offers a range of powerful tools to achieve this. This comprehensive guide will walk you through the different sharpening techniques available in Premiere Pro, providing step-by-step instructions and best practices for achieving optimal results.
What is Video Sharpening?
Video sharpening is a post-production technique that enhances the sharpness and detail of your footage by increasing the contrast between edges. This process essentially makes the edges of objects appear more defined, resulting in a sharper, more visually appealing image.
However, it’s crucial to use sharpening techniques judiciously. Over-sharpening can lead to unwanted artifacts, such as halos around edges, and create an unnatural, overly-processed look.
Premiere Pro offers several sharpening tools, each with its unique characteristics and applications:
How to Sharpening Video in Premiere Pro [3 Techniques]
1. Unsharp Mask
The Unsharp Mask effect is a classic sharpening technique that works by increasing the contrast between edges. It’s a versatile tool that can be used to sharpen various types of footage, from subtle adjustments to more dramatic enhancements.
How to use Unsharp Mask:
Step 1. Apply the effect: Select your video clip in the timeline.

Add the File to the Timeline
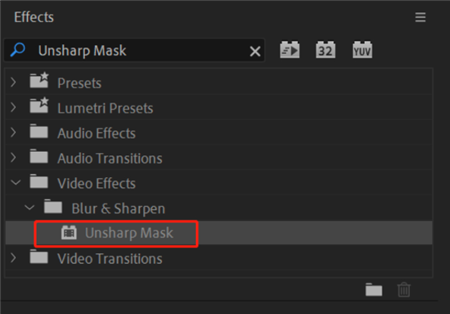
Step 2. Navigate to Effects > Sharpen > Unsharp Mask.

Unsharp Mask Option
Step 2. Adjust the parameters:
- Amount: Controls the intensity of the sharpening. Higher values result in more aggressive sharpening.
- Radius: Defines the size of the area around edges that will be sharpened. Larger radii result in more noticeable sharpening.
- Threshold: Determines the minimum contrast level required to sharpen an edge. Higher values will ignore subtle edges, resulting in less sharpening.
2. Sharpening Video in Premiere Pro via Detail Effect
The Detail effect offers a more subtle approach to sharpening, enhancing fine details within the image. It’s particularly useful for sharpening textures and subtle details without introducing unwanted artifacts.
How to use Detail:
Step 1. Select your video clip and navigate to Effects > Sharpen > Detail.
Step 2. Adjust the parameters:

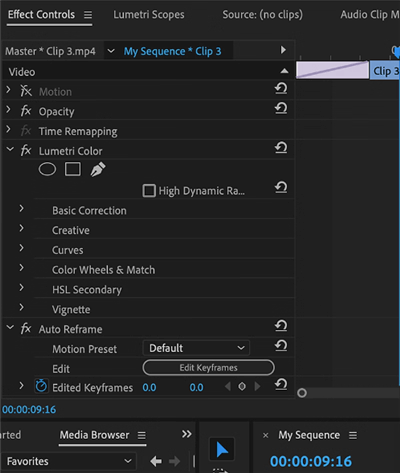
Adjusting the Settings
- Detail: Controls the amount of sharpening applied to fine details.
- Amount: Determines the overall intensity of the sharpening.
- Radius: Defines the size of the area around edges that will be sharpened.
3. Smart Sharpen
Smart Sharpen is a more advanced sharpening tool that uses intelligent algorithms to sharpen different areas of the image selectively. It analyzes the image and applies sharpening only where needed, minimizing the risk of introducing artifacts.
How to use Smart Sharpen:
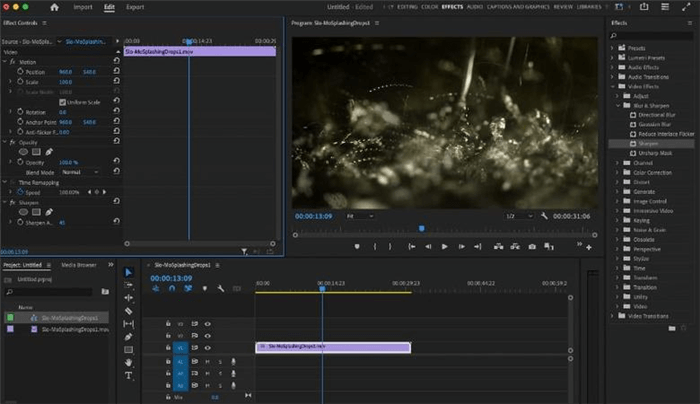
Step 1. Select your video clip and navigate to Effects > Sharpen > Smart Sharpen.

Sharpen the Video
Step 2. Adjust the parameters:
- Amount: Controls the overall intensity of the sharpening.
- Radius: Defines the size of the area around edges that will be sharpened.
- Detail: Controls the amount of sharpening applied to fine details.
- Noise Reduction: Reduces noise and grain in the image, especially helpful for footage with high ISO settings.
Sharpening Video via Premiere Pro Alternative – AnyEnhancer
While Premiere Pro offers powerful video editing capabilities, its methods can be complex for those who want to quickly enhance their video quality without having professional editing skills. In such cases, consider using an AI video optimization solution like AnyEnhancer. AnyEnhancer leverages AI technology to easily enhance videos, delivering stunning results without the need for complicated operations.

AnyEnhancer Webpage Interface
Why Choose AnyEnhancer?
- Effortless Upscaling to 4K: Transform your videos into crystal-clear 4K resolution, enhancing details and textures for a cinematic viewing experience.
- Noise Reduction: Say goodbye to grainy footage! AnyEnhancer automatically analyzes and eliminates noise, restoring clarity and detail for a high-quality viewing experience.
- Low-Resolution to 4K: Breathe new life into your old videos. Upgrade low-resolution footage (360p and 480p) to stunning 4K, preserving details and sharpness.
- Colorization: Give your black-and-white footage a vibrant makeover. AnyEnhancer uses AI to identify objects and people, adding natural and lifelike colors.
- Frame Rate Boost: Smooth out shaky footage and eliminate stuttering and screen tearing. Increase your video’s frame rate by 2X or 4X for a smoother, more enjoyable viewing experience.
- Face Enhancement: Automatically recognize and restore facial details from blurry video via AI video face enhancer model.
Pricing Options:
- 1-Year Subscription: $88.99
- 1-Month Subscription: $28.99
- One-Time Purchase: $268.99
Pros:
- No editing experience is required.
- Multiple AI models cater to various enhancement needs.
- Compatible with both Windows and Mac platforms.
How to Use AnyEnhancer:
Step 1. Free download and install AnyEnhancer for Windows or Mac. It’s 100% safe and easy to install.
Free Download for all windows & 100% safe Free Download for all mac & 100% safe
Free Download100% Clean & Safe
Step 2. Drag and drop your video into the AnyEnhancer interface.

Upload the Original Video
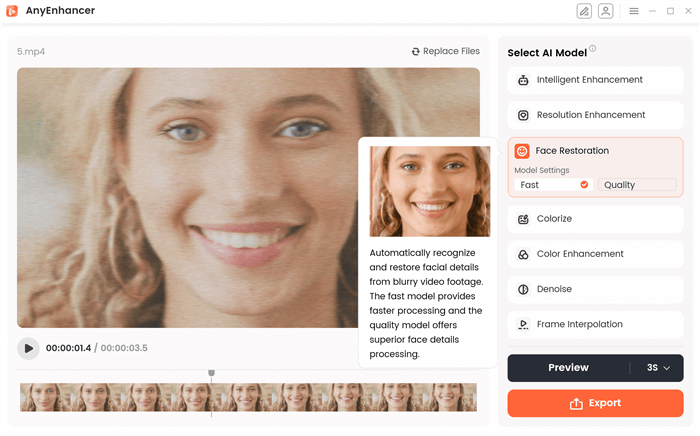
Step 3. Choose the desired AI models for upscaling, noise reduction, colorization, frame rate boosting, or facial detail enhancement.

Face Restoration Model
Step 4. Let AnyEnhancer work its magic! The software will automatically process your video, delivering high-quality results.
Step 5. Export and save your enhanced video in your preferred format and share it with the world!
FAQ about Sharpening Video in Premiere Pro
Q: What if my footage is already sharp?
A: If your footage is already sharp, you may not need to apply any additional sharpening. However, you can use sharpening techniques to enhance specific details or textures within the image.
Q: How do I know if I’m over-sharpening?
A: Over-sharpening is evident by the appearance of halos around edges, exaggerated detail, and an unnatural, overly-processed look.
Q: Can I sharpen specific areas of the image?
A: Yes, you can use the Mask tool in Premiere Pro to selectively apply sharpening effects to specific areas of your image.
Q: What are some alternatives to sharpening in Premiere Pro?
A: Premiere Pro also offers other tools that can improve the overall sharpness and detail of your footage, such as the Lumetri Color panel and the Detail effect.
Conclusion
Mastering video sharpening techniques in Premiere Pro can significantly enhance the visual quality of your footage. By understanding the different tools available and following best practices, you can achieve professional-looking results and elevate your video editing skills. Experiment with different techniques and find what works best for your projects, always remembering to preview and adjust your settings in real-time to avoid over-sharpening and achieve a natural, visually appealing result.
Product-related questions? Contact Our Support Team to Get Quick Solution >

