How to Denoise a Video Like a Pro
The guide focuses on removing video grain to achieve a more professional and polished look, enhancing the overall quality of the video.

Ever wondered how to make your videos look more professional by reducing noise? Video noise can make footage grainy and unclear. This guide shows you how to denoise a video and remove video grain to upscale video to 4K quality.
You can easily clean up your videos with video denoiser tools like Adobe Premiere Pro and AnyEnhancer. Learn about different types of video noise and how to fix each one.
These steps will help you enhance your video quality. Follow these tips to make your videos sharp, clear, and professional! But before denoising a video, let’s look at what video noise is.
What is Video Noise?
Video noise, often called grain, makes video footage look unclear. It appears as random specks across the image, especially in dark areas.
Sources of Video Noise:
- Camera Sensor Limitations: Smaller sensors in cameras capture less light. This lack of light causes more noise because the sensor amplifies the signal, including unwanted noise.
- Low-Light Conditions: In poor lighting, cameras struggle to capture clear images. They enhance the signal to get more light. But this also increases noise, making the video look grainy.
- High ISO Settings: The camera becomes more sensitive to light with increased ISO. In contrast, it brightens the image, it also adds noise, reducing detail and making the video look rough.
- Compression Artifacts: Compressing videos to save space can create blocky or blurry spots. These artifacts further degrade the video’s quality.
Now that you know the sources of video noise. Next, let’s look at its types so you can understand better how to denoise a video.
Types of Video Noise:
- Gaussian Noise: This type of noise looks like random speckles across the entire image. This happens because of electronic interference in the camera sensor. It follows a bell-shaped distribution, affecting all pixels to some extent.
- Salt-and-Pepper Noise: This noise appears as random black-and-white dots on the image. Sudden disturbances in the video signal cause it. It can make some parts of the image very bright or very dark.
- Poisson Noise: This type of noise is common in low-light situations. It happens due to the random nature of light hitting the sensor. It makes the image look grainy, especially in dark areas.
- Speckle Noise: This noise is often seen in radar and ultrasound images. It comes from the coherent processing of scattered signals. It looks like a grainy texture overlaying the image, reducing clarity.
By understanding these types of noise, you can better manage and reduce them. This ensures clearer and more appealing video footage.
Denoising Videos Using AnyEnhancer [Step-by-Step Guide]
Ever wondered how to make your videos look clearer and more professional? AnyEnhancer is the answer. As a professional AI video enhancer, it uses AI to enhance video quality. One of its key features is the Denoise AI model, which can clean up noisy videos. This guide will show you how to use AnyEnhancer to denoise your videos. We’ll also discuss some of its advantages and recommend trying it.
Free Download for all windows & 100% safe Free Download for all mac & 100% safe
Free Download100% Clean & Safe

AnyEnhancer Webpage Interface
Key Features of AnyEnhancer
- Resolution Enhancement
The Resolution Enhancement model boosts video clarity and resolution. It uses AI to increase video quality to 2K or 4K. This feature adds more details and improves the visual experience.
- Denoise Model
The Denoise model removes grain and artifacts from videos. It’s especially useful for low-light or high-ISO videos. This feature makes your videos clearer and more appealing.
- Colorize Model
The Colorize model adds color to grayscale videos. It enhances single or multiple sequences, making them visually appealing and meaningful.
- Frame Interpolation
The Frame Interpolation model smooths out low frame-rate videos. It eliminates stuttering and provides a seamless playback experience.
Steps to Denoise Videos Using AnyEnhancer
The following steps will help you denoise videos using AnyEnhancer.
Step 1. First of all, download and install AnyEnhancer on your computer and launch it. Now, upload the video you want to denoise.
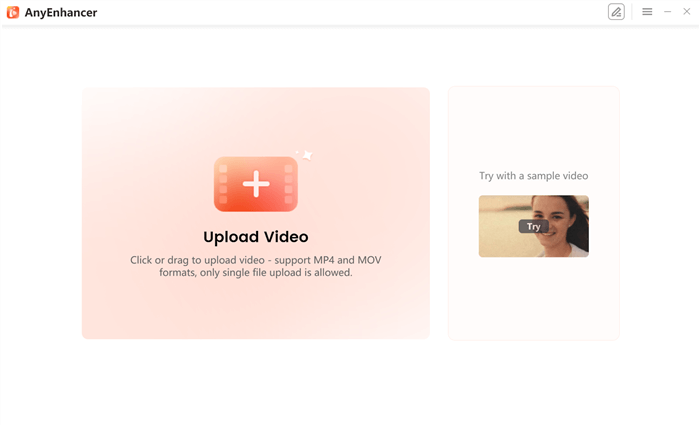
Upload Your Video to AnyEnhancer
Step 2. Next, choose the Denoise AI model and start automatic video enhancement.
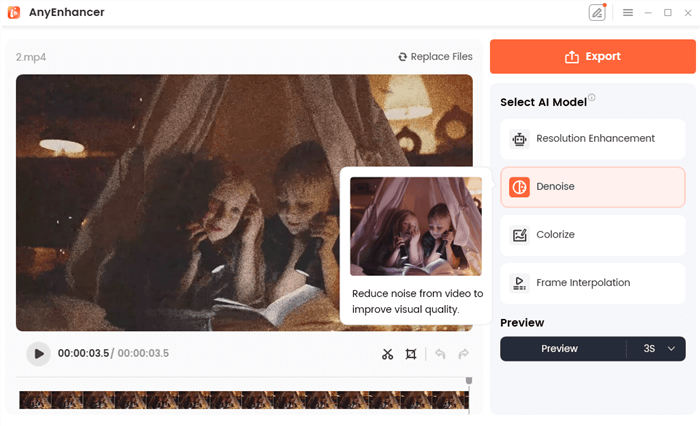
Choose the Denoise AI Model
Step 3. AnyEnhancer will quickly upscale your video. Then, you can preview the video effects and export the enhanced video.
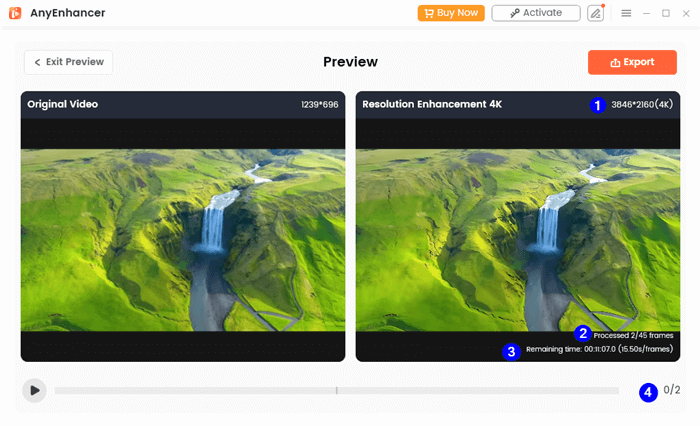
Compare the Video Upscaled to 4K
That’s all about denoising a video using AnyEnhancer. Have a look at the key features of the tool.
Give AnyEnhancer a try to denoise your videos effortlessly! Next, let’s address some frequently asked questions about this process.
Denoising Videos using Adobe Premiere Pro [Step-by-Step Guide]
Use the built-in denoising tools to remove video grain with Adobe Premiere Pro. One effective tool is the Median effect. Follow these steps to denoise video in Premiere Pro:
Step 1. Import and Prepare Your Video
Import your video into Premiere Pro by using “File > Import” or pressing Ctrl + I (Windows) or Cmd + I (MacOS). Create a new sequence by dragging your video to the timeline.
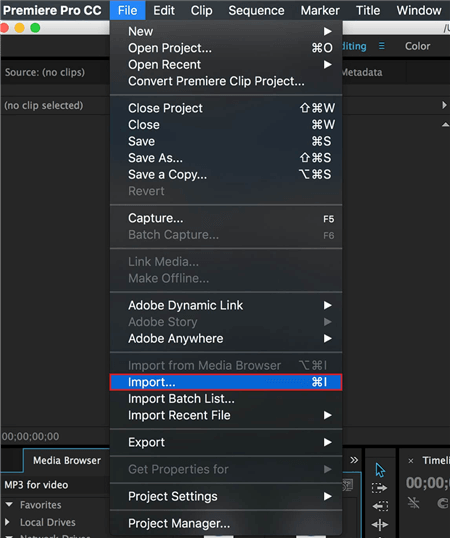
Import Your Noisy Video
Step 2. Apply the Median Effect
In the Effects panel, search for “Median” under “Video Effects > Noise & Grain.” Drag the Median effect to your video clip in the timeline.
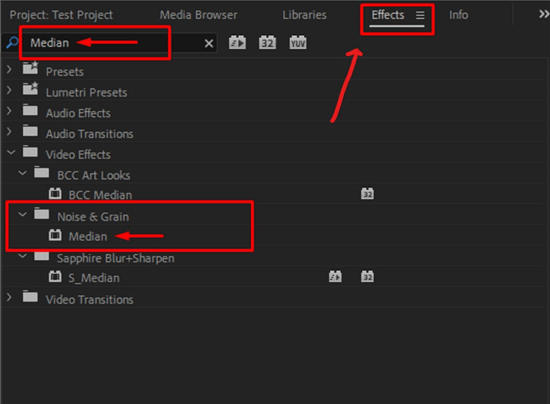
Apply the Median Effect
Step 3. Adjust Median Settings
In the Effects Control panel, locate the Median effect and expand its settings. Adjust the “Radius” setting from 0. Increase it to reduce noise. But avoid over-blurring the image.
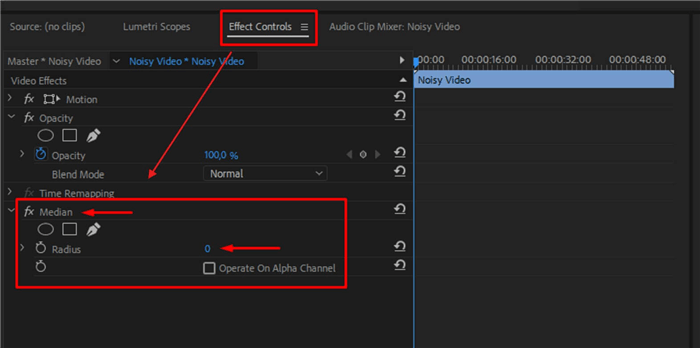
Adjust Median Settings
Step 4. Use Masks for Targeted Noise Reduction
If needed, use masks to focus on specific noisy areas. Use the Pen tool to draw masks or choose a pre-defined shape. This way, you can reduce noise without affecting the entire clip.
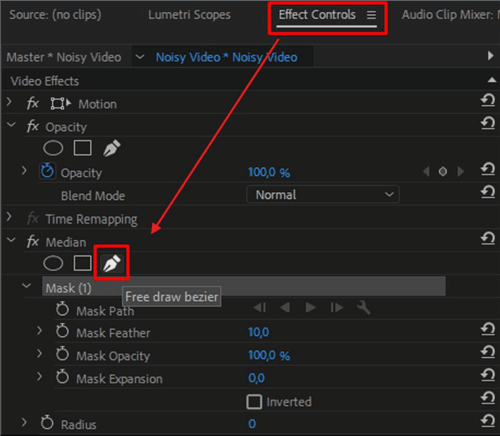
Use Masks for Targeted Noise Reduction
Adjust the “Feather” setting to blend the mask edges smoothly. Increase the “Radius” to balance noise reduction and detail preservation.
You’ve seenhow to denoise a video using Adobe Premier Pro. Next, let’s share the best alternative to Adobe Premier Pro.
FAQs on Video Denoising
What are common video denoising techniques?
Here are some popular methods for reducing noise in video footage:
- Median Filtering: Averages the values of nearby pixels to smooth out small specks while preserving edges.
- Temporal Averaging: Uses data from several frames to reduce noise, working best in scenes without much movement.
- Gaussian Blur: Softens the entire image to lessen noise but may also obscure fine details.
- Wavelet Transform: Separates the actual image data from noise for finer control over noise reduction.
- Non-Local Means (NLM): Compares different parts of the image, averaging similar areas to reduce noise and maintain textures.
How does video denoising differ from image denoising?
Video denoising is different from image denoising mainly because it involves multiple frames. Here are the main differences:
- Temporal Information: Video denoising uses details from adjacent frames to reduce noise, which single images don’t have.
- Movement Consideration: Motion between frames must be considered to avoid visual errors.
- Complexity: Denoising videos is more complicated and requires more computing power because of the motion and amount of data.
- Speed Requirements: Video denoising often needs to happen quickly, even in real-time, unlike image denoising which can be processed more slowly.
These factors make video denoising a more involved process than working with still images.
Where is video denoising used?
Video denoising improves video quality across several fields. It’s used in film and TV to enhance visual clarity. Security teams use it to clear up surveillance footage, which is crucial for identifying important details. In medicine, it helps create clearer diagnostic images. For video calls, it ensure smoother communication. Drone operators also rely on it to sharpen aerial footage. This technique is essential for delivering clearer and more professional results in various applications.
Final Words!
Knowing how to denoise a video can make a big difference. Clearer, sharper videos look more professional and are more enjoyable to watch.
Tools like Adobe Premiere Pro make this process easier. Understanding different types of video noise is also important. These methods help you clean up your footage, improving the overall quality.
Start applying these tips today to see the results for yourself. Your videos will become clearer and more polished, standing out in terms of quality.
AnyEnhancer – AI Video Enhancement
Download AnyEnhancer to enhance your video quality to 4K resolution, remove grain, smooth motion, and add color to black and white videos with just one click.
Product-related questions? Contact Our Support Team to Get Quick Solution >
