How to Get Good Quality on CapCut
CapCut is a professional high-grade editing tool that offers a seamless way to improve video quality. Many of you might not know how to get good quality on CapCut. This detailed guide will cover everything about enhancing your videos’ quality via this tool. Want a simple and reliable alternative? AnyEnhancer can help you upscale your videos to 4K resolution in a single click!
Digital presence has become essential in the technologically advanced world, where everyone wants to have a strong online reach. However, you cannot entertain your audience and hence get any followers unless you post high-quality content that is informative and worth watching. Pixelated and blurry videos are usually scrolled on all social media platforms without any watch time, and you’ll even end up losing your current audience.
Worry no more! All you need to do is improve video quality, and CapCut stands out as a brilliant choice. Wondering how to get good quality on CapCut? CapCut is a featured-packed editing tool that enables content creators to showcase their creativity in style with its multiple advanced-level filters, sound effects, transitions, and upscaling options. We’ll also guide users about a reliable alternative if they find it challenging to use CapCut for quality improvements. Let’s delve into further details and find out some ways to add a touch of elegance to your videos!
Table of ContentsHide
What are the Best CapCut’s Quality Settings
Before we move on to the guide on improving videos via CapCut, we must understand the quality settings offered by this versatile tool. Comprehending the quality settings first will help creators design videos in a particular way and showcase their editing skills in the best possible manner. Let’s review the CapCut’s quality settings:
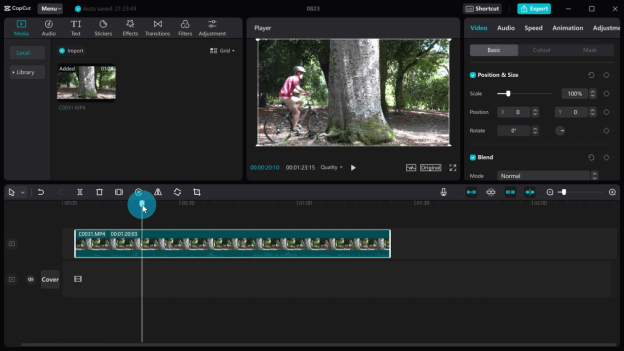
CapCut Interface
Resolution and Frame Rate
There are no limitations for resolution when it comes to importing videos to CapCut. However, if the device doesn’t have powerful specifications, the videos will automatically be converted to 1080p. When it comes to export settings, CapCut offers multiple options. You can export videos in 480p, 720p, 1080p, 2K, and 4K resolution. You can save your videos via CapCut with a frame rate per second ranging from 24 to 60 FPS.
Compression and Bitrate
When upscaling your videos with CapCut, you can choose from various bitrate and Codec options. The tool offers the following options: lower, recommended, higher, and customized for bitrate settings. You can select from H.264, AV1, and HEVC for Codec.
Export Settings
Adjust other parameters, such as video format and audio export, to further improve the quality. CapCut supports two widely accepted video formats: MOV and MP4. Furthermore, you can edit the cover for your video and run a copyright check from the export settings.
How to Get Good Quality on CapCut [Step-by-step Guide]
Selecting the right video upscaling tool hinges on factors like resolution, frame rate, format, and user proficiency. CapCut stands out as a comprehensive solution with advanced AI for professional video enhancement, catering to content creators’ needs.
To upscale video quality in CapCut, there isn’t a one-click fix; you must adjust settings for optimal results. Utilize features like camera tracking, flicker removal, and auto reframing to transform raw footage into polished visuals. The AI movement feature allows for dynamic effects like shaking and zooming, perfect for creating engaging content for platforms like Instagram, YouTube Shorts, and TikTok. Discover how to achieve high-quality outcomes with CapCut.
Steps to Improve Video Quality on CapCut
Here are the steps to upscale your videos and add a touch of elegance with multiple effects, filters, and transitions via CapCut:
Step 1. Download and Launch CapCut
Download, install, and launch CapCut on your PC. Click “New Project” and import the video you wish to improve. Once done, drag and drop the video to the timeline. You can upload videos directly from a PC or cloud storage as well.
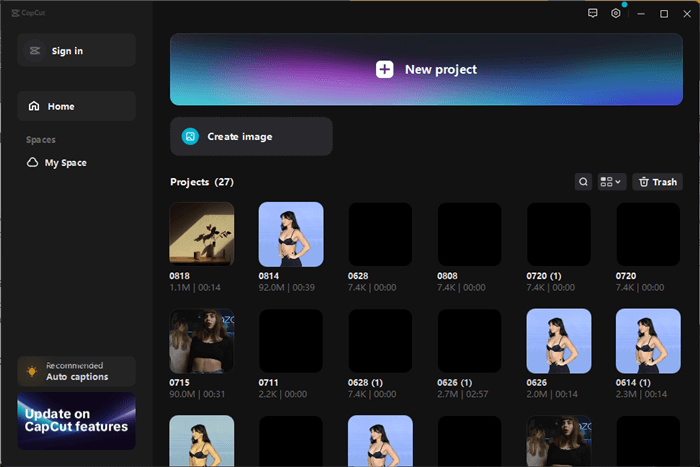
Create a New Project
Step 2. Adjust Hues, Add Effects, and More
To improve the quality of your videos and make them engaging, CapCut offers various editing tools. Click on the “Adjustments” tab and the “Custom Adjustment“. Move the sliders for Hue, Saturation, and Brightness to improve the colors of the video.
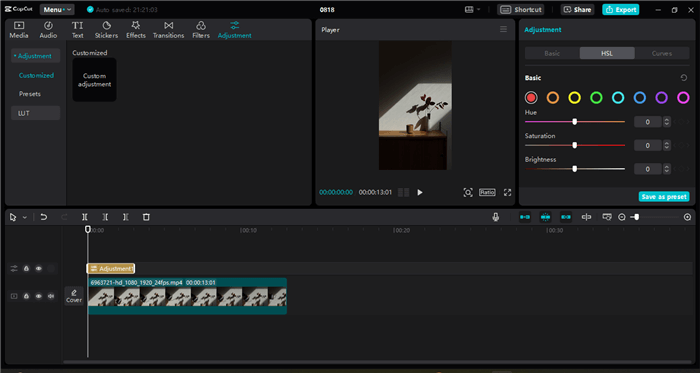
Color Grading
Go to the “Effects” tab from the above toolbar. Here, you can choose from the Video Effects and Body Effects. Add the desired effects to give your video a professional feel.
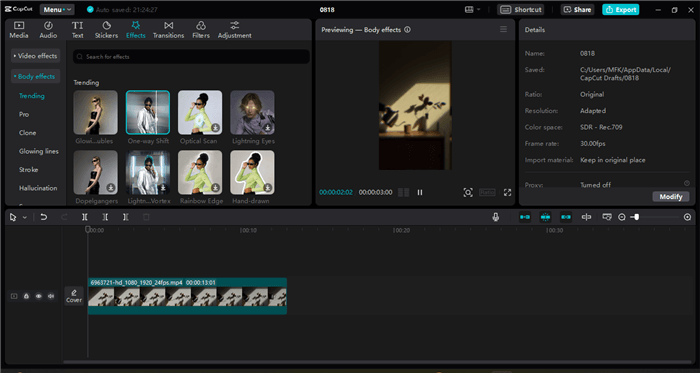
Choose from the Video Effects
Step 3. Upscale Video
Once the adjustments are done, the next step is to upscale the video to improve resolution, frame rate, Codec, bitrate, and more. Click on the “Export” button from the top-right corner and choose the maximum resolution CapCut offers, i.e., 4K. Adjust the frame rate to the highest possible setting, i.e., 60 FPS.
You can also set the bitrate to “Higher” and choose the “AV1 codec” for better compression and saving space. If space is not an issue, choose the H.264 codec. Click on “Export” again to save the upscaled video.
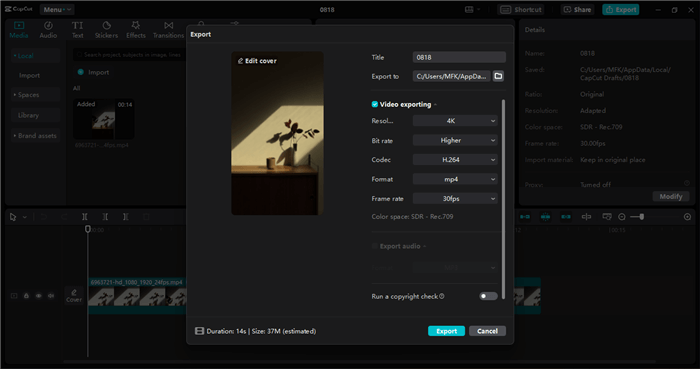
Export Your Video
There are a few disadvantages to using CapCut to improve video quality:
- CapCut is highly resource intensive, using much of the system’s computing resources, and can take time in the video rendering process.
- Moreover, it is difficult to use, especially for beginners unaware of adjusting each setting.
- Lastly, the tool has no preset or pre-defined AI model to add clarity and improve a video’s sharpness or overall quality.
Worry not, as we’ve got you an alternative!
AnyEnhancer – AI Video Enhancement
Download AnyEnhancer to enhance your video quality to 4K resolution, remove grain, smooth motion, and add color to black and white videos with just one click.
Increase Video Quality by CapCut Alternative
Don’t you want to spend too much time adjusting each color setting, adding effects, overlays, and more? No worries! You can try a CapCut alternative to improve video quality, AnyEnhancer. This AI-based video enhancer tool can elevate your video’s resolution from 360p or 480p to 4K while preserving the originality of the pixels.
Remove the fuzz and add a touch of smoothness to your footage by optimizing the frame rate by 2X or 4X. The Frame Interpolation AI model features a smart algorithm to remove shakiness and optimize the transitions in fast-paced visuals. Moreover, you can add clarity and improve the sharpness of a video using the Denoiser model.
Key Features
- Bring your videos to life by reviving the true hues with the Colorize AI model. Colorize the black-and-white video with AI.
- Remove shuttering and pixel distortion while restoring details with the Denoiser AI model.
- Elevate or upscale your raw footage into 4K resolution for a cinematic feel using the Resolution Enhancement model.
- The Frame Interpolation model ensures that the transition between the frames remains silky smooth.
Here’s a step-by-step guide to improving video quality with the AnyEnhancer AI tool:
Step 1. Download, Install, and Launch AnyEnhancer
Download and install AnyEnhancer on your PC. Launch the software, click the “Add” button, or drag and drop videos into the tool.
Free Download for all windows & 100% safe Free Download for all mac & 100% safe
Free Download100% Clean & Safe
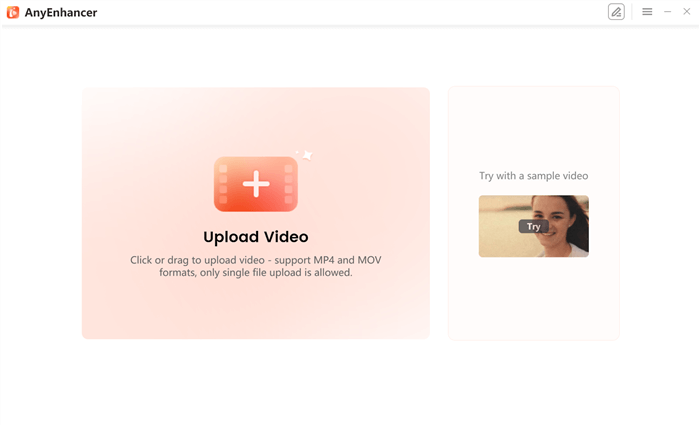
Upload Your Video to AnyEnhancer
Step 2. Remove Visual Grain and Noise
The next step is selecting the AI model you wish to apply to your poor-quality video. You can choose the “Denoise” first to remove shuttering and visual grain from your videos.

Choose the Denoise AI Model
Preview the effects of the Denoise AI model.

Preview the Effect
Step 3. Improve Resolution
You can also enhance the video quality by boosting the resolution and optimizing the FPS. Choose the “Resolution Enhancement” AI model. Enter model settings for resolution, such as 2K or 4K.
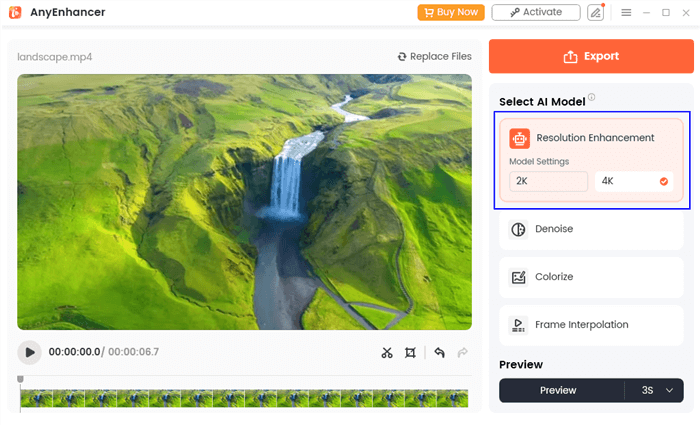
Select the Resolution Enhancement
Step 4. Preview Changes & Export
Click on the “Preview” button to start the process. You can set the preview timer to either 3 seconds or 5 seconds.
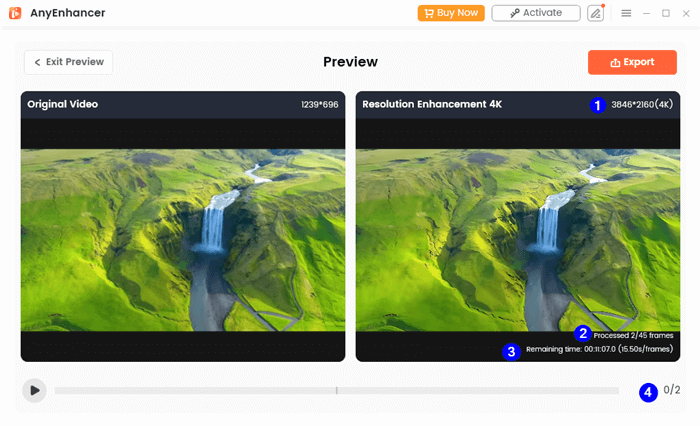
Compare the Video Upscaled to 4K
Once done, click the “Export” button from the top-right corner to save the enhanced-quality TikTok video.
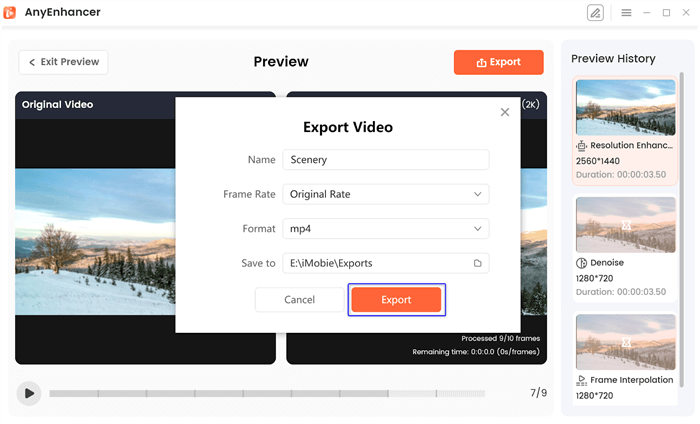
Export the Video
FAQs about How to Get Good Quality on CapCut
How to improve video quality in CapCut?
CapCut is a professional grade editing tool that can improve or enhance video quality by color grading, adding effects and transitions, and upscaling videos to 4K resolution at 60 FPS.
How do I get 4K quality for videos?
You can try various tools to upscale your low-resolution videos to 4K. However, we recommend using AnyEnhancer, an easy and effective option. You can elevate your 360p or 480p videos to 4K in a single click and optimize FPS by 2X or 4X.
Final Words
You might wish to post quality content on social media platforms or preserve your memories with loved ones in high-quality videos. Whatever the purpose is, transforming your videos into cinematic masterpieces is the first step, and CapCut can help you achieve that—wondering how to get good quality on CapCut? We have compiled step-by-step instructions to help you improve video quality via CapCut. You can also utilize a reliable and easy CapCut alternative, i.e., AnyEnhancer, to elevate videos to 4K and optimize FPS by 4X in a single click.
AnyEnhancer – AI Video Enhancement
Download AnyEnhancer to enhance your video quality to 4K resolution, remove grain, smooth motion, and add color to black and white videos with just one click.
Product-related questions? Contact Our Support Team to Get Quick Solution >

