How to Stabilize Video in Davinci Resolve [3 Methods]
This article explains how to stabilize video in DaVinci Resolve using the Edit and Color tabs. We also presented AnyEnhancer, an AI-driven video stabilizer and enhancer that uses AI models to improve video quality and lessen motion blur.

You can make your films look more refined by removing jagged edges with DaVinci Resolve. Below are 3 ways to learn how to stabilize video in DaVinci Resolve. Except for the tabs Edit and Color, you’ll have one more AI enhancer tool for your improvement from this video. These guidelines will help make any transition smooth enough, whether you are a video-making beginner or not. Let’s begin the process and get your footage perfect!
Table of ContentsHide
How to Stabilize Video in DaVinci Resolve
With the help of easy-to-use tools, DaVinci Resolve may enhance shot quality by stabilizing video and eliminating jitters and shaking. The Edit or Color tab tools can achieve smooth results for a polished look. Let’s continue and look at how these methods can improve your video.
Method 1. Stabilizing video from the Edit tab
The stabilization tools in the Edit tab of DaVinci Resolve smoothen the shakes when stabilizing a video. This method is easy and perfect for both new and experienced editors.
You can easily stabilize your videos from the Edit tab to delete unnecessary movement and make them seem more professional. The process involves accessing the stabilization settings, adjusting the parameters to fit your needs, and letting DaVinci Resolve stabilizer handle the rest. Follow the steps below to use this method and effortlessly improve your footage’s stability.
Step 1. Go to the Edit Page
Import your unsteady video from the media pool and go to the “Edit” page. If you don’t see the page icons at the bottom, go to “Workspace” > “Show Page Navigation.” You can also press Shift + 4 to go directly to the “Edit” page.
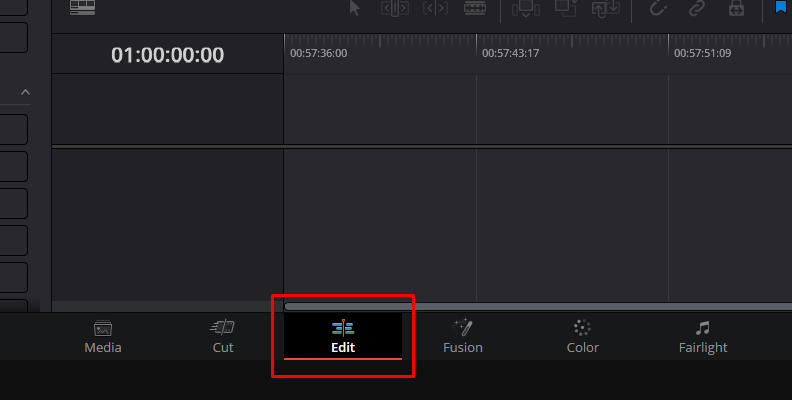
Access Edit
Step 2. Open the Stabilization Menu
Select your video clip on the timeline. Open the inspector window in the upper left. Ensure you’re in the “Video” tab, then scroll down and click on the “Stabilization” option to access its settings.
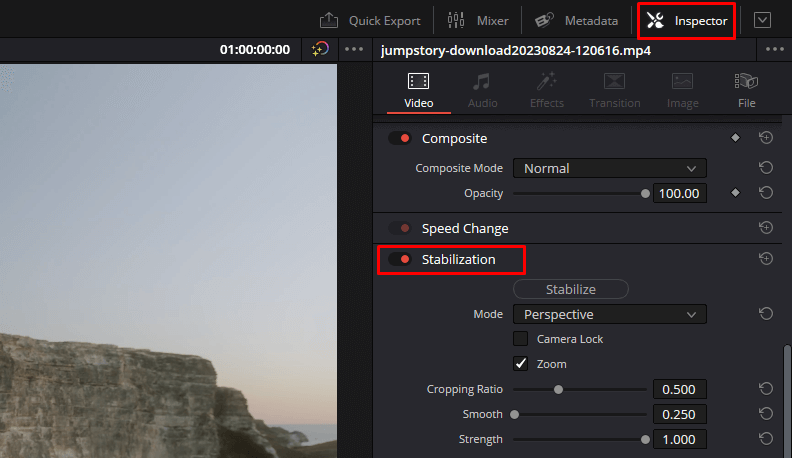
Click Stabilization
Step 3. Choose Your Stabilization Settings
DaVinci Resolve offers three options:
- Perspective: Corrects shakes by adjusting pan, tilt, zoom, and rotation while keeping perspective.
- Similarity: Similar to Perspective but may fix extra motion artifacts.
- Translation: Best for minimal side movement, focusing only on pan and tilt.
You can also enable “Camera Lock” to mimic a tripod effect and use the “Zoom” function to cover black bars. Adjust the “Cropping Ratio,” “Smooth,” and “Strength” to refine the stabilization.
Step 4. Stabilize Your Video
Click the “Stabilize” button to start the process. DaVinci Resolve will correct the shaky parts of your video. Once it’s done, play the video to check the results and adjust the settings. Click “Stabilize” again to apply any changes.
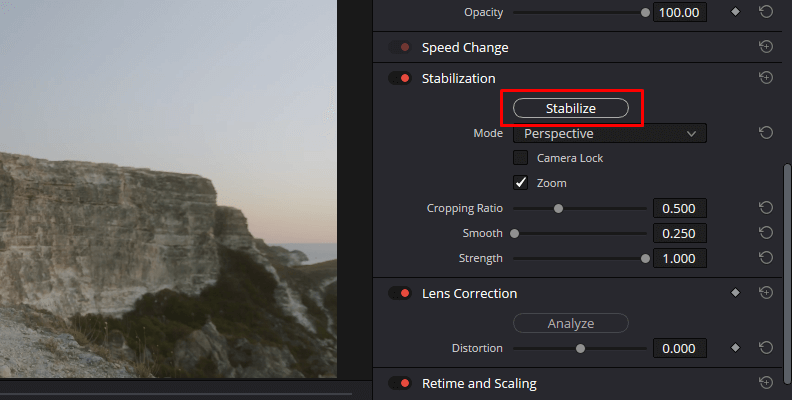
Click Stabilize
Method 2. Stabilizing video from the Color tab
You’ll take advantage of more detailed and precise stabilization tools to stabilize video using the Color tab in DaVinci Resolve. This method is particularly useful for handling complex or challenging footage that may need to be fully stabilized with basic tools. The Color tab lets you fine-tune the stabilization process, offering enhanced control over the final result. Now, let’s use the Color tab in DaVinci Resolve stabilize video.
Step 1. Open the Color Tab
Go to the Color page by selecting the “Color” tab with a color wheel icon. If you don’t see it, go to “Workspace” > “Show Page Navigation” to enable it. You can also press Shift + 6 to switch directly to this page.
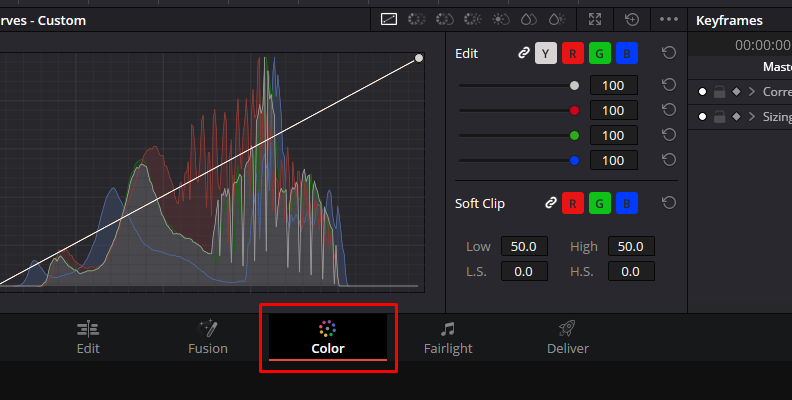
Select Color
Step 2. Access the Tracker Window
Under the video preview, locate the panel with various tools. Click the icon with the target symbol to open the tracker window. It’s the shaky video camera icon between the “Window” and “FX” icons.
Click Tracker Icon
Step 3. Adjust Stabilization Settings
In the tracker window, you’ll find options similar to those in the Edit tab. You can adjust settings like “Crop,” “Smooth,” “Strength,” “Camera Lock,” and “Zoom” at the bottom. At the bottom right, select the stabilization mode from the dropdown menu:
- Perspective: Adjusts pan, tilt, rotation, and perspective.
- Similarity: Adjusts pan, tilt, and rotation.
- Translation: Adjusts only pan and tilt.
Choose the mode and click the “Stabilize” button. DaVinci Resolve will analyze and stabilize your video. In the tracker window, you’ll see a graph of the stabilization process. Adjust the settings or try different modes until you get the best results.
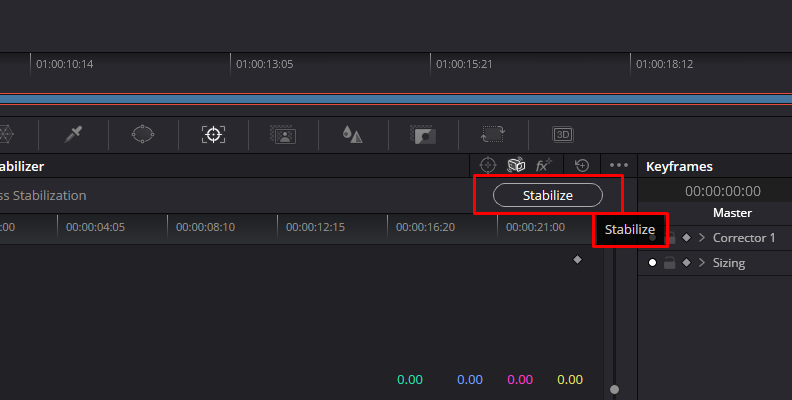
Click Stabilize in Color Tab
How to Stabilize Video with DaVinci Resolve Alternative – AnyEnhancer
Are you curious to learn about a great alternative to DaVinci Resolve for stabilizing videos? AnyEnhancer utilizes advanced models like the Frame Interpolation Model to smooth out shaky footage by increasing the frame rate, resulting in smoother motion and better visual quality. This model is beneficial for stabilizing videos, significantly improving stability and clarity. With its sophisticated algorithms, AnyEnhancer helps to achieve professional-level stabilization that complements the tools available in DaVinci Resolve.
In addition to stabilization, AnyEnhancer offers a range of powerful features. The Face Restoration Model can detect and reconstruct unclear faces, improving the facial features for better visualization. The Colorize Model fills the colorless black-and-white videos with nice shades. To make videos more attractive and eye-catching, the Color Enhancement feature directly raises the brightness and contrast level for higher saturation of colors. The Denoise Model effectively reduces noise, improving overall clarity and quality. Lastly, the Resolution Enhancement model upgrades video quality with 2K and 4K settings, providing sharper and more detailed visuals.
Key Features:
- Intelligent Enhancement simultaneously applies super-resolution and facial enhancement to make people clearer and improve overall video quality, even old video.
- Face Restoration and face refinement enhance blurry faces and bring out fine details for better clarity.
- Frame Interpolation increases frame rate to smooth out motion and stabilize shaky footage.
- Color Enhancement brightens and saturates colors for more vibrant visuals.
Now, let’s explore the simple steps to use AnyEnhancer for stabilizing videos:
Step 1. Free download and install AnyEnhancer on your computer.
Free Download for all windows & 100% safe Free Download for all mac & 100% safe
Free Download100% Clean & Safe
Step 2. Launch the application and click “Upload Video,” or drag your file directly into the program.
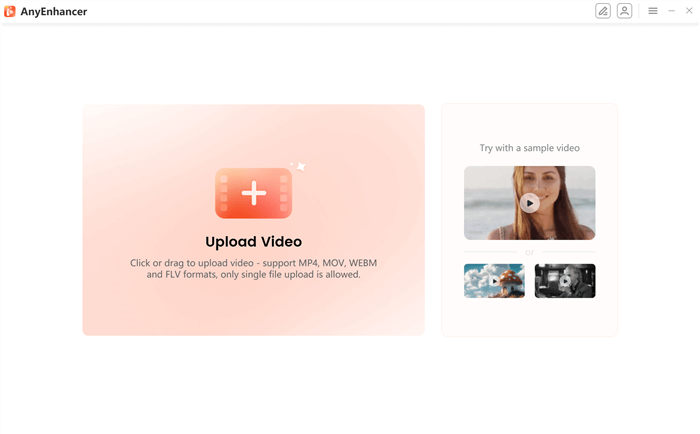
Upload Video
Step 3. Choose the “Frame Interpolation” option to begin stabilizing your video.
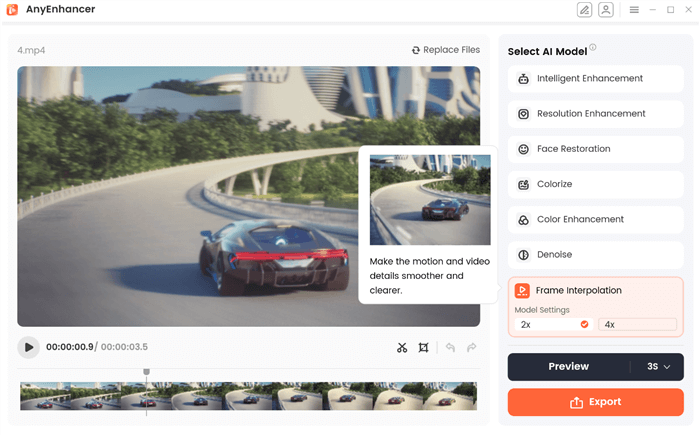
Frame Interpolation Model
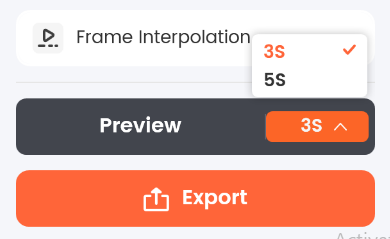
Step 4. Click “Preview” to compare the enhanced video and the original version.
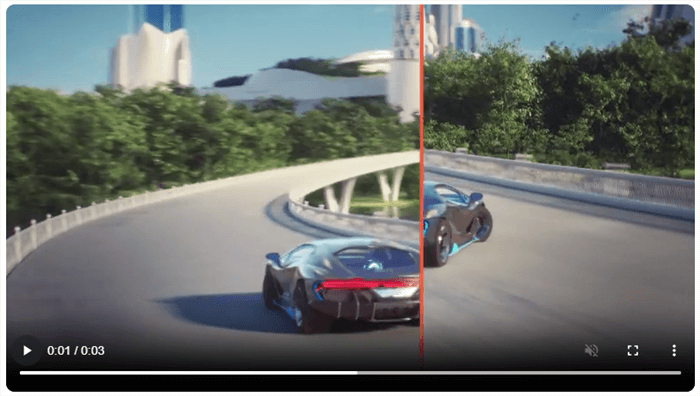
Preview Frame Interpolation Effect
Step 5. If you’re satisfied with the preview, click “Export.” Enter a file name and format, select your preferred save location, and click “Export” again to complete the process.
Click the Export Button
DaVinci Resolve Stabilization FAQs
Does stabilization affect video quality in DaVinci Resolve?
Yes, stabilization can slightly affect video quality, as it may crop and adjust parts of the frame to remove shake. However, the improvements in smoothness usually outweigh minor quality reductions.
Can DaVinci Resolve stabilize really shaky footage?
DaVinci Resolve has an in-built stabilization tool that efficiently stabilizes very shaky footage. Moreover, AnyEnhancer can improve films with more stabilization features and other improvements for better outcomes.
How long does it take for a video to stabilize in DaVinci Resolve?
It would depend on the length of the video and its shake level. While longer or more complicated clips may take longer to process, shorter ones typically last a few minutes.
Final Words
In this post, we delve into stabilizing video footage using DaVinci Resolve, focusing on methods under both the Edit and Color tabs. Both methods effectively reduce shake and improve video stability. However, if you’re looking for advanced stabilization and additional video enhancements, AnyEnhancer is a great alternative. With features like Frame Interpolation for smoother motion, face restoration, and color enhancement tools, it offers comprehensive solutions to elevate your video quality. We highly recommend trying AnyEnhancer to enhance and stabilize your videos for superior results and a more refined look.
AnyEnhancer – AI Video Enhancement
Download AnyEnhancer to enhance your video quality to 4K resolution, remove grain, smooth motion, and add color to black and white videos with just one click.
Product-related questions? Contact Our Support Team to Get Quick Solution >
