How to Turn Live Photo into Video on iPhone
Want to know how to turn live photo into video? Follow this tutorial to easily make live photos into videos within four steps.
iPhone Photo Editing Tips
Edit Photos on iPhone
Edit Live Photos on iPhone
Since iPhone 6s (Plus) was available, the funny feature of live photo was also coming to us. The logic of iPhone live photo is pretty simple. When you try to take a photo using Camera of your iPhone 6s, as well as the later iPhone 11/X/8, it will not only take the picture, but automatically record 3-second mov. files, 1.5 seconds video before the picture and 1.5 seconds video after taking the picture.
This is an awesome function. It would bring more fun to share our photos taken in daily life. However, on some occasions, the live photo would be still when sharing them with others; If importing live photos to computer to share online, they will become still images; If your friends don’t have the device that supports live photo, such iPhone 6/5s/5/4s, the live photos would also become still; etc.
So how to solve these problems? You must know that you can turn live photo into video, or GIF, save them on computer (PC/Mac), and share them via Mail, Messages, AirDrop, etc. In this post, we will share a practical tool to help you with how to make live photo into video.
The Tool We Use
The tool we need is named AnyTrans – a professional iOS data manager. It provides you with three ways to manage your iPhone live photos. You can not only turn live photo into video, but also convert live photo to high-quality JEPG, and make live photo into GIF. It manages all photos on your iPhone including camera roll, photo stream, photo library, albums as well as live photos and photo videos. Why not download it now, and get started with the detailed steps of converting live photo to video?
How to Turn Live Photo into Video with AnyTrans
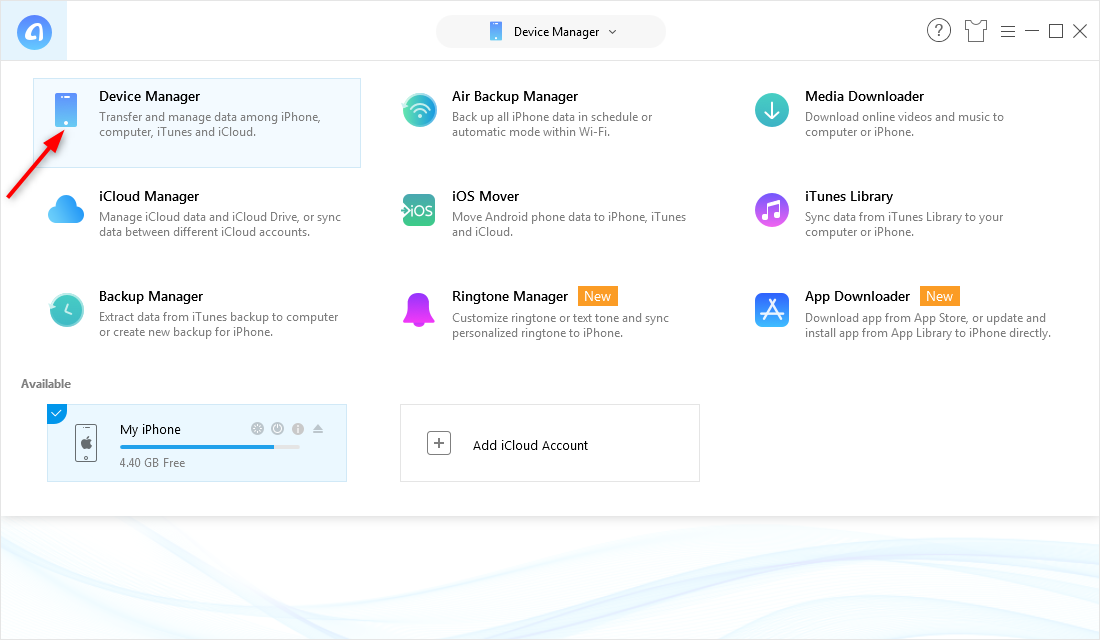
Step 1. Run AnyTrans on your PC/Mac > Connect your iPhone to it > click on Device Manager tab here.

How to Turn Live Photo into Video – Step 1
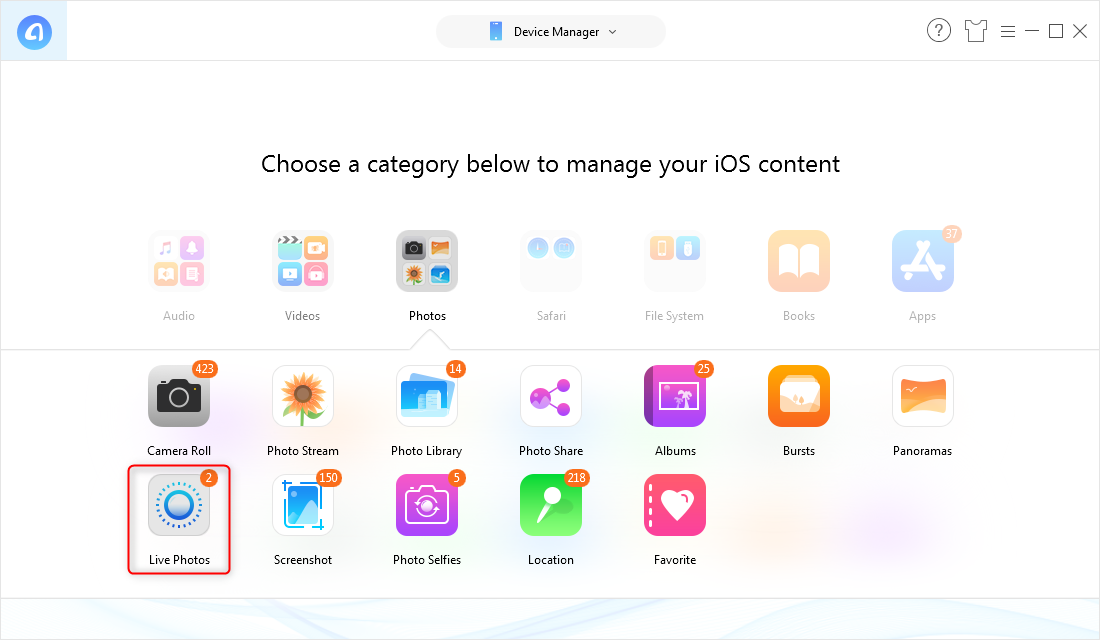
Step 2. Go to the category page > Click on Photos > Choose Live Photo.

How to Turn Live Photo into Video – Step 2
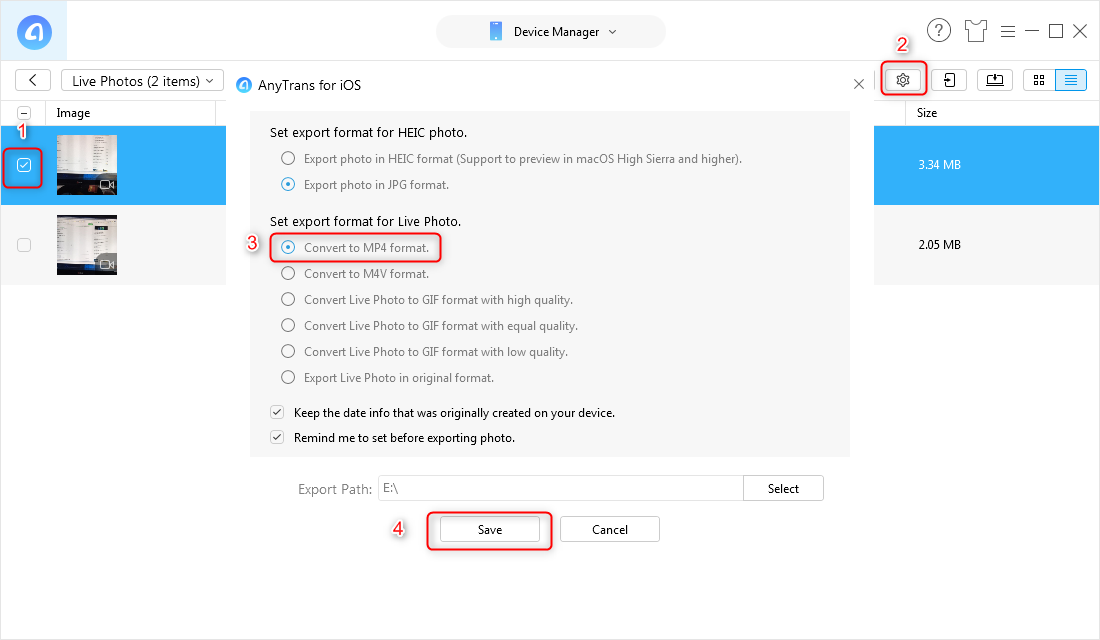
Step 3. Check the live photo you would like to make into video > Click on the Setting menu to choose the export format. Here you can choose MP4 and M4V formats. Taking MP4 as an example > Then Click Send to Computer button.

How to Turn Live Photo into Video – Step 3
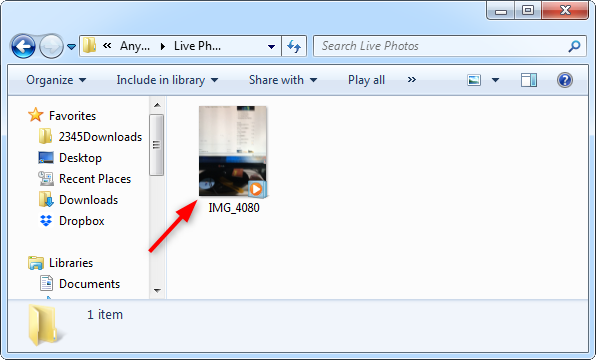
Step 4. After the live photo is transferred to PC/Mac, you can view it in the file. And now you can share it to your friends or social media.

How to Convert Live Photo to Video – Step 4
The Bottom Line
As you can see, with AnyTrans, there are only four steps needed, and you can turn live photo into video easily. Why not give it a try right now? If you have any questions about it, you can contact us via email, or leave your messages in the comments below, and we will answer you as soon as possible.
Product-related questions? Contact Our Support Team to Get Quick Solution >

