3 Easy Methods to Upload Photos to iCloud Drive from iPhone/Computer
How to save photos to iCloud Drive from iPhone/computer? If you are troubled by this question, this post showing you 3 easy methods to move photos to iCloud Drive is exactly what you need.
iPhone Photos Tips
Export Photos from iPhone
Import Photos to iPhone
Fix iPhone Photos Problems
Other iPhone Photos Tips
Cloud service is a great and convenient channel to store kinds of data, for instance, work documents, Keynote presentations, spreadsheets, photos, etc. For Apple users, iCloud is their first choice. Once uploaded to iCloud, you can check the uploaded data on all your iOS devices, such as iPhone, iPad, and Mac. All you need to do is to assure you’ve login the same Apple ID on these devices. Here in this article, we will introduce how to move photos to iCloud Drive from the computer and iPhone.
This guide includes 3 part as below:
If you want to save your photos to iCloud drive, reading this post might be helpful.
Let’s dive right in.
Method 1. Save Photos to iCloud Drive from Computer
As all your photos and videos on Mac will be automatically uploaded to your iCloud drive, this method will mainly talk about how to save photos to iCloud on Windows PC. On a Windows PC, you have two choices to transfer photos to iCloud. One is through the browser, the other is via iCloud for Windows. Here are the steps of saving photos to iCloud via iCloud.com:
Step 1. Go to iCloud.com and sign in.
Step 2. Click the iCloud Drive > Click Upload button on the top > Select the photos you want to save to iCloud > Click Open to start uploading photos to iCloud Drive.
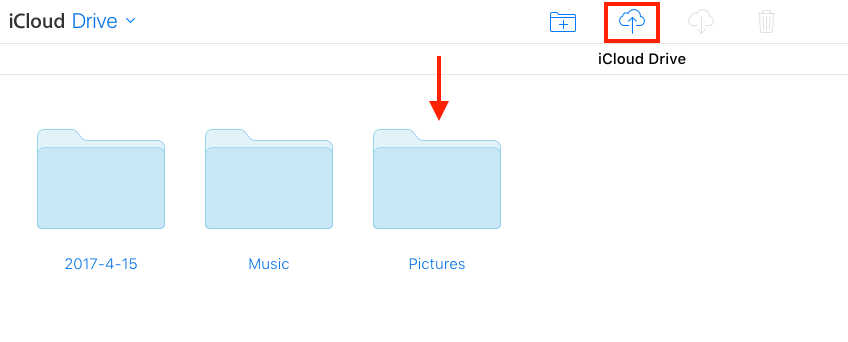
How to Save Photos to iCloud Drive on Web – Step 2
If you have downloaded iCloud for Windows, the upload steps are basically the same. Just login to your Apple ID and click the Upload button to move photos from your computer to iCloud.
To better manage photos in iCloud Drive, you can create a folder and move all photos to it after successfully transferring photos to iCloud Drive, or select one folder first then start to move photos to iCloud Drive.
Method 2. How to Save Photos to iCloud Drive from iPhone
If you want to save your iPhone photos to iCloud, it will be very simple. Here are the detailed steps:
Step 1. Setting > [Your Name] > iCloud > Enable iCloud Drive.
Step 2. Click on Photos on your iPhone, select one picture > Tap the button at the lower-left corner > Then tap “Add to iCloud Drive”.
Step 3. Open the iCloud Drive app on your iPhone; you can see that the picture has been uploaded to iCloud Drive.
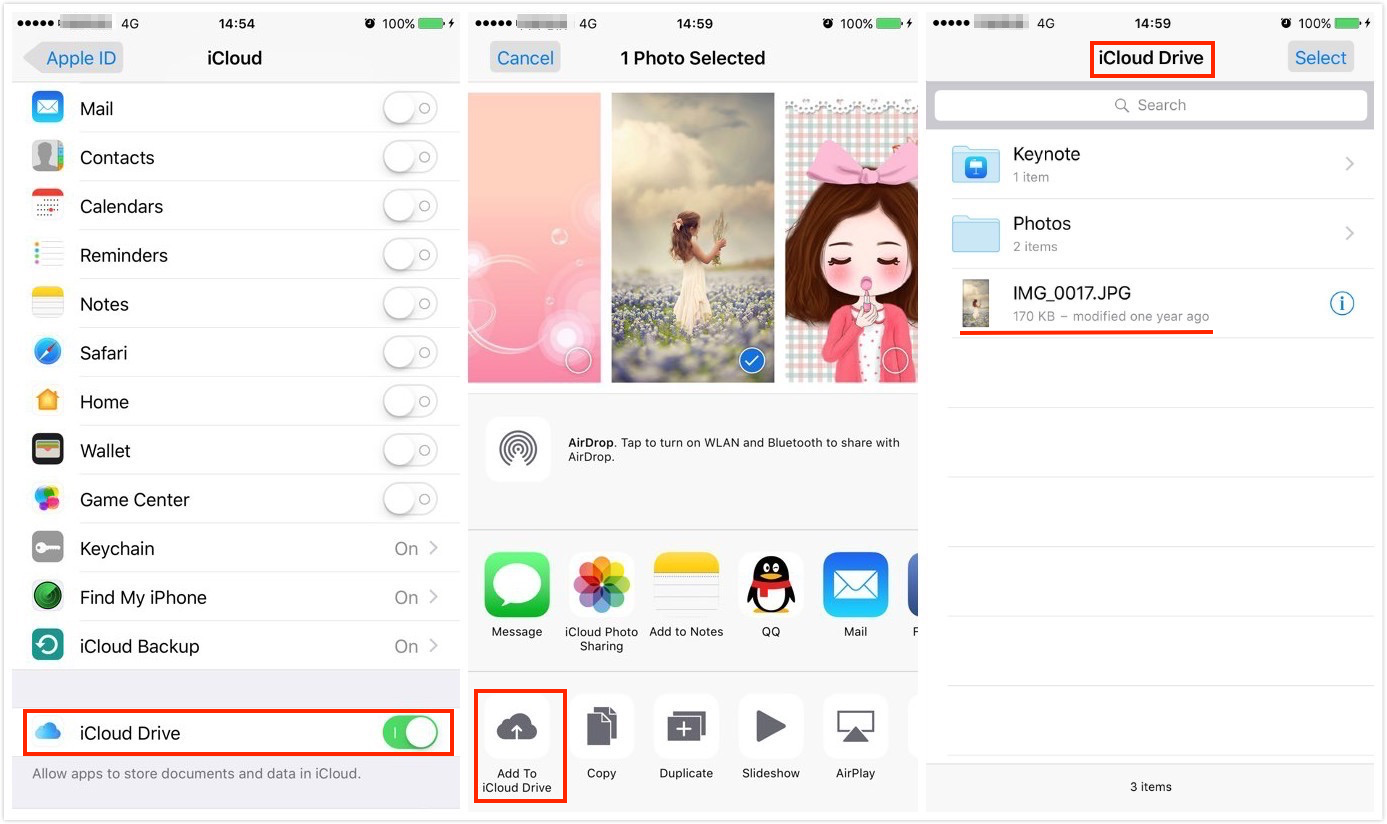
How to Save Photos to iCloud Drive from iPhone
You can also turn on Photos on iCloud so that all your iPhone photos will be automatically uploaded to your iCloud.
Method 3. Save Photos to iCloud Drive with AnyTrans
AnyTrans for iOS is a professional tool with functions of managing & transferring iOS data among iDevice, iTunes, computer, and iCloud. For its iCloud content management function, AnyTrans can help you check, edit, upload, and download multiple types of iCloud content like Contacts, Notes, Reminders, etc. As for iCloud Drive, it not only enables you to check or delete files already in it but also allows you to download & upload files to iCloud Drive directly.
As long as there is still available storage on your iCloud, you can store any type of file in iCloud Drive. That means you can save all of your documents, presentations, and important photos, etc. Now, let’s see how to upload photos to iCloud Drive with AnyTrans.
Step 1. Download and install AnyTrans on your computer > click iCloud Manager > Sign in your iCloud account.
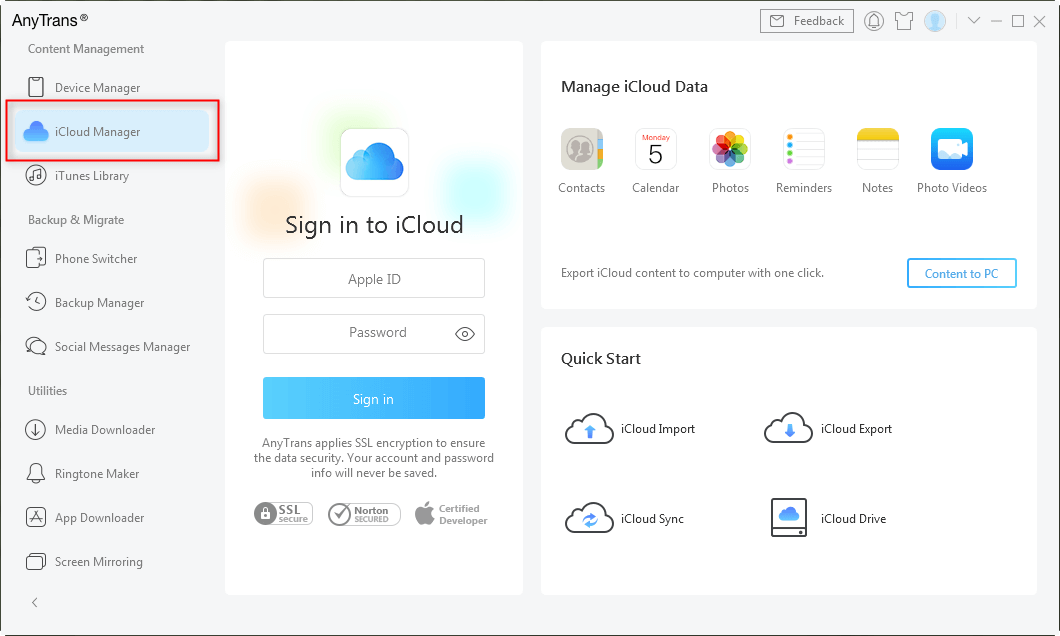
Click on iCloud Manager and Log into iCloud Account
Step 2. Click iCloud Drive.
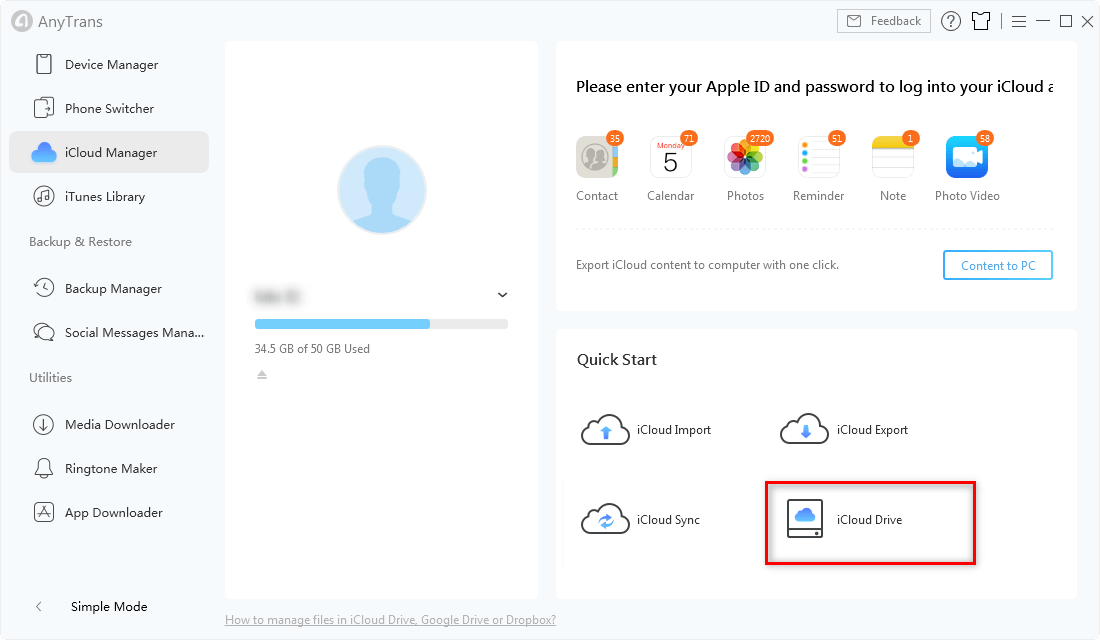
AnyTrans iCloud Drive
Step 3. Click “+” button > Select photos you want to save > Click Open to start transferring photos to iCloud Drive.
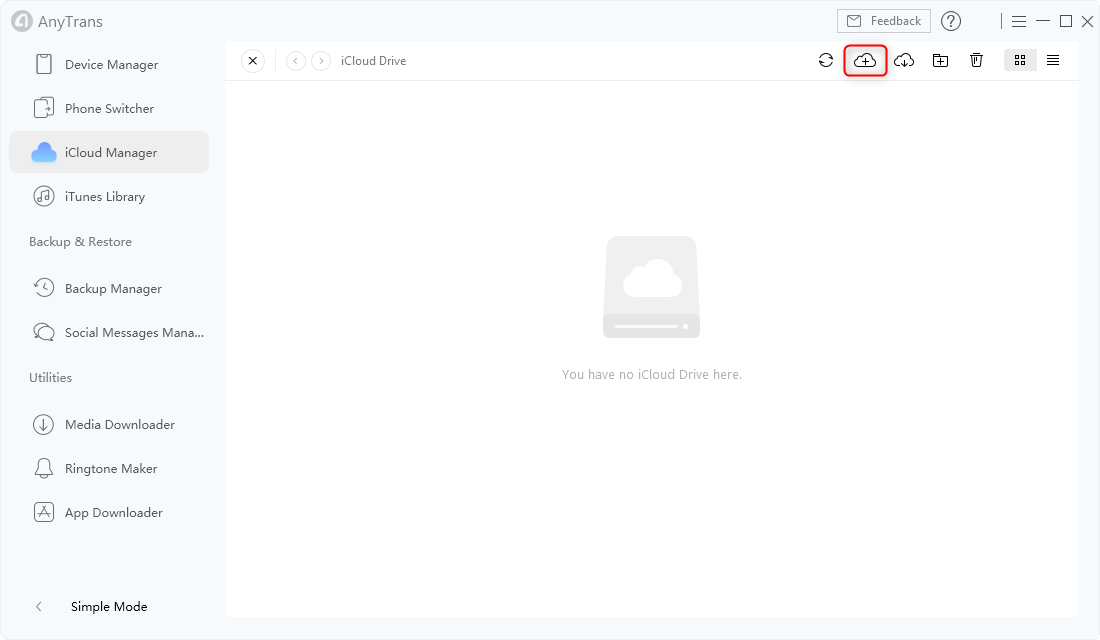
Transfer Photos to iCloud Drive in AnyTrans for iOS – Step 3
Note: You can also drag in the photos you want to save to iCloud Drive directly.
The Bottom Line
That’s all for how to save photos to iCloud Drive. As you can see, AnyTrans is an excellent tool capable of helping you move photos to iCloud Drive. Why not download AnyTrans and give it a try? By the way, if you are having other questions about transferring photos to iCloud Drive or AnyTrans, please be free to leave comments below.
More Related Articles
Product-related questions? Contact Our Support Team to Get Quick Solution >

