How to Put iPhone in Recovery Mode
This guide shows you how to put the iPhone in recovery mode with step-by-step instructions, including all iPhone devices.
Common iPhone Issues
iPhone Connection Issues
iPhone System Issues
iPhone Sound Issues
Other iPhone Issues
What is the iPhone recovery mode? Whenever iOS installation or upgrade is damaged, your iPhone or iPad automatically goes into recovery mode. It is a failsafe that is developed for iOS software so that your iPhone iPad cannot be damaged any further.
If you failed to update your iPhone via Software Update over the air, or your iPhone has become unresponsive, recovery mode might be just what you need to get things going again. And in the following guide, we will separately show you how to put iPhone, and iPad in recovery mode.
When Will You Put iPhone in Recovery Mode
- You are simply trying to update to the latest iOS software and your iPhone gets stuck in a continuous restart loop.
- You attempted to restore the iPhone from backup, the process didn’t complete, and now iTunes doesn’t register the device when you connect it to your computer.
- Your device stuck on the Apple logo, with no change, for many minutes.
- Your iPhone won’t turn on when you try to update the new iOS.
- You intentionally need to enter recovery mode to solve a problem.
- You’re trying to jailbreak your iPhone but it goes terribly wrong.
Free Tip to Put iPhone into Recovery Mode
Tired of finding the right guide for your device and want a 1 click solution? Then you shouldn’t miss this professional iOS system repair tool AnyFix, which is compatible with almost all iOS devices and also offers a free feature that lets you put your iPhone into recovery mode with simple clicks.
Here’s how can you use AnyFix to put your iPhone into recovery mode:
Step 1. Download AnyFix and run it
Go to get the latest AnyFix and install it on your computer.
Free Download * 100% Clean & Safe
Step 2. Connect your iOS device to the computer
Now you can connect your iPhone to the computer via a USB cable. You will see several options on the front page of AnyFix. Here please select Enter/Exit Recovery Mode to go on.
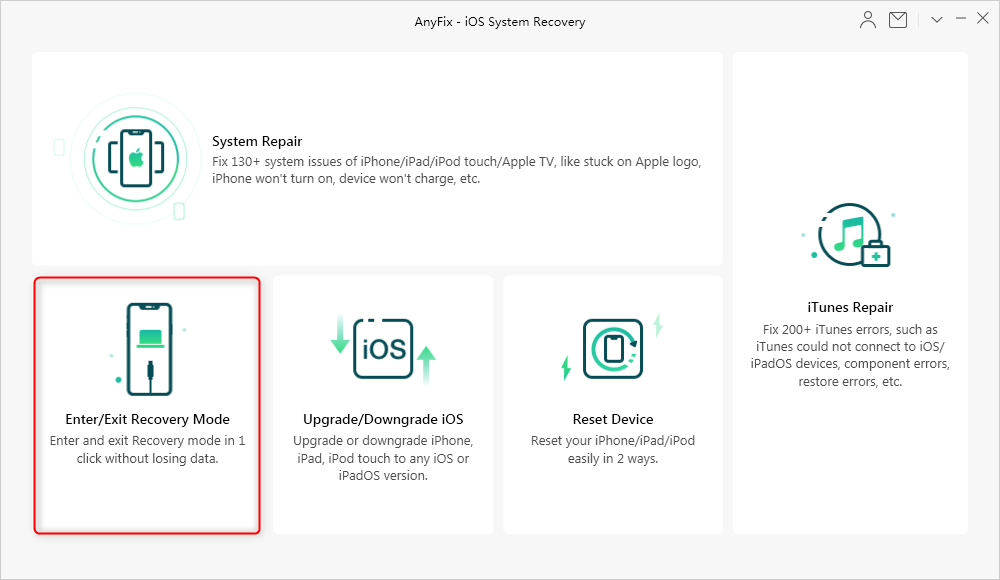
Select Enter/Exit iPhone Recovery Mode
Step 3. Select Enter Recovery Mode
If you want to set your iOS device into recovery mode, you should choose the Enter Recovery Mode and click on the Enter to continue. (Or if your iOS device was stuck in recovery mode, you can choose the right panel to exit Recovery Mode.)
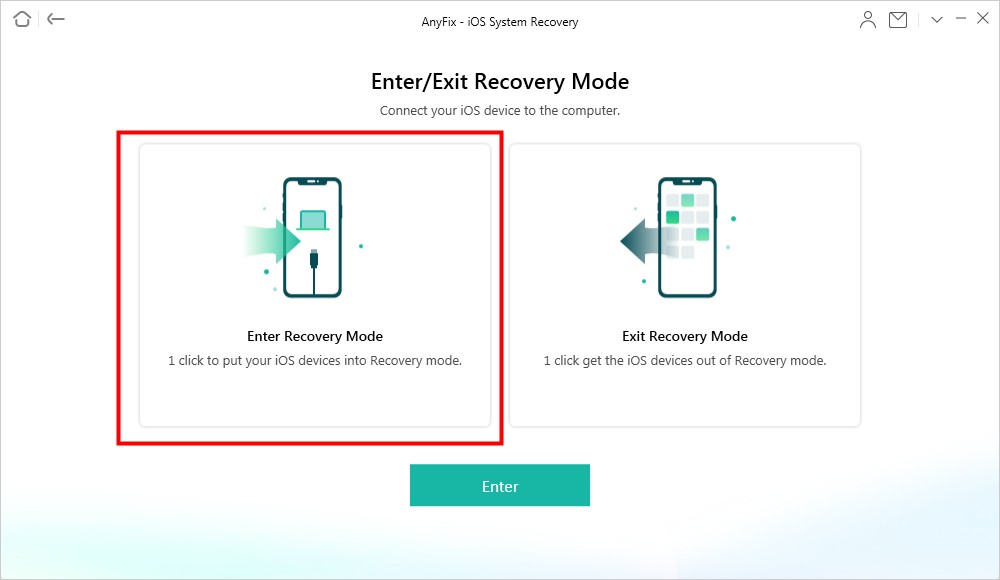
Enter Recovery Mode Successfully
Step 4. Successfully Enter Recovery Mode
A few seconds later, your iPhone will enter recovery mode successfully.
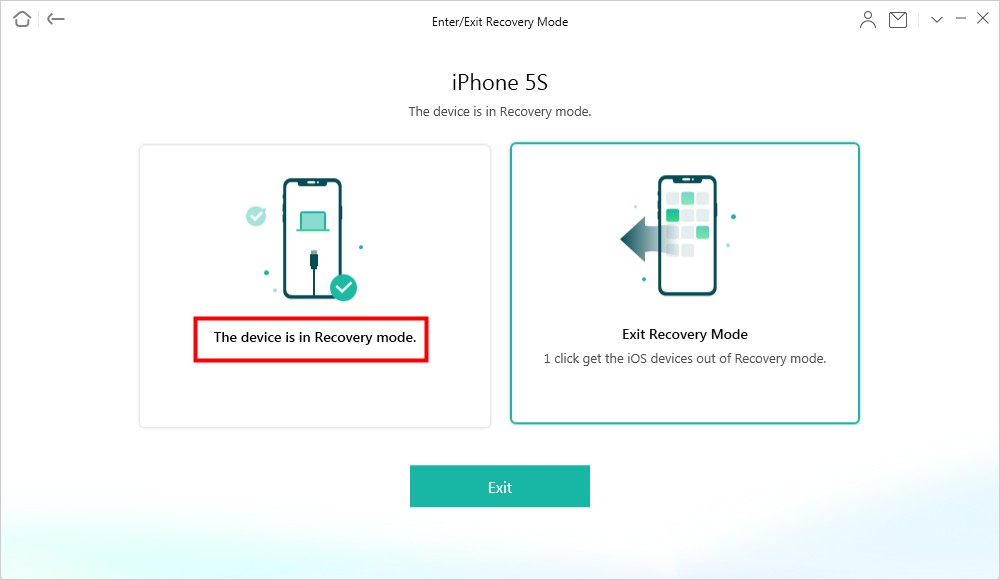
Enter Recovery Mode Successfully
How to Put iPhone 8 and later into Recovery Mode
Step 1. Launch iTunes and connect your iPhone.
Connect your iPhone to the computer and launch iTunes > Connect your iPhone to the computer with a USB cable. If iTunes is already opened, close it and then open it again.
Step 2. Force restart your iPhone.
Press and quickly release the Volume Up button > Quick press and release the Volume Down button > Press and hold the Side/Power button and continue to hold as it restarts. Don’t release the Side/Power button when the Apple logo appears.
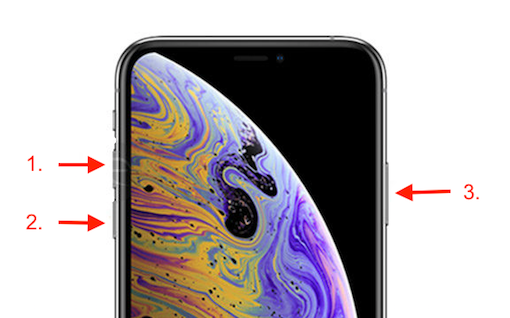
Put iPhone X into Recovery Mode
Step 3. Enter into Recovery mode.
Release the Side/Power button when you see the Connect to iTunes logo on the screen, and it means your iPhone X has been successfully put in recovery mode.
How to Exit Recovery Mode on iPhone 8 and later
If you want to exit recovery mode on your iPhone, just disconnect it from the computer and press the Side button to boot up your iPhone.
How to Put iPhone 7/7 Plus into Recovery Mode
Step 1. Connect the iPhone and open iTunes.
Connect your iPhone 7 to the computer > Open iTunes > Wait the device icon appears on the top left menu.
Step 2. Enter into Recovery mode.
Press and hold the side button > Slide to power off > Press and hold both the Sleep/Wake and Volume Down buttons until the iTunes screen shows up on the screen.
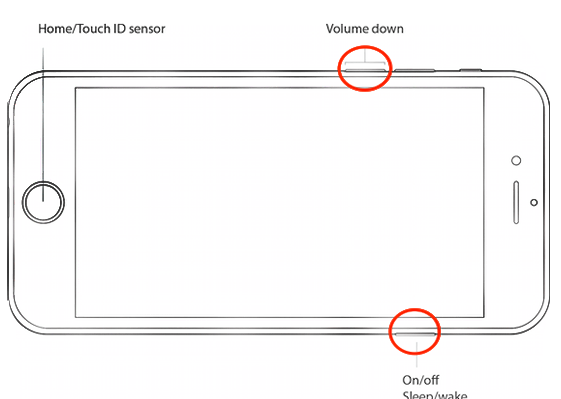
Put iPhone 7/7 Plus into Recovery Mode
How to Exit Recovery Mode on iPhone 7/7 Plus
Simply disconnect your iPhone 7 from the computer, and then press and hold the side button and volume down button until the Apple logo shows up.
How to Put iPhone 6S/6/5S/5/SE/4 or iPad into Recovery Mode
Step 1. Run iTunes and turn off the iPhone.
Make sure iTunes is running on your PC or Mac > Press and hold down the On/Off button on the right side or top for 3 seconds > Swipe the slide to power off.
Step 2. Enter into Recovery mode.
Press and hold the Home button on your iPhone for 10 seconds > Plug your iPhone into your Mac or PC and let go of the Home button when you see the Connect to iTunes screen.
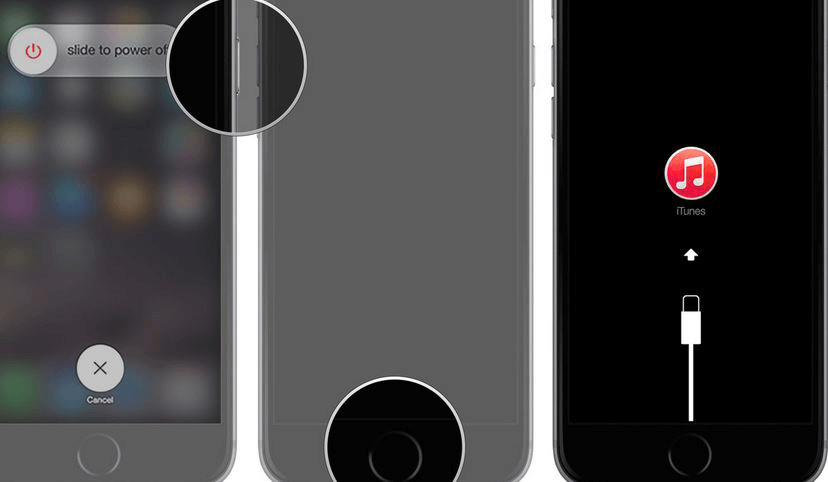
Put iPhone 6S/6/5S/5/SE/4 in Recovery Mode
How to Exit Recovery Mode on Your iPhone 6S/6/5S/5/SE/4
If your iPhone is currently in recovery mode and connected to iTunes, press and hold the Home and Power button for about 15 seconds till the screen goes blank. Then, release the Home button but press the power button till it starts up.
The Bottom Line
You may have got the main point on how to put the iPhone into recovery mode. If you encounter any trouble while finishing the task, feel free to contact us by leaving your comments in the section below and we will reply to you soon. If you find this guide useful, just share it to help more iPhone users.
Product-related questions? Contact Our Support Team to Get Quick Solution >

