How to Transfer Photos from iPhone to PC in Windows 11
This article guide has mentioned 4 easy and simple ways to transfer photos from an iPhone to a Windows 11 PC. You can utilzie AnyTrans, Windows File Explorer, iCloud Photos, and Photos App. It gives detailed procedures as well as advantages associated with each method. The guide on how to transfer photos from iPhone to PC Windows 11 helps users choose the best option for ease and flexibility.
AnyTrans – Transfer Photos from iPhone to pc windows 11
AnyTrans supports to transfer thousands of photos from iPhone to computer in minutes. It’s fast and safe to use. Support both Windows and Mac computers. Download now and transfer iPhone photos to your computer directly.
Most iPhone owners struggle to transfer tressured and memorable photographs from their iPhone to a PC, particularly after updating to Windows 11. Compatibility concerns, a long list of processes, and the usage of unfamiliar software all contribute to this.
But there’s good news! This article gives straightforward instructions on how to transfer photos from your iPhone to a PC Windows 11 with utmost ease. We’ll explore four easy methods: using AnyTrans, File Explorer, iCloud, and Photos App. All the methods are elaborated in a way that includes detailed instructions and recommendations. So, let’s begin to explore how to transfer photos from iPhone to PC Windows 11!
Part 1: AnyTrans: Transfer Photos from iPhone to Windows 11 PC [Without iTunes]
Want to transfer all your unforgettable iPhone photos to a Windows 11 PC in one go? For this, AnyTrans is the best program that one should use. With this program, you can export, import, and delete all iPhone images in one click. Using AnyTrans, you can transfer photos without losing their quality, and it also supports the conversion of HEIC format to Windows-compatible format.
It works in both Windows and Mac and has an easy installation process. AnyTrans supports the current iOS 17 and newly released iPhone 15 Pro, making it compatible with most top-of-the-line devices. So, whether you want to transfer all your photos in one click or transfer specific photos and videos to a computer, AnyTrans will work like a charm, allowing you to transfer and save all your important photos to your Windows 11 computer.
Key Features and Advantages
- Directly transfer all photo categories to your computer, including Places, People, and Photo Videos.
- Maintain original photo quality while seamlessly converting HEIC images to formats compatible with Windows systems.
- Move up to 3000 images from your iPhone to a PC or Mac in minutes.
- Take advantage of seamless and dependable photo transfers with Mac and Windows PCs.
- Efficiently manage, organize, and transfer extensive photo collections without any quality loss or technical difficulties.
Now, let’s explore the basic steps to use AnyTrans tool:
Step 1. Download and install AnyTrans on your computer and launch it.
Step 2. Open AnyTrans, plug your iPhone into the computer via a USB cord, and select “Photos” from the Device Manager menu.
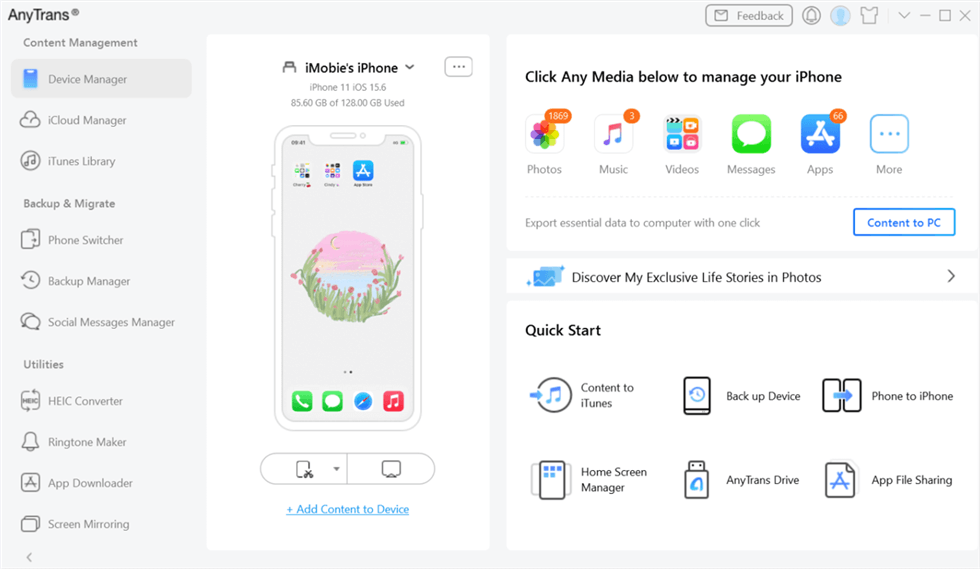
Your Device Is Detected
1. Except connecting an iOS device to AnyTrans with a USB cable, you can also connect the device to AnyTrans via Wi-Fi. And please make sure that the device and computer are connected to the same Wi-Fi.
2. If AnyTrans fails to recognize your iOS device, you may try these troubleshooting steps to solve this problem.
Step 3. Select the album (My Photos, Albums, Recently Deleted) with the pictures you wish to move.
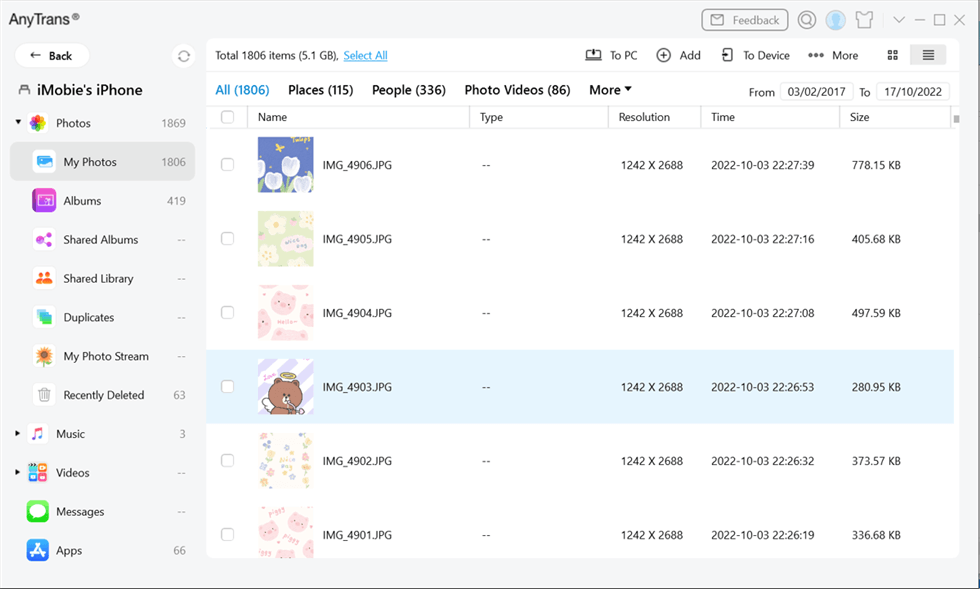
Data in My Photos Is Displayed
Step 4. Choose the pictures you want to send and copy them by clicking the “Send to PC” button.
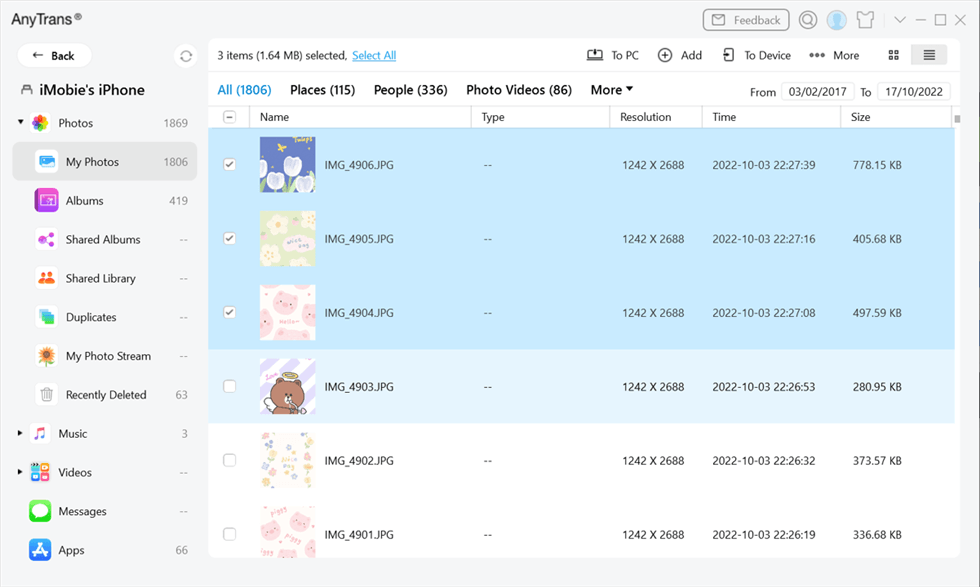
Choose the Photo to Transfer
Step 5. After you choose the photos, you can click To PC button to download them to your computer.
Your Photo Is Transferring
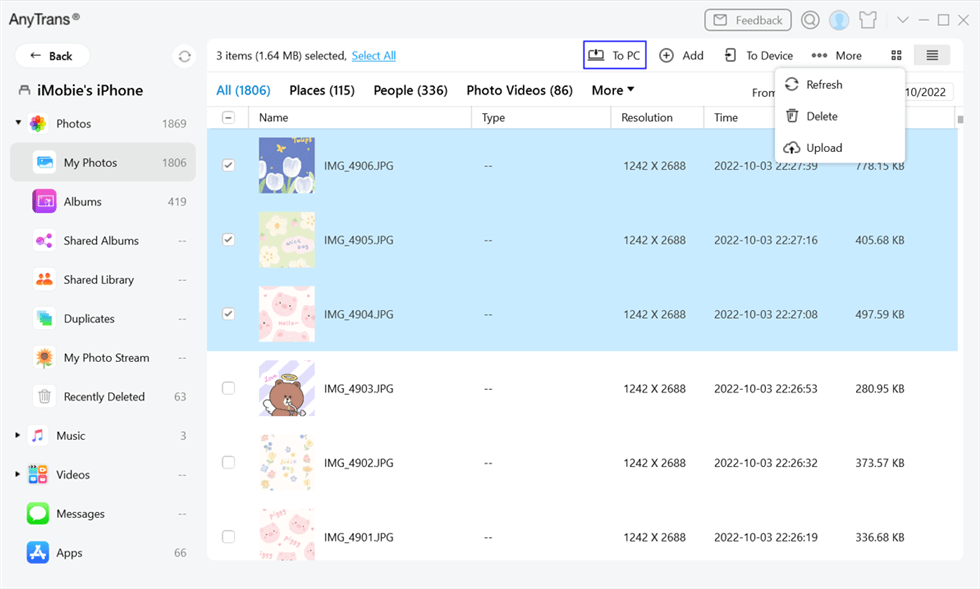
You also can:
Preview Mode: Change the mode for better management of photos.
Add: Transfer photos from computer to device.
To Device: Transfer photos between iOS devices.
More: Unfold more functions.
Refresh: Refresh the interface to load photos correctly.
Delete: Delete the unwanted photos.
Upload: Transfer photos from device to iCloud.
If you want to selectively choose your desired photos, you can constantly press the Shift key (for Mac) or Ctrl key (for Windows) on keyboard to make it.
Step 6. Once the transferring process is completed, you will see Transfer Completed Page. To locate photos exported on computer, click view files button. To go back to the previous page, click transfer more items or Back button.
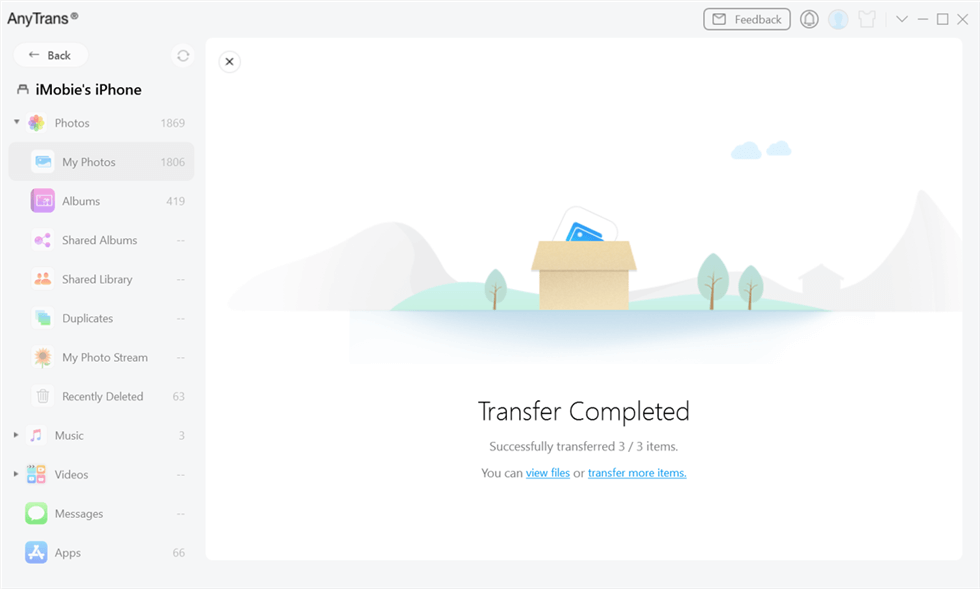
Photo Transfer Completed
Part 2: Using File Explorer to Transfer Photos from iPhone to PC Windows 11
File Explorer offers a quick, easy way to transfer iPhone photos to a Windows 11 computer using drag-and-drop. It is also efficient when using iTunes and similar applications is not an option. It is a straightforward and effective method to transfer photos, and that’s why it is safe. If you only want to transfer specific pictures or if you’ve decided to transfer the entire library, then it’s done quickly and without any problems by using File Explorer. Here are its simple steps:
Step 1. Begin by connecting your iPhone to the PC with a USB cable.
Step 2. Unlock your phone and enable the computer to access the device.
Step 3. Open “This PC” on your computer, then find and select “[your iPhone name]”> “Internal Storage”> “Apple’s Photos.”
Step 4. Choose and copy the photos for transfer.
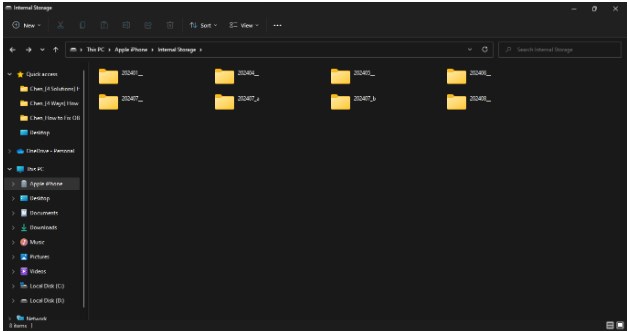
Choose and copy the photos for transfer
Part 3: Using iCloud to Transfer Photos from iPhone to PC Windows 11
Searching for a simple cloud-based way to move pictures from your iPhone to your computer? Look no further! Your iPhone will automatically sync all of its picture and video files to the iCloud server, which you can view from any device—including a Windows computer—as soon as you turn on the iCloud Photos option.
If your images and videos are of a good caliber, you may soon exhaust the 5 GB of storage that the free edition of iCloud allows.
For accessing and downloading all of your photos, you may use the same login credentials to download the iCloud program software to your Windows 11 PC.
Note: Both the iCloud website and the Windows version of the app are available for download.
Step 1. Access “Settings,” tap your name, then “iCloud” and “Photos.” Toggle to turn on “Sync this iPhone.”
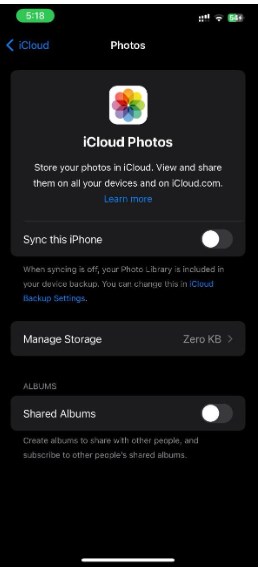
turn on “Sync this iPhone
Step 2. Now, visit iCloud.com on your PC. Continue by signing in with the same Apple ID as your iPhone.
Step 3. Click on the “Photos” section to access your stored images.

Click on the “Photos” section
Step 4. Choose the desired photos and click the download icon to save them to your PC.
Part 4: Using the Photos App to Transfer Photos from iPhone to PC Windows 11
The photos app makes it simple to share photographs from your iPhone to a Windows 11 PC. Images may be imported with a few clicks, and no additional software is required. After transferring the photographs to the app, it categorizes them for subsequent access. It is a quick and flexible way to organize and share your photo collection on your Windows 11 PC. For this:
Step 1. Connect your iPhone to your Windows 11 PC using a USB-C cable.
Step 2. Unlock your phone and enable the computer to access the device.
Step 3. Open the Microsoft Photos app from the Start menu on your PC.
Step 4. Select your iPhone from the External Devices section on the left. Your photos and videos will appear on the right.
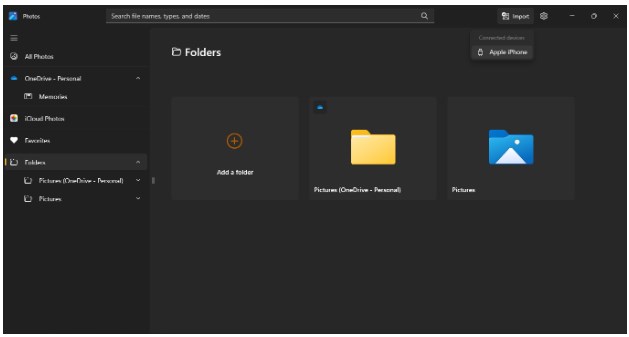
Select your iPhone from the External Devices
Step 5. Pick the preferred images and click the “Import [Number] items” button.
Part 5: Transfer photos from iPhone to Windows 11 PC using AnyTrans
This article guide discussed multiple ways to transfer photos from an iPhone to a Windows 11 PC. Choosing one depends on your needs. Although File Explorer is speedy, it may need to be more intuitive for users. Similarly, iCloud Photos necessitates an internet connection. The Photos app is simple but has limited options.
For the most effortless and efficient transfer, we recommend using AnyTrans. It offers fast transfers, maintains photo quality, and supports Windows and Mac. AnyTrans also converts HEIC files to Windows-compatible formats, making it a versatile choice for managing photos.
Part 6: How to Transfer Photos from iPhone to PC in Windows 11 FAQs
1. Why can’t my iPhone 11 transfer photos to my PC?
The iPhone 11 might not transfer photos to a computer for multiple reasons, such as iCloud being turned off, outdated USB drivers, or locked iPhones.
2. How can I download images from my phone to my Windows 11 computer?
Start by connecting your iPhone to your PC via a wire. Then, launch the Photos app on your computer and choose the device. Click “Import” to download them. You may also use AnyTrans to download iPhone images to a PC and manage iPhone storage.
3. How can I transfer pictures from my camera onto my Windows 11 computer?
You can use the Photos application to import camera pictures from iPhone to PC. Open the Photos app on your computer and choose “Import > Apple’s iPhone” to download them. You can also utilize AnyTrans, a reliable tool for quickly transferring iPhone photos to a Windows 11 PC.

Joy Taylor


Senior writer of the iMobie team as well as an Apple fan, love to help more users solve various types of iOS & Android-related issues.
 Screenify
 AnyEnhancer
 FocuSee
 Vozard
 AnyMiro
 AnyMirror
