The Ultimate Guide of Managing iCloud Photos
iCloud provides you with an amazing photo management service but do you know how to fully utilize it? You will get to learn how to manage your iCloud photos in the guide below so the service can be used to its fullest.
iCloud Data Tips & Issues
iCloud Data Management
If you have been using an iOS-based device such as an iPhone or an iPad for some time, you may likely be using the services provided by iCloud on your device. iCloud is Apple’s suite of online services that let you upload and keep your data on the cloud. You can then share this cloud data with any of your compatible devices online.

How to Manage iCloud Photos
One of the features of iCloud is iCloud Photos. It allows you to upload, keep, and share your photos all from the cloud. You can upload photos from any of your compatible devices to iCloud and allow others to view your photos on the web.
The following shows how you manage your iCloud photos on this fantastic Apple service.
How to Upload Photos to iCloud
When you start using the iCloud Photos service, the first thing you will want to do is upload your photos from your iPhone or iPad over to your iCloud account. Doing so is pretty easy thanks to the easy to use interface of your iPhone and iPad.
The following is how you do the task:
Step 1. Launch the Settings app on your device and tap on Photos & Camera.
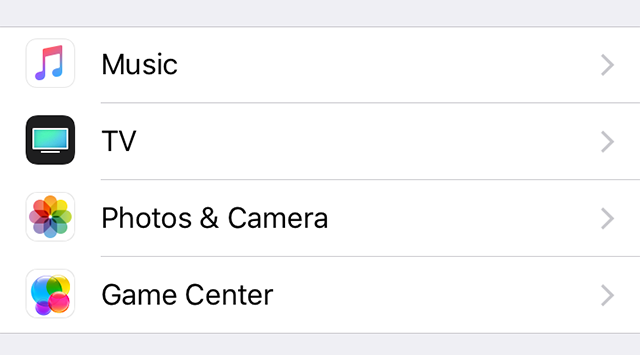
Access the Photos settings on your iOS device
Step 2. On the following screen, enable the option that says iCloud Photo Library.
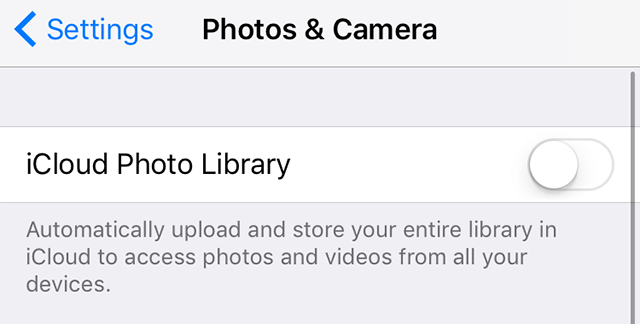
Turn on iCloud Photo Library on your device
Your device will start syncing your iPhone or iPad photos with your iCloud account. You should then be able to find your photos in your iCloud account.
How to View Uploaded Photos on iCloud
So you have uploaded your photos from your device over to your iCloud account and you wish to view your uploaded photos. iCloud provides you with an easy way to access your uploaded photos from any of your devices.
If you wish to view your photos on a Mac, iPhone, or iPad, you may use the Photos app on your device to view the photos. If you are on any other device, you may use the web interface of iCloud to access your photos.
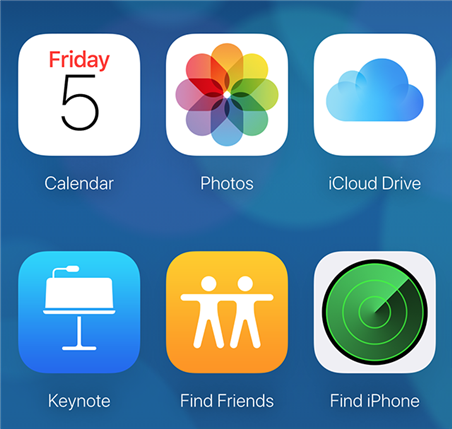
Access the uploaded photos on iCloud
Simply open a web browser on your device and head over to the iCloud website. Log-in to your iCloud account and click on the option that says Photos. You should be able to view all of your uploaded photos on your screen.
How to Download Photos from iCloud
If you want to download your photos from your iCloud account, you can do so from the web version of the iCloud service. You can download single as well as multiple photos at once from your iCloud account.

Download photos from iCloud
Head over to the iCloud website, log-in to your account, click on Photos, select the photos you would like to download and click on the download icon. Your photos will begin to download to your device.
How to Share Photos on iCloud
Besides letting you upload and keep your photos on the cloud, iCloud lets you share your photos as well right from the web interface. Your photos can be shared with multiple services and the following is how you do it.

Share photos on iCloud
Head over to the iCloud website and click on the Photos option. Select the photos you would like to share and click on the share icon. Choose the service you want to use to share your photos and you will be good to go.
How to Delete Photos on iCloud
Sometimes you may want to get rid of some of the photos from your iCloud account. Maybe you do not want to keep your old photos on the cloud or maybe you are about to exceed your iCloud quota. Either way, deleting photos from iCloud is pretty easy.

Delete photos on iCloud
Click on the Photos option on the iCloud website and select the photos you want to remove from your account. Then, click on the delete icon to delete the selected photos from your account.
How to Recover Deleted Photos on iCloud
If you have accidentally deleted your important photos from your iCloud account, recovering them is pretty easy thanks to the built-in recovery option on the iCloud website.
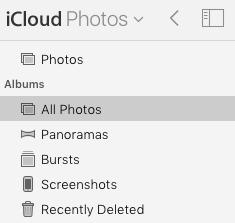
Recover deleted photos on iCloud
Head over to the Photos section on the iCloud website. Click on Recently Deleted in the left sidebar and you will see all of your recently deleted photos. Select the ones you want to recover and click on Recover. Your photos will be back at their place.
Manage iCloud Photos Tasks Efficiently with AnyTrans
Although iCloud lets you perform many of the basic tasks from its web interface with ease, there are even more efficient methods available to manage photos in your iCloud account.
One of these methods is AnyTrans which is an application that connects to your iCloud account and lets you perform many of the tasks from under a single roof. You can upload files, remove files, and even transfer files to your computer or iOS device.
With all of these amazing features under a single interface, it makes working with iCloud photos much easier and efficient and you may definitely want to use it if you do not like the default options provided by iCloud.
The following is how the app works in brief:
Step 1. Download and launch the AnyTrans on your computer. Click on iCloud Manager and log-in to your account.
Free Download * 100% Clean & Safe
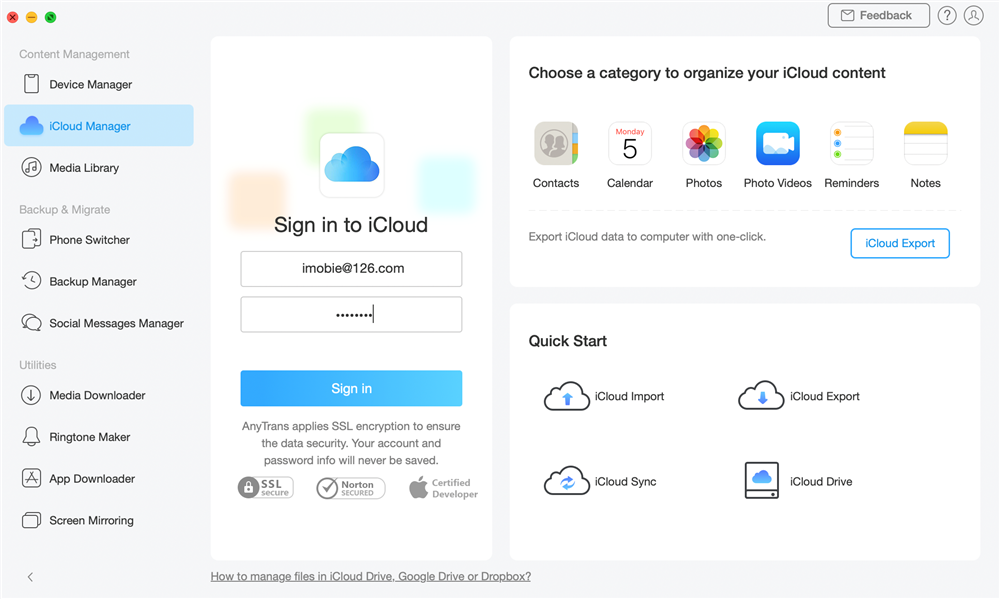
Sign in to iCloud
Step 2. Select Photos on the following screen to manage your iCloud photos.
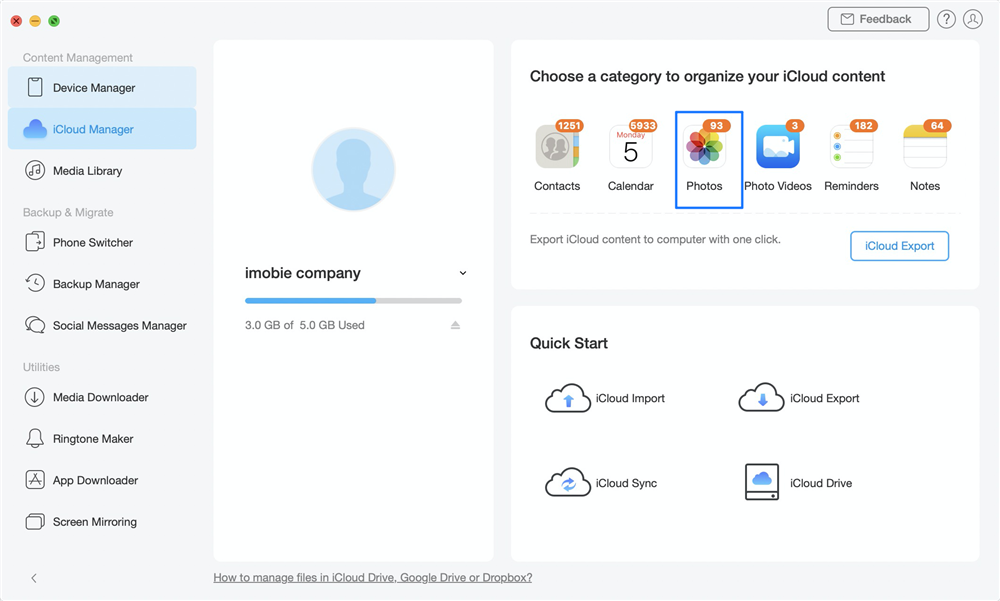
Choose Photos Category
Step 3. The following screen is where you can do many of the tasks with your photos. You can delete photos, download photos, upload photos, and sync photos between iClouds.
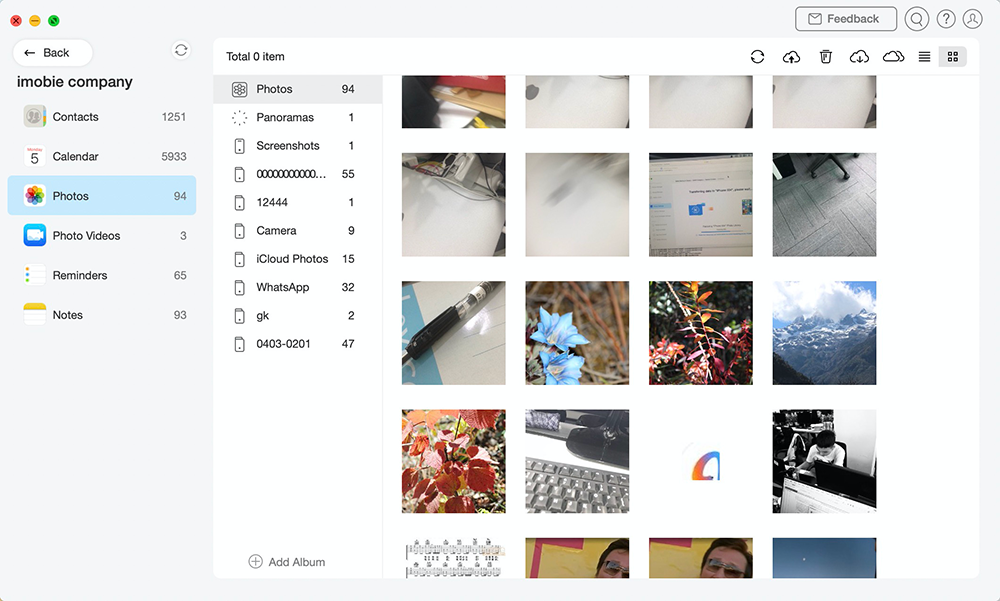
Manage iCloud Photos as you Need
As you can see, using AnyTrans to manage the photos in your iCloud account is more efficient than using the default iCloud options. What’s more, AnyTrans also enables users to backup and view iPhone content. If you are interested in it, just free download it and have a try.
The Bottom Line
If you have got tons of photos in your iCloud account but you are not sure how to manage them with the most efficiency, the guide has now provided you with some of the ideas to work with and manage your photos with efficiency and ease in your iCloud account.
Product-related questions? Contact Our Support Team to Get Quick Solution >

