How to Find and Delete Duplicate Files on Mac
Duplicate files can pile up fast and eat up your Mac storage quickly. This guide shows why this can happen and what you can do to find and delete them. You’ll also learn how to prevent duplicate files on Mac in the future.
Good file management is usually last on the to-do list, but it becomes impossible to ignore once you start running out of space.
Despite the impressive advances in speed and capacity, Apple still insists that its entry-level Macs can function well with 256GB system drives. With macOS using over 50GB (and System Data taking another 70GB), space is at a premium, so removing duplicate files can be an easy way to regain some free space.
I’ve used Macs for over 25 years at work, school, and just for fun. I’ve spent most of that time around web/graphic design, photography, and other types of digital imaging, which involve a surprising amount of file copying.
I used to be very bad about proper file management, so I’ve learned a few tricks for managing duplicate files and regaining free space along the way.
Why Duplicate Files Accumulate on Mac (Reasons At a Glance)
| Cause/Reason | Probability | Impact | Difficulty |
| Bad file management habits | 90% | 8/10 | 6/10 |
| Multiple downloads | 70% | 4/10 | 1/10 |
| Photo library duplicates | 60% | 5/10 | 3/10 |
| iCloud sync issue | 10% | 7/10 | 2/10 |
How to Find & Delete Duplicate Files on Mac Automatically
If you regularly find yourself dealing with duplicate files, you can use a dedicated third-party app to locate them automatically and remove them.
This is much simpler than most of the other methods, allowing you to reclaim your missing storage space in just a few clicks. If your system disk was low on free space, you may also notice a performance boost.
While these apps can be helpful, it’s important to remember that they can’t make the decisions for you about what to delete (though you wouldn’t really want them to, anyway.)
For example, CleanMyMac duplicate file finder simplifies the monitoring and removal process in just a few clicks.
Here’s how it works:
Step 1: Open CleanMyMac and switch to the My Clutter module, then click the large Scan button at the bottom of the window.
Step 2: The scan includes your Photos library, so it may take some time to complete if you have a large collection. Once it’s done, click the Review All Files button to see more details.
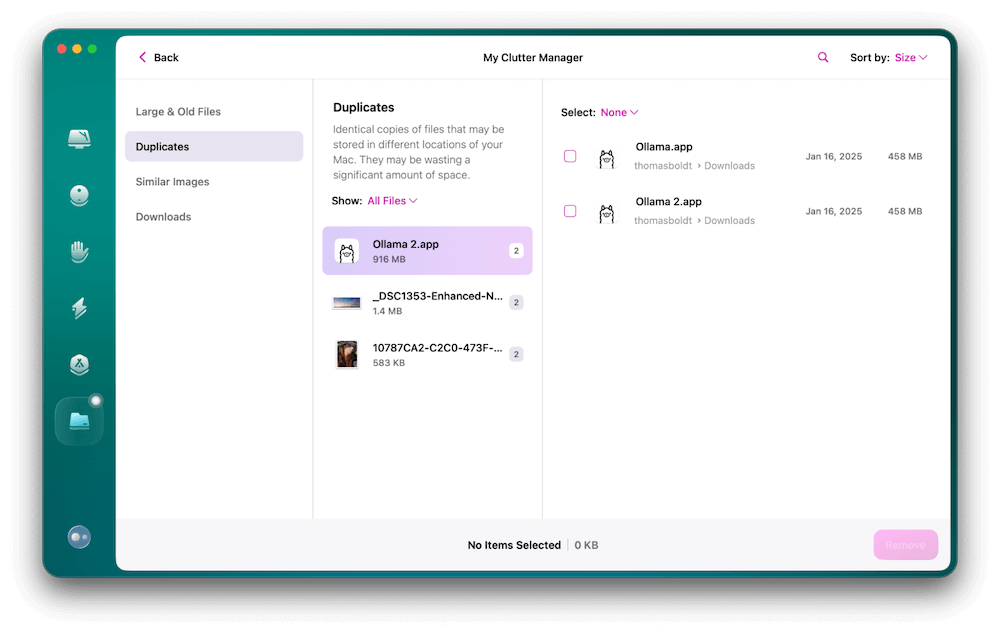
CleanMyMac My Clutter Manager
Step 3: Switch to the Duplicates section and review the files. The list is sorted by file size by default, so you can quickly regain more space by targeting larger duplicates. Place a checkmark beside the files you want to remove, and click the Remove button to delete them.
That’s all there is to it!
How to Find Duplicate Files on Mac Manually
Method 1: Use macOS Storage Tools
| Time Needed | Difficulty Level | Impact on Result | Cost |
| 5 minutes | Easy | High | Free |
The most problematic duplicate files are usually the largest ones since they waste the most space. macOS has a built-in tool for locating large files, which you can also use to identify potential duplicates ready for deletion.
Step 1: Open the Apple menu and click System Settings, then switch to the General section and click Storage.
Step 2: To search your storage for large duplicate files, click the small i icon next to the Documents label.
Step 3: A popup window will display a list of files that macOS has identified as large, sorted by size. Duplicate files will have the exact same size, so scan the list looking for files with similar names next to each other.

Using macOS Storage Tools to find duplicate files
If you’re unsure about a particular file, select it from the list and click Show in Finder for a closer look.
Step 4: To delete a file, just select it from the list and click Delete. Because macOS deletes these files immediately instead of putting them in the Trash, it will ask you to click Confirm to ensure that you are sure that you want to delete them.
Method 2: Use Smart Folders
| Time Needed | Difficulty Level | Impact on Result | Cost |
| 10 minutes | Medium | Medium | Free |
Smart Folders is one of the most useful but least known features of macOS Finder. It allows you to filter all the files on your Mac based on a specific set of custom properties no matter where the files are located, which makes it very useful when searching for a particular type of duplicate file.
For example, you could set up a Smart Folder to display all of your JPEG images, or you could refine it to only show JPEGs created on a specific date with a file size over 50 megabytes – the possibilities are endless.
Step 1: Open Finder, then open the File menu and click New Smart Folder. Unfortunately, this is one of the few macOS tools without a keyboard shortcut.
Step 2: Your Smart Folder will look like a blank Finder window until you set some search criteria. Click the small + icon in the upper right corner of the Smart Folder window to add a new rule.
Step 3: To customize the rule, open the first dropdown menu and select your search parameter.
The default option for the first new rule is Name, but you can see the complete list by choosing Other at the bottom of the dropdown menu. As you work from left to right on each rule, the parameters get narrower and narrower.
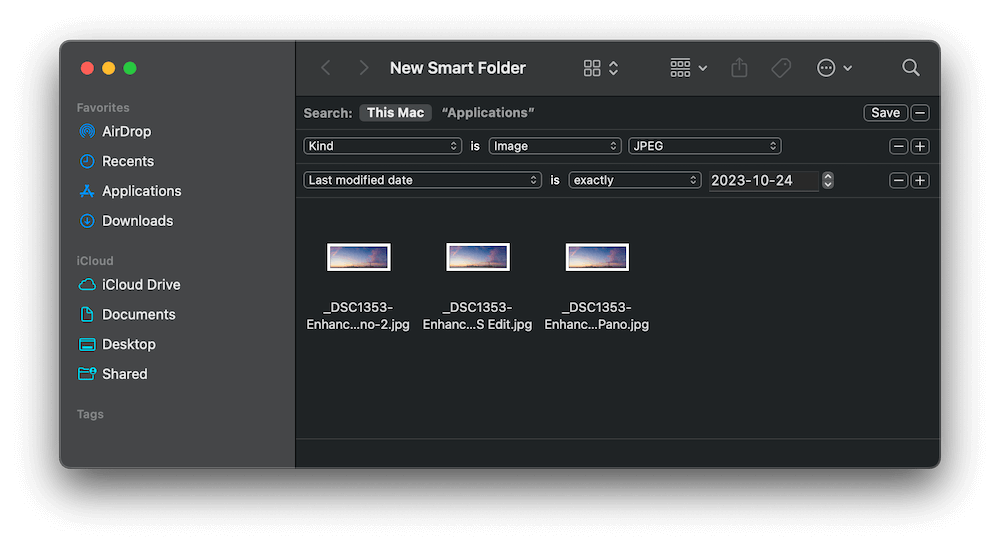
macOS Smart Folder feature
You can save your Smart Folder with the Save button in the upper right corner and return to it later if you need to review additional files.
Tip: If you want to include files from only one specific folder, navigate to that folder before creating the Smart Folder. You’ll see a small button with the folder name that allows you to toggle between searching that folder and your whole Mac.
Method 3: Use the Photos App
| Time Needed | Difficulty Level | Impact on Result | Cost |
| 5-10 minutes | Easy | High | Free |
After many years of complaints from frustrated photographers, Apple has finally added a duplicate detection feature built right into the Photos app. It’s incredibly simple to use, which makes up a little for the delay.
Step 1: Open the Photos app and locate the Utilities entry in the Collections section of the left pane. Click the small arrow icon to expand Utilities, and select Duplicates.
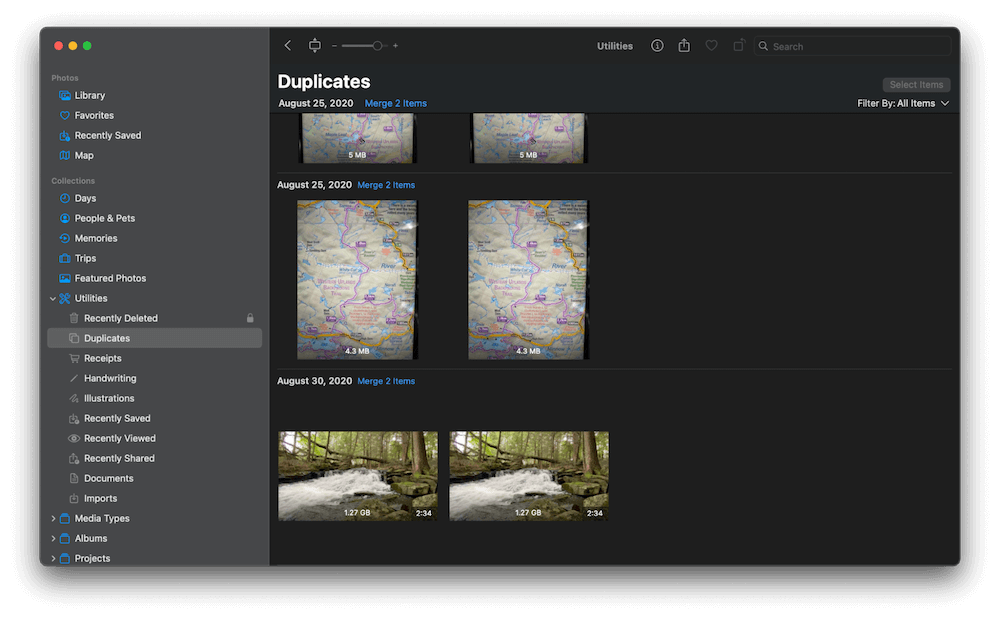
Using the Photos app on Mac to identify duplicates
Step 2: The right pane will display a list of your duplicate photos and videos. At this point, you have two options: select Merge 2 Items, and macOS will merge the metadata to preserve it and keep one copy of the file, or you can select one of the files and press the Delete key.
Method 4: Troubleshooting iCloud Sync Issues
| Time Needed | Difficulty Level | Impact on Result | Cost |
| 10 minutes | Easy | High | Free |
iCloud syncing is one of MacOS’s most useful features, but changing your sync settings can cause strange issues with duplicate files. This only applies if you use the ‘Desktop and Documents Folders’ syncing feature to store files in iCloud for use on multiple devices.
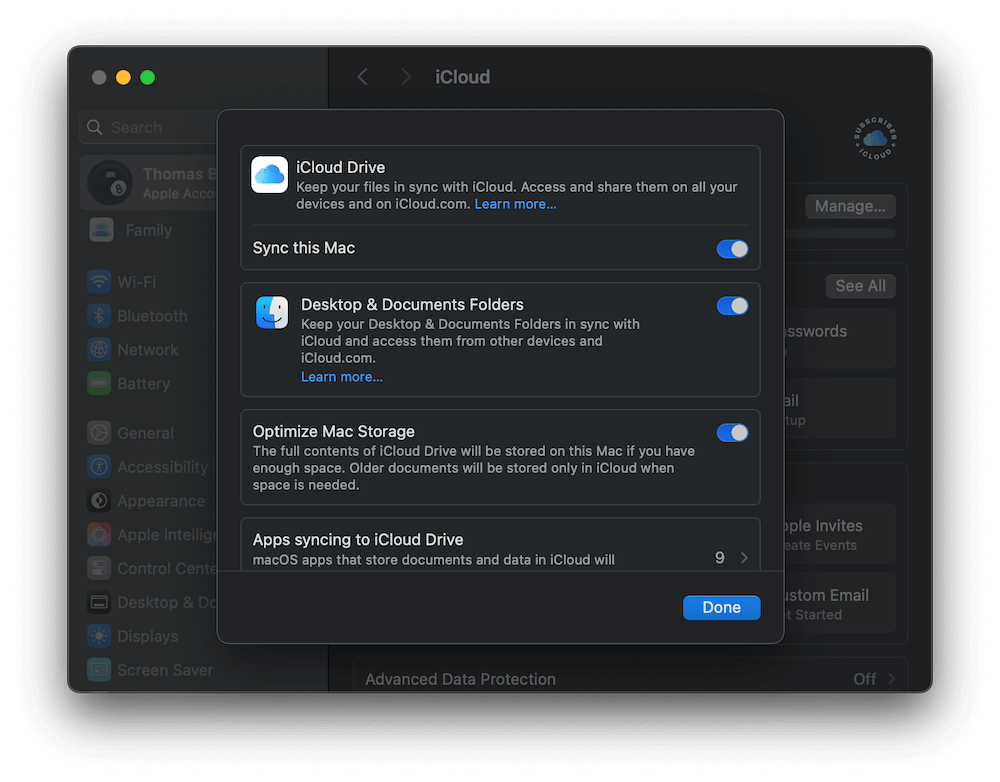
macOS iCloud Sync feature
If you use Desktop and Documents Folders to sync your iCloud files to your Mac and then disable iCloud syncing or log out of iCloud drive, your Mac will keep a copy of your synced files in a new folder named iCloud Drive (Archive). If you log back in or turn iCloud syncing back on later, you may end up with duplicate copies of all your iCloud synced files.
Fortunately, deleting these duplicate files is extremely simple once you know to look for them—just drag the folder to the Trash like any normal file or folder.
However, before you empty the Trash, I strongly advise you to confirm that your original iCloud data is still safely stored in the cloud. Nobody wants you to lose your data!
To learn more, check out the last section of this Apple support article about potential iCloud syncing issues.
Bonus Method: Use *nix Terminal Commands
| Time Needed | Difficulty Level | Impact on Result | Cost |
| 15 minutes | High | Medium | Free |
I’ve included this bonus method because it’s a great way to test out an advanced Terminal command, but it’s not very practical for regular daily use. This is a complex multi-step command, so if you’re going to use it, I recommend that you just copy and paste it directly from your browser into the Terminal window.
In a nutshell (ha ha), it creates a list of all files in a specific folder, then calculates a unique SHA hash for each file. Two files can only have the same SHA hash if their contents are identical. If it detects a match, the file name and path are added to the output text file.
Step 1: Press Command + Space, type Terminal, and press Return to launch it.
Step 2: To search a specific folder, type cd /Folder/Path/Here and press Return. For example, to switch to my Documents folder, I would use the command cd /User/thomasboldt/Documents. Because it’s in my user folder, I could use cd ~/Documents instead.
If you get lost, you can use the pwd command to display your current location and use cd .. (for clarity, those are two periods) to navigate up one folder level.
Step 3: To locate duplicate files in your current folder, copy and paste the following command:
find . -type f -print0 | xargs -0 shasum | sort | awk ‘{if ($1 in seen) {print $2} else {seen[$1]=1}}’ > ~/Desktop/duplicates.txt
In this example, I left out the part that adds the list to a text file, so Terminal just prints the only duplicate it found.
If you’d rather use it on a specific folder, you can modify the command to include the folder path like this:
find ~/Documents -type f -print0 | xargs -0 shasum | sort | awk ‘{if ($1 in seen) {print $2} else {seen[$1]=1}}’ > ~/Desktop/duplicates.txt
In the end, the command creates a new text file on your desktop named duplicates.txt, containing a list of all duplicate files in your selected folder. Unfortunately, you still have to go through and delete them yourself, but it’s possible to modify the command to prompt you about deleting each one.
Bonus Tip: AI chatbots like ChatGPT write terrible prose, but they are very good at constructing and explaining complex macOS Terminal commands. Give it a try!
How to Prevent Duplicate Files on Mac in the Future
As they say in healthcare, ‘prevention is better than cure,’ and it’s also good advice for your Mac’s digital health. Here are a few tips that may help save you from dealing with duplicate files in the first place:
- Pay attention when copying files. It’s easy to copy things to the wrong place when you’re in the middle of another task and then forget to deal with it when you have time later.
- Use a consistent folder structure. Organizing your files can be boring, but a good system will make it much easier to keep track of which files belong where.
- Monitor your downloads. Your browser can show you a list of recently downloaded files, so you can cancel a download if it’s an accidental duplicate.
- Keep an eye on your storage space. If you notice a sudden drop in your free space that doesn’t seem to match your usage, you may be able to catch the problem before it gets any worse.
Last but not least, remember that even with all these strategies, duplicates can still be created when you’re busy or distracted. It’s always a good idea to have a few tools ready for dealing with them when needed, so test out the methods in this article for yourself!
FAQs
Does removing duplicate files help improve my Mac’s performance?
Yes, removing duplicate files can help improve your Mac’s performance by increasing your free storage disk space, minimizing sync and backup times, and making your documents easier to navigate.
How accurate are Mac duplicate file finder apps?
Mac duplicate file finder apps are as accurate as any of the other methods discussed in this article. Some apps include additional features for locating similar files, such as CleanMyMac’s Similar Photos tool, which can help you keep your photo collection compact by highlighting unneeded burst shots, edited versions, and outtakes you forgot to delete.
Final Thoughts
The best defense against duplicate files is preventing them from occurring in the first place. I know it may sound tedious, but take the extra time when copying files to ensure that you’re not creating unnecessary duplicates.
Apple’s excessive storage drive pricing puts a premium on every gigabyte, so it’s worth the time it takes to stay ahead of the issue.

Enhance digital experiences through optimizing system performance and data management.
Product-related questions? Contact Our Support Team to Get Quick Solution >