How to Fix iOS 14/13 Screen Recording No Sound on iPhone iPad
Wonder how fix iOS 14/13 screen recording no sound on iPhone iPad? Follow this tutorial to get it solved on iPhone and iPad easily.
Common iOS Issues & Tips
Siri Issues & Tips
iPhone Screen Issues
WiFi & Battery Issues
Yesterday, I wanted to record my iPhone screen because I saw a funny part in a video that I wanted to share with my friends. I recorded the Screen with audio (hit “Mic on”) and cut the part, that I wanted to show. Now it gets funny – when sending this part my friend doesn’t seem to have sound on the clip – it’s muted.
As one of the funniest features of iOS 11 – screen recording enables users to record any operation on an iPhone/iPad screen as videos and save them in a Photo Video album. It does not just save the video, but also the audio, from both the outside voice and the built-in apps, as long as you turn on the microphone.
However, recently when the latest iOS 14 was released, more and more users who have updated their iOS device to the latest iOS have complained that there are many problems occurred, such as Flashlight not working, screen recording no sound, and iMessage bug, etc. Among these problems, the screen recording no sound issue is the most typical one that has cropped up in iOS 13 before. How could this iOS 14/13 screen recording no sound issue happen? By far we guess it is probably a bug of iOS 14/13 and fixed in the future version by Apple.
But now what can we do with it? How to fix iOS 14/13 screen recording with no sound on your iPhone or iPad? Luckily we have collected and tested several practical methods which you can try in the following. Keep reading.
Make Sure Your iPhone iPad with Microphone Turning On
Only when you turn on the microphone, there will be audio saved in videos. If you still have no idea how to toggle on the microphone when screen recording, please follow the steps:
Step 1. Go into the Control Centre.
Step 2. Find the Screen Record icon.
Step 3. Hold on to the icon for a pop-up.
Step 4. Press Microphone Audio in the pop-up. The gray icon should turn red to signify that you’ve turned on the microphone.
If the microphone is on and the screen recording has no sound still, you can try to turn it off and on.
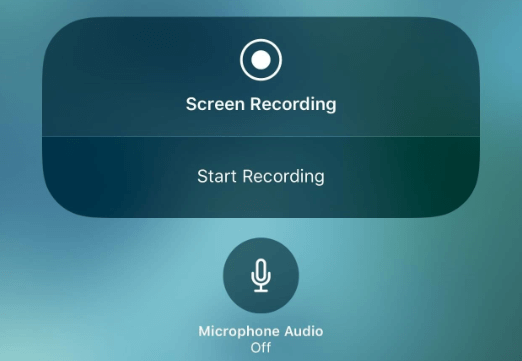
Fix iOS 14/13 Screen Recording No Sound – Enable Microphone
Restart Your iPhone iPad
If after taking Method 1, screen recording no sound still exists on iOS 12/11, you can try restarting your iDevice to fix it. It works on most occasions. But you need also to know that there could be a weird thing that audio maybe works the first time, but later there is no sound again to do screen recording, according to the user’s feedback:
Strangely I have noticed that for me, both audio and video recording works the only first time after I restart my iPhone. But when I try to record the same video again or a different video, I could not hear any audio. – User from Apple Discussion
Reset All Settings
Reset All Settings on iOS 14/13 could be a lifesaver in many situations. Go to Settings > General > Reset > Reset All Settings. This way will not remove exited data like photos, messages, contacts, etc, but it will reset your general preferences in Notifications, General, Sounds, Touch ID, Brightness, and some other features.
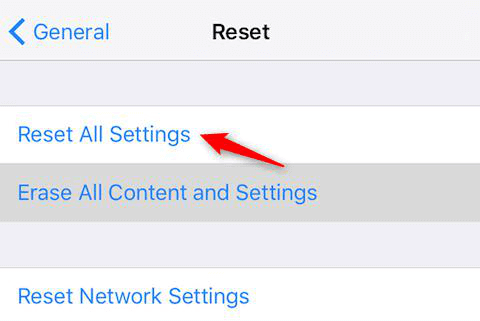
Reset All Settings
Restore Your iPhone iPad with iTunes
Step 1. Open iTunes on the Mac or PC that you used to back up your device.
Step 2. Connect your device to your computer with a USB cable.
Step 3. Select your iPhone when it appears in iTunes. If your device doesn’t appear on iTunes, learn what to do.
Step 4. Select Restore iPhone.
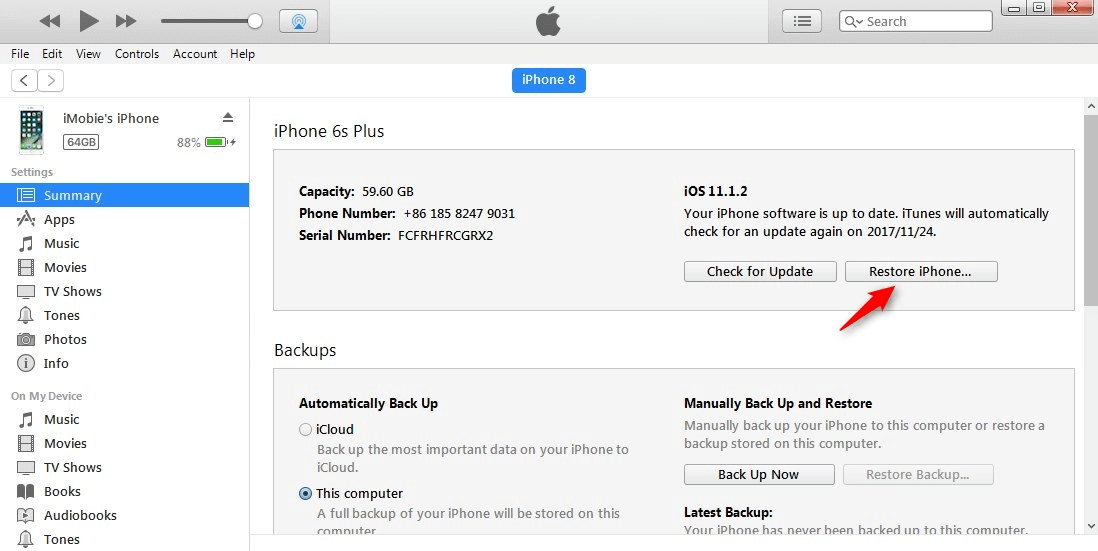
iTunes Restoring
Bonus Tip: How to Export Screen Recording Videos to Computers
As you fix the iOS 14/13 screen recording no sound issue, now you can save as many videos as you like. But too many videos will eat up your storage soon. If you want to save some space on your iPhone or iPad, you can store these screen recording videos on your computer; Or if you want to share them with others, besides on iPhone or iPad directly, you can also move them onto your PC/Mac for a more possible operation.
But the question is how to export screen recording videos to the computer. Here in this part, we’re going to recommend you the best iOS data management and transfer tool – AnyTrans, which is engaged in transferring & managing iPhone iPad iPod data in a simple way. With it, you can easily export recordings videos from iPhone iPad to PC or Mac computer just in 3 steps. Let’s see how to make it.
Step 1. Download and install AnyTrans on your Mac or Windows computer > Connect your iPhone or iPad.
Step 2. Choose Device Manager on the left panel and click on Photos on the right.
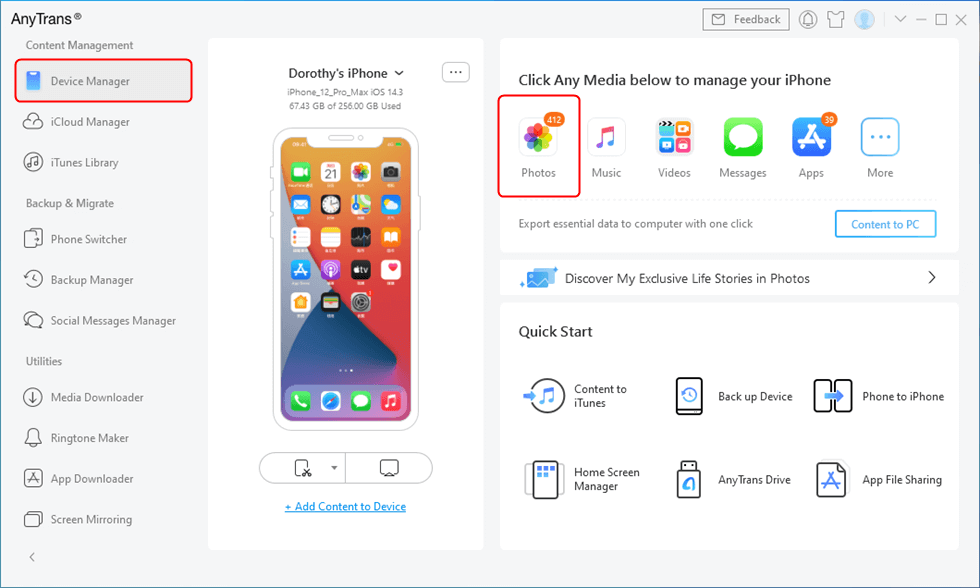
Go to Device Manager and Choose Photos
Step 3. Choose the photos/videos you want to transfer and click on the To PC button to transfer.
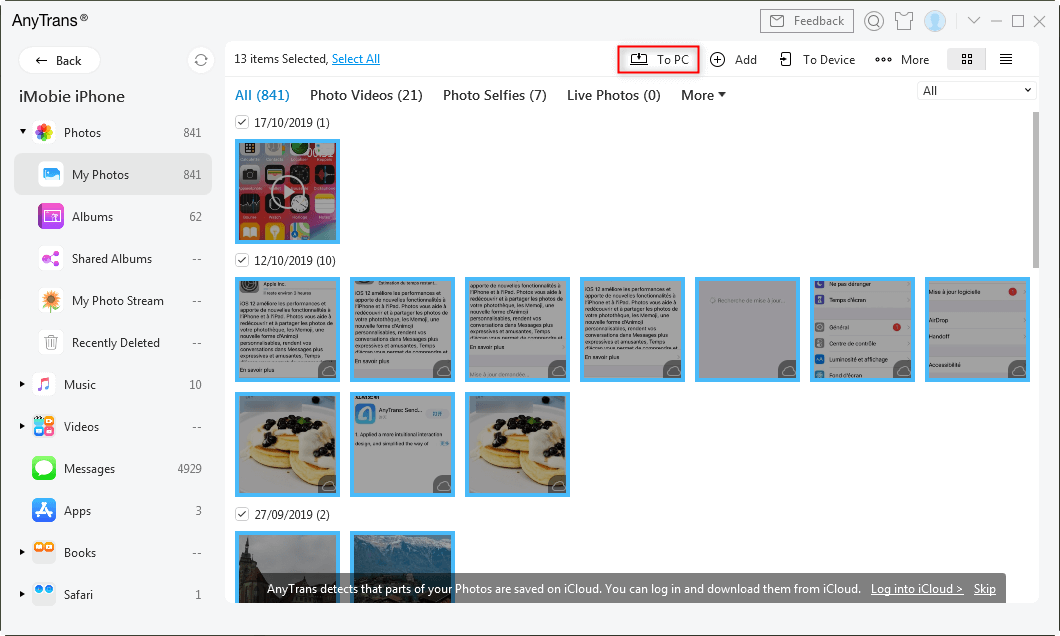
Choose the Photos You Want and Click on To PC
1. Besides recording videos, you can also use AnyTrans to export other types of iOS data, such as photos, ringtones, music, movies, iBooks, contacts, notes, reminders, messages, and so on.
2. It not only allows you to export data from iDevice to computer, but also enables you to transfer data from computer/iTunes to device, from device to iCloud, from one iCloud to another iCloud, from any iOS device to another iOS device, and even from Android phone to iPhone.
iMobie New PC Screen Recorder: Gemoo Recorder Lite
iOS users can enjoy the convenience of the in-built screen recording features of the iPhone and iPad, while PC and Mac users are longing for a handy screen recording tool. iMobie has developed a light and powerful screen recorder – Gemoo Recorder Lite. It supports recording the desktop screen, and webcam, and annotating the screen or adding camera effects.
Highlights of Gemoo Recorder Lite:
- Full screen and part screen recording
- System sound and microphone sound recording
- Supports adding filters, backgrounds, and frames.
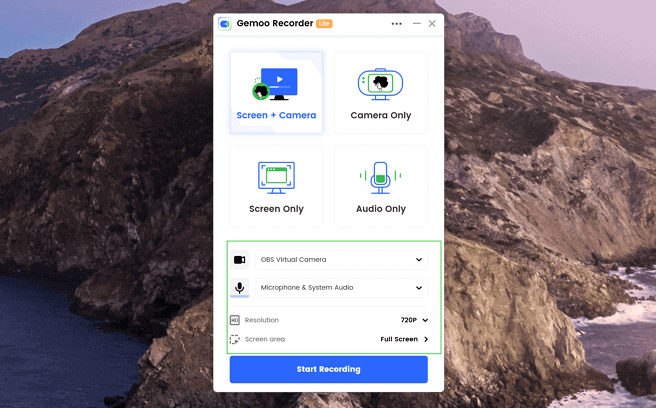
Gemoo Recorder Lite
The Bottom Line
With these 4 methods above, you can fix iOS 14/13 screen recording no sound easily. But also if you plan to share your screen videos with others on the computer, you can apply AnyTrans to quickly transfer videos from iPhone iPad to PC/Mac. Give it a try now. Also if you have another practical method to fix screen recording with no sound, you can share it in the comments below, helping more people.
Product-related questions? Contact Our Support Team to Get Quick Solution >

