How to FaceTime on iPhone/iPad/Mac
FaceTime is one of the coolest features your Apple device comes preloaded with and there are a number of ways you can use it. This post explains the basics of the feature to help you get started with it.
If you do not already know, most Apple devices including the iPhone, iPad, iPod, and Mac ship with a feature called FaceTime. FaceTime is like Skype that allows you to make both audio and video calls but with a restriction that you can only call other Apple users.

How to Use FaceTime
If you have been using an iOS device or a Mac for some time, you may have likely used the feature to call your friends and family.
If you are yet to use the feature, you have come to the right place. This guide will explain to you how to use FaceTime for making calls, how it is used on a desktop Mac, and everything else regarding the feature. So if you are looking to use this feature and want a nice little guide to teach you how to do it, we have you covered.
How to FaceTime on iPhone/iPad/iPod Touch
Using the FaceTime feature on an iPhone, iPad, and iPod Touch is pretty easy as all you need to do is tap on the app icon on your springboard and you are ready to use it.
However, you may need some guidance here and there to explore the features of the app. The following is how you perform some of the basic tasks using the FaceTime app on your iOS-based device:
1. Make a FaceTime Call
Making a FaceTime call is pretty easy as it works mostly like your regular phone calls. What makes this a bit unique, though, is that you can even call an email address in addition to calling phone numbers. It is something you cannot do with the regular phone calls on your device. In order to make a FaceTime call, simply launch the app on your device, enter an email address or a phone number, and tap either audio or video call icon to begin the call.
2. Make a FaceTime Audio or Video Call
FaceTime lets you make both audio and video calls and placing either type of call is extremely easy.

Place a FaceTime Call on iPhone
Simply open the FaceTime app on your iOS device, choose the contact you want to place a call with, and tap on either the audio icon to place an audio call or the video icon to place a video call. Your call will begin and you are ready to talk.
3. Use Emojis in a FaceTime Call
You can use Apple’s famous emojis, often referred to as memojis, during a FaceTime call on your device. These emojis will help give your call a special effect and the following shows how to do it.

Use Emojis in a FaceTime Call
Open the FaceTime app on your device and place a call with someone. When the call is placed, tap on the effects icon. You will then be able to use any emoji you want in your phone call. That is how you make your FaceTime calls a bit more interesting.
4. Switch from a Regular Call to a FaceTime Call
If you are already on a regular call with someone and you want to switch the call to a FaceTime call, you can do so very easily from within the Phone app on your device.
While you are on a regular call, tap on the FaceTime icon on your screen and it will turn the call into a FaceTime call. The other person must have a compatible device or you will not see the FaceTime call option on your device.
How to FaceTime on Mac
FaceTime works on the Mac as well and you can use the app to make both audio and video calls from any of your Mac machines. The following is how you FaceTime on your Mac:
1. Make a FaceTime Call on Mac
When you start using the app, the first and most obvious thing you will want to do is make a FaceTime call. Well, it is pretty easy and works just like it does on your iOS devices.

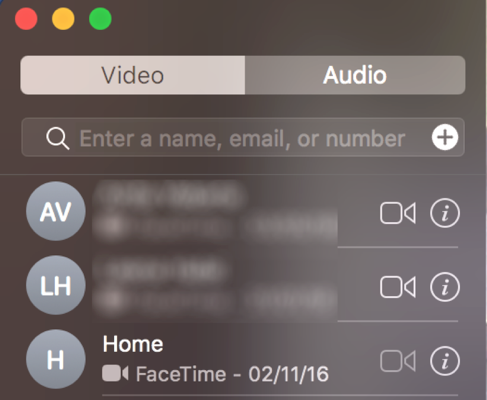
Place a FaceTime Call on Mac
Launch the FaceTime app from the Launchpad on your Mac. When the app opens, select the contact you want to call, and click on either audio or video icon to place a call.
2. Make a Group FaceTime Call on Mac
If you run the latest version of macOS on your Mac, you can group call with up to 32 people using the FaceTime app on your machine.
Open the FaceTime app on your Mac and select the people you want to make a group call with. Click on either audio or video icon and your call will start.
3. Answer or Decline a Group FaceTime Call on Mac
If you have received a group FaceTime call request, you can either accept the request or reject the request. Doing both tasks is easy.

Accept or Decline a Group FaceTime Call on Mac
When you receive the call request, you will see a notification on your Mac. Click on it and you will see the options for accepting and declining the call.
4. Set Your Location in FaceTime
FaceTime lets you set your location as well so it can serve you with more personalized features. The following shows how you can set your location in the app on your Mac.
Step 1. Launch the FaceTime app on your Mac. Then, click on the File menu and select Preferences.

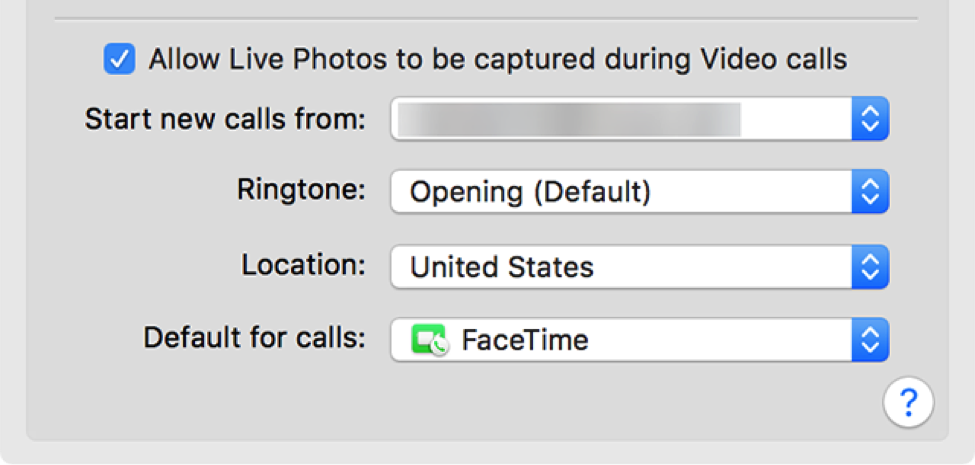
Access the FaceTime Settings Menu
Step 2. On the following screen, you can select any country from the Location dropdown menu. That’s all. Your new location should reflect in the app on your Mac.

Select a Location for FaceTime
The Bottom Line
Whether you are looking for a way on how to FaceTime on an iPad or you want to use FaceTime on your desktop Mac, the above guide has got FaceTime usage instructions for all the supported Apple devices out there. We hope it helps you out.

Joy Taylor


Member of iMobie team as well as an Apple fan, love to help more users solve various types of iOS & Android related issues.
Screenify
AnyEnhancer
FocuSee
Vozard
AnyMiro
AnyMirror


