How to Download iMessage History to PC Windows/Mac
Want to back up iMessages on your iPhone or iPad to computer for better preservation? But don’t know how to download iMessage history to PC or Mac computer? Head to the tutorial below to figure it out.
iMessage Tips & Issues
iMessage Recovery Tips
iMessage Management Tips
iMessage Trouble Shootings
One workable way to avoid iPhone iMessages loss due to wrong deletion, upgrade failure or restore error is to backup iMessages to a PC or Mac computer. iTunes gives you chance to create a full backup containing iMessage for your iPhone to a computer. But unfortunately, the content including iMessages in the iTunes backup is unreadable.
If you want to see and download the full iMessage history, here 4 methods are introduced. You can view, download, or print iMessage history to your PC/Mac easily, even including how to retrieve deleted messages. Let’s move to the full methods below:
How to Download iMessage History to PC with AnyTrans
AnyTrans is a comprehensive iOS content management program & iMessage backup app, available to transfer messages, iMessage history, and various iOS data from iPhone to computer. Also, you can sync iPhone/iPad to iPhone/iPad and manage your iTunes and iCloud backup in a safe and simple way. Here’s how can you view and download iMessage history:
- Preview iMessage history on iPhone/iPad: Connect your iPhone/iPad to the computer, all the text history, photos, or other attachments from iMessage will be shown.
- Back up messages & iMessages to PC/Mac: So you can save them safely on your computer, and download history as you need.
- Export iMessages with PDF/TEXT/HTML formats directly.
- Print the iMessages on paper.
- Supports the latest iPhone 13 models and iOS 15.
Here’s how to download iMessage text history to MacBook Pro or print them out directly:
Now to download iMessage history, you need to first get AnyTrans installed on your computer.
Free Download * 100% Clean & Safe
Step 1. Open AnyTrans on PC and plug in your iPhone or iPad. Select and click on the Messages option on the right side.
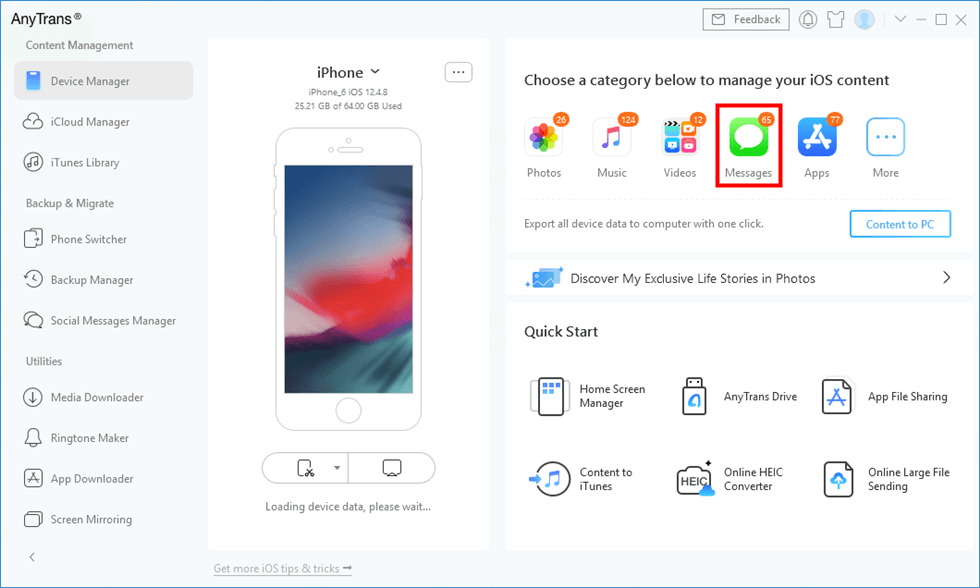
Click Messages in AnyTrans
Step 2. Preview the iMessage of one person that contains text history, photos, emojis, etc., and select all or only what you want to download to your computer. Click the To PC/To Mac button to export as .txt, .pdf, or .html format. Also, you can click the Print button to print text messages from your iPhone directly.
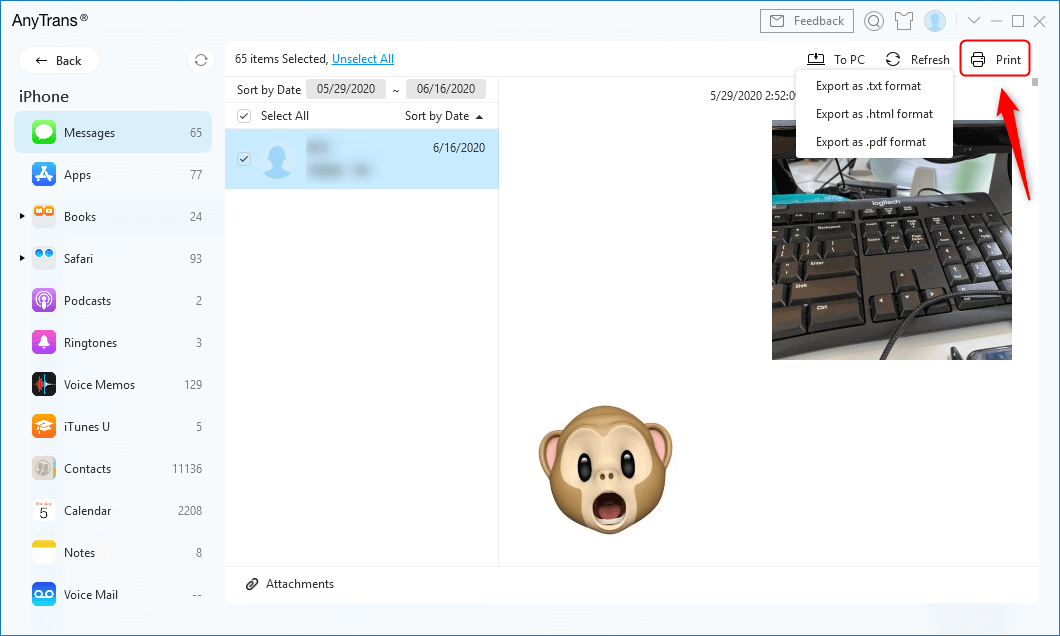
Pint iPhone Messages with AnyTrans
Step 3. Now you can view the iMessage history on PC that you just downloaded.
How to View iMessage History on Mac with iMessage Sync
For Mac users, there is a default iMessage app, you can send messages on Mac as well as sync iPhone messages with Mac so that you can view the messages on your Mac with ease. Check the steps to view iPhone messages on Mac:
Step 1. Find the icon of the Messages app on your Mac and launch it.
Step 2. Sign in with the same Apple ID you used on your iPhone.
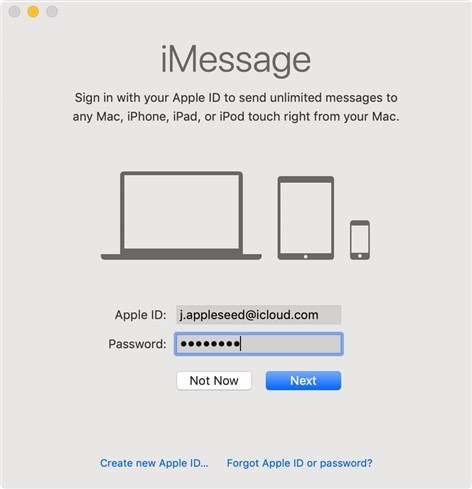
Log in with the same Apple ID
Step 3. Once you have logged in, your messages on your iPhone will be synced to your Mac automatically.
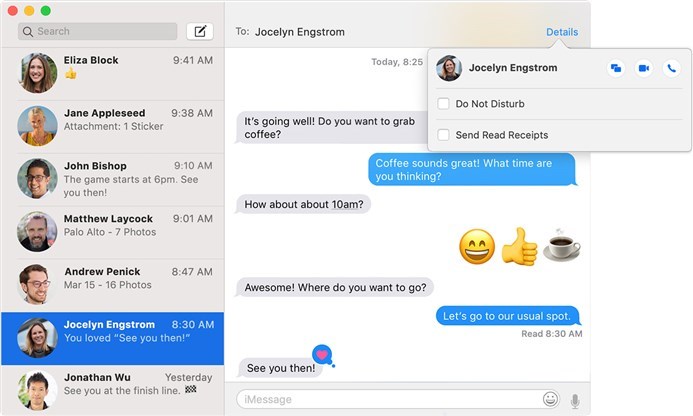
Check the Messages on Mac
Further Reading: How to Recover Text Messages after Factory Reset iPhone >
How Can I Retrieve Deleted iMessage History?
With the methods above, you can easily view and download iMessage history on your iPhone or iPad. However, if you accidentally deleted text messages, how can you view and retrieve deleted iMessage history? PhoneRescue for iOS is an iOS/iPadOS data recovery tool and certainly an iMessage recovery tool, which helps you to find old or deleted iMessage history without a backup or extract from iTunes/iCloud backup without erasing the existing data. Steps to retrieve deleted iMessage history:
Step 1. Get PhoneRescue for iOS on Mac/PC
Download the latest version of PhoneRescue for iOS. Once you launch the software, choose one recovery mode. Here we take Recover from iOS Device as an example, which will recover iPhone data directly without backup.
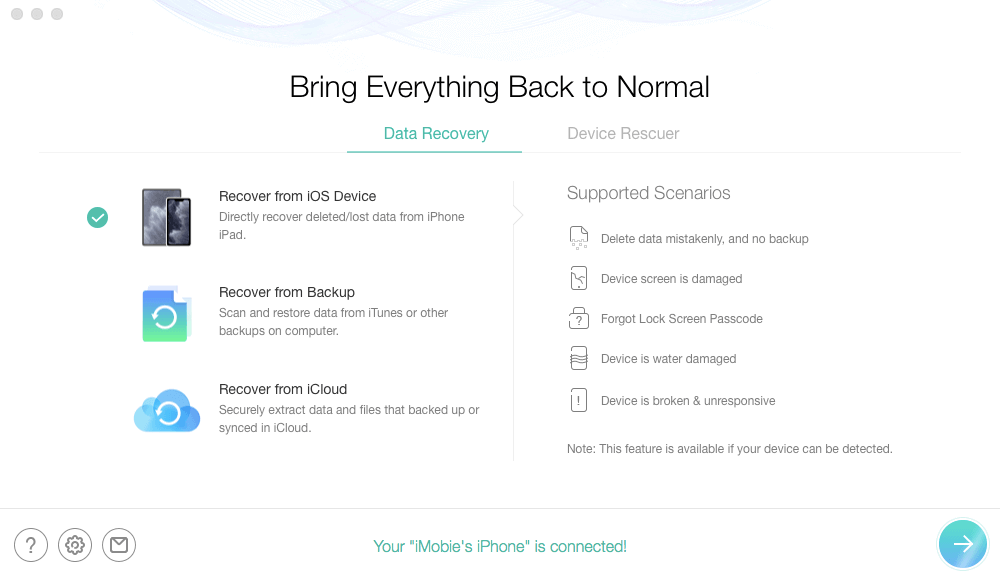
Recover from iOS without Backup
Step 2. Scan All Text Messages
Uncheck Select All and choose Messages only. It will scan and show you all messages, including iMessages on your iPhone device.
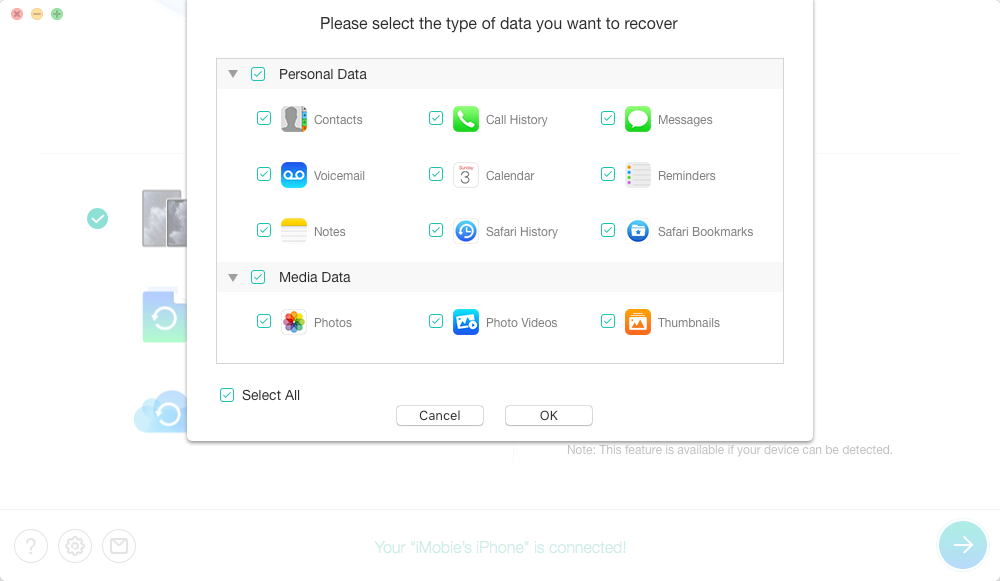
Select One Backup
Step 3. Search iMessage History by Date/ Name
Wait for all messages to show, you can search old or deleted history by name or by one person. Then choose what you want to download and click to iPhone or to Mac/PC.
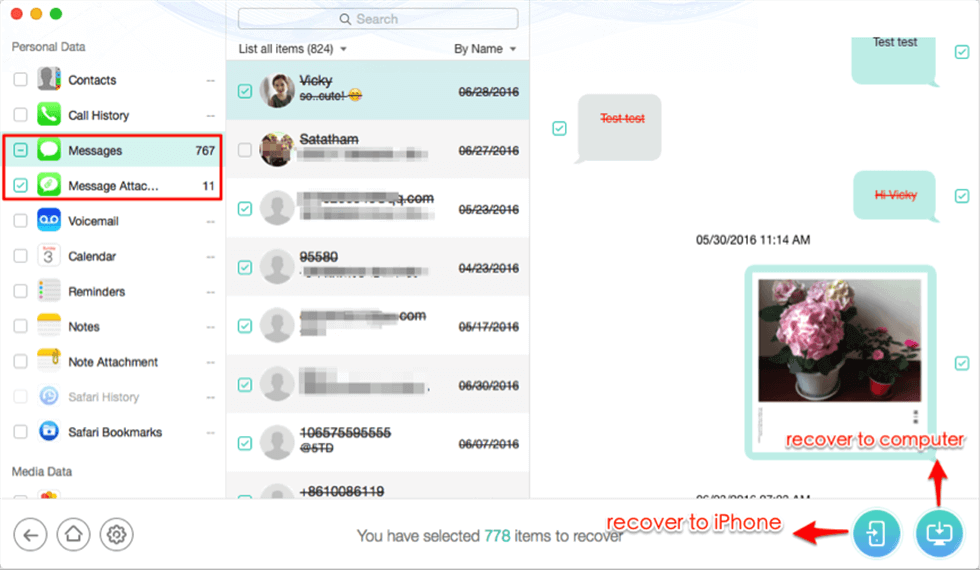
Select Messages/iMessages to Restore to Your iPhone
Free Download * 100% Clean & Safe
How to Download iMessage History from iCloud
If you got a new iPhone and want to see full iMessage history on one device like your old iPhone, you can log in to your iCloud account and fully download messages in iCloud. Here are the steps:
- When you set up your new iPhone and sign in to the same Apple ID on your old iPhone, open Settings.
- Tap on [your name] > iCloud.
- Toggle on Messages.
- All the iMessage history on one device will be downloaded now.
Download Entire iMessage History from Database
Where messages and iMessage history are stored in the Mac folder named ~/Library/Messages/chat.db. If you want to download text history from iMessage via the SQLite program, you need to install the SQLite tools. It is a method that contains more complicated steps. Here’s how to do:
- First, get SQLite tools.
- Go to Finder menu bar > Go > Go to Folder…, > Type into the folder name > Click Go.
- Right-click the chat.db and choose open with DB Browser for SQLite.
- Once you open the database, find the text history that you want to check.
- Choose to export, print, etc. from Edit Database Cell.
Can’t see iMessage history? Here’s how to fix iMessage disappear >
The Bottom Line
Except for iMessage, AnyTrans also helps transfer text messages, music, photos, videos, contacts, notes, and more between iOS devices, and between devices and computers. Get AnyTrans to give it a shot. And if you have any doubts, write them down in the comments to let us know.
More Related Articles
Product-related questions? Contact Our Support Team to Get Quick Solution >

