How to Access iPhone Files on Mac [New!]
If you have both a Mac and an iPhone, you will be interested in learning how to access iPhone files on a Mac. This will prove to be useful when you want to view or download something from your iPhone to your Mac machine. There are multiple ways to do that as shown here in this guide.
Mac Tips & Issue Fixes
Mac Related Tips
AnyTrans – iPhone File Manage Tool
AnyTrans is an all-around iPhone files manager made to manage files on your iPhone. Download it to have a try after reading this guide on how to access iPhone files on Mac.
How to Access iPhone Files on Mac
One of the many good things about owning a Mac device is that you can work with all other Apple devices seamlessly. Whether it is your iPhone, iPad, or even Apple Watch, they all work great with your Mac as these all devices are from Apple. They are tightly integrated with each other and you can access one device’s files on another. If you have an iPhone, you can access its files on your Mac. If you wanna access iOS data on Mac, then you are in the right place! The following guide covers multiple methods to help you gain access iPhone files on Mac.
Method 1. Access iPhone Files on Mac with Professional Tool [Easy & Fast]
Normal methods only let you view the popular file types on your Mac. This mostly includes your photos, notes, videos, calendar entries, and so on. None of these methods let you access the system files on your iPhone and that is something you may want to do sometimes.
AnyTrans – iPhone Data Manager is an app that makes accessing system files on your iPhone possible. Also, it is the quickest way for you to access files on Mac. Besides, it is just easy for AnyTrans to help you access normal types of files, including your photos, notes, contacts, videos, music, etc. Let’s see its main features below.
AnyTrans – iPhone File Manager
- View iPhone files on Mac one by one conveniently.
- Transfer all data from your iPhone to your computer.
- System files can also be accessed easily and quickly.
- No damage to your data and no viruses, 100% safe.
Free Download100% Clean & Safe
Free Download100% Clean & Safe
Free Download * 100% Clean & Safe
The operation is quite simple, let’s have a look now.
Step 1. Free get AnyTrans and launch it on your computer > Connect your iPhone to your computer via a USB cable > Click on the More to view more content on iPhone via AnyTrans.
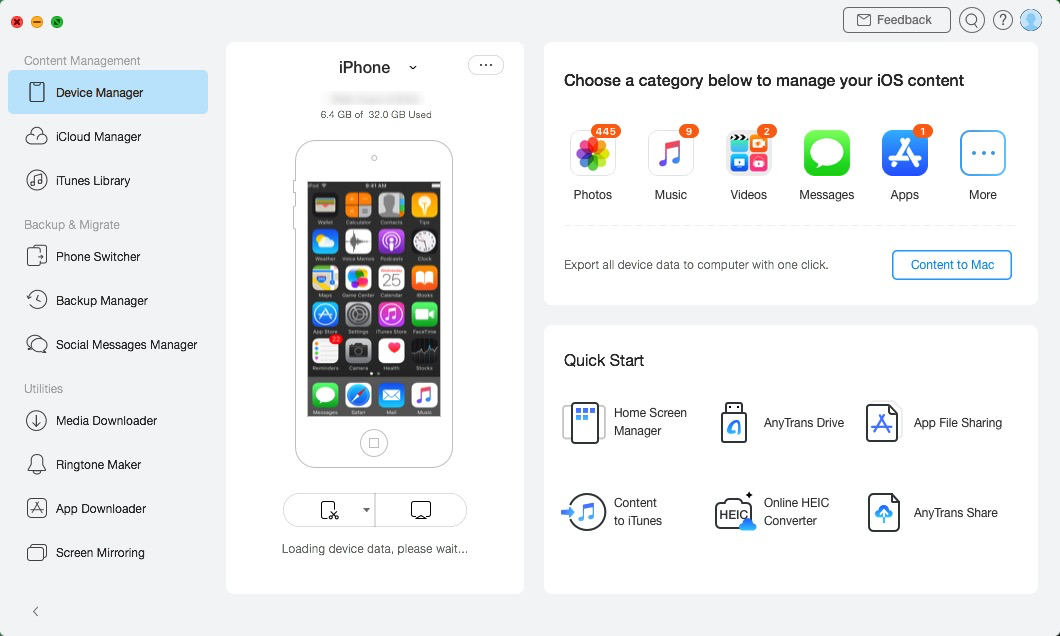
Plugin your iPhone to your Mac and Launch AnyTrans for iOS
Step 2. Scroll down in the left sidebar and choose the option that says System. You will now see the system files of your iPhone on your Mac.
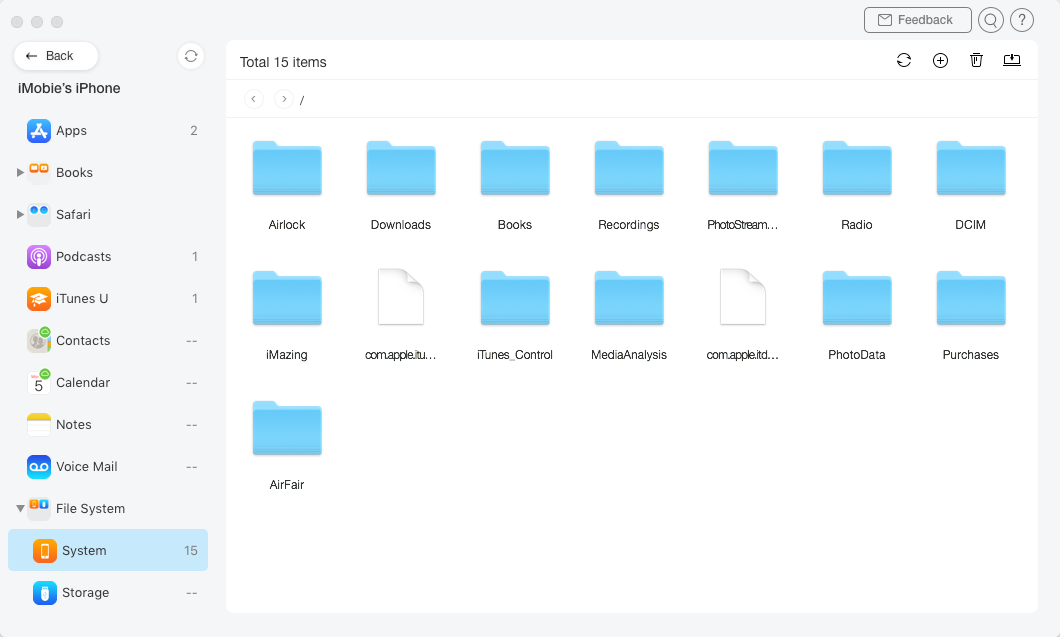
View iPhone’s System Files on Mac
Step 3. To copy these files from your iPhone to your Mac, choose the files to be copied and click on the To Computer button at the top.
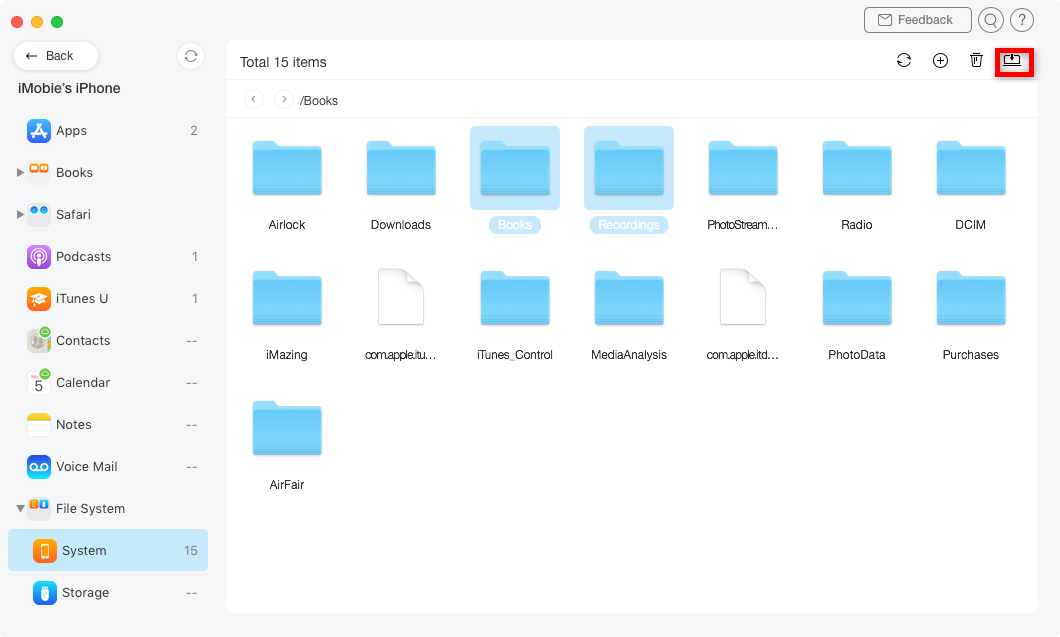
Transfer iPhone’s Files to the Mac
Step 4. Your files will be transferred to your Mac.
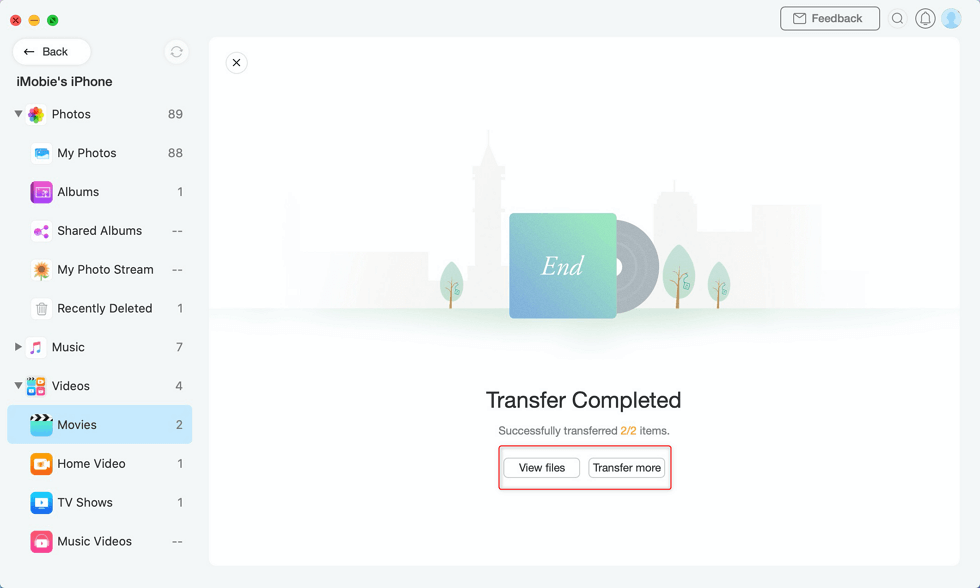
View Files After Transfer Completed
You can access the popular file types like photos and music as well by choosing an appropriate option on the AnyTrans’ main interface.
Method 2. How to Access iPhone Files on Mac with Finder
With the introduction of macOS Catalina, Apple changed how your iPhones interact with your Mac. Earlier, you had to use iTunes to access your iPhone’s files on Mac. With the Catalina update, you no longer need to do that as this update lets you access iPhone files without iTunes.
You can now simply plug your iPhone into your Mac and use the Finder to view and manage your iPhone’s files. This has eliminated an app that you had to use to access your files. This method allows you to fetch files from your iPhone and view them on your Mac as well as add files from your Mac to your iPhone.
If you have updated your Mac to run the latest macOS Catalina, the following is all you need to do to view your iPhone’s files on your Mac.
- Use a USB cable to connect your iPhone to your Mac.
- Launch a Finder window on your Mac.
- Under the Locations section in the left sidebar, you will see your iPhone listed. Click on it to open your phone’s files.
- The right-hand pane should now show all the files you have got on your iPhone. You can click on various file type options to see various files available on your iPhone.
- To copy files from your iPhone to your Mac, drag the files you want to copy over to a folder in the Finder.
- To copy files from your Mac to your iPhone, drag the files you want to copy from a Finder window over to an app on your iPhone.
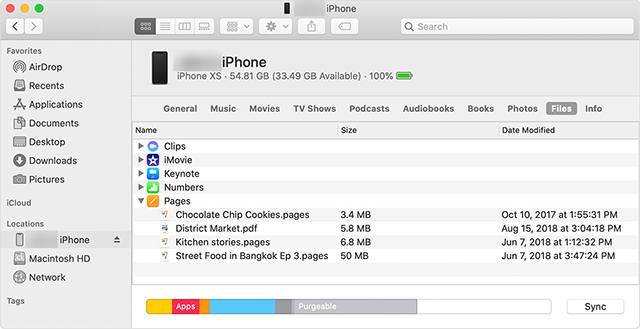
Access iPhone Files with Finder on Mac
Method 3. How to Access iPhone Files on Mac with iCloud
iCloud has made sharing files and data between your iOS and Mac devices much easier than ever. When you are signed in to an iCloud account on your iPhone, you can use the same account on your Mac and view all your iPhone files. Similarly, this gives you access to your Mac’s files on your iPhone as well.
The only thing you need to do is to sync all the content that you want to make available on your other devices from your iPhone. This way, your content will become available on the iCloud and then any iCloud-compatible device can access that content. This is how you can view iPhone files on a Mac machine.
On a Mac, you can either use the built-in Apple apps to view your iPhone’s files or you can access the iCloud web version and get access to your data. None of these things require you to download or install anything on your machine.
Sync Your iPhone Files with iCloud
The first thing you are going to have to do is to sync your iPhone’s files with iCloud. This can be done from your iPhone itself and you will need a stable Internet connection to do this. This is because all your chosen file types will be uploaded from your iPhone to the iCloud. The following is how you sync your iPhone with iCloud.
Step 1. Launch the Settings app on your iPhone and tap on your name banner at the top. On the following screen, tap on the option that says iCloud to manage your iCloud content.
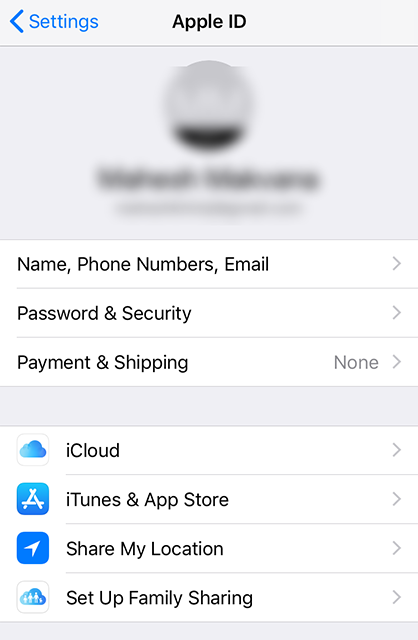
Open iCloud Settings on iPhone
Step 2. You can now select the content that you want to make available on your Mac. For example, if you want to access your iPhone’s photo files on your Mac, tap on the Photos option and turn it on.
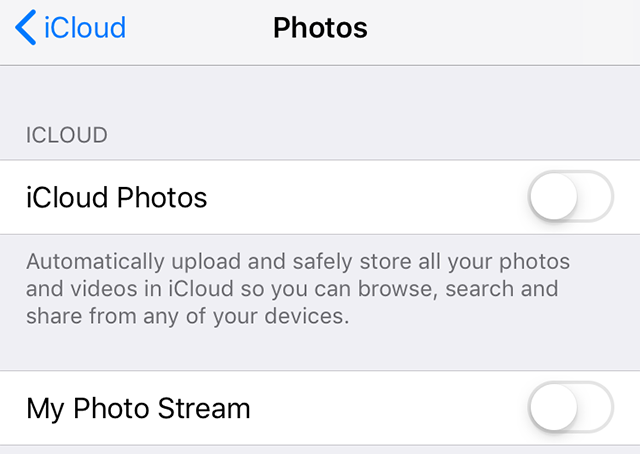
Turn on iCloud Photos Sync on iPhone
Step 3. You can enable sync for various other file types including Contacts, Calendars, Notes, and so on.
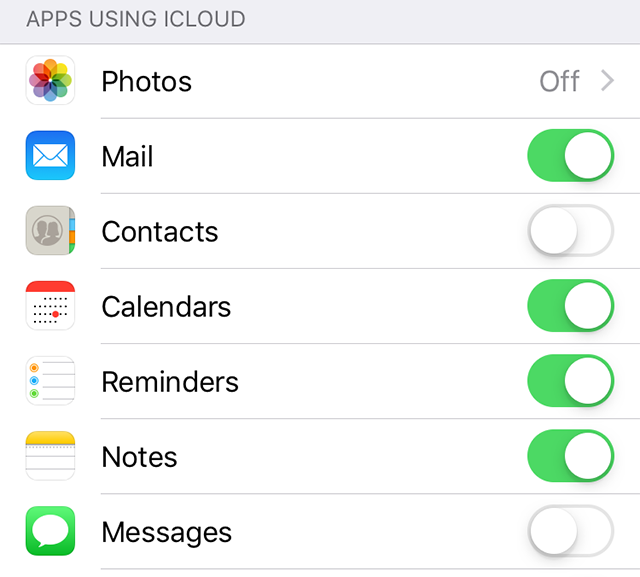
Sync Other iPhone Content
Access iPhone Files with Built-in Mac Apps
Once your iPhone files are available in your iCloud account, you can start accessing them from your Mac machine. One of the ways to do this is to use the stock apps that have come preloaded on your Mac. These apps sync with your iCloud account and let you access various types of files on your machine.
These apps include the Photos app, Notes app, Calendar app, and so on. Depending on what iPhone files you want to view on your Mac, you can choose and launch an appropriate app and get access to your data. The following shows how you can use some of these apps to access your iPhone’s files on your Mac.
1. Click on the Apple logo at the top-left corner of your screen and choose System Preferences.
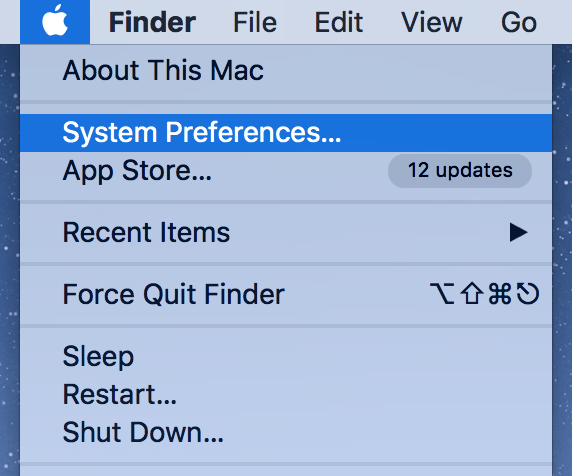
Access the Main Settings on Mac
2. On the following screen, click on the option that says iCloud to manage your iCloud account on your Mac.
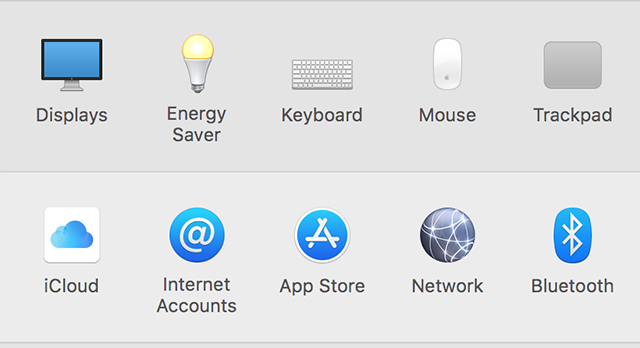
Launch iCloud Settings Panel on Mac
3. On the right-hand side panel, you will see all the file types that you can fetch from iCloud and access on your Mac. Tick-mark all the file types that you want to view.
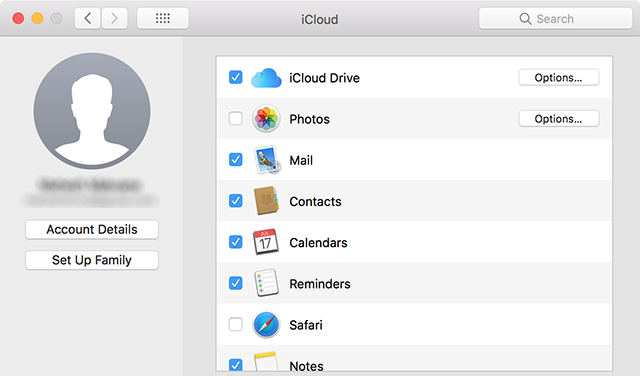
Sync iCloud Content with Mac
4. If you want to view your iPhone’s photo files on your Mac, launch the Photos app on your Mac and you will see all the synced content.
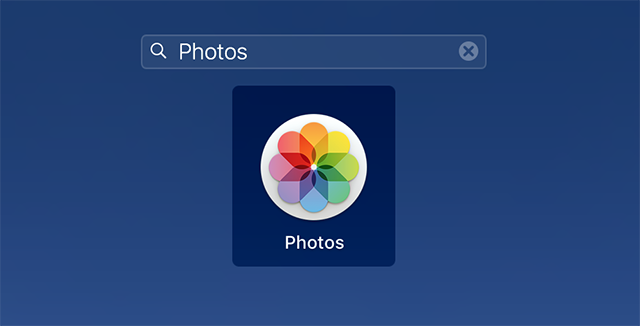
View iPhone’s Photos on Mac
5. To access your iPhone’s notes, launch the Notes app on your Mac and all your iPhone notes will be in front of you.

Access iPhone’s Notes on Mac
Access iPhone Files with iCloud Web Version on Mac
If you are not looking to use the stock apps on your Mac to view your iPhone’s files, the other way to do the task is to use the iCloud web version. iCloud has an online version available that you can access from any of your web browsers and get access to your synced files.
This should work from Safari, Chrome, Firefox, or any other browser you have installed on your Mac. You will be able to see all the files that you have chosen to share from your iPhone with your iCloud account. Some of these files can also be downloaded to your Mac if you want.
The following should teach you how to access your iPhone’s files on your Mac with the iCloud web version.
Step 1. Launch a browser on your Mac and head over to the iCloud website. Sign in to the same iCloud account as your iPhone. When the main interface appears, you can click on any of the options to access your files. For example, if you want to view your iPhone’s photos, click on the Photos option.
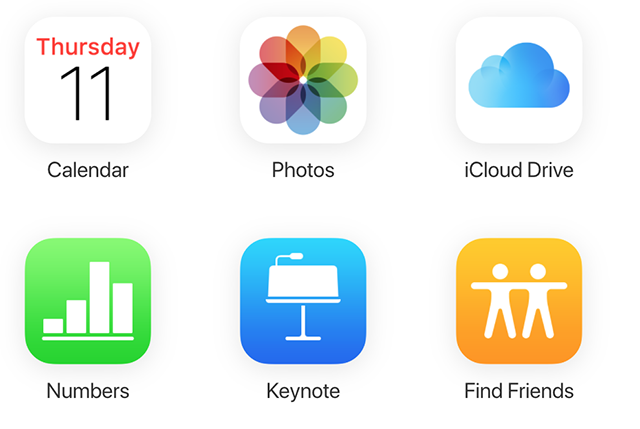
View the iPhone Photos on the iCloud Web
Step 2. To view your iPhone’s reminder files, click on the Reminders option and you will have access to all your iPhone reminders on your Mac.
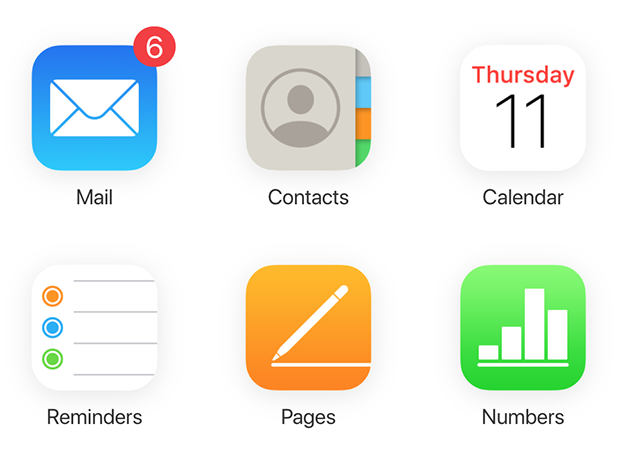
Access your iPhone Reminders on the iCloud Web
Method 4. How to Access iOS Files on Mac via iTunes
You can use iTunes to access your movies, music, voice memos, books, audiobooks, and more if you have a Mac running macOS Mojave or older or a PC. Check the steps below:
- Launch iTunes on your Mac, and connect your iPhone to the Mac.
- Then you will see your device in the left sidebar after iTunes detects your iPhone. Tap on your device icon.
- Finally, you can select the file you wish to access on Mac.
The Bottom Line
If you are not sure how to access iPhone files on a Mac, our guide above offers multiple ways to access your iPhone’s files on a Mac machine. These methods will let you access as well as copy files from your iPhone over to your Mac. To solve your problem in the quickest manner, we recommend you free get and use AnyTrans to access iPhone files on Mac.
Free Download * 100% Clean & Safe
Product-related questions? Contact Our Support Team to Get Quick Solution >

