Stepwise Guide to Use Windows Default Screen Recorder
Windows default screen recorders allow users to capture everything from their PC’s screen, whether it’s a tutorial or an online meeting. However, both the Xbox Game Bar and Snipping Tool offer brilliant screen recording capabilities but come with downsides such as limited recording modes, time limit restrictions, and more. You can utilize Screenify— a free 4K screen recorder without such restrictions.
Try Screenify for free to record screen on Windows or Mac. Whether full-screen or partial-screen recording, recording with sound or with camera, Screenify can do it with ease.
You might want to record a tutorial to guide your audience about specific instructions regarding a product, share your gameplay sessions with your friends, or record an instructional guide for your employees. Recording your PC’s screen is a compulsory step in all these scenarios. Various third-party tools in the market can help you capture what’s happening on the screen.
Windows Default Screen Recorder
Nevertheless, Windows default screen recorder might assist you if you don’t want to cope with complicated installation processes or install any third-party programs! Screen recording is simple using Windows 10/11 default screen recorders, which include the Xbox Game Bar and Snipping Tool. There are still certain constraints, though, such as time limits on recording, a lesser frame rate and quality, etc. Let us examine the built-in screen recorder in Windows and its substitutes:
Part 1: Is There a Default Screen Recorder on Windows?
Yes, both Windows 10 and 11 come with the default screen recording tools, including Snipping Tool and Xbox Game Bar. However, it must be noted that not all the tools can be recorded on all types of operating systems. For example, the Snipping Tool’s screen recording feature will not work on Windows 10 operating systems. On the other hand, Windows 11 PCs will have both the Xbox Game Bar and Snipping Tool as screen recorders.
Want to record gameplay sessions, tutorials, product demonstration videos, or anything happening on the screen? Let’s explore the key features and step-by-step guides for the default screen recorder on Windows 10/11!
Part 2. How to use Xbox Game Bar for Windows 10/11
Imagine winning a game or experiencing a funny glitch but don’t know how to share it with your friends or audience on social media platforms! No worries, as Windows’s built-in Xbox Game Record offers a seamless way to capture your PC’s screen without any installation needed. Although the tool was designed and integrated into Windows 10 and 11 for game recordings, you can also capture tutorials, product guides, presentations, and meetings.
Additionally, you can adjust the settings for frame rate, resolution, and more. However, some of the drawbacks of Xbox Game Bar include the time limit restrictions and limited recording ability. Xbox Game Bar can record content for up to 4 hours, and you can record only a single window at a time.
Key Features
- Xbox Game Bar lets you record PC screens with or without system audio and microphone.
- It enables users to use the shortcut keys to start/stop the screen recording quickly.
- This tool allows you to customize the settings, such as frame rate and resolution.
- It can also display the computer’s performance alongside screen recording features.
Steps to Record Windows PC Screen with Xbox Game Bar
Step 1. Launch the Xbox Game Bar on your HP Laptop. There are two ways to launch it.
- Search “Xbox Game Bar” in Windows search and click to open it.
- Press the keyboard’s Windows key + G (Shortcut keys) to open it.
Xbox Game Bar
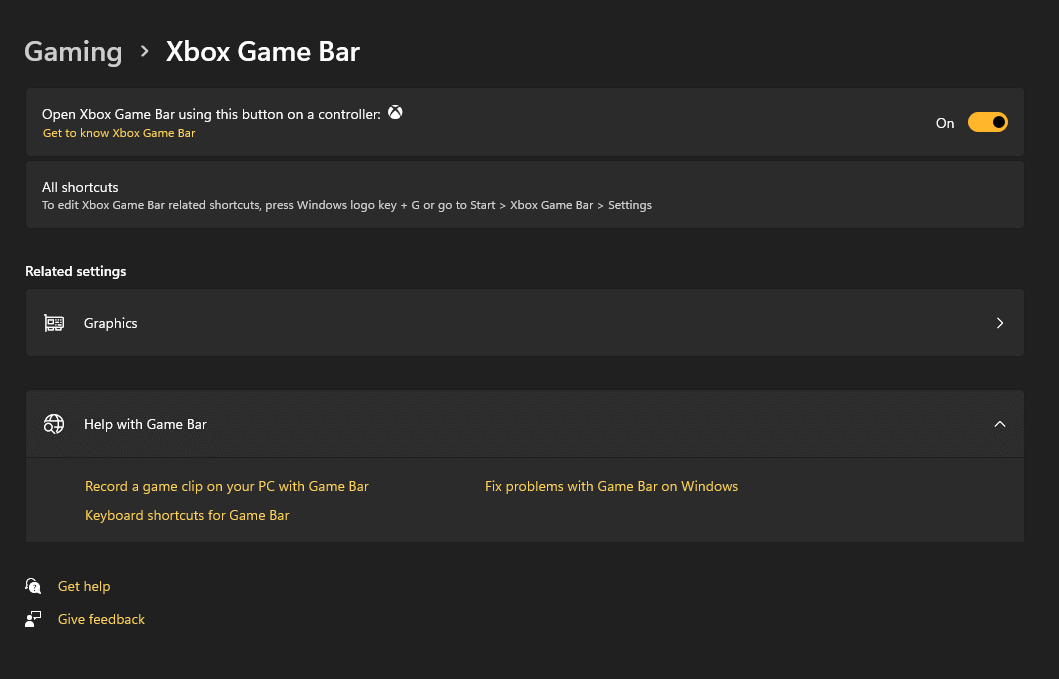
If Xbox Game Bar is not opening on your HP laptop, you’ll need to enable it first from the settings. Navigate to “Settings” on your PC and then “Gaming“. Click on “Xbox Game Bar” and toggle to turn it ON.
Step 2. You’ll see the floating toolbars and multiple options to adjust. Click on the “Settings” button from the above toolbar to adjust the settings, such as widgets, shortcut keys, and more.
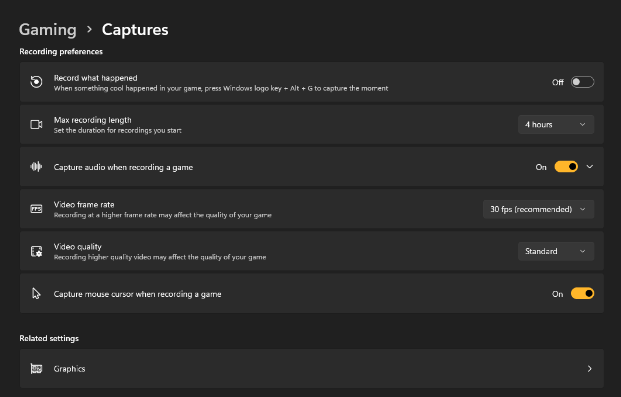
Step 3. Adjust the settings, such as maximum recording length, video frame rate, video quality, cursor movement capture, and more. To configure these settings, navigate to “Settings> Gaming and then Captures.” The maximum video length can go up to 4 hours, and the frame rate is 60 FPS.
Step 4. Choose to record the “System Audio” and “Microphone” or both during the screen recording. Adjust the volume with the sliders.
If audio is not enabled on Xbox Game Bar by default, you’ll need to turn it ON from the settings:
Navigate to “Settings” and “Gaming” from the left pane. Click on “Captures” to open the settings of the Xbox Game Bar. Toggle to turn ON the option “Capture audio when recording a game.”
Xbox Game Bar Captures
Step 5. Once done, click the “Start Recording” button for screen recording process. Alternatively, you can use shortcut keys such as “Windows Key + Alt + G” to start the screen recording.
Part 3. Screen Recording Custom Regions with Snipping Tool
Snipping Tool is another built-in screen recorder for Windows 11 if you want to record customized regions. Although, Windows 10 users cannot record screens with this tool. With its intuitive and easy-to-use interface, even beginners can screen record their Windows PC’s screens.
Several screen recording modes and the ability to choose specific locations to record on are features of the snipping tool. But there are also some disadvantages. The screen recording’s resolution and output format cannot be altered in this tool. Furthermore, the screen-capturing capability of the Snipping Tool is limited to Windows 11 version 22621.1344.
Key Features
- Snipping Tool allows users to record either full screen or a specific part/region.
- It offers an intuitive user interface.
- The tool is simple to use and works fine even for beginners without technical knowledge.
- You can export the recording in MP4 format, which is compatible with almost all media players.
Steps to Record Windows PC Screen with Snipping Tool
Follow the step-by-step guide to record the screen on Windows 11 via the Snipping Tool:
Step 1. In the first step, you’ll need to check whether your Windows 11 PC supports Snipping Tool screen recording! To check if your Windows 11 PC is eligible for screen recording via the Snipping Tool:
Navigate to “Settings>System“. Click on “About“. Check Windows 11 version i.e., 22621.1344 or higher.
Step 2. Go to the search bar and type “Snipping Tool.” Launch the Snipping Tool on your Windows 11 PC.

Snipping Tool
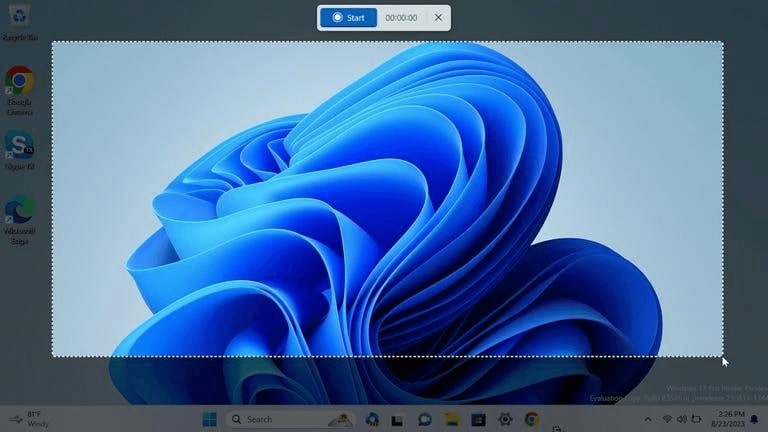
Step 3. Click the “Record” button next to the Camera icon. You’ll be asked to draw the selection. Select the area that you wish to record on your screen.
Step 4. Then, you’ll be asked to record system audio, microphone, or both. Make a selection and click “Start” to initiate the screen recording.
Part 4. Alternative: Record Your Screen on both Windows & Mac via the Free tool—Screenify
The Windows default screen recorders offer various disadvantages, such as lower recording resolution and frame rate, poor recording ability, time limit restrictions, and more. Third-party tools can fill this gap, and Screenify is at the top of it all! Screenify is a free 4K screen recorder for Windows and Mac operating systems that offers a brilliant 4K recording resolution alongside a 60 FPS frame rate. Whether you wish to record a gameplay session, tutorial, or an online meeting, there will be no frame drops and lags in recorded clips.
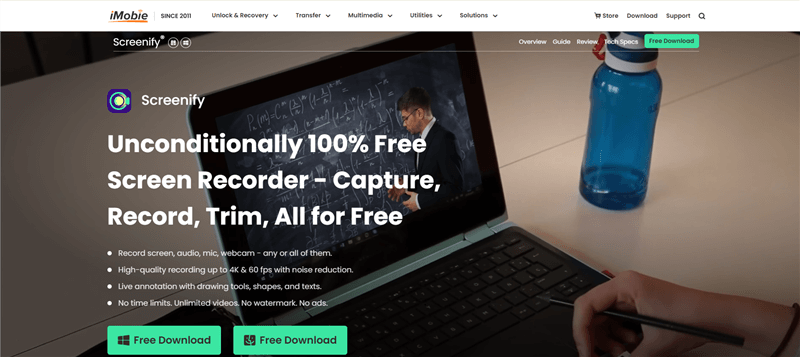
Screenify Website Interface
Screenify offers dual-screen recording modes where you can record on a full screen or in a specific region. There are no time limit restrictions and watermarks for screen recording. Whether you’re a streamer or want to record content for e-learning platforms, Screenify has advanced functionalities to cater to everyone’s needs.
Also Read: How to Screen Record on Windows PC | Full Guide
Key Features
- Screenify is free to use with no watermark and dual recording modes such as full screen or region.
- This versatile tool can help you record 4K screen recording with no lags at 60 FPS and a noise reduction functionality for audio and video files.
- Record screen visuals alongside audio (system sound, microphone, or both).
- Lock window features ensure privacy by recording only what’s present in the recording window.
Stepwise Guide on How to Record Screen via Screenify
Now, let’s explore the simple steps to use this tool for recording:
Step 1. Begin by downloading and installing Screenify on your computer.
Step 2. Launch Screenify and select the “Record screen” option.
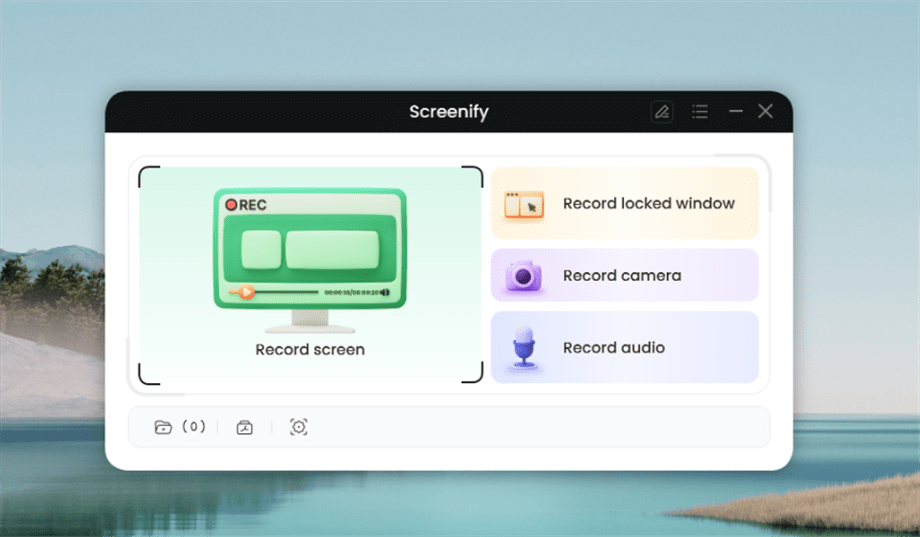
Select Record Screen Mode
Step 3. Set up your recording preferences, including system audio, before you start.
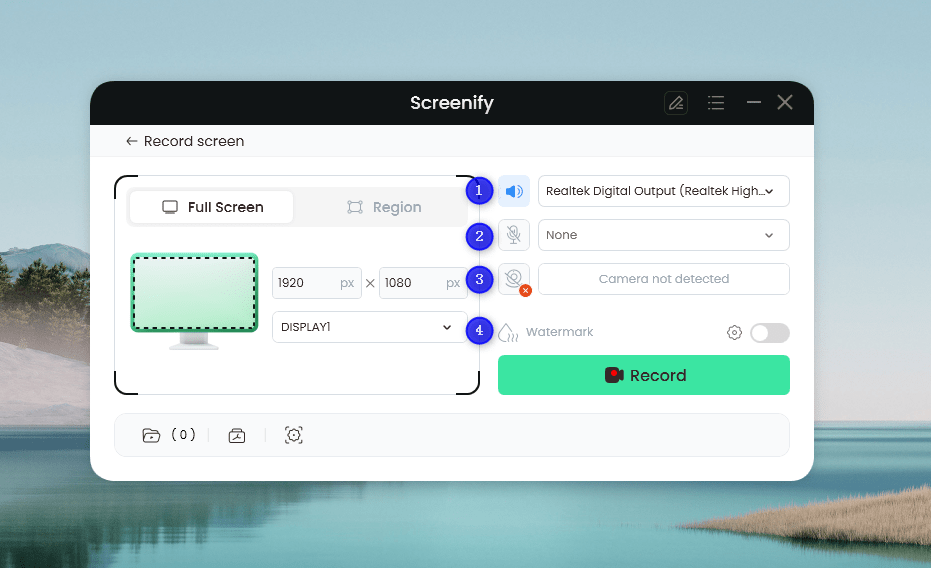
Set Configure Recording Settings
Step 4. Choose the recording area. Click “Full Screen” for a complete screen capture, or manually select a specific region. After that, click “Record.” You can adjust the selection to match social media sizes if needed.
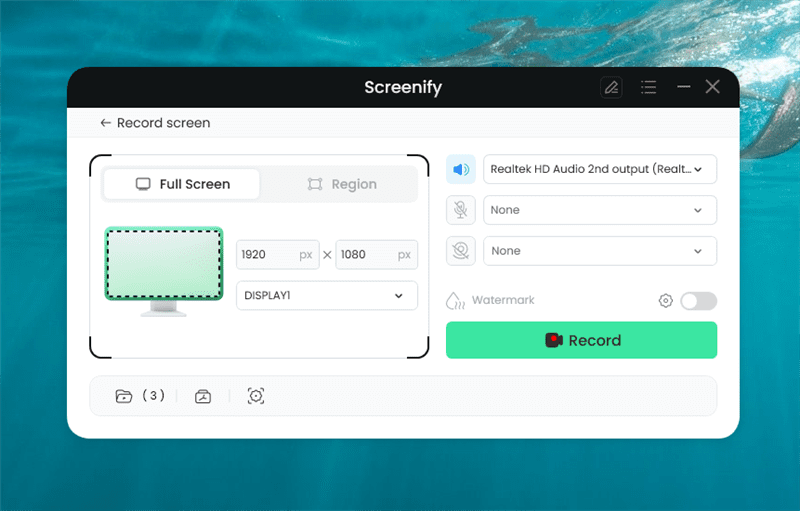
Screenify Full Screen Record
Step 5. Wait for the 3-second countdown to prepare for recording.
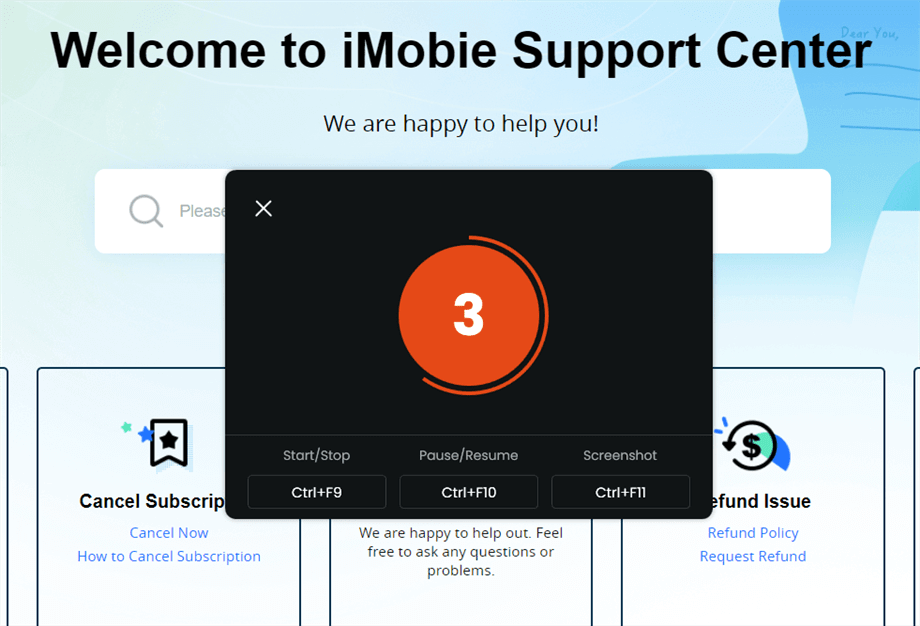
Wait for the Recording Countdown
Step 6. Recording will begin after the countdown. You can add annotations during the recording if you like.
Part 5. Frequently Asked Questions
Q1. What is the Windows default screen recorder, and how do I access it?
Windows 10 and 11 have a default screen recorder named Xbox Game Bar. Search “Xbox Game Bar” in Windows search and click to open it. Alternatively, you can press the Windows key + G (Shortcut keys) on the keyboard to access.
Q2. Can I record my entire screen or just specific windows with the Windows default screen recorder?
You can record the entire screen, such as the Desktop screen and File Explorer, but not the applications simultaneously with Xbox Game Bar. The snipping tool allows you to record either a full screen or a part of it.
Q3. Can I edit my recordings directly with the Windows default screen recorder?
No, Windows’ default screen recorder, such as Xbox Game Bar, doesn’t allow you to edit your recordings. However, the Snipping Tool allows clips to be edited directly with Clipchamp.
Q4. Are there any limitations or performance considerations I should be aware of with the Windows default screen recorder?
Windows default screen recorder comes with some limitations. For example, the Xbox Game Bar can only record clips up to 4 hours and 60 FPS maximum. Also, you cannot customize the region. The snipping tool doesn’t allow you to customize the settings, such as resolution or FPS. We recommend using Screenify, a free 4K screen recorder with no time limit restrictions and watermarks.
Part 6. Conclusion
Windows users need not to worry about the screen capturing as the OS coems with the default screen recorders. The Xbox Game Bar or Snipping Tool can record your PC’s screen. However, Windows default screen recorders have some limitations, such as restricted recording modes, poor resolution or FPS, no customized region recording, and more. We recommend using Screenify, a free 4K screen recorder with no time limit restrictions, watermarks, or laggy recorded clips.

Joy Taylor


Senior writer of the iMobie team as well as an Apple fan, love to help more users solve various types of iOS & Android-related issues.
Screenify
AnyEnhancer
FocuSee
Vozard
AnyMiro
AnyMirror

