Why is My OBS Recording Low Quality | Quick Solution
This article explains why your OBS recordings might be low-quality and how to fix them. It covers simple settings adjustments in OBS and introduces Screenify, a free alternative that offers easier, high-quality recording. You’ll also find answers to common questions about OBS recording low quality issues and tips for better video quality.
Is the quality of recording with OBS low? Use Screenify to record the screen on Windows or Mac for free, helping you record the screen more easily and with high quality.
Why is my OBS recording low quality? People often wonder why their recordings look grainy or blurry. This can be frustrating, especially when you want to create high-quality content. The main issue is usually with OBS settings. Problems with the encoder, bitrate, or resolution are common causes of poor video quality. The hardware in your computer may occasionally have trouble handling recording, which results in low-quality video.
But don’t worry; there are easy ways to improve the quality of your OBS recordings. You can get considerably better results by tweaking critical parameters, such as resolution and encoder optimization. We’ll also introduce Screenify, a free and easy alternative to OBS for capturing clear, high-quality videos. You can improve your recording quality by following the tips in this article.
Part 1: Why Is My OBS Recording Low Quality?
Open Broadcaster Software Studio recordings can occasionally provide low-quality results, leaving your films hazy or distorted. Recognizing these flaws is the first step toward improving your recordings. We’ll go over the leading causes of low-quality OBS recordings below.
1. Incorrect Resolution Settings
Resolution is crucial for recording high-quality videos. Your recordings look grainy if your OBS resolution settings are not set correctly or according to your intended recording quality. It’s critical to select a resolution that works for the content you’re producing or to match the resolution of your recording to the resolution of your monitor.
2. Insufficient Processing Power
OBS is resource-intensive, requiring significant CPU or GPU power to encode and stream videos. If your computer relies solely on the CPU without leveraging hardware encoding, you might experience severe pixelation, especially during high-demand tasks like gaming. Limited processing power can also cause frame drops and reduce the overall performance of your recordings.
3. Improper Encoder Settings
The encoder converts your video for recording or streaming. Using suitable encoder settings can lead to better quality. OBS offers software (x264) and hardware (NVENC) encoders. The video might lag or look bad if the software encoder struggles due to your computer’s limitations. Switching to a hardware encoder, like NVENC, can improve performance and quality if your GPU supports it.
4. Insufficient Hardware Performance
More processing power on your PC may cause OBS to have trouble recording excellent-quality videos. A sluggish CPU or GPU can cause video stuttering, missing frames, and decreased quality. To improve this, close unnecessary programs while recording to free up resources, or consider upgrading your hardware. This ensures OBS has enough power to handle the recording smoothly.
Part 2: The OBS Recording Quality Is Low, How to Improve it?
Don’t worry if the quality of your OBS recording is poor! Your recording quality and smoothness can significantly improve by tweaking a few important OBS parameters. Minor changes, such as modifying the encoder settings or boosting the resolution, might substantially impact. We’ll walk you through easy adjustments in this part to improve the quality of your OBS recordings and generate better-looking videos.
Fix 1: Set Low Screen Resolution
Adjust the program’s settings if your OBS video quality isn’t excellent. Lowering the screen resolution often solves the problem. This smaller resolution is easier for OBS to handle and still looks good. Downscaling prevents unnecessary data from being added to the video, keeping it cleaner and sharper. Here are the steps to reduce screen resolution in OBS:
Step 1. Start OBS on your computer. Click on the “Settings” button in the bottom-right corner of the screen.
Step 2. Open the settings menu and go to the “Video” section.
Step 3. Locate the “Base Resolution” and “Output Resolution” options and set both to 1280x720p.
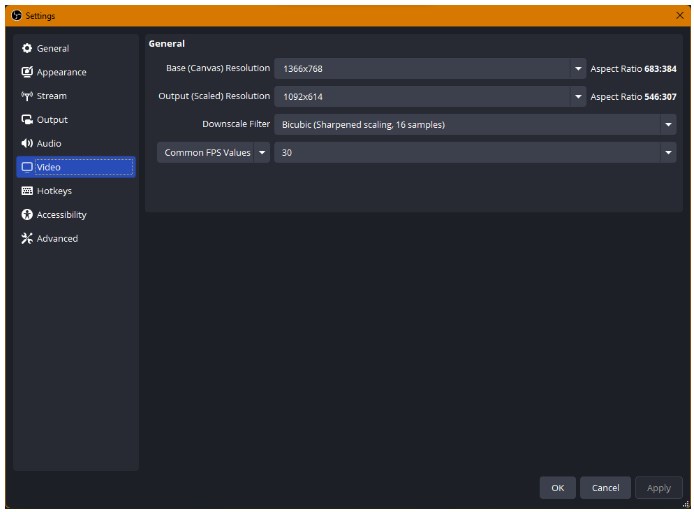
set low screen resolution
Step 4. Click “Apply” and then “OK” to save the changes. Start a new recording to see the improved quality.
Fix 2: Optimize Advanced Output Mode Settings
You can achieve better OBS Studio recording quality by modifying the Advanced Output Mode settings. You may significantly improve the smoothness and quality of your videos by selecting the suitable graphics card, adjusting the bitrate, and picking the ideal file format. Here’s how to optimize advanced output settings:
Step 1. Launch OBS Studio and click on the “Settings” button.
Step 2. Go to the “Output” tab and choose “Advanced” from the “Output Mode” dropdown.
Step 3. Click on the “Recording” tab to access recording settings. Choose “MP4” or another preferred format for easier editing later.
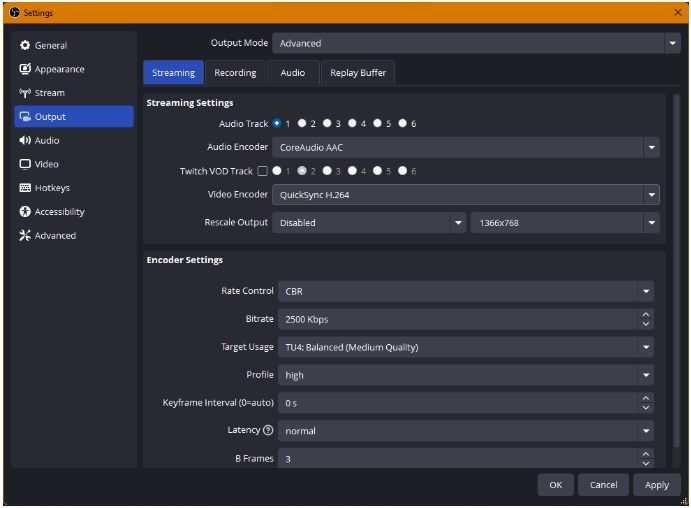
optimize advanced output mode settings
Step 4. Select your preferred graphics card instead of the default x264 encoder if available.
Step 5. Set “Rate Control” to “CBR” and bitrate to 40000 Kbps. Click “Apply” and “OK” to save your new settings.
Fix 3: Adjust the Color Format for Better Quality
You may significantly improve the visual quality of your recordings by adjusting the color format in OBS. Create more accurate and vivid colors, which will enhance the professional appearance of your videos by changing the color parameters. This minor tweak can significantly impact you, particularly if your recordings seem dull or washed out. For this:
Step 1. Start OBS and click on the “Settings” button.
Step 2. In the settings menu, select the “Advanced” section.
Step 3. Access the “Video” section. Under “Color Format,” choose “NV12” from the dropdown menu.
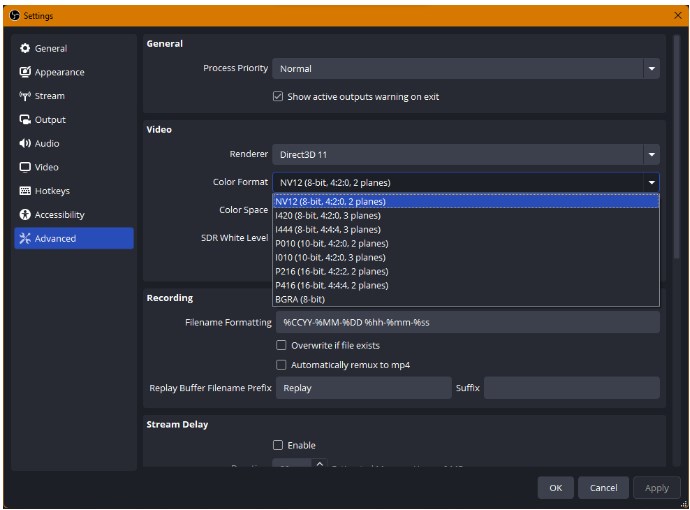
adjust the color format for better quality
Step 4. Set the “Color Space” to “709.” Change the “Color Range” to “Full.”
Step 5. Click “Apply” and “OK” to save your settings. Re-record your screen to see the improved quality.
Part 3: The Fastest Way to Improve Low-quality OBS Recordings: Use Screenify (100% Free)
Do you have trouble with poor-quality OBS recordings? It could be time to look into using a new tool if the videos with OBS look grainy. Moreover, OBS can be complicated, and its settings or technical limitations occasionally prevent it from producing optimal outcomes. Fortunately, there’s a simpler and more reliable alternative: Screenify screen recording tool.
Several features provided by Screenify make it simple to record high-quality videos. You may record in HD and even 4K at 60 frames per second using Screenify. You can start recording immediately due to the simple interface and availability of several file formats. It also lets you add text watermarks and record as long as necessary and provides simple cropping tools.
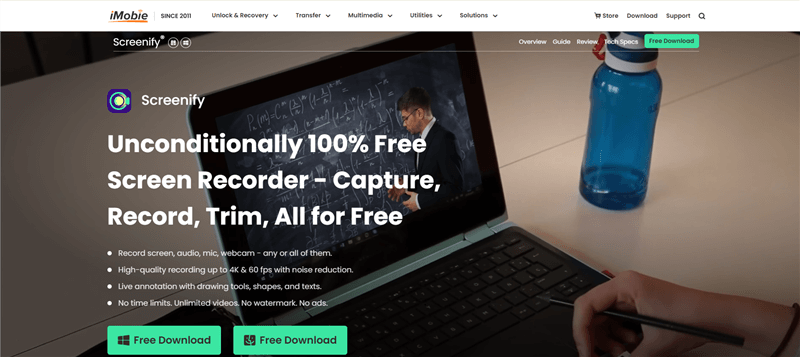
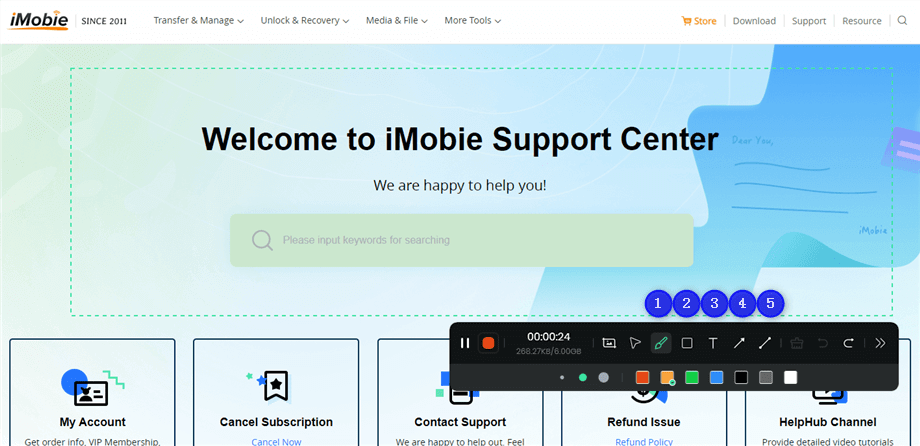
Screenify Website Interface
Compared to OBS, Screenify provides many users with a more straightforward and effective solution. While OBS offers extensive customization, it can be challenging to configure correctly. Screenify, on the other hand, simplifies the process with its intuitive design and reliable performance. For users who need high-quality recordings without the hassle of complex settings, Screenify may be the better choice.
Key Features and Advantages
- Screenify is entirely free to use, and there is no hidden cost for any of your recording needs.
- The tool is compatible with Mac and Windows computers.
- Record as long as you need without any limits at 4K quality in 60 FPS.
- This versatile screen recorder lets you record system audio and microphone and adjust the volume and speed during playback.
- The lock window feature ensures privacy by recording only what’s present in the recording window.
- Export screen recording videos in multiple formats for extended compatibility
Here are the steps to use this tool for better quality of your recording:
Step 1. Begin by downloading and installing Screenify on your computer.
Step 2. Open Screenify and select the option to “Record Screen.”

Select Record Screen Mode
Step 3. Set up your recording preferences, including audio options, before starting.
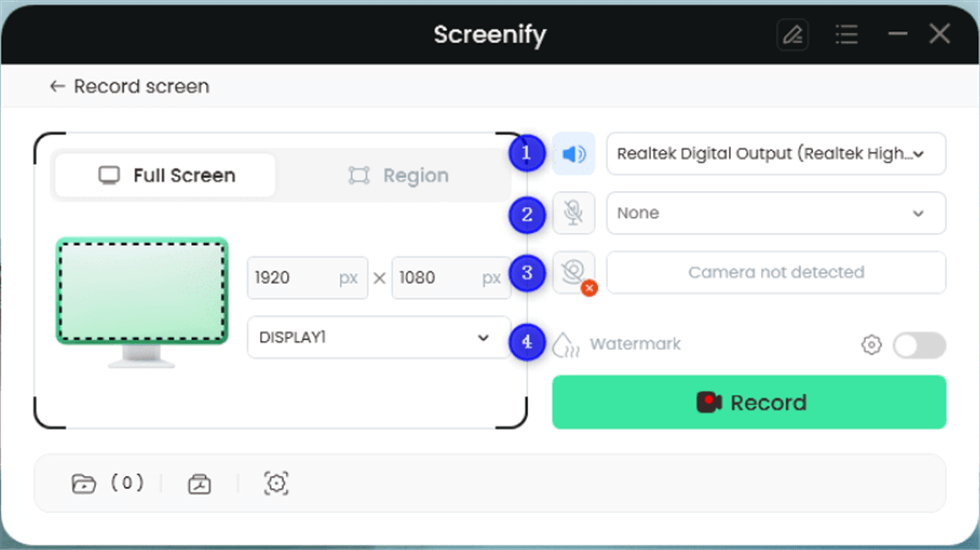
Record Setting
Step 4. For full-screen recording, select “Full Screen” and click “Record.” Click on “Region” to capture a designated area, drag to choose the region and adjust it as needed.
Full Screen
Step 5. Begin the recording after the 3-second countdown.
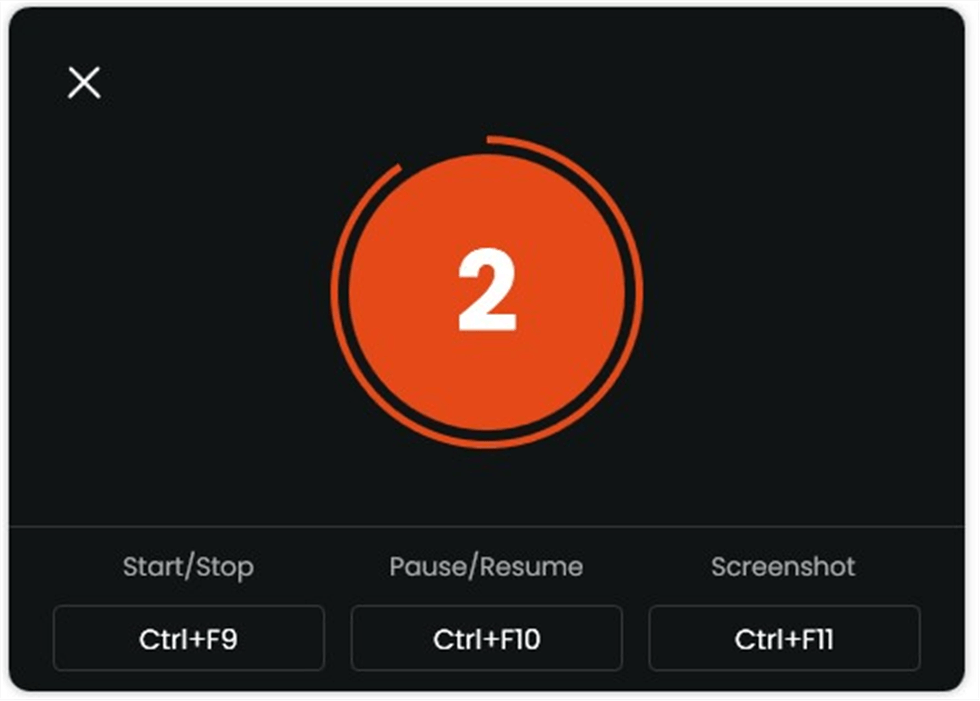
Start recording countdown
Step 6. You can add annotations directly on the screen during recording.
Annotate the Screen during Recording
Step 7. Click the red “Stop” button to end the recording. Review and manage your captured files as needed.

Record Screen Process Completed
Part 4: Why is My OBS Recording Low Quality FAQ
1. Why are my OBS recordings blurry or pixelated?
Your recordings can be blurry, distorted, or pixelated due to low quality, excessive compression, or an unreliable network. Check and modify your settings for better quality.
2. How do I fix delayed OBS recordings?
Delayed recordings can be fixed by adjusting your bitrate and encoder settings in OBS. Also, ensure your computer is running efficiently and not overloaded.
3. What are the best OBS settings for recording?
Use a resolution of 1920x1080p, a bitrate of 2500 Kbps, and select “CBR” for rate control. Choose hardware encoding if available for better performance.
4. Is there a more accessible recording alternative than OBS?
Tools like Screenify offer a more straightforward, user-friendly interface and make it easier to record high-quality videos without complex settings.
5. How do I share my OBS recordings?
To share your OBS recordings, you can upload them to YouTube or a cloud service like Dropbox or OneDrive.
You may also like: Top 10 Portable Screen Recorder [New]
Part 5: Conclusion
In conclusion, adjusting parameters like resolution, bitrate, and color format can frequently improve OBS recording low quality. These adjustments can resolve typical problems like pixelation and blurriness. But, it could be a good idea to use a different tool if you discover these modifications still need to be improved to suit your objectives. We recommend using Screenify for a more straightforward recording experience. With features like multiple recording modes, unlimited recording time, and support for 4K videos, Screenify simplifies the process and enhances video quality with its user-friendly interface and flexible options.
How to Manage Video Easily
Troubleshooting Error Issue

Joy Taylor


Senior writer of the iMobie team as well as an Apple fan, love to help more users solve various types of iOS & Android-related issues.
 Screenify
 AnyEnhancer
 FocuSee
 Vozard
 AnyMiro
 AnyMirror