How to Screen Record Snapchat without Them Knowing [Solved]
In this comprehensive guide, we’ve uncovered the secrets to discreetly screen recording Snapchat content on various devices, including Windows, Mac, Android, and iPhone. Whether you’ve received a side-splitting Snapchat you’d like to preserve or you’re simply curious about the process, we’ve got you covered.
Imagine this: You’ve just received a hilarious, once-in-a-lifetime Snapchat from a friend, and you want to save it forever. But there’s a catch – you don’t want them to know you’ve saved it. Is it even possible to screen-record Snapchat without tipping them off? The answer is yes, and we’ve got the inside scoop.
In this guide, we’ll show you the secrets to screen recording on Snapchat discreetly. Whether you’re on Windows, Mac, Android, or iPhone, we’ve got methods to suit your device. So, let’s convert you into a Snapchat screen recording ninja!
Can You Screen Record Snapchat without Notifying?
If you’re wondering whether it’s possible to record on Snapchat without alerting your friends or the sender, you’re not alone.
Snapchat is designed to notify users when someone takes a screenshot or screen records their snaps. This built-in feature is all about respecting privacy and trust. When you take a screenshot or use a screen recording app, Snapchat sends a notification to the person whose snap you’ve captured.
So, the short answer is, no, you can’t record Snapchat without notifying the person. However, if you really want to find a workaround, you’re at the right place!
How to Screen Record Snapchat on Windows/Mac?
For users looking to record Snapchat on Windows or Mac, the best place to start is a third-party screen recorder. We recommend Screenify for you.
It is a reliable and easy-to-use screen recorder. Compatible with both Windows and Mac, it can capture anything on your computer. Its numerous recording modes make it perfect for capturing Snapchat content while maintaining transparency.
Just free download Screenify and take a look at the guide below to learn more about Snapchat screen recording with it.
Free Download * 100% Clean & Safe
Step 1. Download and Install Screenify on Computer.
Step 2. Launch Screenify on your computer, and select Record screen mode.
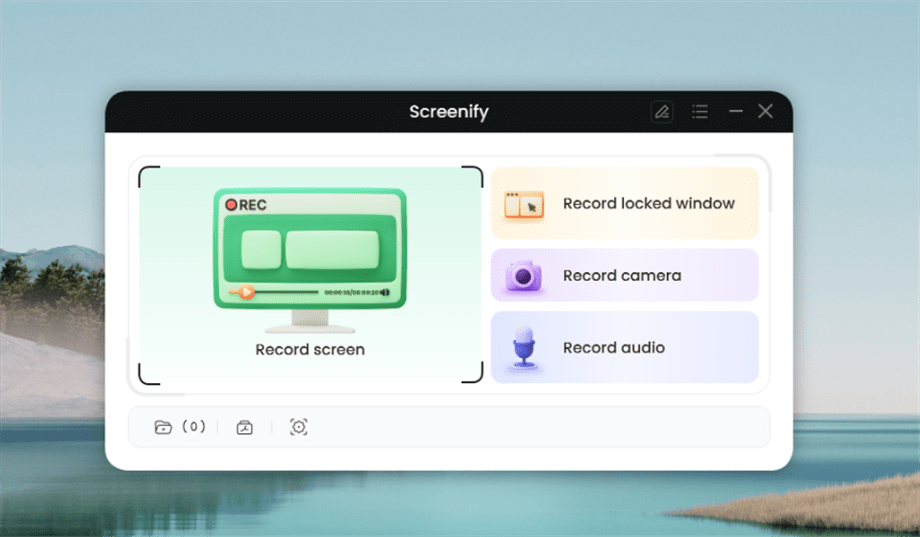
Select Record Screen Mode
Step 3. Configure Recording Settings aims to configure settings like system audio before recording.
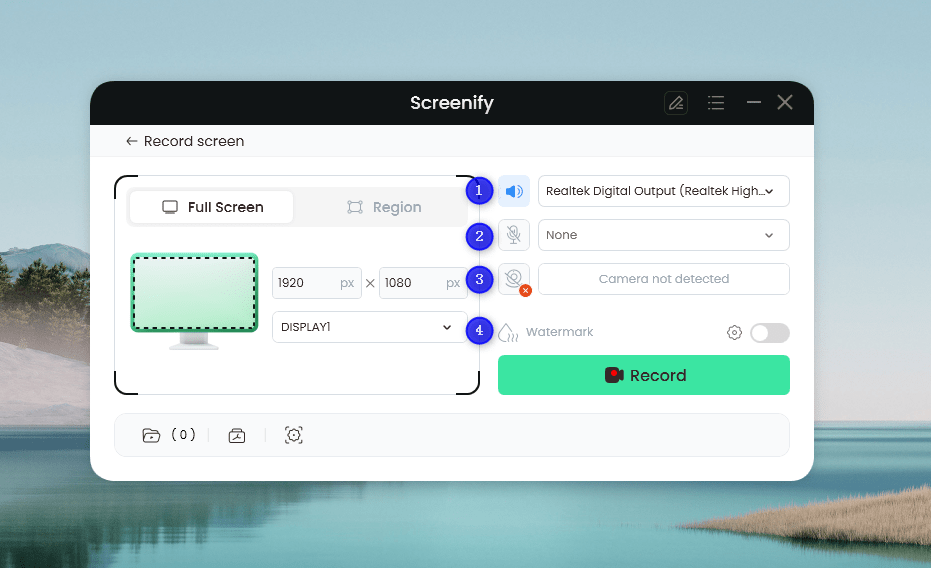
Set Configure Recording Settings
In this setting menu, you can:
1 Choose the System audio.
2 Choose the Microphone you want to record.
3 Choose the Camera you want to use.
4 Choose whether to add a watermark.
Step 4. Select Recording Screen.
Option 1. Full Screen Record
Please select Full Screen mode and choose the display you need to record. Hit Record button to initiate recording.
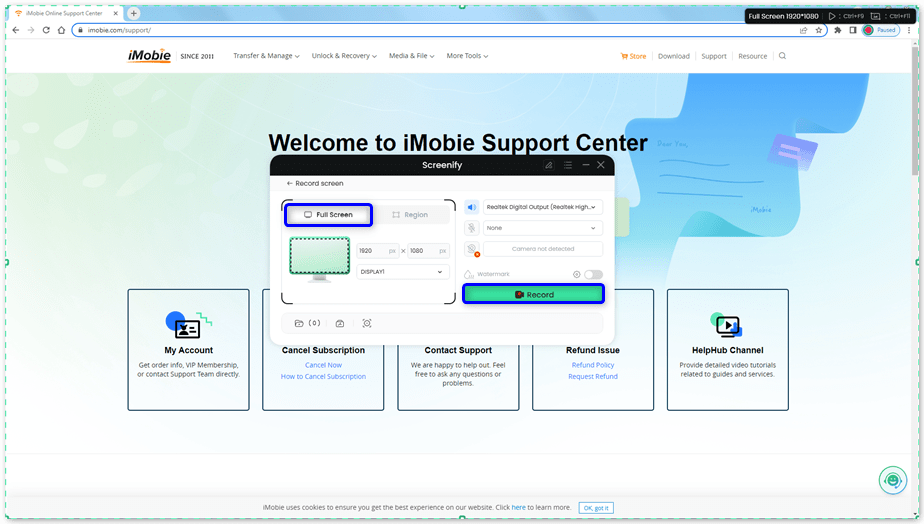
Select Full Screen
Option 2. Region Record
To record region, you need to manually select the recording area. After selection, you can still adjust the selected area. It supports customize selection, full screen, and proportional selection based on common social media dimensions.
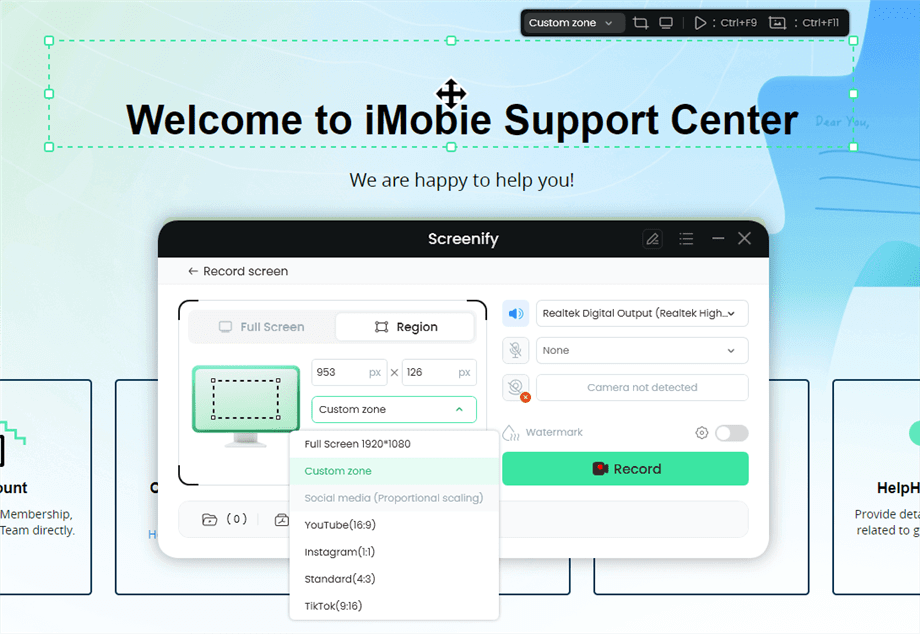
Record Region
Step 5. Wait for the Recording Countdown.
There is a 3-second countdown to help you prepare the recording after you are ready to start recording.
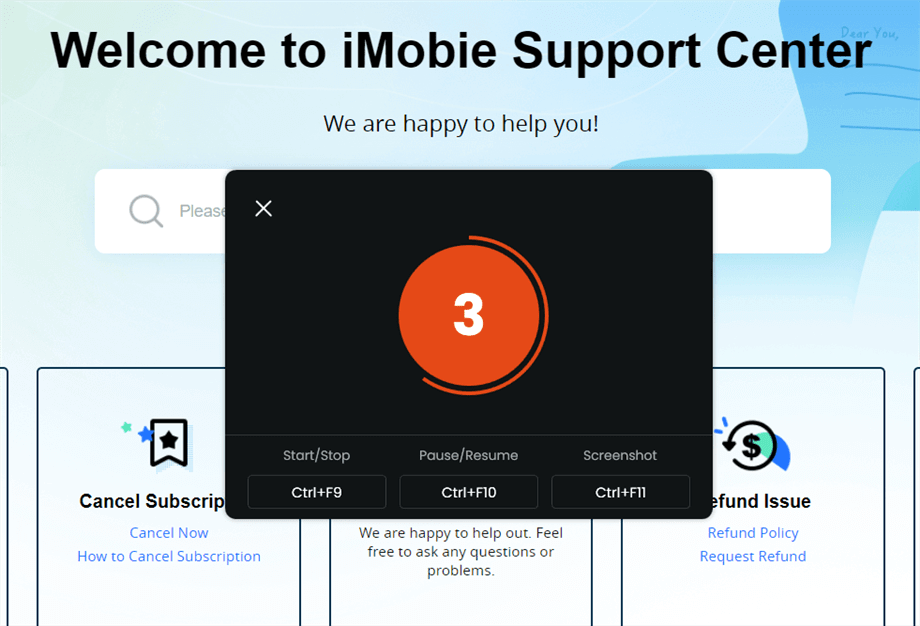
Wait for the Recording Countdown
If you would like to see a recording countdown before your recording starts, you can enable the countdown option. Or you can tap it off. View this post to know how to set the countdown option.
Step 6. Start Recording.
The recording will begin after a 3-second countdown. You can make annotations on the recording interface during the recording.
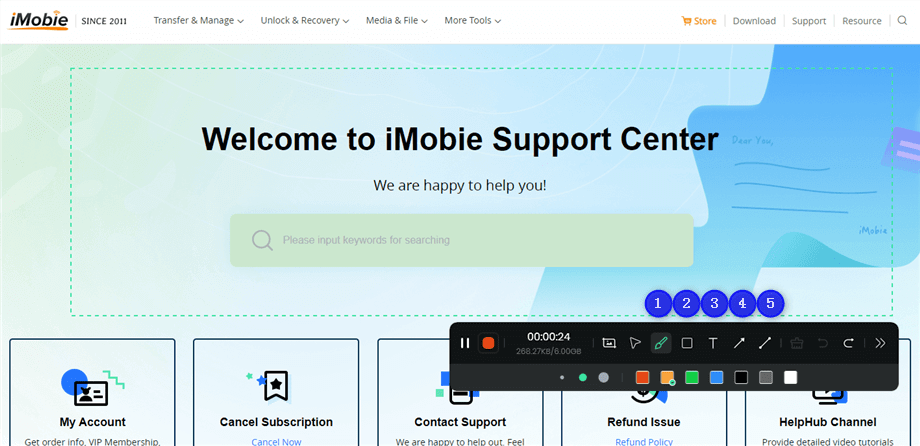
Annotate the Screen during Recording
With the toolbar, you can add the annotation in the screen:
1 Brush: Draw freehand on the screen recording interface to highlight or illustrate specific areas during the recording.
2 Rectangle: Draw rectangular shapes on the screen recording interface.
3 Text: Add written notes or labels directly onto the screen recording interface.
4 Arrow: Draw arrows on the screen recording interface to point out and emphasize specific areas.
5 Line: Draw straight lines on the screen recording interface to underline or connect specific points.
Step 7. Record Screen Process Completed.
When the recording is completed, you can click the red Stop button to end the recording. Your recorded files will be displayed. From here, you can preview and manage the recorded content as needed.
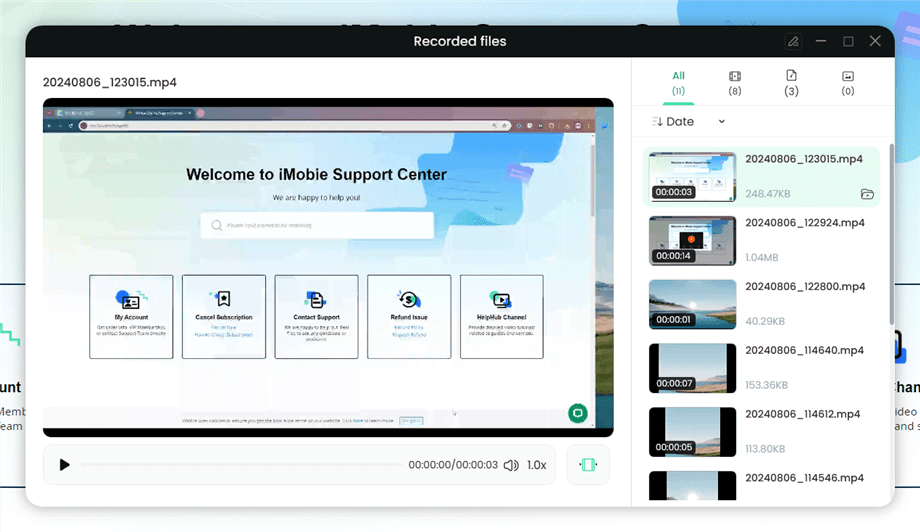
Preview the Recording
You may also want to know: How to screen record protected videos
Now, you’ve successfully screen-recorded Snapchat on your Windows or Mac computer using Screenify.
How to Screen Record Snapchat without Them Knowing?
There are a couple of workarounds of Snapchat screen recording without letting anyone know. We have discussed two of the easiest methods here.
Method 1: Turn on Airplane Mode
Follow these simple steps to screen-record your Snapchat content without letting anyone know.
Step 1: Access your device settings.
Step 2: Find and enable “Airplane Mode.” This action will disconnect your device from the internet, including Wi-Fi and mobile data.
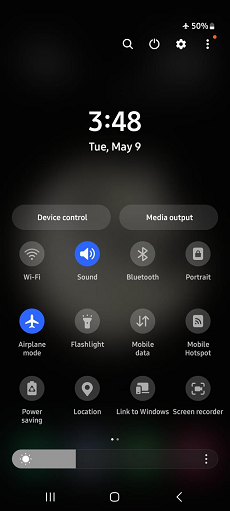
Open Airplane Mode
Step 3: Open Snapchat on your device.
Step 4: Use your device’s screen recording feature to capture the desired Snapchat content.
Step 5: Once you’ve captured the content, you can turn off Airplane Mode to regain internet connectivity.
If this method does not suit you, there is another similar way to screen record Snapchat.
Method 2: Turn off the Wi-Fi
Another method is to simply disconnect your Wi-Fi. You can do so with just a few taps.
Step 1: Navigate to the Wi-Fi settings on your device.
Step 2: Turn off your Wi-Fi connection.
Step 3: Open the Snapchat app on your device.
Step 4: Use your device’s built-in screen recorder to capture the content. Make sure Snapchat is visible on the screen during recording.
Step 5: After recording, you can re-enable your Wi-Fi connection.
Keep in mind that while these methods allow you to screen-record Snapchat without immediate notifications, they do not guarantee complete secrecy. The sender may still receive notifications once you regain internet connectivity.
How to Screen Record Snapchat on Android?
Snapchat screen recording is pretty simple when using a mobile phone, especially on an Android. For the basic recording feature, use your built-in screen recorder to capture Snapchat. Here is how you can do so.
Step 1: Swipe down from the top of your screen to open the Control Centre.
Step 2: Tap the Screen Record icon to start the recording. If you cannot find it, just hit “Edit” and add the “Screen record” option to your Quick Settings.
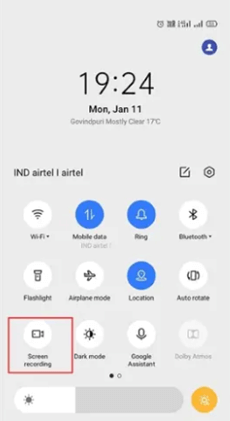
Android Screen Recording Feature
Step 3: Open the Snap you want to capture or record.
Step 4: Once you are done, hit the Stop button. You can find the recording in your gallery.
Always use screen recording responsibly and respect the privacy and trust of others when capturing Snapchat content.
How to Screen Record Snapchat on iPhone?
If you want to record Snapchat on an iPhone, the method is similar to the Android method. You can use the built-in iOS screen recorder to do so.
Step 1: Swipe down from the top right corner of the screen. Click on the screen recorder icon to start recording.
Click Screen Recorder Icon to Start
Step 2: Open Snapchat and go to the snap or story you want to capture.
Step 3: Record the content and then tap on the stop button.
You can view the recorded content in the Photos app. Now, take a look at some of the FAQs in the next section.
FAQs about Snapchat Screen Recording
Here, we have answered some of the most common questions about Snapchat Screen Recording.
Where does Snapchat screen recording go?
Whether you use a built-in screen recorder or a third-party app, the Snapchat screen recording is saved in your storage. For Android and iPhone users, it is saved in the Gallery and Photo apps, respectively.
How do you turn off Snapchat screen recording?
If you want to turn your Snapchat screen recording off, simply hit the stop button on your screen recorder.
The Bottom Line
Preserving memories is an important aspect of our lives. So, if something pops up on your Snapchat, you might want to record it for yourself. In this article, you can learn all the tricks to easily screen record your content on Snapchat using your computer or phone. With our tools and guidelines, you’re now equipped to treasure your favorite snaps while keeping your secret safe. And we highly recommend you try Screenify for free first for its convenience and high-quality screen recording. Happy recording!
Free Download * 100% Clean & Safe
Product-related questions? Contact Our Support Team to Get Quick Solution >

