How to Screen Record on Windows PC | Full Guide
No matter if you want to capture tutorials or instructional videos, you can screen record on a PC with built-in recorders. However, you can utilize a third-party alternative, Screenify, a 4K screen recorder with 60 FPS capability and no time limit restrictions.
Try Screenify for free to record screen on Windows or Mac. Whether full-screen or partial-screen recording, recording with sound or with camera, Screenify can do it with ease.
Part 1: Introduction
Creating step-by-step tutorials and instructional guides is necessary to learn new skills and guide others about a solution to a problem. However, tutorial guides or instructional videos will not best serve the purpose if the video quality is not up to the mark or the screen is blurry or distorted. Are you curious about how to screen record on PC? Various ways to screen record on a PC exist— from built-in functionalities to third-party tools.
Windows’ built-in tools, such as Xbox Game Bar and Snipping Tools, allow users to capture screens on PCs or laptops in brilliant quality and resolution but with some limitations. Users can rely on third-party alternatives such as Screenify to overcome the limitations. This detailed guide will explore all the methods on how to screen record on a PC via the built-in Window tool and its alternatives:
Part 2: Does Windows Come with a built-in Screen Recorder?
Yes, Windows users do not need to worry when it comes to recording PC/laptop screens due to the availability of more than one built-in tool. Built-in screen recorders such as Snipping Tool and Xbox Game Bar offer multiple functionalities— from recording in higher resolution and FPS to customizing the region and more. However, it must be remembered that both tools come with different compatibilities.
The Snipping Tool will work only on Windows 11 version 22621.1344 or higher and doesn’t have a screen recording feature for Windows 10. On the other hand, Windows 11 PCs will have both the Xbox Game Bar and Snipping Tool as screen recorders.
Do you want to screen record PCs to capture tutorials or gameplay sessions but are confused about making a choice? No worries! This detailed guide will compare the built-in tools, i.e., Xbox Game Bar and Snipping Tool, and a reliable third-party option, i.e., Screenify. Let’s explore and make an informed decision!
| Feature |
Snipping Tool |
Xbox Game Bar |
Screenify |
| Primary Function |
Capture screenshots and screen recordings |
Capture screenshots, screen recordings, and game clips |
Capture screenshots and screen recordings |
| Platform |
Windows 10 |
Windows 10/11 |
Windows, macOS |
| Basic Capture Options |
Rectangular, free-form, window, full-screen |
Full-screen |
Full-screen or a region |
| Editing Tools |
Basic markup |
Limited editing |
Basic markup |
| Additional Features |
None |
Screen recording with audio, game clips, widgets |
Screen recording with audio, No time limit, no watermarks, 4K resolution, 60 FPS |
Now that you have an overview of all the Windows PC screen recorders, it’s time to explore each of them in detail and make a choice that fits your needs.
Part 3: What’re the Screen Recorder on Windows?
Wondering how to screen record on a computer? The following are seamless ways to capture your PC’s screen, whether you want to create a step-by-step tutorial or a product demonstration guide for your remote staff. Let’s explore the features and step-by-step guides for each tool:
Method 1. Snipping Tool
Snipping Tool is a built-in screen recorder for Windows that lets you record anything on your screen with a single click. The best part is that you don’t have to deal with intricate installation techniques or require any prior setup. The snipping tool includes numerous screen-recording options, including whole screen and custom areas.
Apart from its numerous benefits, the Snipping Tool has some drawbacks as well. For example, users cannot change the resolution or format of the screen recording. Additionally, Snipping Tool is only available for Windows 11 version “22621.1344” or higher.
Key Features
- This tool has an intuitive and easy-to-use interface that is suitable even for beginners with no technical knowledge.
- The Snipping tool seamlessly records screens with system and microphone audio.
- You can also capture screenshots via the Snipping Tool.
- It allows you to directly edit the screen recordings via Clipchamp on a Windows PC.
Step to Screen Record PC via Snipping Tool
Follow the step-by-step guide to screen record PC via the Snipping Tool:
Step 1. Before proceeding further, check whether your Windows 11 PC supports Snipping Tool screen recording! Navigate to “Settings>System“. Click on “About“. Check the Windows 11 version, i.e., 22621.1344 or higher.
Step 2. Go to the search bar and type “Snipping Tool.” Launch the Snipping Tool on your Windows 11 PC. Click the “Record” button next to the Camera icon. Select the area that you wish to record on your screen.
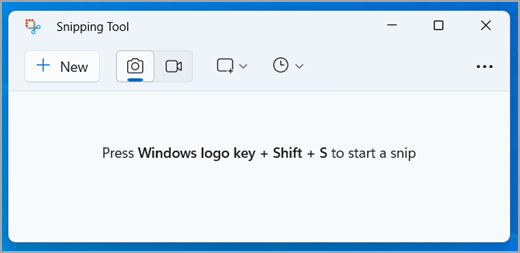
Windows 11 Snipping Tool
Step 3. You can also choose to enable or disable the system audio and microphone. Click “Start” to initiate the screen recording.
Method 2. Xbox Game Bar
Whether your PC runs Windows 10 or 11, you can utilize the built-in Xbox Game Bar. Xbox Game Bar offers various customization options to choose from! You can adjust the resolution, frame rate, audio settings, and more from the settings.
Don’t get confused with its name, as the tool was integrated into the Windows operating system to record games, but you can utilize it to capture PC screens for various other purposes, such as recording tutorials, instructional videos, or presentation lectures.
Xbox Game Bar is also not at all about the positive sides as it also comes with some drawbacks. Some of these include time limit restrictions and limited recording ability. The recording time limit of 4 hours can affect the experience of gamers and professionals who need to capture screens for a longer duration. Moreover, the tool doesn’t allow you to edit your recordings. Last but not least, you can record the entire screen, such as the Desktop screen and File Explorer, but not the applications simultaneously with Xbox Game Bar.
Key Features
- This tool allows you to adjust the quality parameters, such as frame rate and resolution.
- It doesn’t require any installation to record screens with the Xbox Game Bar.
- This tool displays the computer’s performance alongside screen recording features.
- You can also capture screenshots using the Xbox Game Bar.
Step to Screen Record PC via Xbox Game Bar
Follow the step-by-step guide to screen record PC via Xbox Game Bar:
Step 1. Launch the Xbox Game Bar on your HP Laptop. There are two ways to launch it: via a search bar or shortcut keys. Search “Xbox Game Bar” in Windows search or press the Windows key + G (Shortcut keys) on the keyboard to open it.
Xbox Game Bar
Step 2. Click on the “Settings” button from the above toolbar to adjust the settings, such as widgets, shortcut keys, and more.
Step 3. You can configure the settings such as maximum recording length, video frame rate, video quality, cursor movement capture, and more.
Step 4. Navigate to “Settings> Gaming and then “Captures.”
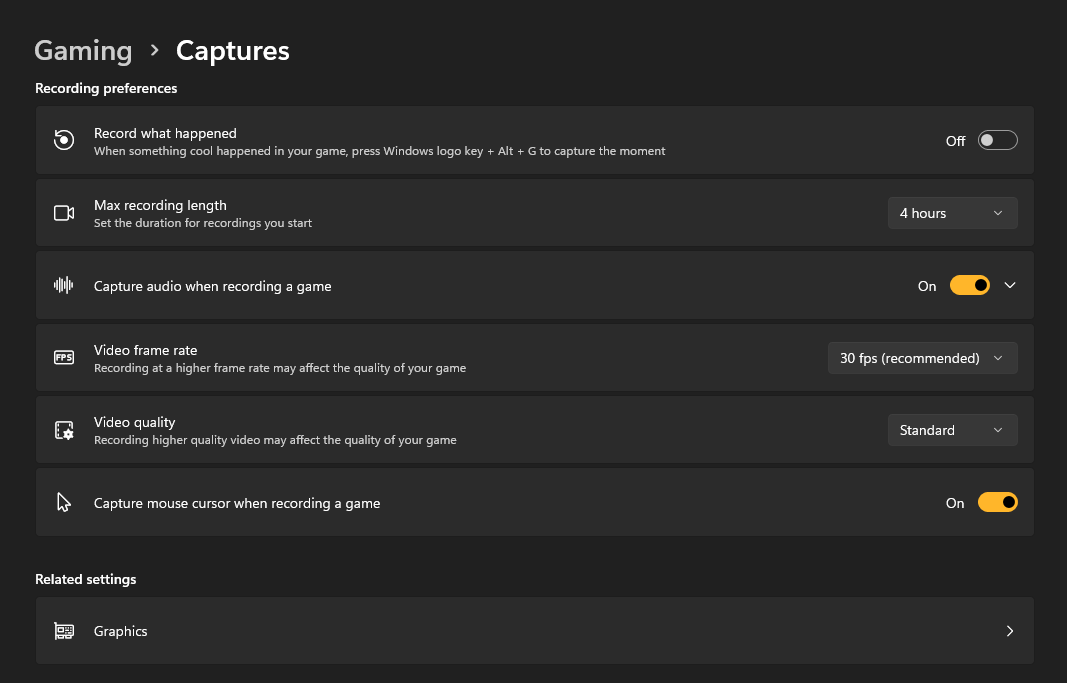
Gaming Capture
The maximum video length can go up to 4 hours, and the frame rate is 60 FPS.
Step 5. Choose to record the “System Audio” and “Microphone” or both during the screen recording. Adjust the volume with the sliders. Once done, click the “Start Recording” button to begin screen recording.
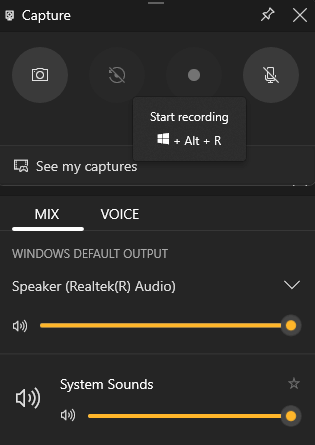
Choose Start Recording
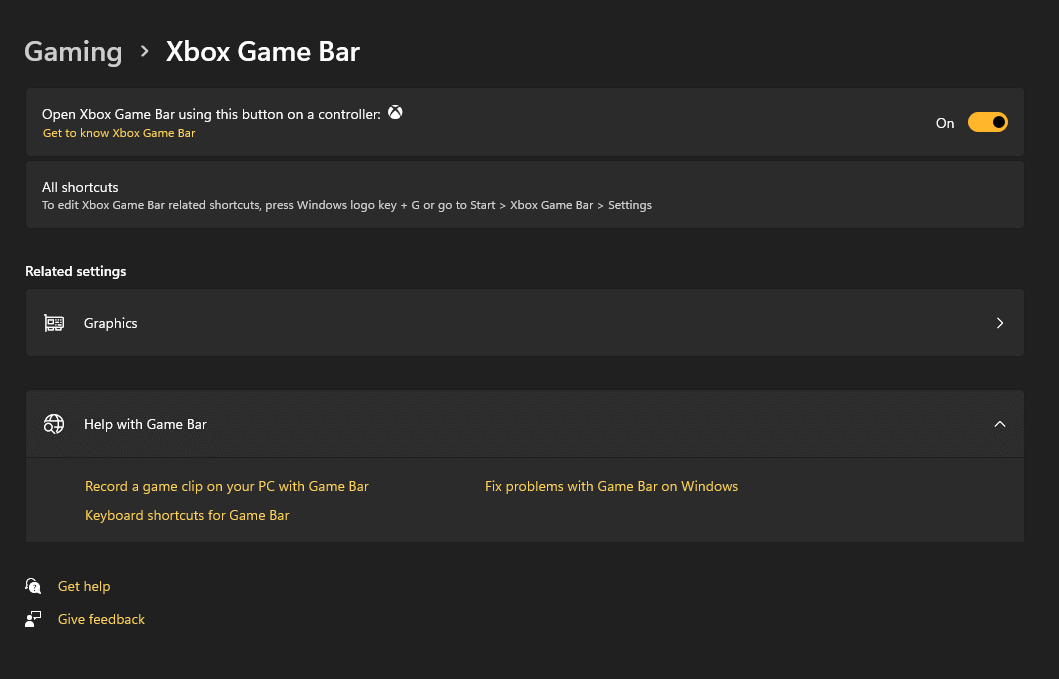
If Xbox Game Bar is not opening on your HP laptop, you’ll need to enable it first from the settings. Navigate to “Settings” on your PC and then “Gaming“. Click on “Xbox Game Bar” and toggle to turn it ON.
Method 3. Screenify: Free Alternative for Windows 10/11 (Mac)
Want to fill the gap with a third-party tool? No worries! We recommend using Screenify— a free 4K screen recorder for PC with all the advanced functionalities a professional needs! Screenify is an all-in-one screen recorder that allows you to capture what’s happening on the screen.
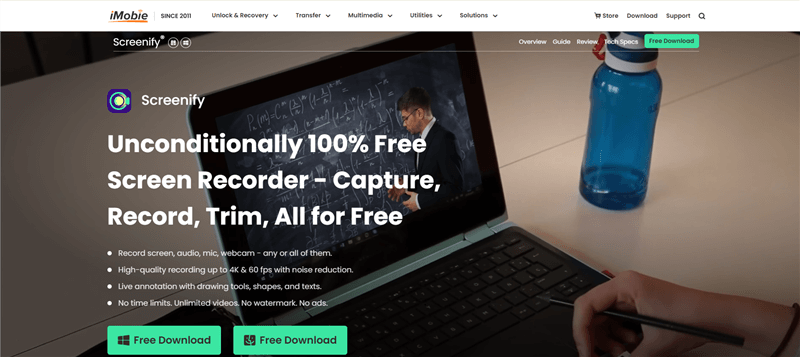
Screenify Website Interface
Record your PC screen in 4K resolution at 60 FPS to avoid blurriness and interference. Moreover, there is no time limit for the screen recording; you can record visuals for as long as you want without worry. Additionally, you can adjust the volume for each audio source, i.e., system sound and microphone, and you can even use the noise reduction feature to minimize the noise level. The tools also allow you to set the watermark or disable it freely.
Key Features
- Record screen visuals alongside audio (system sound, microphone, or both).
- Screenify allows you to record PC screen in 4K quality with 60 FPS settings without any watermarks.
- There is no screen recording time limit; you can export the recording in various formats.
- Utilize the noise reduction features to minimize the noise level.
How to Record Screen Via Screenify
Step 1. Download and install Screenify on your computer. Open Screenify and choose the “Record Screen” option.
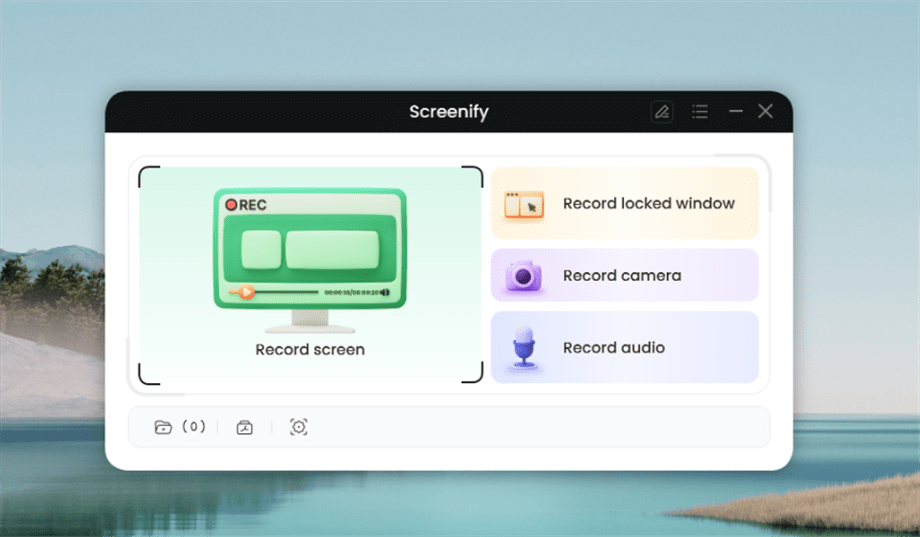
Select Record Screen Mode
Step 2. Adjust your recording settings, such as system audio, before starting.
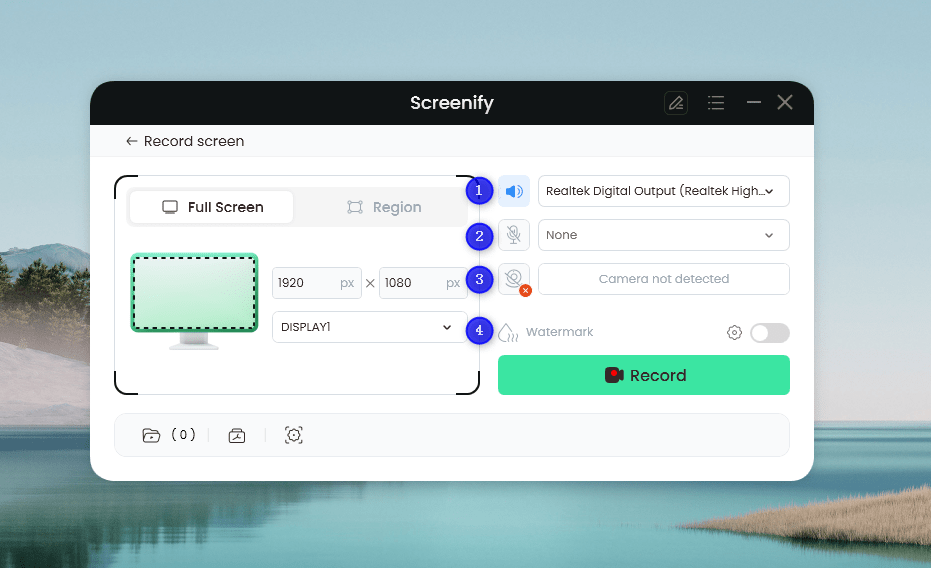
Set Configure Recording Settings
Step 3. Select the recording area—choose “Full Screen” or highlight a specific region. Click “Record” to begin. You can also adjust the area for social media sizes if needed.

Screenify Full Screen Record
Step 4. Wait for the 3-second countdown to get ready. Recording will start after the countdown. You can add annotations during the capture if you wish.
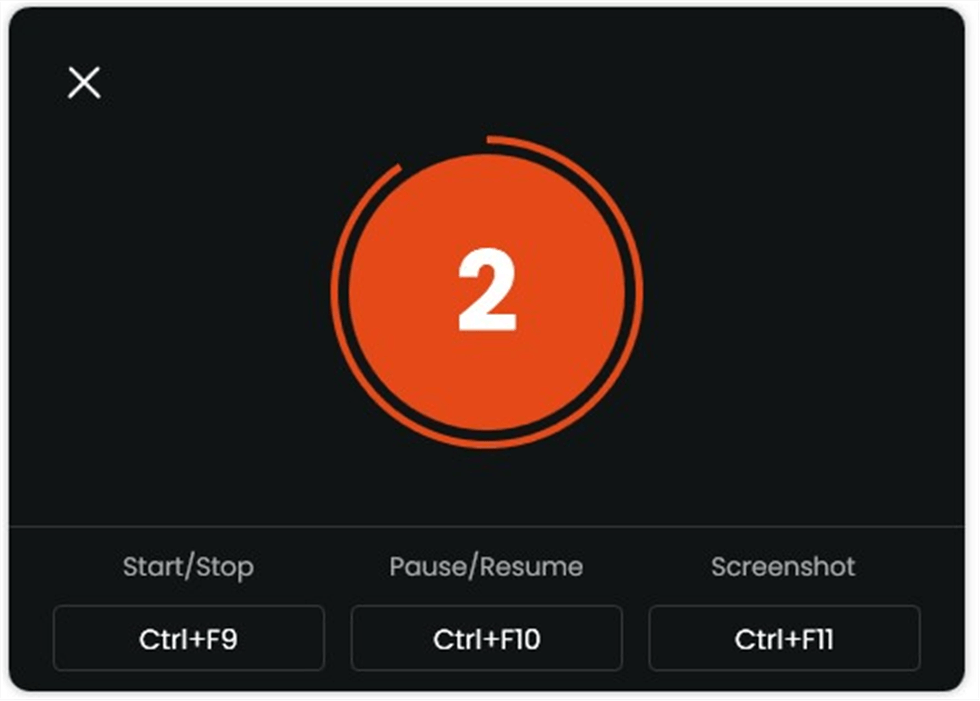
Start recording countdown
Step 5. Click the red “Stop” button to finish. Preview and manage your recorded videos afterward.
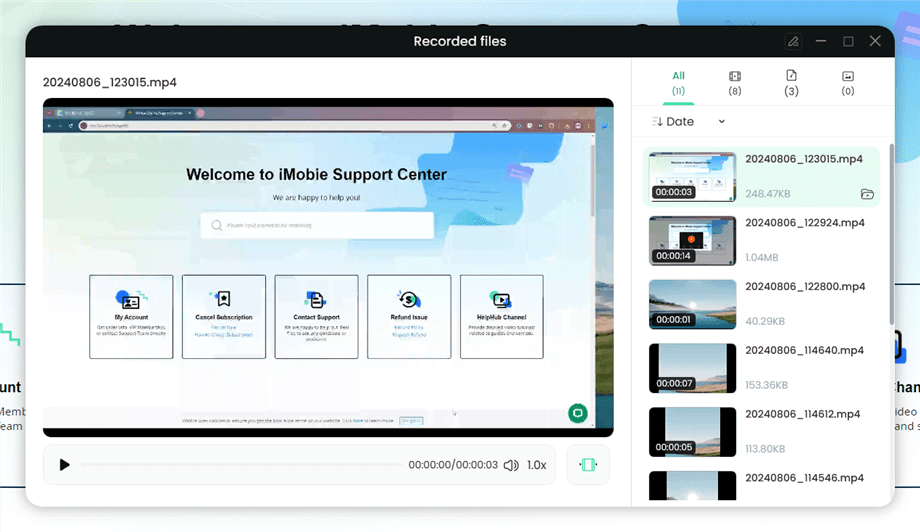
Preview the Recording
Part 4: Bonus Tip: How to Screen Record on Mac
MacOS also offers a built-in screen recorder named QuickTime Player. Since it comes with some limitations such as no system sound recording, you can utilize an alternative third-party tool. Let’s explore!
Method 1. QuickTime Player
QuickTime Player is the Mac’s built-in screen and audio recorder software, making recording simple even for beginners. It allows users to capture displays in 4K quality at 120 FPS. Basic editing functions like cutting, dividing, and reordering are accessible.
Although QuickTime Player offers a seamless screen and microphone sound recording ability, it cannot record the internal system sound by default, and you’ll need to install a third-party tool for this purpose.
Key Features
- QuickTime player can record screen alongside microphone audio seamlessly in high quality.
- You can record visuals up to 4K with 120 Frames Rate Per Second (FPS).
- You can customize the basic settings, such as the audio input source, cursor visibility, etc.
Step to Screen Record PC via QuickTime Player
Follow the step-by-step guide to screen record PC QuickTime Player:
Step 1. Launch QuickTime player on your Mac. Click on “File > New Screen Recording.”
Step 2. Click the down arrow to select the audio input, such as “Internal Microphone.”
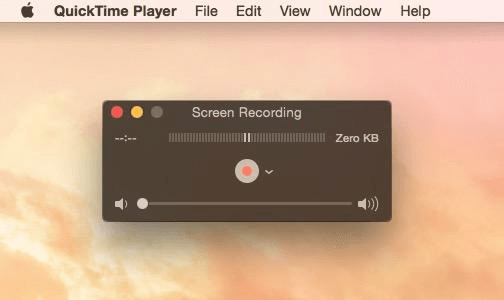
Select the Audio Input
Step 3. Click the “Record” button to start the screen and audio recording on your Mac.
Method 2. Screenify
Mac users can have flexible screen recording options as the tool comes with dual recording modes. It enables you to record either full-screen content or a region/part of it. It lets you lock the window, and no other contents will be recorded, ensuring safety and privacy on your Mac system. This tool has many exceptional features on MacOS, including unlimited screen recording time and freely set watermarks.
Key Features
- Record Mac screen in 4K resolution at 60 FPS without blurriness and lags.
- Unlike QuickTime Player, you can record system audio and microphone sound seamlessly.
- Adjust the volume and speed of screen recording on Mac during playback.
- You can record what’s happening on the MacBook screen without any time limit.
Part 5: Conclusion
Looking for ways on how to screen record on PC? This article guide has summarized all the possible ways to screen record PC or laptop visuals in brilliant quality at higher FPS to eliminate lags and interferences. Apart from built-in Windows screen recorders with some limitations, we recommend using Screenify— a Windows and Mac screen recorder. It offers 4K resolution at 60 FPS without any time limits and watermarks.

Joy Taylor


Senior writer of the iMobie team as well as an Apple fan, love to help more users solve various types of iOS & Android-related issues.
 Screenify
 AnyEnhancer
 FocuSee
 Vozard
 AnyMiro
 AnyMirror