How to Record Screen on Mac Without External Audio
This guide covers why you might want to record screen on Mac without external audio and offers two methods: QuickTime Player and Screenify. You’ll also find answers to common questions about Mac screen recording and internal audio. Perfect for anyone looking for a simple solution. Explore how to screen record on Mac without external audio.
Capturing the screen of your Mac without the external sound is suitable if you merely want to display the content of your screen to the audience without the distraction of any audio. Whether you are creating a tutorial, presenting a lecture, or just sharing something with a friend, it is quite possible to pay all your attention to the internal sounds of your Mac. In this guide, we will walk you through how to achieve this step by step so you do not have to worry about any form of interference.
We’ll show you two simple methods: QuickTime Player, a native Mac application, and a reliable third-party tool named Screenify, which can assist with improved noise reduction. At the end of this article, you should know how to screen record on Mac without external audio interference to produce quality videos. So, let’s begin!
You may also like: How to start and stop screen recording on Mac
Why I Want to Record Screen on Mac Without External Audio?
Recording your screen on a Mac without external audio is useful when you want to focus only on the internal sounds, like system notifications or app audio, without picking up background noise. Some reasons to pick this approach are:
- Clearer Tutorials – Tutorials and guides are more professional and easier to follow without background noise.
- Privacy Concerns – You can avoid capturing private conversations or unintended sounds happening around you.
- Focus on Internal Audio – If your video relies on internal app sounds, external audio can be distracting.
- Less Editing Time – Removing unwanted background noise saves time on post-recording audio edits.
- Professional Presentations – Your screen recordings will look cleaner for presentations and demos without external noise.
Screen Record on Mac Without External Audio Using QuickTime Player
QuickTime Player integrates into Macs by default, making it quite convenient and efficient for screen capturing with no extra sound. There is no need to install the app and is free to use. Additionally, it allows you to focus on internal audio only, so you won’t capture any background noise. This is perfect for creating tutorials, presentations, or app demos where only your screen and internal sounds are important. Apart from screen recording, QuickTime Player never disappoints even with the editing. You can trim, split, and rearrange video recording clips seamlessly right from within the tool.
QuickTime also enables you to record in high resolution, so your screen captures are clear and polished. This screen recording tool allows users to record a Mac screen in 4K resolution at 120 frames per second (FPS).
Key Features:
- Basic editing functionalities such as trimming, splitting, and rearranging are available.
- Record the screen of your MacBook up to 4K with 120 Frames Rate Per Second (FPS).
- No installation is needed, as this screen recorder is a built-in tool for Mac.
- Choose the display of the cursor movement while screen recording.
Here are the steps for recording with QuickTime Player without external audio:
Step 1. Open QuickTime Player from your Applications folder. Then, click “File” in the menu bar and select “New Screen Recording.”
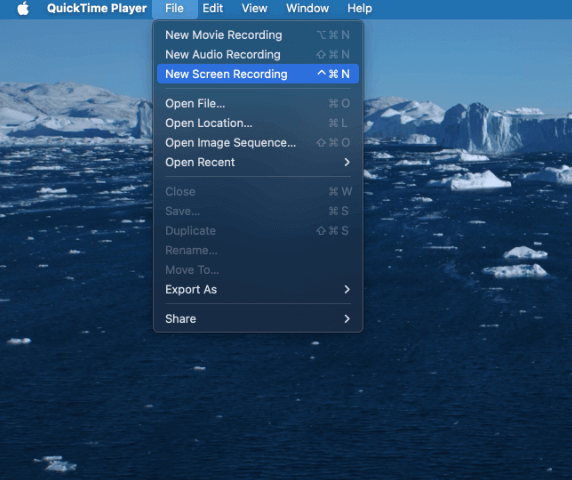
New Screen Recording in QuickTime
Step 2. Before starting, click the arrow next to the “Record” button and choose “None” for the microphone to avoid capturing external audio.
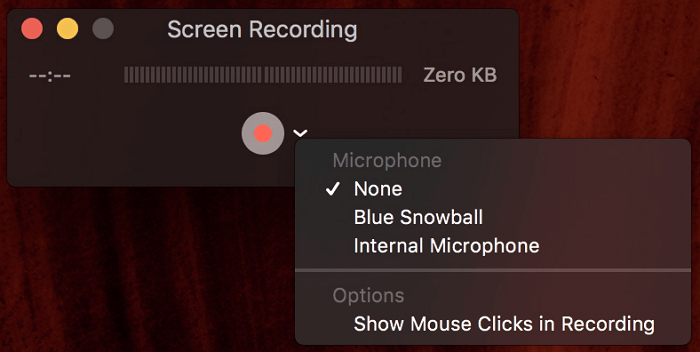
Select Microphone for QuickTime Recording
Step 3. To begin recording, click the “Record” button. You can choose to record your entire screen by clicking anywhere on it, or you can select a specific portion by dragging your cursor over the area you want to capture, then click “Start Recording” to begin.
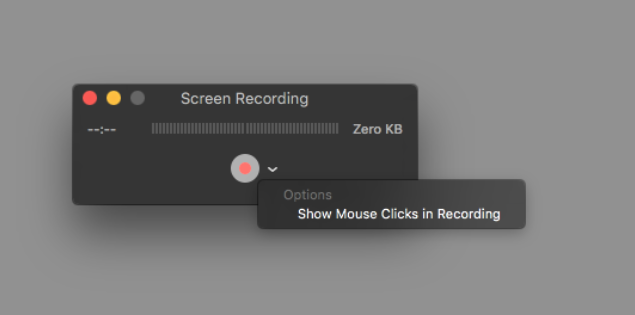
QuickTime Screen Recording
Step 4. To stop recording, click the “Stop” button in the menu bar or press Command-Control-Esc (Escape). QuickTime Player will automatically open your recording for you to view, edit, or share.
Record Screen on Mac Without Background Noise with Screenify
If you want to record your screen on a Mac without recording external audio, Screenify is a great option. This very accessible utility is available for free on both Mac and Windows platforms. It ensures high-quality screen recordings with an infinite recording period and support for 4K video at 60 frames per second. Unlike the built-in screen recorder on Macs, you may record with and without system audio and microphone sound with ease. Additionally, noise reduction technologies let you capture distraction-free audio that is clear and sharp.
With Screenify, you can easily add text watermarks to your videos, making them more personalized. It also offers multiple recording modes, whether you want to record the full screen, a specific region, or lock to a particular window. Additionally, it supports various file formats and lets you crop videos effortlessly for a cleaner presentation.
Key Features:
- Full-Screen Recording – Easily capture everything happening on your display with full-screen mode.
- Region Selection – Manually select and adjust specific regions to record only the parts you need.
- Lock Window Recording – Record a specific app window without including background activities or interruptions.
- Audio Recording – Capture system or microphone sound with adjustable volume and noise reduction options.
- Camera Recording – Record your webcam with mirroring, zooming, and watermarking options.
Here are the steps to use Screenify effectively for screen recording Mac:
Step 1. Begin the process by downloading and installing Screenify.
Step 2. Access and launch Screenify and choose “Record Screen.”
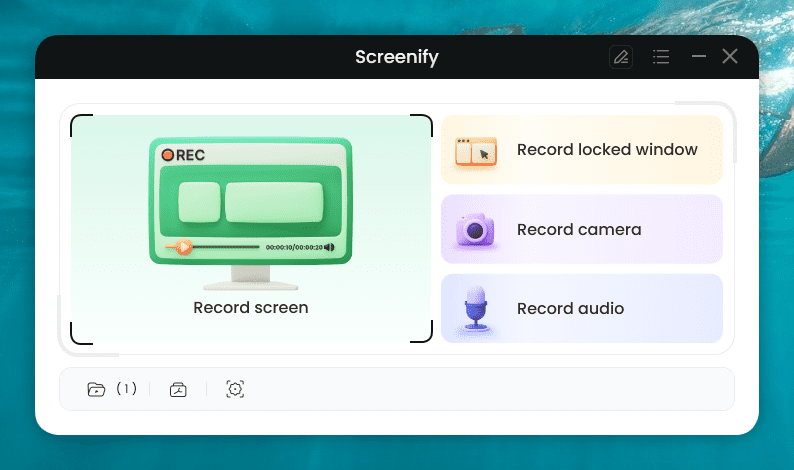
Screenify Main Screen
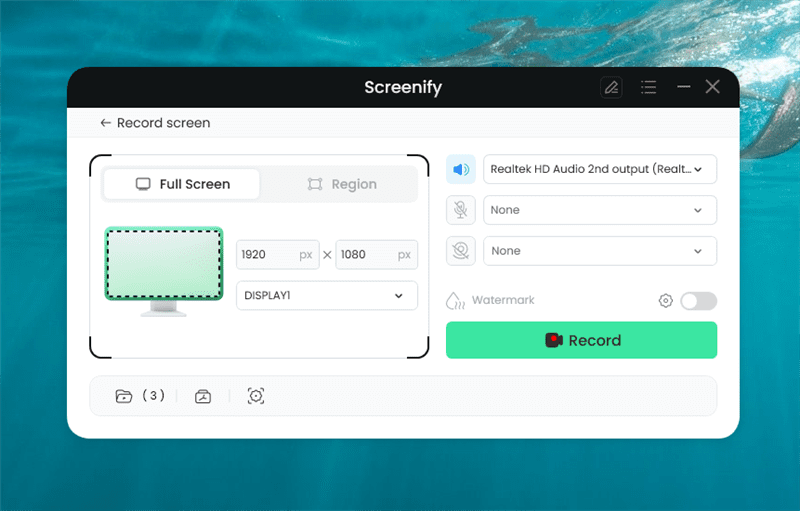
Step 3. Customize your recording settings, including audio preferences, before you begin.
Step 4. Choose your recording area by selecting “Full Screen” to capture everything or manually highlight a specific region. Adjust as needed for social media formats, then click “Record” to start.
Screenify Full Screen Record
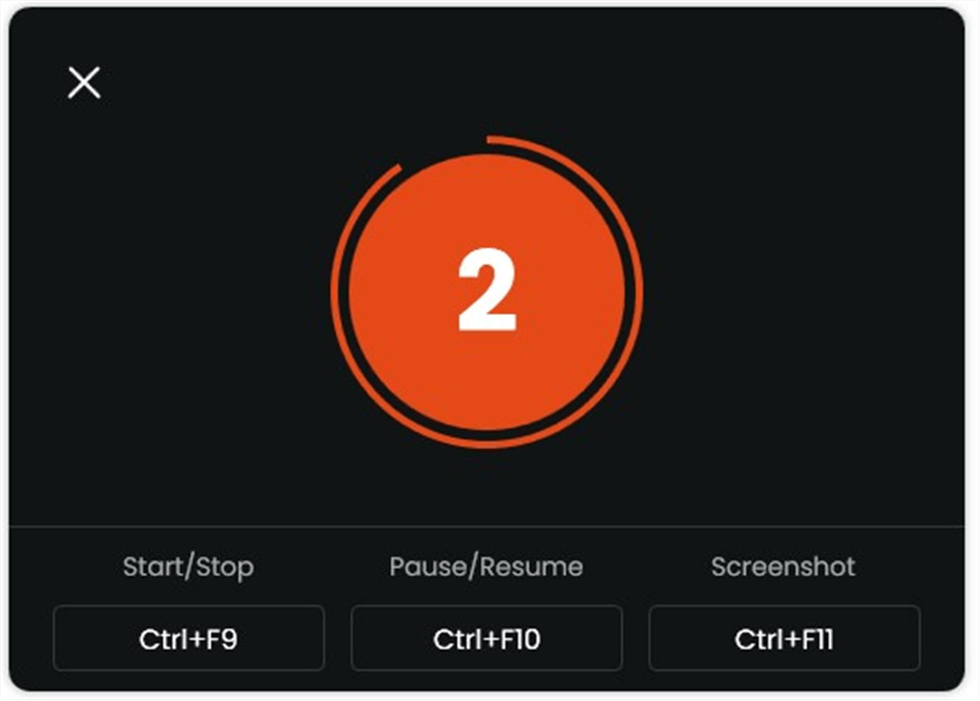
Step 5. A 3-second countdown will give you time to prepare.
Screenify Recording Countdown
Step 6. Once the countdown finishes, recording will start, and you can add notes or annotations if desired.
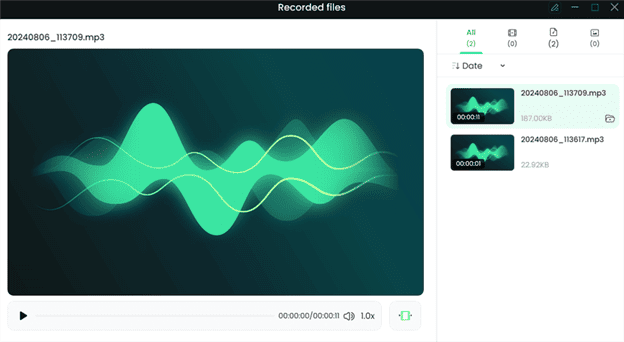
Step 7. Click “Stop” to end the recording. You can then review and manage your video.
Preview and Export Recorded Files
FAQs about Mac Screen Recording
1. Does Mac screen recording not record audio?
If you are using a Mac and find yourself having no sound while screen recording, you use a tool that records only the video. Screenify screen recording tool can help you record both internal and external audio seamlessly.
2. How do I record screen on Mac with internal audio?
Open QuickTime Player, select “New Screen Recording” under File, and choose a microphone by clicking the down arrow next to the record button before starting the recording.
Conclusion
Mac users planning to record on-screen without external audio must use their chosen tools carefully. Regarding the audio settings of your recording, it is very simple to remove external noise with the help of QuickTime Player. Another great option is Screenify, which offers additional features and flexibility. With Screenify, you can record high-quality video, add text watermarks, and choose from multiple recording modes while ensuring no external audio is captured. For those who need a simple and effective solution, Screenify stands out as a top choice for recording your screen without any unwanted background noise.

Joy Taylor


Senior writer of the iMobie team as well as an Apple fan, love to help more users solve various types of iOS & Android-related issues.
Screenify
AnyEnhancer
FocuSee
Vozard
AnyMiro
AnyMirror


