How to Record Skype Calls Audio & Video
This article will teach us how to record Skype calls easily. We will learn three step-by-step efficient methods. We will also explore Screenify, a high-quality screen recorder with exceptional features. Moreover, every method has detailed images and guidelines.
Have you ever wished to record an important Skype call but can’t figure out the correct method? Worry not! Many people want to record Skype calls so they can replay them later. Some want to keep records of business meetings, while others want to record exciting moments. Recording Skype calls provides lifetime access to important calls. It’s also pretty simple.
In this article, we will learn three efficient methods. You can easily rely on this step-by-step guide to make your life easier. We will also learn about Screenify, which is the right solution for your needs. Let’s buckle up!
Part 1: How to Record Skype Calls
It is essential to know how to record Skype calls. You can directly record the calls in the app. But if you are quality-conscious and looking for quality softwares, how can we forget Screenify? Let’s dive in and explore each method step-by-step.
You can also get high-quality audio and video online using these methods.
Method 1. How to Record Skype Calls Using its Built-in Recorder
Skype’s built-in recorder makes it easy to record Skype calls. Skype is open-source software. The recording feature is accessible with one click. The magic is that Skype hides any unwanted background while recording.
You don’t have to worry about storage. The Skype call recording option is cloud-based. You can access the saved recording from any device. The recorded call on Skype is available for 30 days. You can easily download it on your computer at any time.
Let’s explore the detailed step-by-step guidelines.
Steps on How to Record Skype Calls Via its Built-in Recorder
Following are the detailed steps on how to record Skype calls:
Step 1: After joining your Skype call, tap the “Record Button” to start recording.
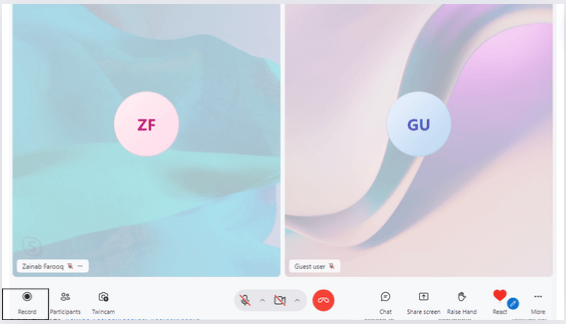
Click Record Button
Everyone will know that the call is being recorded.
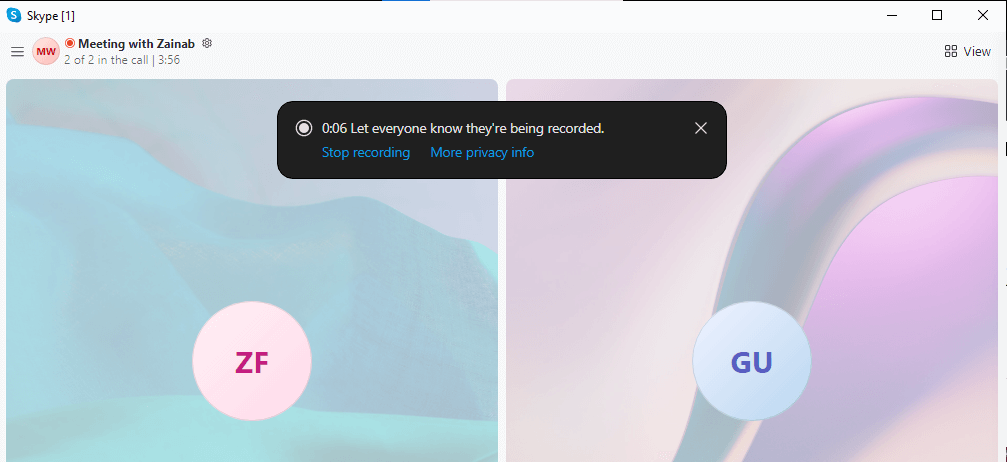
Notification of Call Being Recorded
Step 2: Stop the recording, and it will start saving in your chat.
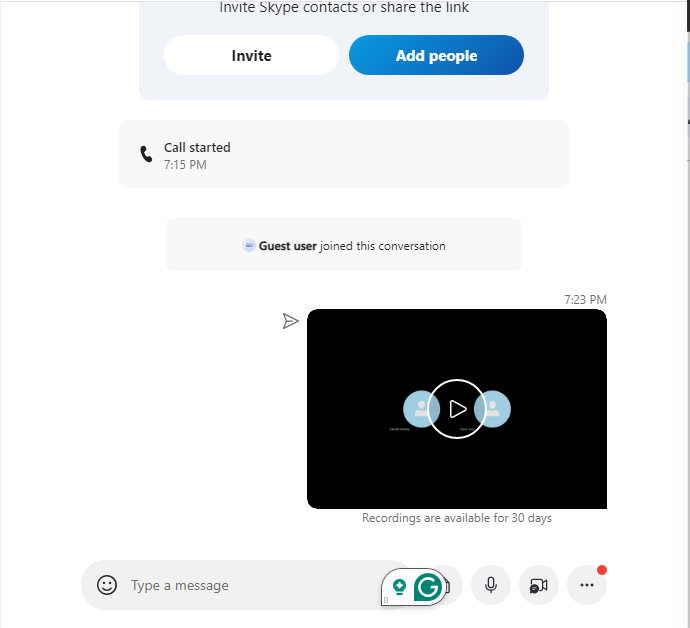
Recording Saved in the Chat
And boom! You have explored how to record Skype calls. This is how you can use Skype’s built-in feature easily. But it has some limitations as:
- Limited Recording Length
- Overall Quality Compromised
- Limited Storage Time
To gain a quality experience, continue exploring the following efficient method.
Method 2. How to Record Skype Calls Using Screenify for FREE
Screenify is a newly launched 100% free screen recorder with fantastic free features. It can easily record high-quality recordings with noise reduction. The plus point is that the recorded videos do not contain any watermarks or ads.
Say goodbye to limited and complex recording methods. Say hello to Screenify, which helps you record Skype calls smoothly, limitlessly, and freely. Get ready to have a worry-free and seamless recording experience. You can easily download the software within seconds.
Free Download * 100% Clean & Safe
Now, let’s explore the step-by-step guide.
Steps on How to Record Skype Calls Via its Screenify
Here is a detailed guide on how to record Skype calls using specialized Sceenify software:
Step 1: Firstly, download and install Screenify.
Step 2: Select the recording area. You can choose the entire screen or just the Skype window.
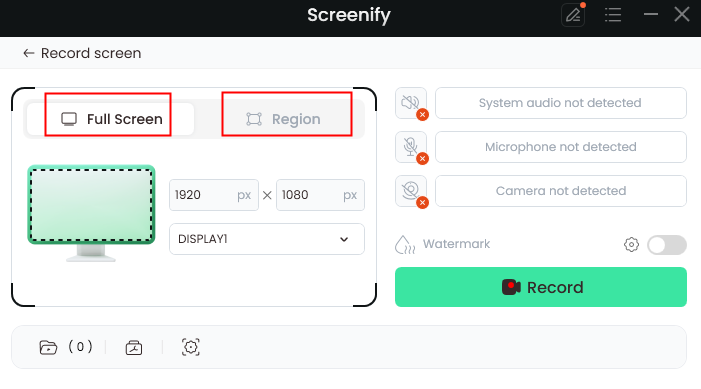
Choose Full Screen or Region
Step 3: Start your Skype call and click the “Record” button on Sceenify to start recording.
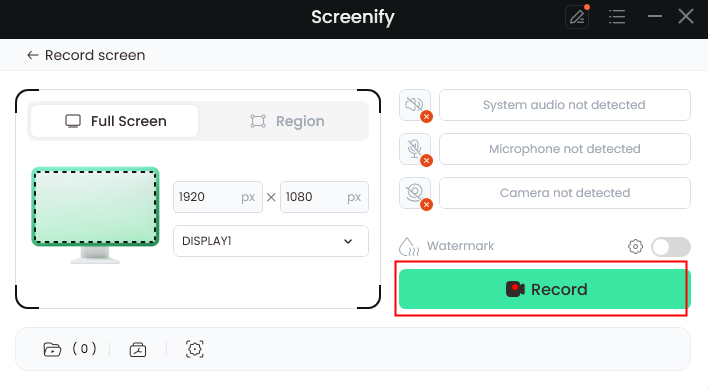
Choose Record
You can do the settings according to your requirements.
Step 4: Once your Skype call is finished, click the “Stop” button in Screenify.
Step 5: Save the recording of the call to your desired location on your computer.
Here you go! You have explored how to record Skype calls with the best quality. Screenify also has many unique features. Don’t forget to examine them. Let’s move forward to the next method.
Method 3. How to Record Skype Calls Using OBS Studio
The OBS Studio is a powerful open-source software tool for recording calls. It allows you to record Skype calls quickly and is used for recording videos and streaming. A wide range of content creators love to use it.
OBS Studio is completely free to download and install on any operating system. Beginners or advanced professionals can access it. Because of its simple user interface, it is top-quality software.
Steps on How to Record Skype Calls Via OBS Studio
Here are the steps to easily record Skype calls using OBS Studio:
Step 1: Visit the official website and download the OBS Studio. Select your operating system. After downloading the setup, install it.
Step 2: After opening OBS Studio, click the “+” button under the source. Select the “Window Capture.”
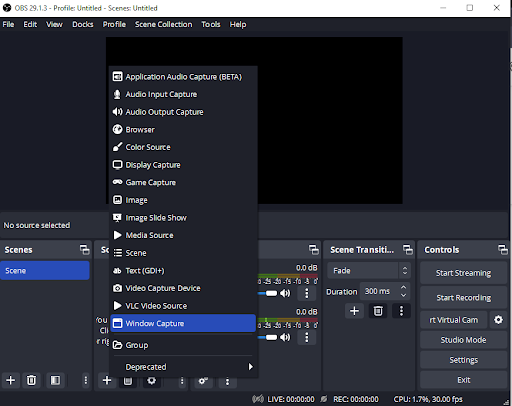
Open the Window Capture Option
Step 3: Then, choose the Skype Window.
Step 4: Start your Skype call and click “Start Recording” in OBS Studio.
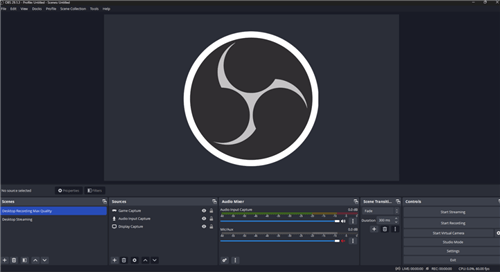
Start Recording
Step 5: After your Skype call, click “Stop Recording” on OBS Studio. Your recording will be easily saved on your computer.
It is efficient and fast to record Skype calls using the powerful OBS Studio.
Part 2: Frequently Asked Questions
Frequently asked questions on how to record Skype calls include:
Q1. Can I record Skype calls without notifying other people?
No. The built-in Skype recorder notifies everyone on the call for privacy reasons.
Q2. Is it legal to record Skype calls?
You must inform the person in the meeting that the call is being recorded, regardless of the situation.
Q3. What is the most efficient software for recording Skype calls?
You should consider your needs when choosing. Screenify is free and offers high-quality unlimited recordings.
Q4. How to improve the quality of recording Skype calls?
Ensure a stable internet connection and use software like Screenify for HD-quality recordings.
Q5. Where are the Skype call recordings saved?
Built-in recorder recordings are saved in the chat and from other software in your chosen location.
Conclusion
Recording Skype calls for business purposes, study groups, or podcasts is advantageous. Depending on your needs, you can use different software. These software include Screenify, Skype’s built-in recorder, or OBS Studio.
This article is a complete guide to whether you prefer beginner or advanced tools to record Skype calls. Don’t forget to download and use Screenifly to enjoy its endless benefits. Capture every moment and important detail today!
Product-related questions? Contact Our Support Team to Get Quick Solution >

