10 Ways to Record PC Gameplay
Got some epic gaming moments you will like to share with friends but don’t know how to record your PC screen? You are in the right place. In this article, we will share with you a comprehensive guide to recording gameplay screens on any PC with high quality.
Recording your gaming screen is one of the best ways to capture and share those epic moments, and mind-blowing tricks you pulled while playing your favorite games on PC. It’s a great way to source income if you are a content creator looking to provide gaming content, such as tricks, etc., to your audience on YouTube, Twitter, Facebook, Twitch, and other interesting social media platforms.
There are numerous ways to record your gameplay screen on a PC, but this post will focus on the 10 simple yet effective techniques that you can follow. Each technique has been confirmed by experts to generate lossless quality results and is easy to implement. Let’s get started.
4 Easy Ways to Record Gameplay on PC
Select, and apply any of the four (4) techniques demonstrated below to record your gameplay screen on PC:
1. Capture Gameplay Screen on PC Using Screenify
Screenify is a world-leading game recording solution well known for recording top-notch videos on both Mac and PC. This software permits you to record all sorts of games, from action to soccer, tennis, adventure, arcade, and more, that you have on your PC in one of the best resolution formats, usually Full HD/4K.
The sleek user interface makes recording easy and quick for all end-users, whether tech literate or not. Another great advantage of this software is the capability to record in multiple dimensions, as it allows you to capture your full screen, specific portion or windows. Gamers find Screenify handy because of the flexibility in usage.
Screenify allows you to configure/enter your preferred recording parameters, such as the selection of audio source, resolution quality, recording dimensions, and more. So you can add more life to your recordings, this software lets you annotate your gaming screen using the drawing tools, shapes, stickers, texts, cursor effects, stylus, and more.
Key Features
- 1-click to record your gameplay screen on PC/Mac.
- Offers 4 recording modes, such as screen only, screen + camera, audio only, and camera only, which covers nearly all types of project requirements.
- Record your gaming screen, webcam/camera plus audio simultaneously.
- Allows you to configure your device to record audio via external recorders, or the built-in sound recording system tucked into your PC/Mac.
- Besides gameplay, Gemoo Recorder Lite can capture other on-screen activities, like podcasts, live streams, YouTube clips, and many more.
Step 1: Free download Screenify Gemoo Recorder Lite from the official website. Launch the app and select the desired mode.
Free Download* 100% Clean & Safe
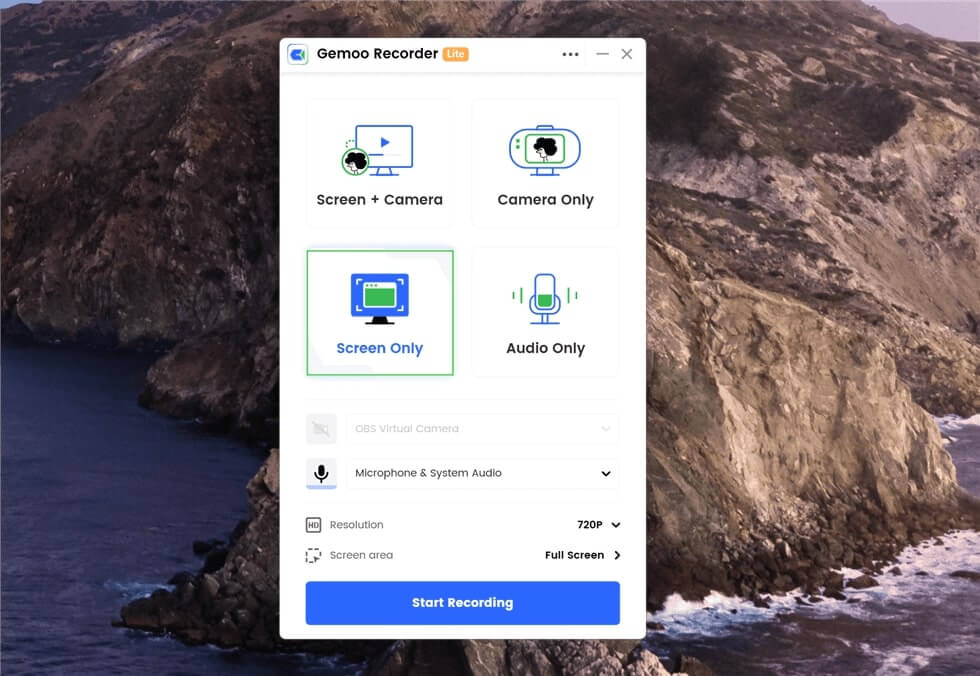
Choose the Recording Mode
Step 2: Click on “Start Recording.” A countdown will appear on the screen before the recording starts.

Start Screen Recording
Step 3: Once you have recorded your gameplay, click on the red button. You can also stop the recording by clicking on the “Finish Recording” button.
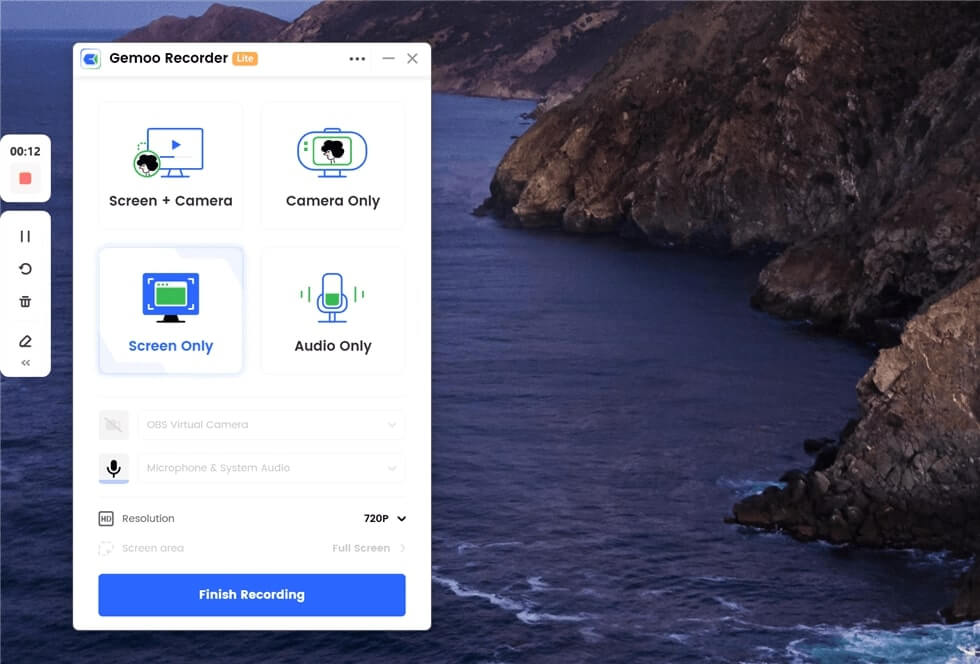
Finish the Screen Recording
2. Record Gameplay on PC via Xbox Game Bar
Xbox Game Bar is the built-in screen recording system tucked into PCs running on the Windows 10 or later operating system. Just as the name implies, this tool is capable of recording your gaming screen at an exceptional resolution of nearly 1080p, and 60FPS.
This game recording program ensures the smooth capturing of your gameplay screen at a zero fee. It has a clean UI and offers unlimited recording time. Xbox Game Bar records your screen in multiple dimensions, both full-screen and specific windows.
You can apply the steps below to record gameplay on PC using it:
Step 1: Move your cursor to the lower left corner of your PC, and click the search box. Enter Xbox Game Bar, and a couple of related searches will come up. Click the icon that corresponds with the keyword you entered, and Game Bar will open. Alternatively, you can click on the Windows + G button and a similar result will be generated.
Step 2: Next, a window requesting if you truly want to launch Xbox Game bar on your PC will automatically appear. Check the box beside Yes, this is a game, and the program will immediately open. When the program launches, you will find a window with the four buttons, start recording, stop recording, screenshots, and settings, just like below:

Record Screen with Xbox Game Bar
Step 3: Click on the appropriate button to start recording your gaming screen, then exercise little patience till the process is over. After that, hit the Stop Recording button to end the process.
3. Record Gameplay on PC OBS Studio
OBS Studio is another excellent screen recorder with high-demand.. With this software, you can capture your gaming screen on any PC with minimal stress. Due to its flexibility in usage plus its open-source nature, it is regarded as one of the best options for gamers worldwide.
Alongside your gaming screen, the software also works perfectly for livestreaming operations . This program offers the best streaming services, all thanks to the built-in GPU feature that lets you stream clips in high quality. OBS Studio is very simple to use and comes with a nice preset setting which you don’t need to tamper with before recording your gaming screen.
You can record your gameplay on PC using OBS Studio by following the stps down here:
Step 1: Launch the OBS Studio program. You will see similar page as below on your PC screen:
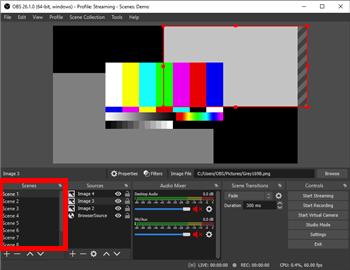
Record Screen with OBS Studio
Head to the Controls pane, and click on the Settings button so you can make some adjustments on the program.
Step 2: Next, click on the Start Recording button, which is situated underneath the Controls panel on the OBS Studio screen. After recording the gaming screen, hit the Stop Recording icon to end screen recording.
4. Use Medal.TV to Record Gameplay on PC
Medal.TV is another renowned game recording utility popular for capturing high-quality clips on any PC. This program stands out amongst others in the same industry due to the clip stitching and bookmark features tucked into it.
Use the stepwise guide shared down here to record gameplay on PC using the Medal.TV screen recording program:
Step 1: Install the Medal.TV program from the official homepage. Launch the program and proceed to set up the clip button.
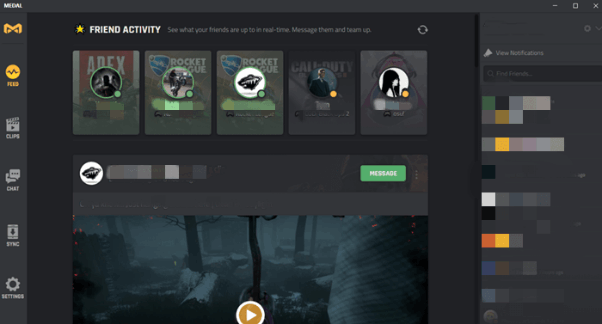
Record Gameplay via Medal.TV
Step 2: Once Medal.TV detects your gaming screen, just hit the preset button and the program will start recording the screen and then store in your local drive.
Step 3: When recording is finished, edit the corresponding clip and then bookmark it for future reference. After that, create a hashtag for the clip and share with your contacts on YouTube, or Discord channel.
Other Tools to Record Gameplay on PC
1. NVIDIA ShadowPlay
Got a Windows PC with the NVIDIA GPU integrated into it? Then screen recording isn’t a problem. Just install the GeForce Experience on your computer and you are good to start recording any on-screen activities that’s worth keeping for future reference. All thanks to the NVIDIA ShadowPlay program that comes with the installation.
NVIDIA ShadowPlay permits you to record your gameplay screen for several minutes or hours with high quality results. So end-users don’t struggle to operate this program, the interface is made beginner friendly.
One issue you might have with the NVIDIA ShadowPlay program is the poor quality output. The program saves your recordings according to the resolution format of your PC. This means, if your PC is 1080p, your recording is stored in 1080p.
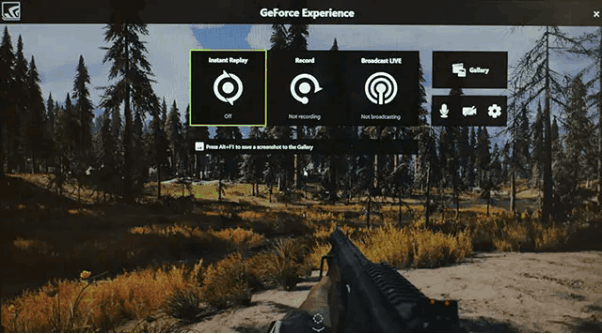
NVIDIA ShadowPlay Interface
2. Radeon ReLive
Radeon ReLive is the native screen recording program for AMD. Like the NVIDIA ShadowPlay program, Radeon ReLive lets you capture your gaming screen. So you can optimize your CPU, this program uses GPU for all recording operations.
Besides screen recording, this AMD screen recording utility also works well for live streaming. Unlike NVIDIA ShadowPaly, Radeon ReLive doesn’t depend on your monitor’s native resolution. This program can record up to 4K resolution format for a 1080p monitor. The only downside of this program is the limited recording functionality. Also, it doesn’t work with Mac computers.
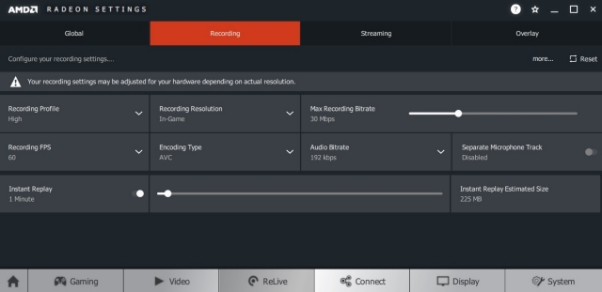
Radeon ReLive Interface
3. Bandicam
Bandicam is another popular game recording software used by both novices and professionals to capture their screen while playing their favorite games. This software captures your gameplay screen at high bitrates and frame rates. It’s capable of recording up to 4K ultra HD resolution.
Though not free, this screen recorder offers a trial version which could be used to verify the quality of its services. It comes with a lifetime subscription pricing plan of $39.95 that you can purchase to access all the features it holds.
With Bandicam, you aren’t limited to gameplay recordings. The software extends its services to other on-screen activities such as webinars, how-to clips, and more. It only works with Windows PC, so it’s not a great option for Mac users.
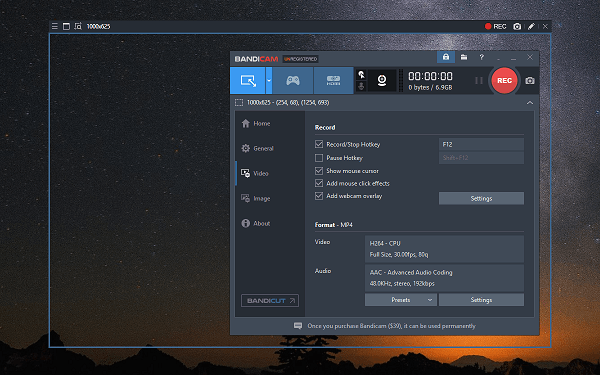
Game Recorder Software Bandicam
4. Action!
Established by Mirillis, Action! is another high-quality screen recording program with rich features to help you capture your gaming screen. This beginner-friendly program lets you record up to 4K resolution format videos with minimal stress. It also supports live streaming, on platforms like Ustream, YouTube, Twitch, and many others.
Action! uses GPU to process your recordings so there’s less pressure on your CPU. It comes with a Time-Shift feature, which is designed to help you go back in time to capture events that have happened 10 minutes before. Another cool feature tucked into this program is the Green Screen mode, which allows you to remove background while recording your screen. This program is expensive to use and has no option for users to customize their frame rates.
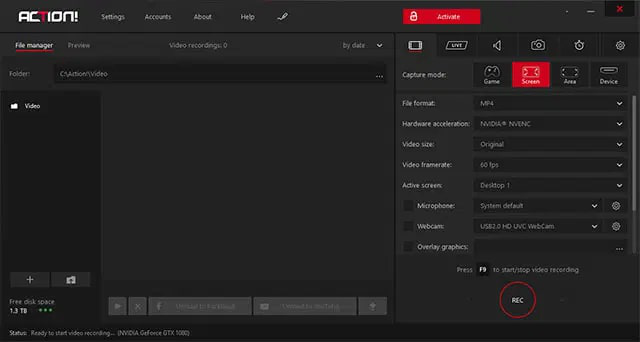
Game Recorder Software Action
5. D3DGear
D3DGear is another useful screen recorder that powers interesting features that you need for recording high-end clips on PC. It records gameplay to your taste. This program is very easy to install. It’s a cool option if you need a professional game recorder with video editing functionality. Like every other tool, it uses GPU for recordings and not CPU. This program supports limited features, and the interface is obsolete.
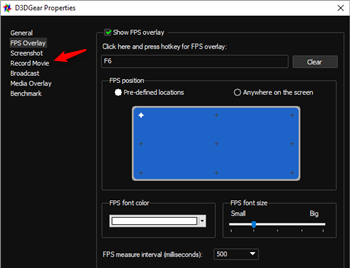
Record Screen with D3DGear
6. Fraps
Fraps is a lightweight screen recording tool with a simple interface for you to quickly record your gameplay screen on any Windows PC. This software comes with customizable frame rates (30-120 FPS), which you can easily adjust to suit your project needs. It lets you include a cursor in your recordings- one reason it’s a great pick for how-to videos, lectures, and any other related content. It doesn’t integrate with mobile phones or Macs.
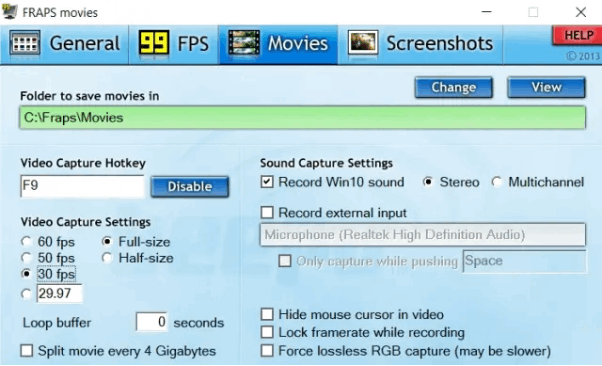
Fraps Interface
Final Words
We’ve demonstrated the 10 ways to record your gameplay screen on a PC. Choose, and apply the procedure that seems fit for you. Our best procedure is the one with Screenify. The software offers quality screen recording services.
Product-related questions? Contact Our Support Team to Get Quick Solution >

