How to Record Gameplay on Xbox One – 4 Methods Explained
Mastering how to record gameplay on Xbox One has never been easier. Our guide unveils four unique methods to capture your gaming moments. We have covered everything from Xbox’s innate features to specialized tools like Gemoo Recorder Lite. Now use these methods and beautifully preserve every significant in-game achievement.
Whether you’ve just executed a flawless combo or pulled off a jaw-dropping move, there’s an innate desire to share these moments.
The good news? The Xbox One offers various tools and features to capture those exact moments. And if you want to share them on YouTube, you can use a Capture card with Gemoo Recorder Lite.
We’ve got all the details of these methods here. This guide shows you how to record gameplay on Xbox One stepwise.
So why are we still waiting? Let’s start this with the built-in recording features of Xbox One.
How to Record Gameplay on Xbox One with Built-in Features
Xbox One has built-in recording features for its users. These features are tailored for both spontaneous captures and premeditated recordings.
Let’s say you’re deep into a game. And suddenly, an unforgettable event unfolds. It may be an unexpected victory, a close save, or a heart-stopping encounter. Often, these fleeting moments pass by before we even realize their importance. And we’re left with the wish to replay and save them.
This is where the Xbox One’s built-in recording features come to the rescue. Let’s see how to record short clips on Xbox One.
Steps to Record Short Clips on Xbox One
Step 1. While in the game, press the Xbox button on your controller. This action brings up a menu on your screen.
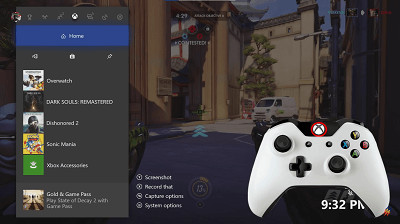
Press the Xbox button
Step 2. Without hesitation, press the X button on the controller.
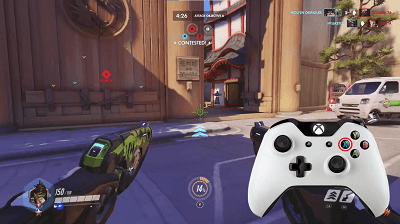
Press the “X” button
This simple command saves the previous 30 seconds of your gameplay, capturing that all-important moment.
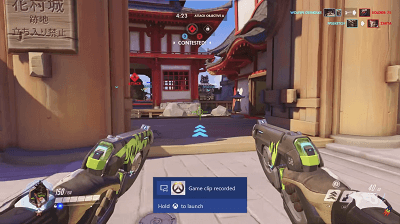
Game clip recorded
Important Note
- If you are capturing short clips on Xbox One, here are some things to remember.
- Bear in mind that certain games may restrict recording during specific sequences, especially during transition scenes.
- If you wish to capture the game in a still image, you can take a screenshot by pressing the Y button instead of the X button.
- The Xbox One offers flexibility in recording durations. You can adjust the length of your clip from the Broadcast & Capture Settings.
- Ensure that the “Background Recording” is turned on to capture these short clips.
But short clips are not always what we need. There are times when we need to record the gameplay from the start.
So let’s move on and see how to do it using the Game DVR of Xbox One.
How to Record Gameplay on Xbox One with Game DVR
Sometimes, a mere 30 seconds or a few minutes isn’t enough to capture the gaming experience. Especially for those who wish to provide a full gameplay walkthrough or share detailed tutorials.
For this, you need the Game DVR. It’s an Xbox One’s in-built feature that lets you record prolonged clips. This tool answers those wondering how to capture lengthy gameplay moments.
Steps to Record Gameplay on Xbox with Game DVR
1. Start your gameplay. Now click on the Xbox button located at the center of your controller.
2. Press the “View” button to open the capture options. A sidebar will appear. Select the “Record from now” option from this menu.
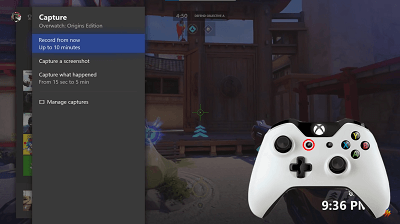
Press the “View” button
3. Now the game recording will automatically start. You’ll see a “Recording Started” popup at the bottom of your screen.
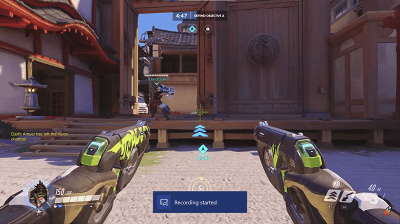
Recording started
Note: At this stage, if you wish to record extended gameplay, ensure you have an external storage device connected to your Xbox One. Then you can record for up to one hour using Game DVR.
4. To connect an external storage device, plug it into one of the Xbox One’s USB ports. Then go to Settings > System > Storage, and set the device as the capture location.
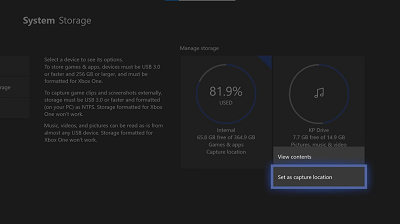
Set external device as the capture location
In Settings, you can also decide on the specific resolution from the recorded video.
Once saved, you’re all set to share your extended gameplay.
If you want to record for even more duration, you need the Windows Xbox Game Bar.
How to Record Screen on Xbox One with Game Bar
The Xbox Game Bar is a robust overlay tool for Windows. It is designed to provide gamers with a suite of functionalities. Among many Game Bar features, the standout trait is its screen recording.
Many gamers are accustomed to gaming directly on their Xbox One consoles. But still, there’s an increasing trend of playing Xbox games on Windows PCs or connecting the Xbox to a PC via a capture card. For such setups, the Xbox Game Bar can record gameplay continuously for up to 4 hours. Let’s see how to do it.
Steps to Record Screen via Xbox Game Bar
- Connect Xbox One to a capture card using HDMI. Then link the card to your PC.
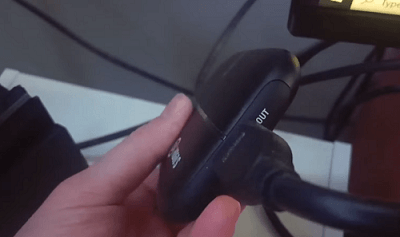
Connect the Xbox One to PC with a capture card
- Launch capture card software on the PC and ensure that Xbox gameplay is visible.
- Press the Windows + G keys together, bringing up the Xbox Game Bar.
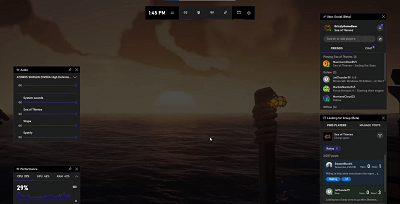
Start the Xbox Game Bar overlay
- Click the “Record” button from the “Capture” widget in the overlay. You can also use Windows + Alt + R as the hotkeys.
- When you end the recording, clips automatically save to “Captures” under your PC’s “Videos” library. You can also view them from the Game Bar by clicking “Show all Capture.”
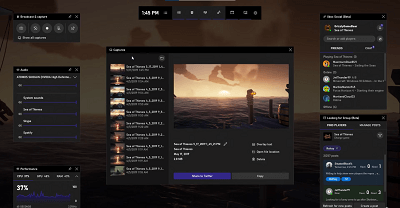
Showing all capture videos of Game Bar
- Now polish your gameplay with editing tools from the Windows Video Editor.
Now let’s move on to the last method. This method has been specially tailored for all YouTube gamers.
How to Record Gameplay on Xbox One for YouTube?
Screenify is a free screen recording tool that is particularly suitable for recording game content. It provides high-quality recording options that can capture every detail in the game and supports multiple recording methods to meet the needs of players.
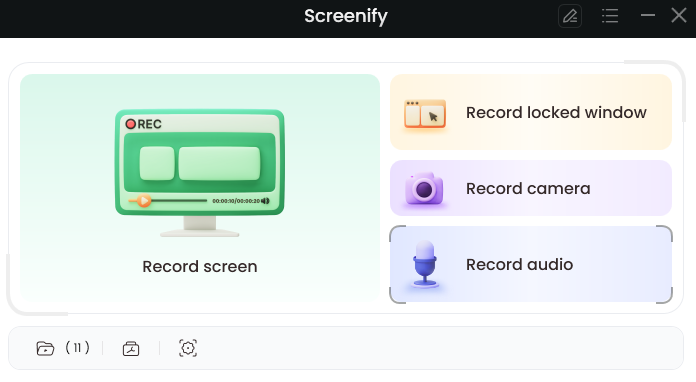
Screenify
Product Features:
- Free use: You can enjoy full recording functions without paying.
- High-quality recording: Supports HD game recording to ensure clear pictures.
- Multiple recording options: Provides full-screen recording, window recording, and custom area recording to meet different game recording needs.
- Easy operation: The interface is simple and the settings are simple, suitable for novice users.
Free Download * 100% Clean & Safe
You just need to follow the steps below:
Step 1.Download and Install Screenify on Computer.
Step 2.Launch Screenify on your computer, and select Record screen mode.
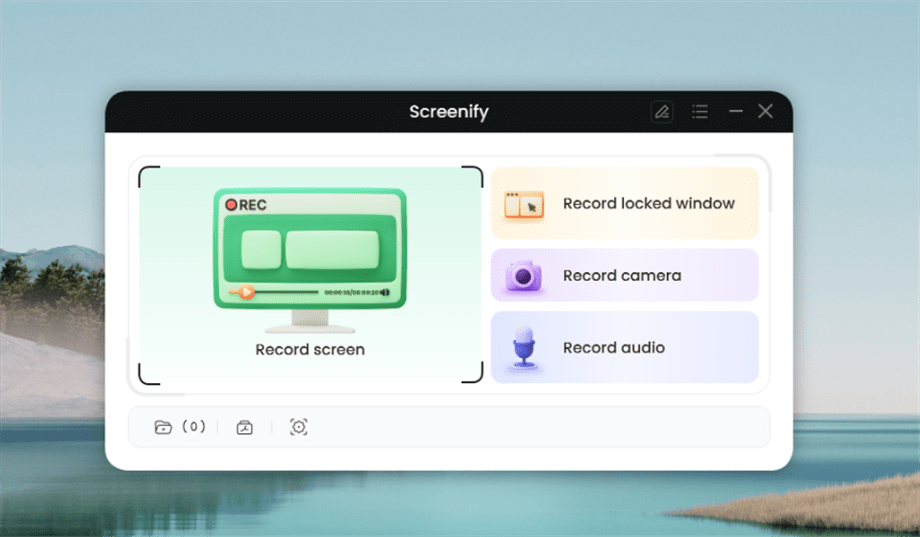
Select Record Screen Mode
Step 3.Configure Recording Settings aims to configure settings like system audio before recording.
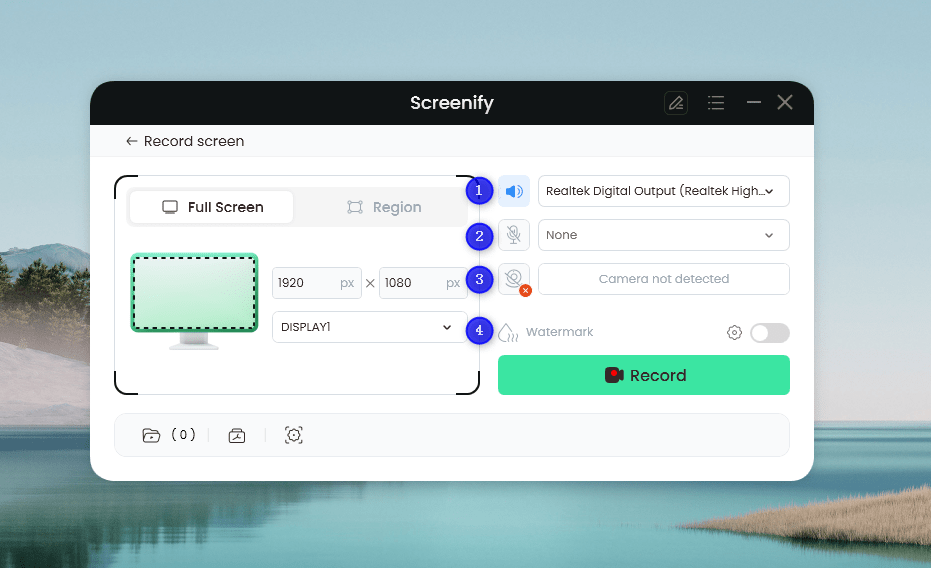
Set Configure Recording Settings
In this setting menu, you can:
1 Choose the System audio.
2 Choose the Microphone you want to record.
3 Choose the Camera you want to use.
4 Choose whether to add a watermark.
Step 4.Select Recording Screen.
Option 1. Full Screen Record
Please select Full Screen mode and choose the display you need to record. Hit Record button to initiate recording.
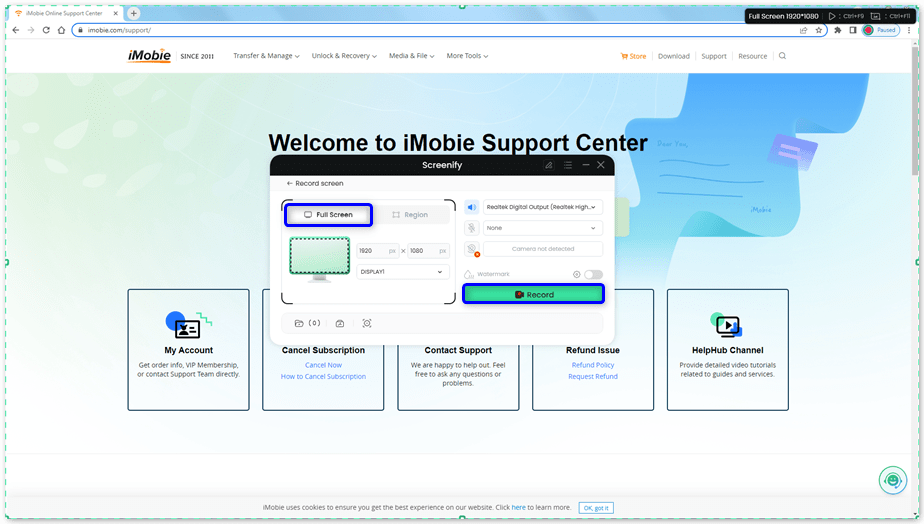
Select Full Screen
Option 2. Region Record
To record region, you need to manually select the recording area. After selection, you can still adjust the selected area. It supports customize selection, full screen, and proportional selection based on common social media dimensions.
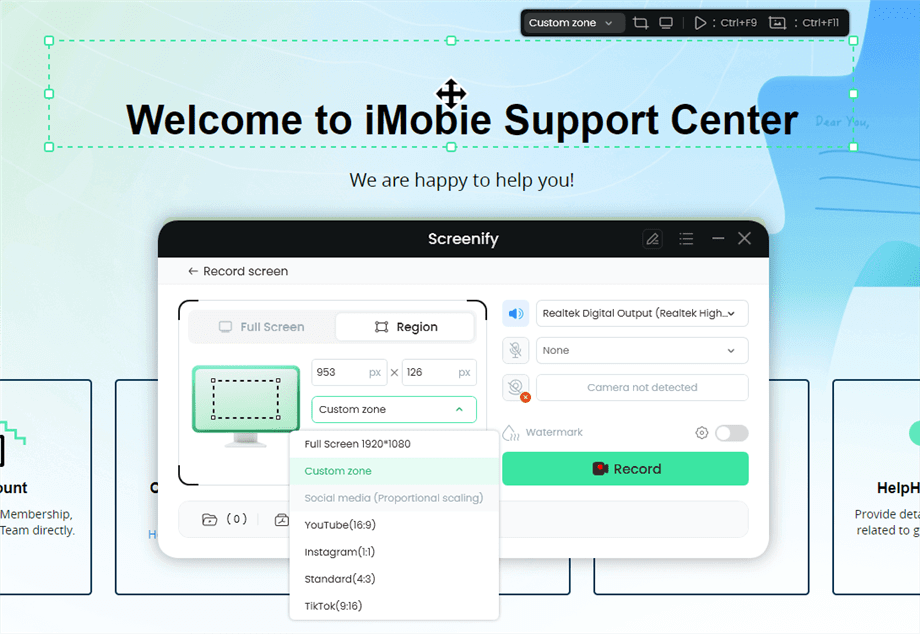
Record Region
Step 5.Wait for the Recording Countdown.
There is a 3-second countdown to help you prepare the recording after you are ready to start recording.
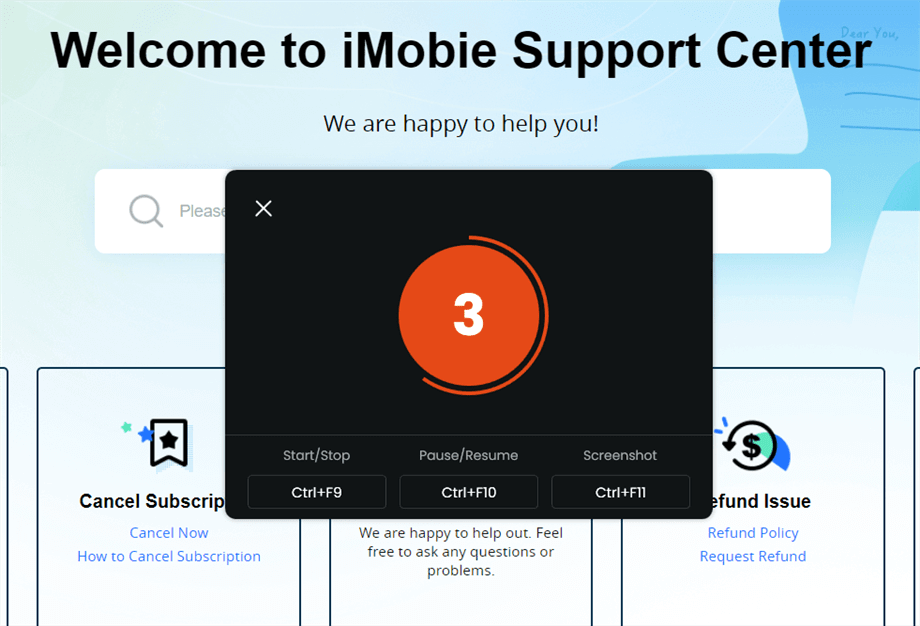
Wait for the Recording Countdown
If you would like to see a recording countdown before your recording starts, you can enable the countdown option. Or you can tap it off. View this post to know how to set the countdown option.
Step 6.Start Recording.
The recording will begin after a 3-second countdown. You can make annotations on the recording interface during the recording.
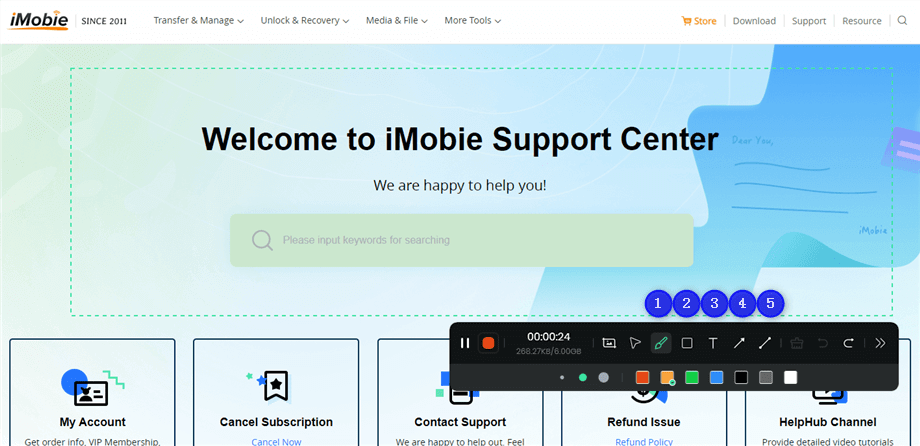
Annotate the Screen during Recording
With the toolbar, you can add the annotation in the screen:
1 Brush: Draw freehand on the screen recording interface to highlight or illustrate specific areas during the recording.
2 Rectangle: Draw rectangular shapes on the screen recording interface.
3 Text: Add written notes or labels directly onto the screen recording interface.
4 Arrow: Draw arrows on the screen recording interface to point out and emphasize specific areas.
5 Line: Draw straight lines on the screen recording interface to underline or connect specific points.
Step 7.Record Screen Process Completed.
When the recording is completed, you can click the red Stop button to end the recording. Your recorded files will be displayed. From here, you can preview and manage the recorded content as needed.
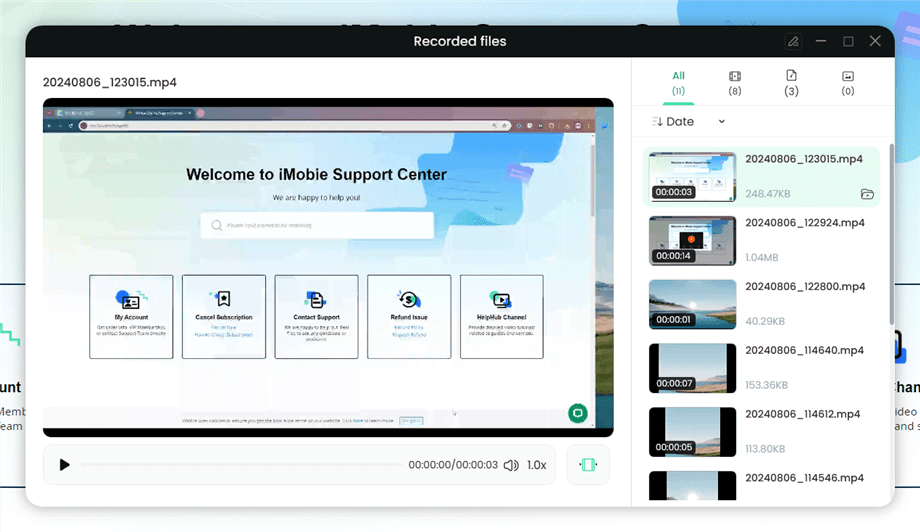
Preview the Recording
Generally speaking, as a free game recording tool, Screenify can meet the basic recording needs of most players. Although it is limited in advanced features and support, Screenify is an option worth considering for users who need a simple and practical recording solution.
Final Words
Knowing how to record gameplay on Xbox isn’t just about preserving memories. It’s about joining a community of storytellers who share a love for the medium.
You can leverage the Xbox’s in-built recording capabilities to save short or long clips. If you want a free personalized recording, you can opt for the Screenify.
Free Download * 100% Clean & Safe
Product-related questions? Contact Our Support Team to Get Quick Solution >

