How to Record Audio from Website
This article walks you through four methods to record audio from website with a step guide. Whether you want to record audio for educational, personal, or professional needs, we have a solution. And, for an all-in-one screen and audio recording tool, Screenify is recommended.
Are you a professional who needs to store web-based meetings for future reference? Or, perhaps you’re a content creator looking to spice up your podcasts with online audio clips. But no matter the situation, knowing how to record audio from website can make life a lot simpler.
Also Read: Best Streaming Audio Recorders 2025
This article will show you four simple methods to get this job done. We’ll describe the tool first and give you its key features. Then, we’ll give you a step-by-step guide on how to record audio from a website with it. You can go over each method and pick the one that best fits your needs. So why are we still waiting? Let’s get started!
Record Audio from Website via Free Audio Recorder
There’s no shortage of third-party tools that can record audio from a website. While some tools require a subscription fee, others are free. One such free tool is Screenify. It has proven a reliable choice for both Windows and Mac users.
Screenify is a free screen and video recording tool. It allows you to record audio, video, and even webcam footage. You can do all these things without restrictions like watermarks or time limits. Screenify was developed with a focus on user convenience. It is particularly suitable for people who want to record audio from websites easily. Check out what Screenify can do for you.
Here are Screenify’s key features that distinguish it from other competitors.
- Screenify records screen, webcam, and audio without watermarks or time limits.
- It supports high-quality video formats up to 4K resolution.
- There’s an option to customize the video with filters and virtual backgrounds.
- It saves recordings locally with a single click.
Steps to Record Audio from Website via Screenify
Step 1. Download and Install Screenify on Computer.
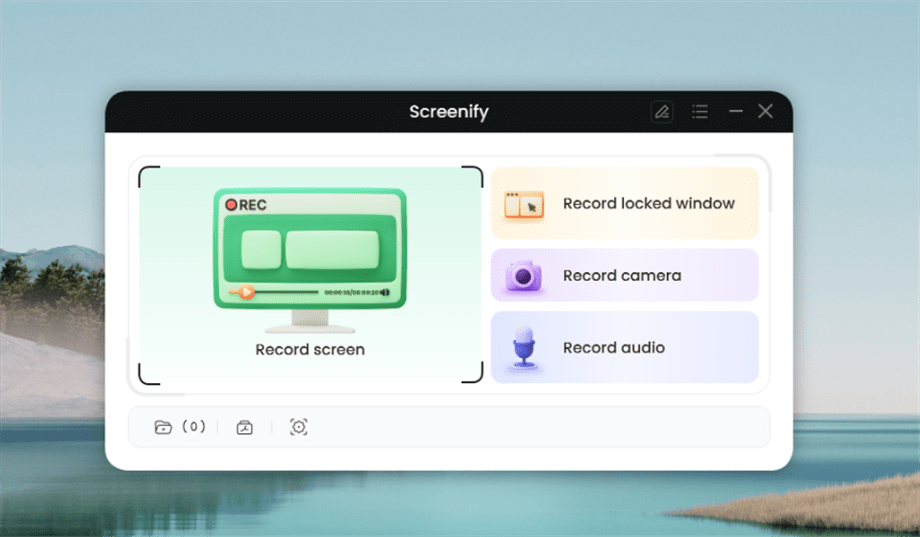
Step 2. Launch Screenify on your computer, and select Record screen mode.
Select Record Screen Mode
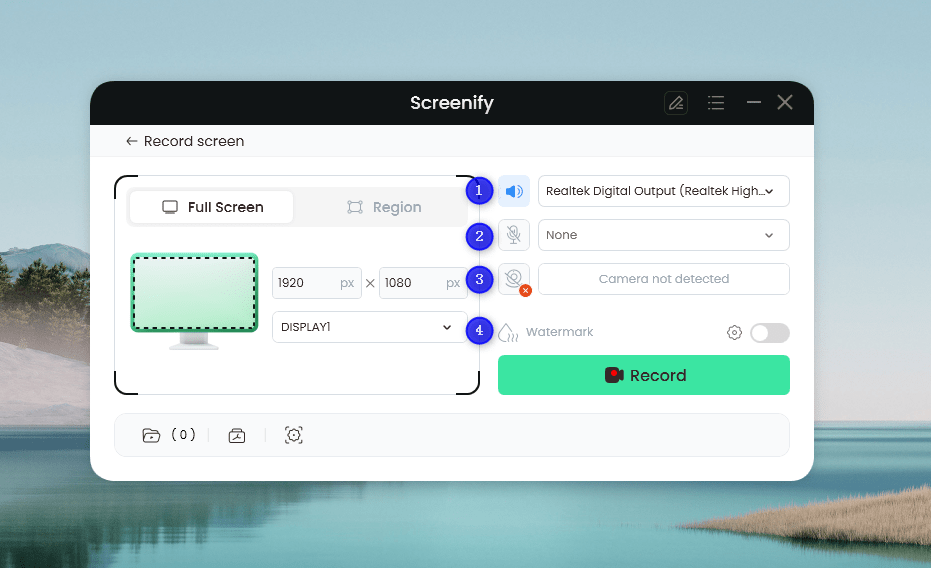
Step 3. Configure Recording Settings aims to configure settings like system audio before recording.
Set Configure Recording Settings
In this setting menu, you can:
1 Choose the System audio.
2 Choose the Microphone you want to record.
3 Choose the Camera you want to use.
4 Choose whether to add a watermark.
Step 4. Select Recording Screen.
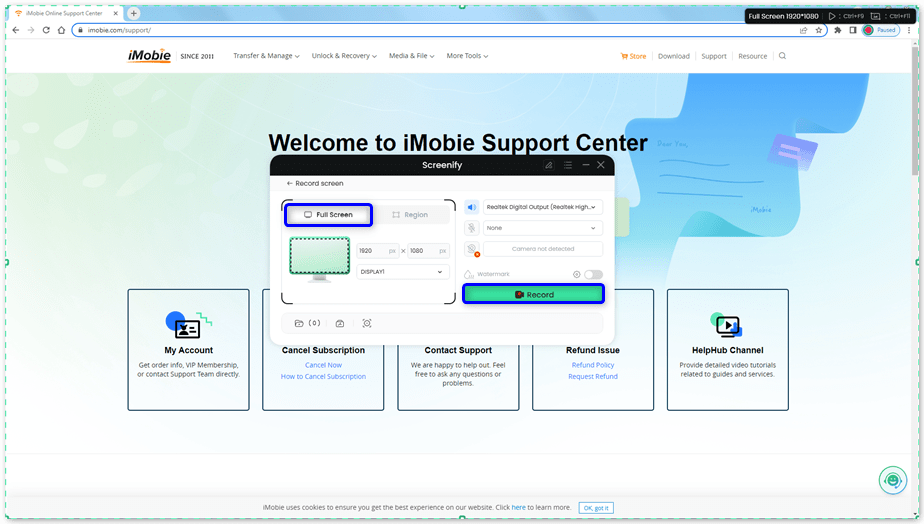
Option 1. Full Screen Record
Please select Full Screen mode and choose the display you need to record. Hit Record button to initiate recording.
Select Full Screen
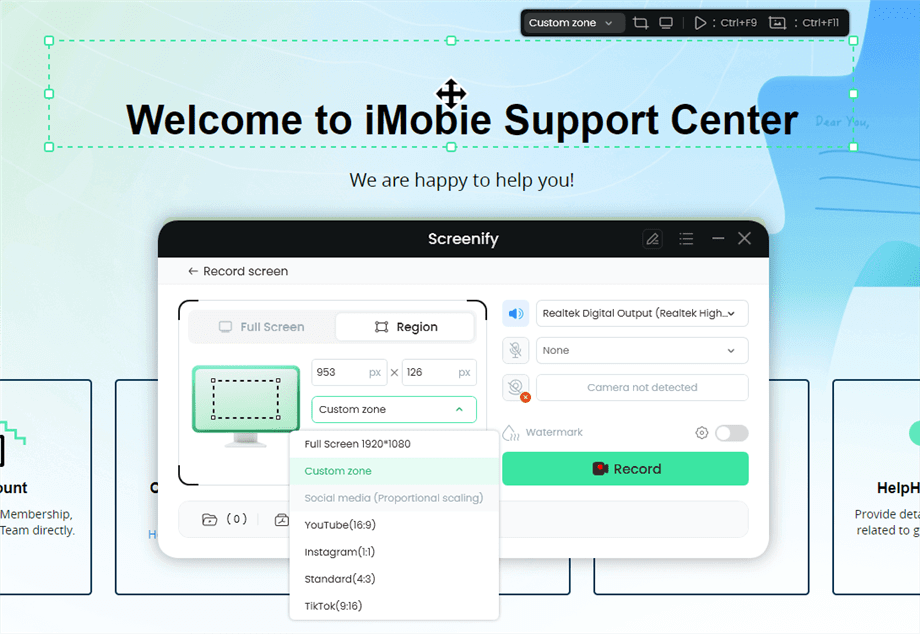
Option 2. Region Record
To record region, you need to manually select the recording area. After selection, you can still adjust the selected area. It supports customize selection, full screen, and proportional selection based on common social media dimensions.
Record Region
Step 5. Wait for the Recording Countdown.
There is a 3-second countdown to help you prepare the recording after you are ready to start recording.
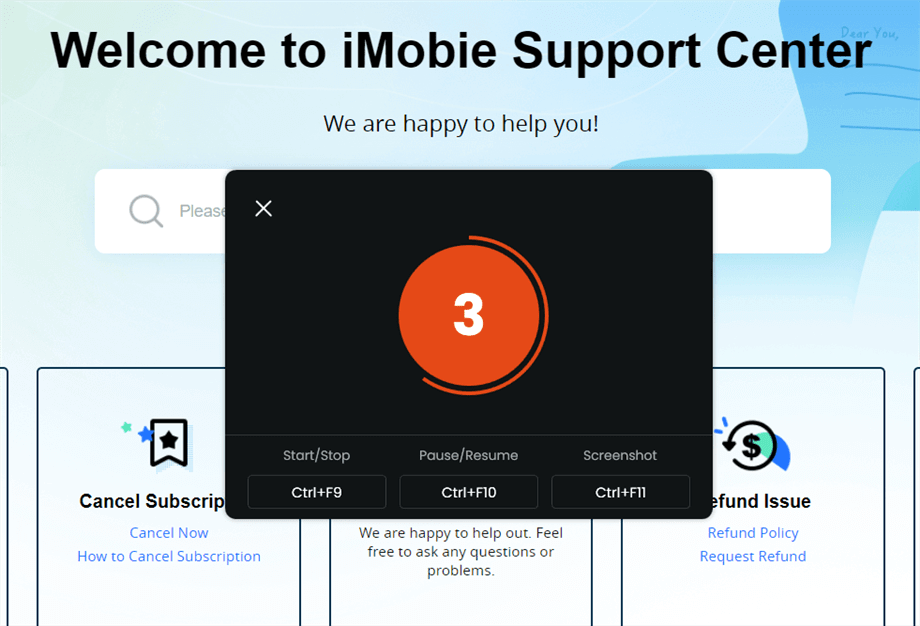
Wait for the Recording Countdown
If you would like to see a recording countdown before your recording starts, you can enable the countdown option. Or you can tap it off. View this post to know how to set the countdown option.
Step 6. Start Recording.
The recording will begin after a 3-second countdown. You can make annotations on the recording interface during the recording.
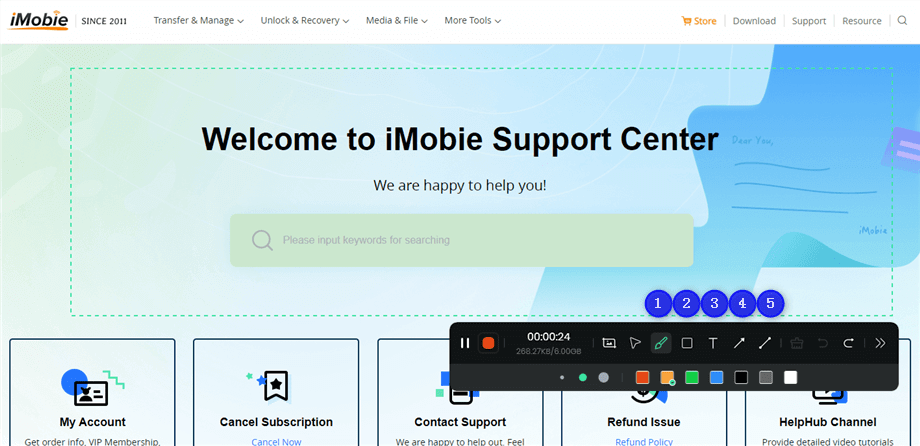
Annotate the Screen during Recording
With the toolbar, you can add the annotation in the screen:
1 Brush: Draw freehand on the screen recording interface to highlight or illustrate specific areas during the recording.
2 Rectangle: Draw rectangular shapes on the screen recording interface.
3 Text: Add written notes or labels directly onto the screen recording interface.
4 Arrow: Draw arrows on the screen recording interface to point out and emphasize specific areas.
5 Line: Draw straight lines on the screen recording interface to underline or connect specific points.
Step 7. Record Screen Process Completed.
When the recording is completed, you can click the red Stop button to end the recording. Your recorded files will be displayed. From here, you can preview and manage the recorded content as needed.
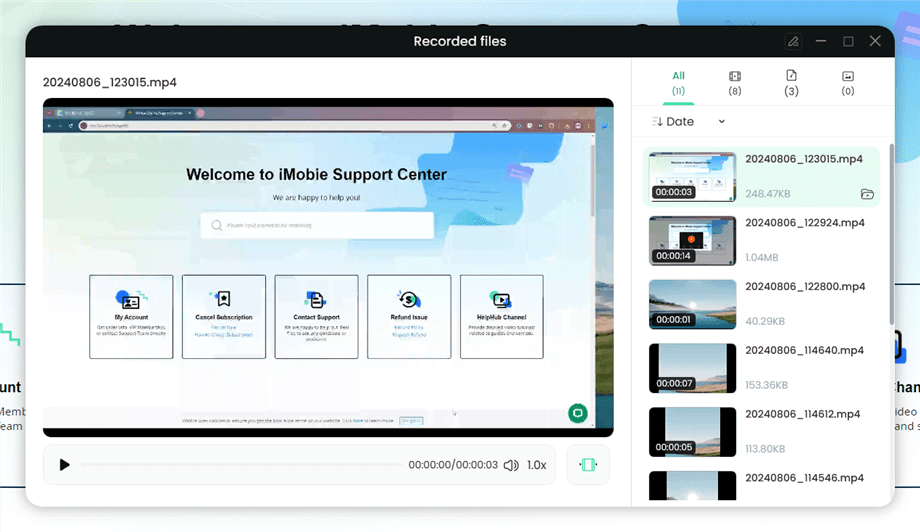
Preview the Recording
You may also want to know: How to screen record protected videos
We’ve still got three more methods to record audio from the website. So, let’s move on to our second method.
Capture Audio from the Website via Chrome Audio Capture
Google Chrome is popular for internet browsing. If you’re also using it, you have an even simpler method to record audio directly from websites. Chrome provides its users with a complete market of extensions. These extensions also include tools designed for audio capture from a website. One such tool is Chrome Audio Capture.
Chrome Audio Capture is an extension of Google Chrome that records audio playing on the current tab. The extension also allows you to record from multiple tabs simultaneously. Moreover, no additional software installation is needed when you use Chrome Audio Capture. But before you use this Chrome extension, you must consider some important points.
Keep in mind that when you use Chrome Audio Capture:
- Recordings are limited to 20 minutes because of memory constraints.
- You can save your recordings in either MP3 or WAV formats.
- Users can mute tabs while they’re being recorded.
Follow the stepwise guide to record audio from website via Audio Capture.
Step 1. Open the Chrome Web Store and search for Chrome Audio Capture. Click “Add to Chrome” to install this extension.
Step 2. Open the website or tab from which you want to record audio. Now click on the Chrome Audio Capture icon near the address bar.
Step 3. Click the “Start Capture” button or use hotkeys to initiate the audio capture.
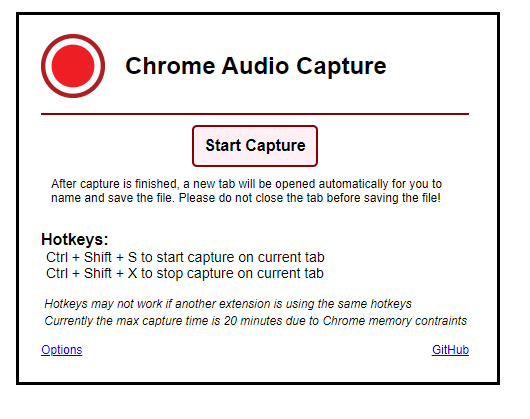
Click Start Recording Button
Step 4. Keep an eye on the time; recordings are capped at 20 minutes. Click the “Save Capture” button to stop the recording.
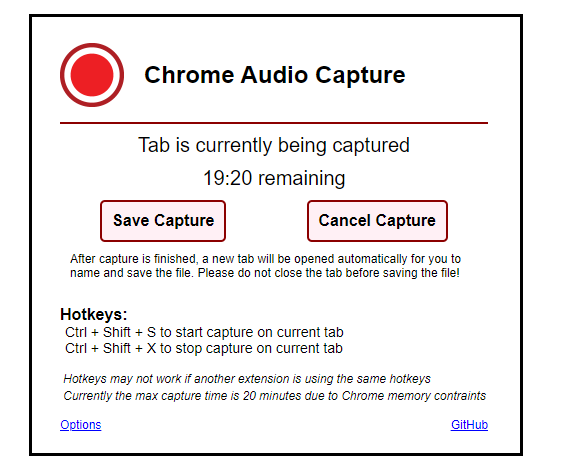
Click On Save Capture
Step 5. Once you’ve stopped the recording, a new tab will appear. You can click “Save Capture” again to save your recorded file.
Step 6. A file explorer will be opened. Name your recorded audio file and set a directory before saving it on the computer.
Record Audio from Website via Audacity
Tools like Screenify offer an all-in-one solution for recording screen, audio, and webcam. But there are also specialized tools that focus solely on audio recording. One such tool for capturing and editing audio is Audacity.
Audacity is a feature-rich audio recording and editing software. It’s available for Windows, macOS, and Linux. Audacity is free and open source. It’s an accessible choice for amateur and professional users looking for high-quality audio recordings.
Here are the key features of Audacity.
- It captures live audio and allows for versatile file export options.
- You also get to use powerful editing tools with real-time effect previews.
- Audacity supports a range of plugins.
- There are extensive keyboard shortcuts for easier control.
Follow this step-by-step guide to record audio from website with Audacity.
Step 1. Visit Audacity’s official website to download and install the software on your computer.
Step 2. Launch the software and go to Edit > Preferences.
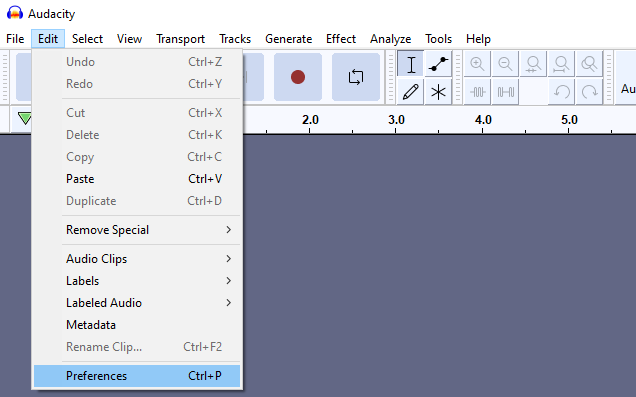
Opening The Preference Settings
Step 3. In the Preferences window, locate the “Host” dropdown. Choose “Windows WASAPI” if you’re on Windows or “Core Audio” if you’re on macOS from the list.
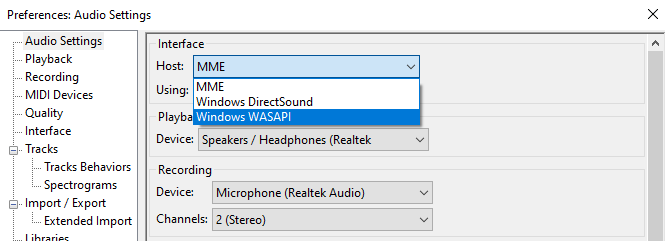
Select Windows WASAPI
Step 4. Now locate the “Playback” section and change the playback device to your desired setting.
Step 5. Under the “Recording” section, change the device to your computer’s loopback option. The option will be labelled “Speakers (Loopback)” or similar.
Step 6. In the same “Recording” section, set the channel to “Stereo”. Then press “OK” to save the settings.
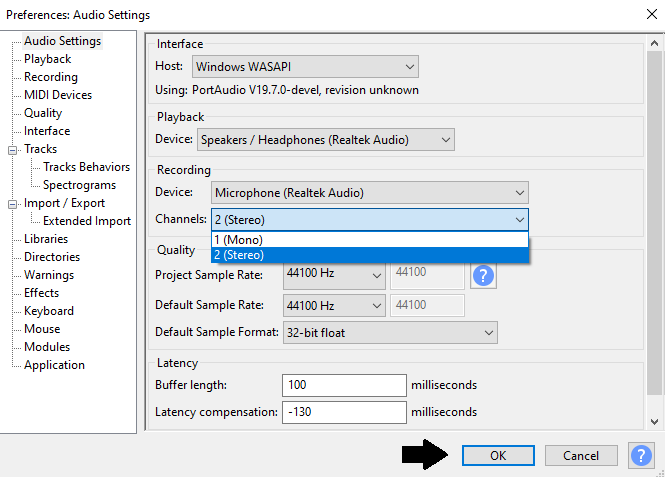
Select Stereo
Step 7. Press the “Record” button in Audacity and play the audio on the website. You’ll see that Audacity is recording audio from the website. Stop the recording when done. Note: You can use Audacity’s extensive editing features to trim, enhance, or modify the captured audio as you see fit.
Step 8. Audacity allows you to save the final product in various formats. Go to File > Export and select the “Export as MP3” option.
Using Audacity is an extremely popular method to record any type of audio. If you are still looking for another method, we have a last one for you. So, let’s move on!
Capture Sound from the Website via OBS Studio
OBS Studio is another free and open-source tool. It is not used just for video recording and live streaming. But OBS Studio can also help you in recording audio from a website. OBS is compatible with Windows, Mac, and Linux. It has gained immense popularity for its multiple capabilities. But remember, OBS is mainly a screen recording and broadcasting tool. So you can only record audio from website with a black screen as a video file. You can then use another third-party tool to extract audio from this recorded video file.
The key features of OBS Studio shows that:
- It offers an audio mixer with per-source filters like noise gates and noise suppression.
- There are custom transitions between an unlimited number of scenes.
- A customizable layout design is provided.
- It offers powerful options for adding new sources and adjusting their properties.
Here’s a step below to record audio from a website using OBS.
Step 1. First, download OBS Studio from its official website and complete the installation process.
Step 2. Launch OBS Studio and go to the “Sources” panel. Click the “+” button and select “Audio Output Capture” to capture the audio from the website.
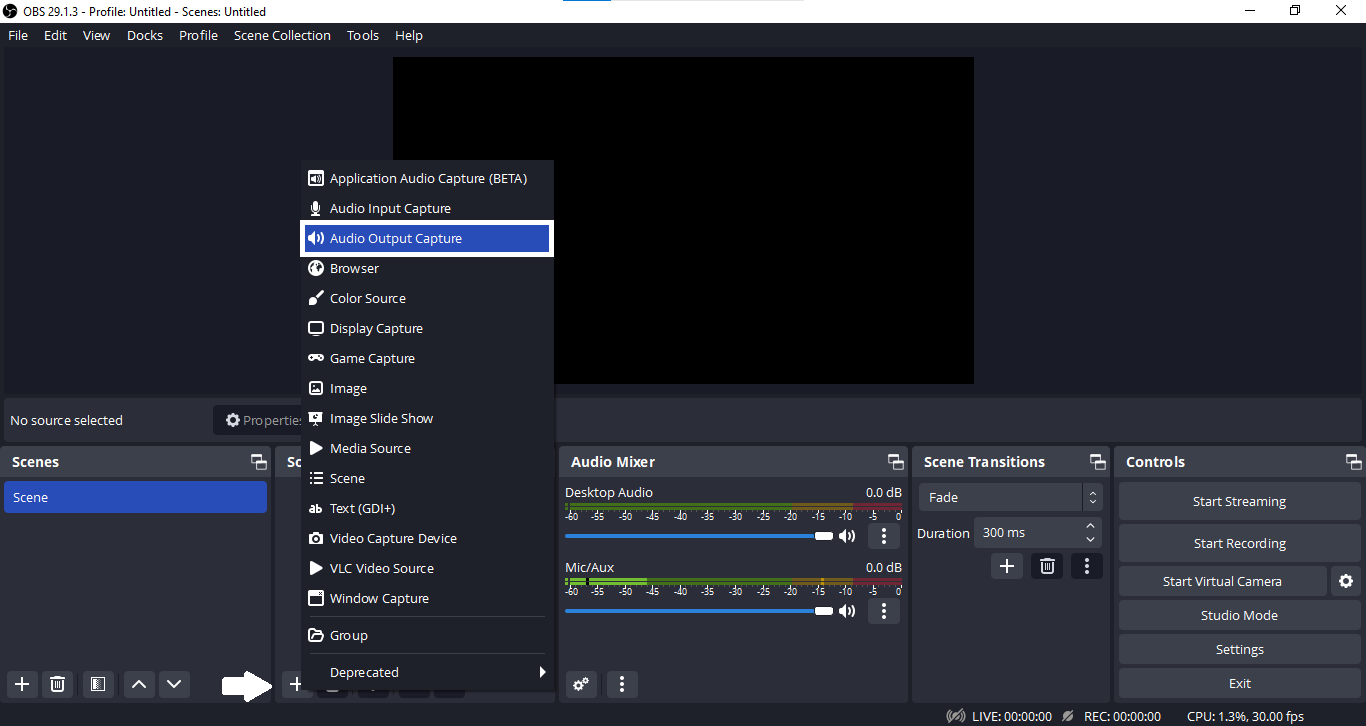
Select Audio Output Capture
Step 3. Right-click on the “Audio Output Capture” and choose “Properties.” From the drop-down, select your Speakers as the recording device.
Step 4. Now, start audio from your website. Look at the audio mixer section to see if the audio levels are coming through. Make adjustments if needed.
Step 5. Once you’re satisfied with the audio levels, click the “Start Recording” button. It’s located at the bottom right corner of the OBS Studio.
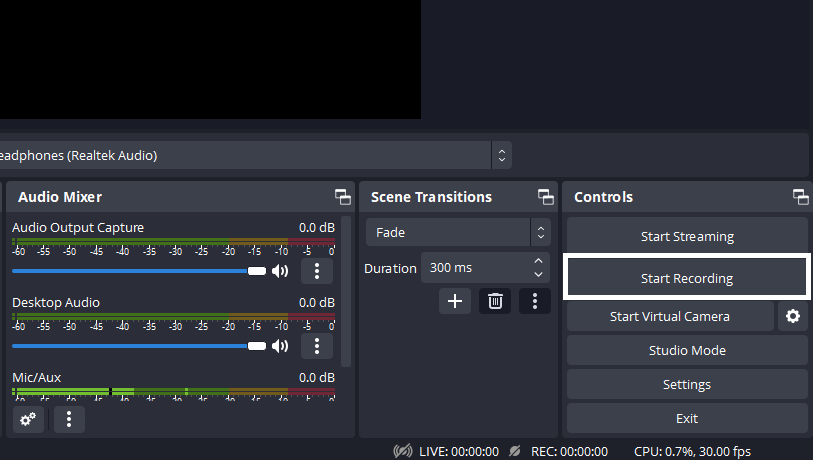
Start Recording
Step 6. OBS will now record audio from website. When you’re done, click the “Stop Recording” button in OBS.
Step 7. The audio file will be saved automatically. To locate the saved file, go to the “File” section in the top left corner of OBS Studio. Now select “Show Recordings.”
So these were the top four methods to record audio from website.
Frequently Asked Questions
Can a website record audio without permission?
No, websites cannot record audio without your explicit permission. When a website wants to access your microphone, a prompt will appear. This prompt will ask you to allow or deny the request. So always be cautious and read the permissions before clicking “Allow.”
How to record audio on Chrome?
You can record audio on Chrome using various extensions like Chrome Audio Capture. Here’s how:
- Install the extension from the Chrome Web Store.
- Click its icon near the address bar.
- Follow the on-screen instructions to start and stop recording.
After you’re done, you can save the audio file that opens in a new tab.
Final Words
There are various situations where we might need to capture audio from a website in various situations. In this guide, we’ve provided you with four different methods to record audio from website. You can use these methods for academic, professional, or personal reasons. Each method comes with its own set of benefits. But if you’re looking for an all-in-one recording tool, Screenify is highly recommended. This free tool is an excellent choice for recording your screen, webcam, or audio.
Free Download * 100% Clean & Safe
Product-related questions? Contact Our Support Team to Get Quick Solution >

