How to Record PowerPoint Screen on PC
If you have made a stellar PowerPoint presentation and want to record it to share it with others, you’re at the right place. In this article, we have discussed 2 ways for PowerPoint screen recording, complete with step-by-step instructions.
Have you ever thought about recording your PowerPoint presentations on your PC? It can really make a huge difference in creating engaging content, tutorials, or webinars.
Don’t worry if you’re not sure how to do it; we are here to help!
In this guide, we will take you through step-by-step instructions on how to capture your screen, add voice narration, or record animations. You’ll have plenty of options to choose from, including built-in features like PowerPoint’s own recording capabilities and third-party software options.
By the end of this article, you’ll be able to carry out PowerPoint screen recording effortlessly, making it more interactive and informative for your audience.
So let’s get started!
Is It Possible to Screen-record PowerPoint on Your PC?
Yes, it is possible to screen-record PowerPoint presentations on your PC. There are two primary methods to achieve this:
1. Record the Screen Directly in PowerPoint
You can directly record your screen in PowerPoint, which is perfect for simple presentations where you want to add your voice and capture slide transitions. It’s a great way to engage your audience and make your presentation more interesting.
2. Use a Third-Party App
You can also use third-party software for your recording needs. It can offer some amazing features such as editing options, adding annotations, including multiple sources like a webcam feed, and exporting in various formats. This can be really helpful if you want more control and post-production capabilities.
With that sorted, let’s look at the steps of PowerPoint screen recording using both these methods.
How to Record Screen in PowerPoint Directly?
Did you know that PowerPoint comes with a built-in feature that lets you record your presentations, complete with your voice and annotations?
It’s perfect for making simple presentations, tutorials, or demos without having to install any extra software. But there are a few things you need to keep in mind to make sure your recording turns out just right.
Limitations
- You cannot record video from a protected application, such as a banking website or a streaming video service.
- When recording a PowerPoint presentation, there may be some limitations on how long you can record based on the resources available on your computer. If you’re recording for a longer duration, it might use up more memory and processing power, causing some performance issues.
Requirements
- The screen recording feature is only available in PowerPoint 2016 and later.
- You must have a microphone to record audio.
- Screen recording in PowerPoint is only available for Windows users. Mac users can use a different screen recording tool.
Steps for Direct PowerPoint Screen Recording
Here are the detailed steps to record your screen directly using PowerPoint’s built-in screen recording feature:
Step 1. Launch PowerPoint and open the presentation you want to record.
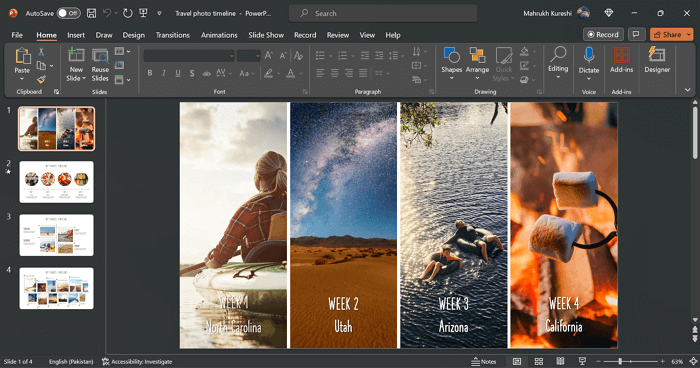
Open the Presentation You Want to Record
Step 2. Click on “Record > Screen Recording” from the menu at the top.
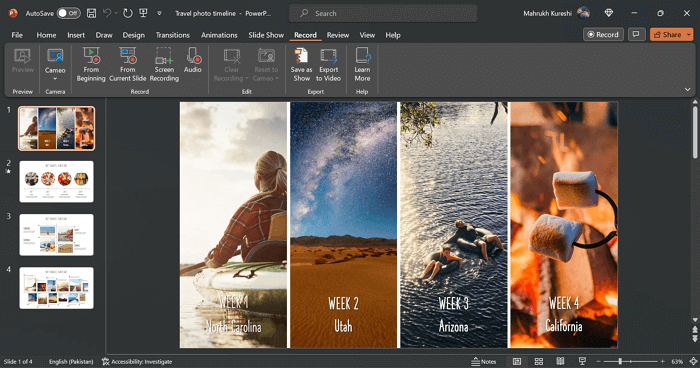
Select Screen Recording from the Record Menu
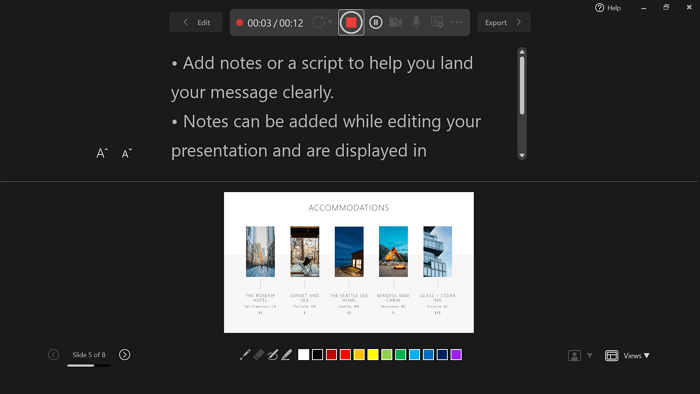
Step 3. A small window will appear from where you can select whether you want to record audio and show a record pointer. You can also select the specific area you want to record.
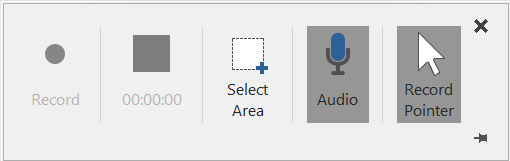
PowerPoint Screen Recording Settings
Step 4. Once you have selected the area you want to record, click “Record” to start recording your screen.
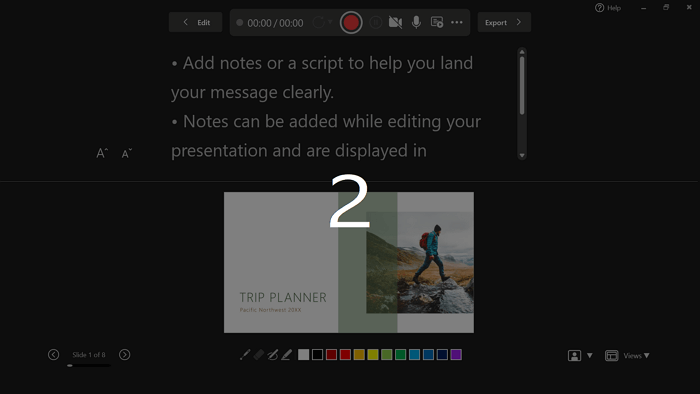
Start Recording PowerPoint Screen
Step 5. Click on the “Stop Recording” button again to stop the recording.
Click the Stop Recording Button to Stop
And that’s how you record your screen using the PowerPoint screen recording feature.
However, given the limitations of screen recording directly using PowerPoint, if you would like to use third-party software that offers more advanced features, we have just the tool for you!
How to Record PowerPoint with Screenify?
Screenify is an amazing tool with which you can easily record your screen and audio at the same time and then export your recordings to a variety of popular video formats, such as MP4, AVI, and MKV.
Whether you’re recording a PowerPoint presentation, an online lecture, a tutorial, or even gameplay, Screenify is the perfect choice. Plus, it’s packed with awesome features that make it perfect for creating video presentations and marketing videos. You won’t be disappointed!
Steps to Record PowerPoint Using Screenify
Here’s a step-by-step tutorial on using Screenify for PowerPoint screen recording:
Step 1. Download, install, and launch Screenify on your computer.
Step 2. Now choose the mode you want to use in your recording.
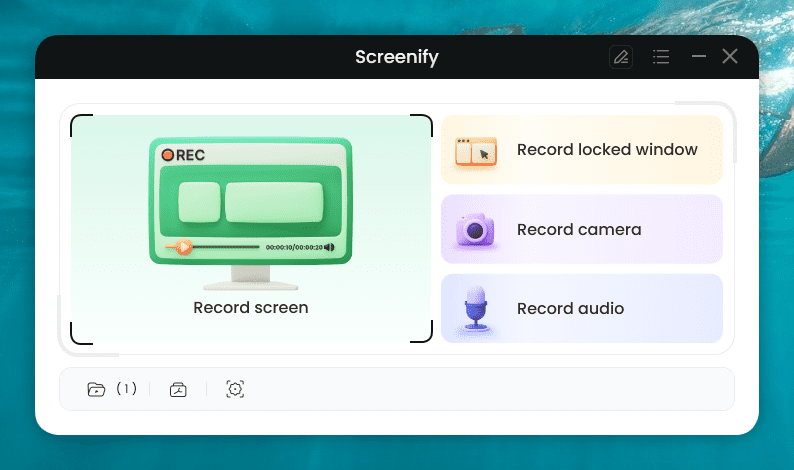
Choose the Mode You want to use
Step 3. Configure the settings before recording. Then, choose the recording screen. It has two options: either record full screen or a specific region. Select your preferred mode and hit “Record.” Then, there will be a three-second timer. After this countdown, the recording will start.
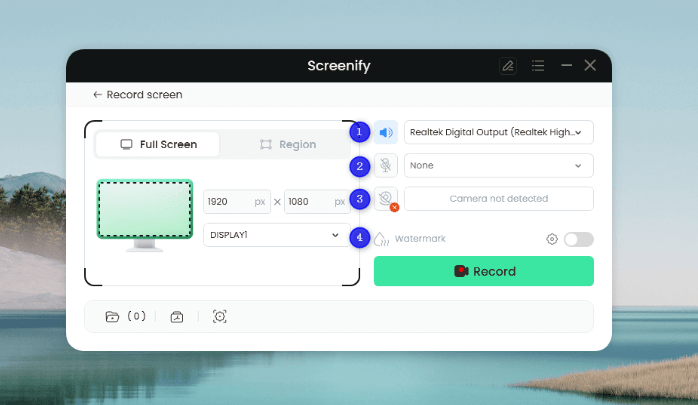
Configure the Settings and Hit the Record Button
Step 4. You can add annotations while recording the screen. You have brush, shape, text, arrow, and line options here.
Step 5. After you have finished recording, click on the Red “Stop” button. Your video will be displayed, and now you can preview and edit it.
Why do We Recommend Screenify?
Screenify offers a number of advantages over the built-in screen recording feature of PowerPoint.
Here are some of them:
Advanced Features
Screenify offers a wider range of features compared to the PowerPoint screen recording feature. For instance, Screenify allows you to:
- Record in high quality (up to 4K resolution)
- Record with webcam
- Add annotations and effects to your recordings
- Export recordings to a wider range of video formats
User-Friendliness
Screenify is more user-friendly than PowerPoint, as it has a simple and intuitive interface, and it is easy to get started with.
Free
Screenify is free to use, with no time limit or watermark. In comparison, the built-in PowerPoint screen recording feature is free but has a watermark. Also, it’s only available in PowerPoint 2016 and later.
Record Screen And Audio
Screenify enables you to record your screen and audio simultaneously so that you can create videos with both video and audio commentary.
Webcam Recording
Screenify supports screen recording as well as webcam recording so that you can add yourself to your videos.
Annotations and Effects
With Screenify, you can add annotations and effects to your recordings, such as text, arrows, shapes, and highlights. This can help you to make your videos more engaging and informative.
Video Formats
You can export your recordings to a variety of video formats, including MP4, AVI, MKV, and WMV. This makes it easy to share your videos with others or to upload them to video-sharing websites like YouTube.
Now that you know how to record your screen using the PowerPoint screen recording feature and Screenify, let’s address some common user issues.
Frequently Asked Questions
Q. How do you record a PowerPoint presentation as a video?
You can record a PowerPoint presentation as a video using the built-in screen recorder in PowerPoint. Just go to “Record > Screen Recording.” Now, select the area of the screen you want to capture and press the record button.
Q. What are some tips for recording a PowerPoint presentation with Screenify?
Here are some tips for recording a PowerPoint presentation with Screenify:
- Make sure that you have a good microphone if you plan to record audio.
- Practice your presentation before you record it so that you can deliver it smoothly.
- Use a webcam to record yourself presenting if you want to create a more engaging video.
- Edit your video after recording to trim out any mistakes or unnecessary footage.
Q. Which PowerPoint version has a video recording option?
You can avail of the video recording option in PowerPoint if you have version 2016 or later.
Q. Can you go live using PowerPoint screen recording?
No, you cannot go live using the built-in PowerPoint screen recorder. For that, you will have to get a third-party streaming app like OBS.
Conclusion
If you ever come across a situation where you need to record your PowerPoint presentation for professional or educational purposes, you will be surprised to know that PowerPoint has a built-in screen recording feature. However, this feature has several limitations and is only compatible with Windows.
Therefore, if you want to record your screen on Windows and Mac, you’ll have to get a third-party app that’s compatible with both systems. We recommend Screenify for this.
In this comprehensive guide, we have put together the detailed steps for recording your presentation using the PowerPoint screen recording feature and Screenify. So, the next time you need to record an informative PowerPoint presentation using annotations and text, Screenify is the way to go!

Joy Taylor


Senior writer of the iMobie team as well as an Apple fan, love to help more users solve various types of iOS & Android-related issues.
 Screenify
 AnyEnhancer
 FocuSee
 Vozard
 AnyMiro
 AnyMirror