How-to Fix: ‘OBS Sound Not Working’ Error
This article explores common reasons why OBS sound may not work and provides easy-to-follow solutions to fix the issue. It also introduces Screenify as an alternative for recording video and sound. The guide is designed to help you quickly resolve problems with OBS sound not working, ensuring smooth and clear streaming.
Part 1: Introduction
Suppose you are preparing to begin a live stream or a recording of an urgent video. You set up your shot, and when you press record, there is no audio. All the configurations are in place well, but there is no sound. This issue can stem from incorrect settings/parameters, driver problems, or hardware-related issues. This article will explain the procedures to follow and rectify this issue in detail. Furthermore, we’ll also provide you with an alternative tool, Screenify, that you can use in case the OBS sound not working issue. So, let’s begin to explore!
Part 2: Why Does OBS No Sound?
Why does OBS have no sound? It is a widespread problem that certainly can be annoying, especially when filming or broadcasting. Open Broadcaster Software (OBS) is valuable and practical, but sometimes, the sound is not heard during its operation. This problem may originate from various factors, from basic settings to complex technical ones. But before one is able to solve the problem, you must first identify why the sound is not working. Now let us explore some of the most common causes which can lead to OBS sound issues.
1. Incorrect Audio Settings:
One of the most common reasons is incorrect audio settings within OBS. If your audio input or output devices are not selected correctly, OBS won’t capture any sound. Double-checking your settings to ensure the correct devices are chosen can often resolve the issue.
2. Outdated Drivers:
Corrupted or missing audio drivers can also be the reason why OBS fails to capture sound. Drivers are needed for your hardware to perform smoothly; thus, updating them is crucial. The simplest solution is to update your sound drivers to help you solve the issue with the sound.
3. Conflicting Software:
Other apps on your computer might interfere with OBS, causing audio problems if they use the microphone or speakers. Closing unnecessary applications can help prevent this problem.
4. Disabled Audio Devices:
Your system settings may have turned off the audio devices you wish to utilize with OBS. OBS will not record sound if your speakers or microphone are not selected as the default devices or are switched off. Enabling these devices and setting them as default can resolve the issue.
5. Incorrect Scene or Source Configuration:
OBS uses scenes and sources to manage audio and video inputs. If the audio source is not correctly added to the scene or is muted within OBS, you won’t hear any sound. Double-checking the configuration of your scenes and sources can help ensure that the audio is being captured correctly.
Part 3: How to Fix OBS Sound Not Working Error?
We will now look at various ways of fixing the problem and proceeding to the next stage of streaming or recording with good sound quality.
Fix 1: Fix Error via Unmute OBS
There are times when the most straightforward problems result in the most headaches. If OBS is muted in your software mixer, it will not record or broadcast any audio. Make sure that OBS is not muted through the OBS panel and in the computer’s control panel. For this, below are the steps to follow:
Step 1. Begin by right-clicking on the “Speaker” icon on your taskbar and click “Open Volume Mixer.”
Step 2. In this window, find the OBS Studio bar. If the “Speaker” icon below it is muted, click it to unmute OBS.

Unmute OBS
Fix 2: Fix Error via Adjust OBS Audio Settings
If you encounter issues with sound, it is often found in the audio configuration of OBS. OBS cannot record the sound or play it properly if there exists a problem with the sound’s input or output settings. If you adjust these properties, you can help OBS recognize the proper devices for the audio. This might involve selecting the appropriate microphone speakers or adjusting audio levels. Here are the steps to appropriately adapt your Open Broadcaster Software audio settings.
Step 1. Open OBS Studio on your computer. Click on the “File” tab at the top, then select “Settings” from the drop-down menu.
Step 2. In the settings window, go to the “Audio” section on the left. Make sure the “Channels” option is set to “Stereo.”
Step 3. Scroll down to the “Global Audio Devices” section. Choose your audio device for “Desktop Audio” and “Mic/Auxiliary Audio.” You can also set them to “Default” to use the system’s default devices—Restart OBS Studio to apply the changes.

Set Audio Stereo
Fix 3: Fix Error via Run OBS with the Administrator
Running OBS as an administrator can solve many issues, including audio problems. Sometimes, OBS might not have the necessary permissions to access specific audio devices or settings on your computer. By running it as an administrator, you give OBS the access it needs to function correctly. This can be a simple yet effective way to resolve sound issues. To do this, follow the steps below to run OBS as an administrator.
Step 1. First, close OBS if it’s currently running. Then, locate the OBS shortcut on your desktop or search for OBS in the Start menu.
Step 2. Right-click the OBS icon to open a context menu, and select “Run as administrator.”

Locate OBS Studio and Run as Administrator
Step 3. If any prompts appear, click “Yes” to allow OBS to make changes to your device.
Fix 4: Fix Error via Reinstall OBS Studio
Sometimes, Open Broadcaster Software (OBS) can develop several issues, such as bugs or corrupt files that would jam the program’s normal operations. These issues can most probably be fixed by reinstalling the OBS since all settings can be changed back to default, and all files should be installed properly. This process is straightforward and often clears up persistent sound issues. Here are the steps to reinstall OBS.
Step 1. Press “Windows + R“. Type “appwiz.cpl” and hit “Enter” to open “Programs and Features.”
Step 2. Find OBS Studio in the list. Right-click and select “Uninstall/Change.”
Step 3. Go to the official OBS Studio website and download the latest version.
Step 4. Open the downloaded installer and follow the instructions to reinstall OBS.
Part 4: Best Alternative: Record via Screenify | Video and Sound
If you’re having trouble with OBS and need a reliable alternative, Screenify is an excellent option for recording audio. Screenify offers a range of valuable features to enhance your recording experience. Screenify makes it simple to record microphone or system sound, allowing you the freedom to get the audio you require. With Screenify, you can adjust the volume of your recordings to get the perfect sound levels.

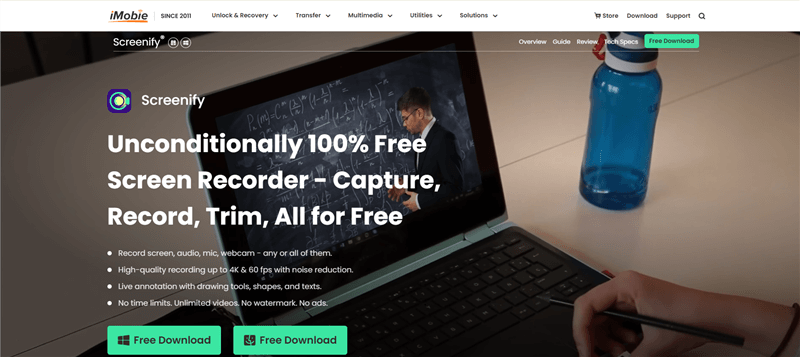
Screenify Website Interface
Its noise reduction feature removes unwanted background noise, giving you cleaner, more transparent audio. Just upload your file, select “Noise Reduction,” and enjoy a polished result, no matter the format. Screenify is completely free to use with no hidden costs. It works on Mac and Windows with no recording time limits and doesn’t add watermarks to your audio. It’s great for professional projects. Apart from the sound recording, Screenify can capture the happenings on the screen at 4K resolution and 60 frames per second (FPS), which eliminates the lag and distortions.
Key Features and Advantages
- Record system sound or microphone audio with adjustable volume to capture clear, customized audio.
- The noise reduction feature swiftly eliminates unwanted background noise from both audio and video files.
- Completely free to use with no hidden costs, making it accessible to everyone.
- Compatible with a variety of operating systems, accessible on both Mac and Windows.
- No watermark on audio recordings, providing a clean, professional finish for your projects.
Here are the simple steps to use Screenify as an OBS alternative:
Step 1. Download and install Screenify on your computer. Make sure you have a reliable internet connection for the download.
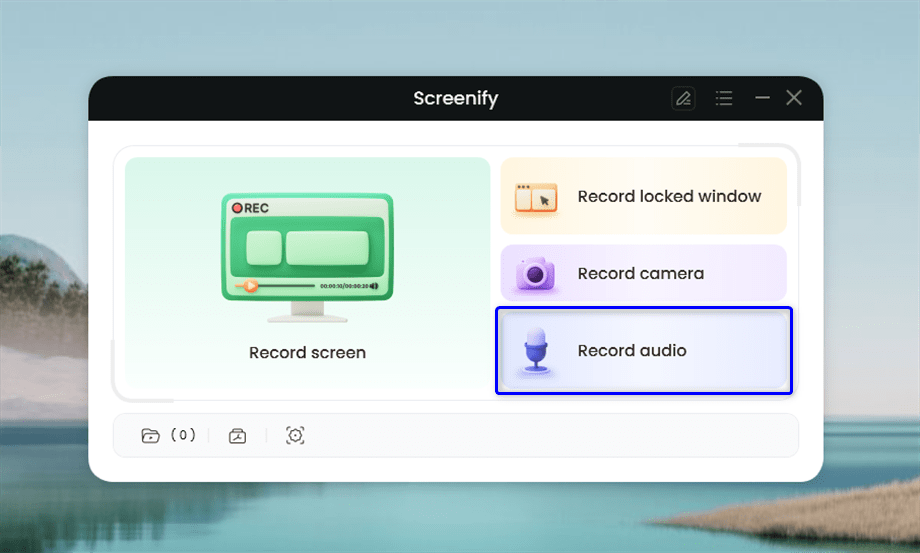
Step 2. Launch Screenify and choose the “Record audio” option. This is available from the main menu after opening the app.

Choose the Record Audio Mode
Step 3. Select the audio input you want to use. Choose either the speaker or microphone in the audio settings.

Select the Audio Input
Step 4. Click “Record” to initiate the capturing of the audio. This will start your recording session.

Record
Step 5. Observe the countdown before the recording starts. You’ll get a few seconds to prepare before the recording begins.

Recording Countdown
Step 6. Recording will commence after the 3-second countdown. You’ll see an indicator showing the recording progress.

Recording Indicator
Step 7. Click “Stop” when you finish recording. You can then listen to and review your recorded audio file.

Review Recorded Audio File
Part 5: Conclusion
In conclusion, while resolving OBS sound not working difficulties can be annoying, there are a few practical options to consider. You can fix these issues and resume flawless streaming or recording by verifying that your audio devices are set up correctly and reviewing your settings. We recommend Screenify for audio recording. It’s reliable and user-friendly, and its main features include noise reduction, unlimited recording time, and compatibility with Mac and Windows.

Joy Taylor


Senior writer of the iMobie team as well as an Apple fan, love to help more users solve various types of iOS & Android-related issues.
Screenify
AnyEnhancer
FocuSee
Vozard
AnyMiro
AnyMirror


