How to Fix OBS Black Screen Effortlessly?
Looking for solutions to fix OBS’s black screen issue? Our detailed guide will explore 7 ways to solve the black screen in OBS Studio and resume the screen capture process to create engaging tutorials, instructional videos, and more.
Screenify – All-in-One Screen Recorder
Try Screenify for free to record screen on Windows or Mac. Whether full-screen or partial-screen recording, recording with sound or with camera, Screenify can do it with ease.
100% Clean & Safe
Part 1. Introduction
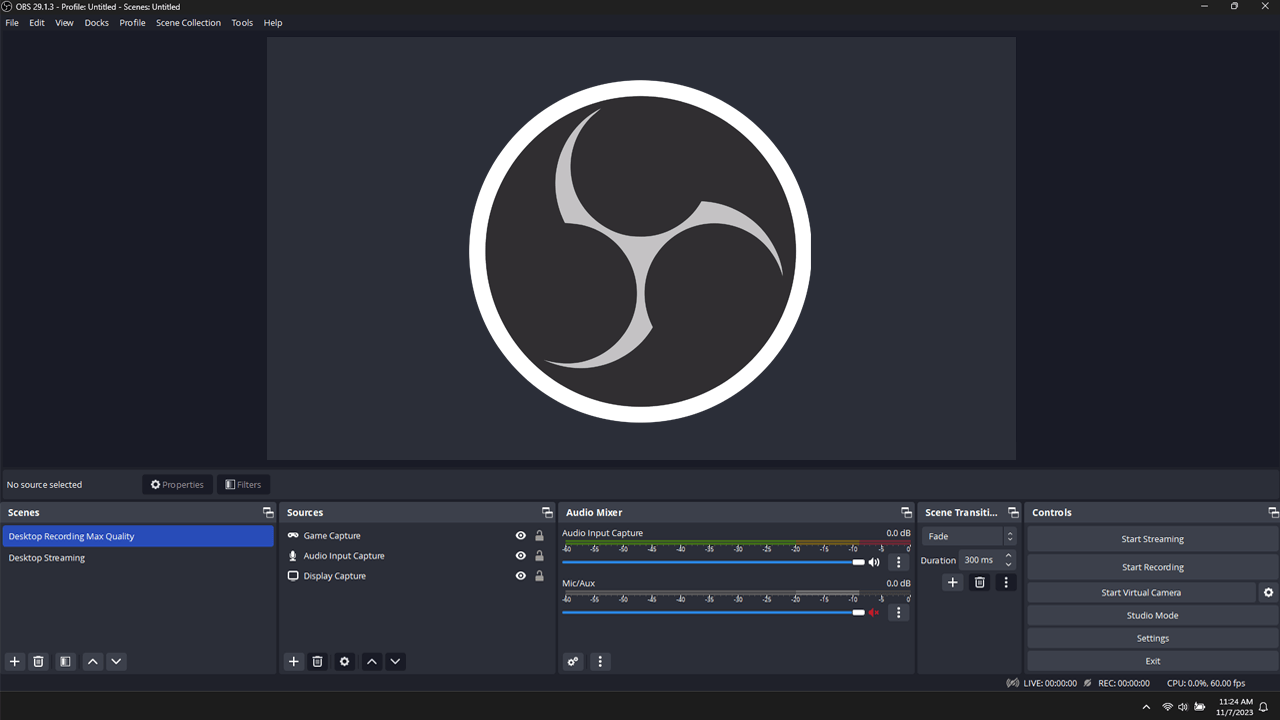
Open Broadcaster Software, known as the OBS Studio, is a free and reliable tool for recording and livestreaming a screen— irrespective of the purpose. The tool runs on both Windows and Mac devices. Recently, however many Windows users have been complaining of the OBS black screen issue while trying to record and share the screen.
OBS Studio
OBS black screen interrupts the process of screen recording and can ruin your final recorder clip with a plain black screen. It means none of your screen content will be recorded. But you don’t need to worry! This detailed guide will explore ways to fix the OBS black screen and a reliable alternative. Let’s delve into further details:
Part 2. Why is OBS showing a black screen?
Before we move on to solutions, let’s understand why the OBS black screen appears. Here are a few common causes of black screens on OBS:
- Outdated Version—One of the most common causes of OBS black screen issues is an outdated software version. An outdated version may sometimes contain bugs and performance issues that interrupt your screen recording.
- Display Drivers—Sometimes, outdated or incompatible display drivers can be the culprit for the OBS Studio black screen problem.
- Other Recorders—Interruptions from other screen recorders on your desktop or laptop can also result in a black screen in OBS Studio.
- Permissions Denial— If screen recording permissions are not enabled on your system, OBS Studio will not be able to record the contents appearing on the screen, resulting in a black screen.
Part 3. 7 Ways to Fix Black Screen in OBS
Now that you know the causes of the OBS black screen issue, it’s time to explore how to fix it. Here are seven solutions to this most common black screen issue:
Method 1: Turn Off Conflicting Software
OBS is a high-performing screen recording and streaming tool that seamlessly captures what’s on the screen. Since it’s a third-party tool, its regular operation can get interrupted due to other third-party tools using high resources, resulting in a black screen issue. You can always turn off the conflicting software to eliminate interference with the OBS Studio.
Here are the steps to turn off or force close the conflicting software:
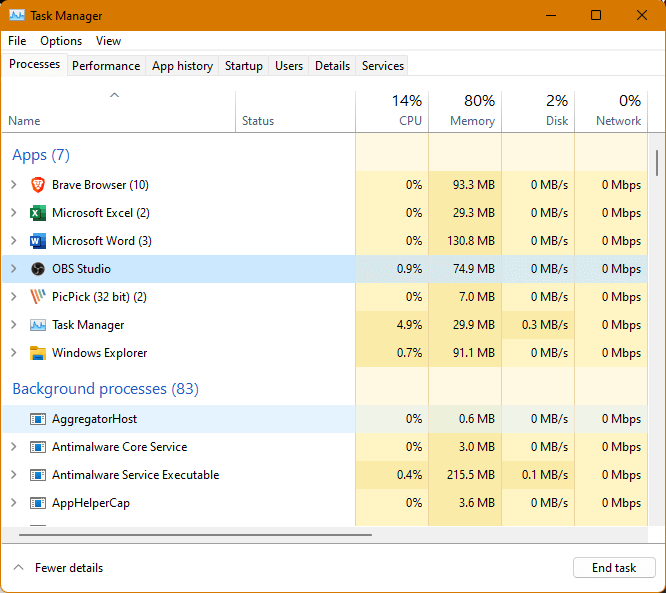
Step 1. Launch Task Manager on your Windows PC and Activity Monitor on your Mac.
Step 2. Check the running applications and processes. Look for conflicting software like other screen recorders or applications using high system resources.
Step 3. On your Windows PC, click “End Task“. On your Mac, click “Quit” to terminate the process.
End Task
Method 2: Disable the Game Mode
Game Mode is a built-in setting on a Windows PC designed to optimize users’ gaming experience. Once enabled, gaming mode can assign multiple GPUs and extended RAM capacity to the game resources, optimizing them to run entirely. The Xbox Game Bar on Windows PC also enables gamers to capture screenshots or record gameplay sessions easily, even with the shortcut keys. Similar in function, the Game Bar can interfere with the OBS Studio while recording the screen.
Therefore, it is recommended that you disable the Game Mode or Game Bar to record the screen seamlessly via OBS Studio without any black screen issues. Here are the steps to disable Game Mode on a Windows PC.
Step 1. From the left pane, navigate to your PC’s “Settings” and “Gaming.”
Step 2. Click on “Game Mode” and then toggle to turn it OFF.
Method 3: Choose a Game Capture with a Specific Window
OBS Studio is a screen recorder that lets you capture your PC’s screen for a variety of purposes, including recording a tutorial, gameplay session or instructional video. Additionally, OBS Studio lets you add multiple scenes to record screens from various sources.
OBS Studio does, however, have a unique Game Capture option for recording gameplay footage. To eliminate black screens in OBS, you should use the Game Capture option. You can smoothly switch scenes even during the recording process. Therefore, choosing a specific window to record is preferred over selecting full screen capturing to avoid the black screen problem.
Step 1. Launch OBS Studio on your PC.
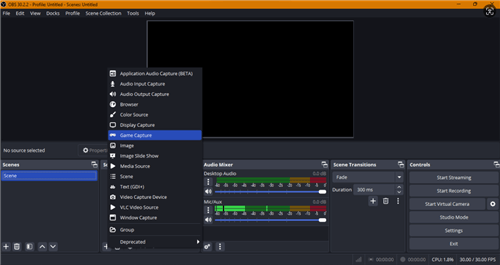
Step 2. Click on the “+” symbol from the “Sources” pane.
Step 3. Click on “Game Capture“.
Choose Game Capture
Step 4. Choose “Capture Specific Window” from the properties of the Game Capture pop-up.
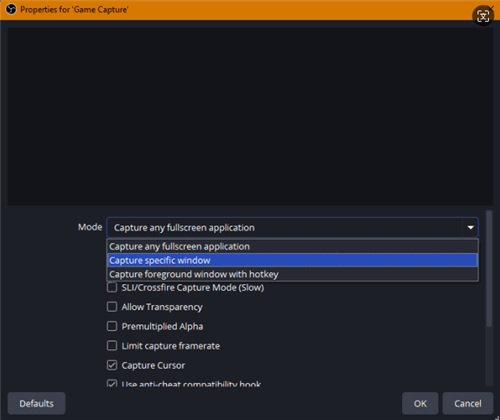
Choose Capture Specific Window
Method 4: Run OBS as Administrator
Administrator access is necessary to run third-party tools, especially those that need to install, remove, or modify system data. The same is the case for OBS Studio. This screen recorder tool needs access to record the screen of your PC and hence requires administrator access. You must run OBS Studio as an administrator to ensure that the OBS records your screen and is not blocked by your PC’s administrator.
Here are the steps to run OBS Studio as an Administrator:
Step 1. Click on “Search” on a Windows PC. Type OBS Studio in the search bar.
Step 2. Right-click the OBS Studio icon and click “Run as Administrator.”
Running OBS Studio as an Administrator might give this tool access to the record screen on your PC and solve the OBS black screen issue.
Method 5: Switch GPU
There are two GPUs on your Windows PC: an Integrated graphics card and a dedicated GPU. Now, take an example where you’re running a game and a screen recording tool side by side. If the game or application you’re trying to record is running on the dedicated one and OBS Studio is trying to record the screen while utilizing the integrated graphics card, chances are you’ll get a black screen while recording the screen.
This happens because you allocate GPU resources when you run a game or a specific application. Once you try to capture the screen via OBS Studio, you allocate the GPU resources again. GPU will not be able to handle the screen recording in this case. The only solution left is to switch the GPUs.
Here’s how to switch GPUs and record screens via OBS Studio without any black screen issues:
Step 1. Navigate to “Settings” on your PC.
Step 2. Then, navigate to “System > Display” and click on “Graphics“.
Step 3. Explore the list of Applications and find OBS Studio. If it’s not in the list, click “Add an App”.
Step 4. Once done, click on OBS Studio and choose “High Performance” from the Graphics Preferences window.
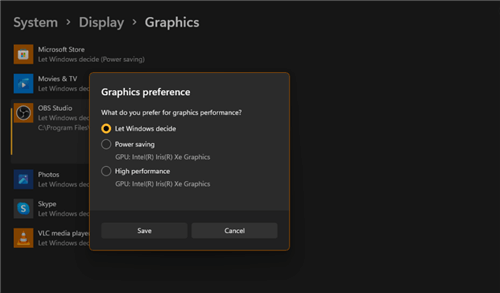
Choose High Performance
Method 6: Enable Compatibility Mode
Windows PC has a compatibility mode where you can run programs or software for older operating system versions. Wondering what is compatibility mode? The compatibility mode is a condition where your operating system will simulate the processor, operating system, and even hardware to older versions and run the applications according to it.
Many users have reported that the OBS black screen issue appears after updating to Windows 10 or 11. Therefore, it is recommended that OBS Studio’s operations be checked, considering the older operating system. For that purpose, you can enable OBS compatibility mode. Here’s how to do it:
Step 1. Navigate to the folder where OBS Studio is installed on your PC.
Step 2. Right-click on the OBS Studio application and click on “Properties.”
Step 3. Navigate to the “Compatibility” tab. You can “Run Compatibility Troubleshooter” for automatic diagnostics.
Step 4. You can also click “Run this program in compatibility for:” and choose the desired operating system, such as Windows 8 or 7.
Step 5. Click on “Apply” to finish the process. Restart OBS Studio and check if the black screen issue is resolved.
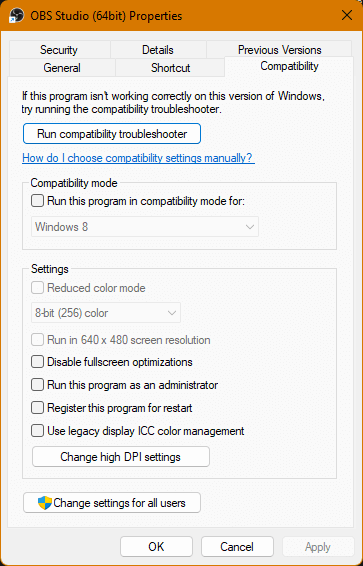
Choose Apply
Method 7: Try OBS Alternative-Screenify (Hot)
The OBS black screen problem can be troublesome, especially if you want to record important meetings, online lectures, or instructional videos. A black screen can appear anytime, even during the recording process, ruining all your progress. However, worry no more—we’ve got you a solution! We highly recommend using Screenify, a reliable OBS alternative, to eliminate the black screen problem.
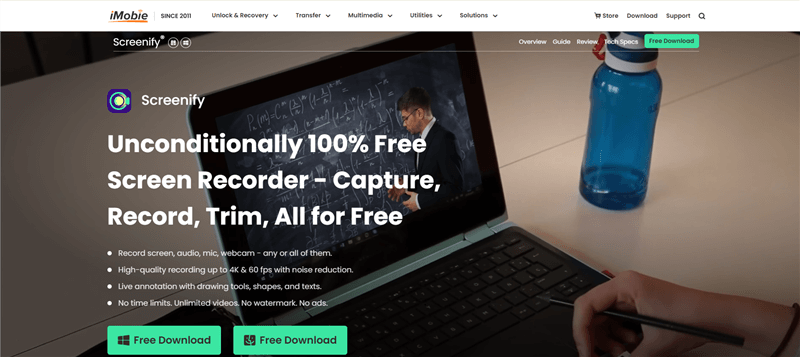
Screenify Website Interface
Screenify is a trusted tool with 4K screen recording capability— No more blurry or black screen issues! Apart from the 4K resolution, Screenify can capture the happenings on the screen at 60 frames per second (FPS), which eliminates the lag and distortions. Additionally, this recording tool has dual audio recording capabilities, which means that you can record both system audio and microphone simultaneously.
Free Download * 100% Clean & Safe
Advantages of Screenify:
- Lock window features ensure privacy by recording only what’s in the recording window.
- Screenify supports multiple recording modes, where you can choose full screen or a part of it.
- Record screen alongside audio in 4K resolution at 60 FPS.
- Adjust the volume of both audio input sources to make a perfect blend.
- There are no time limit constraints and watermarks.
How to Record Screen Via Screenify
Step 1. Download and install Screenify on your computer. Open Screenify and choose the “Record Screen” option.
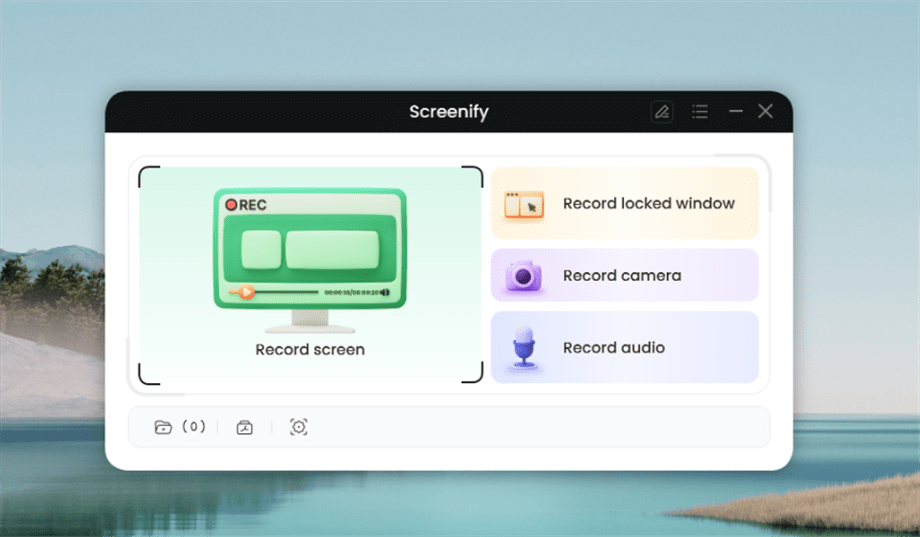
Select Record Screen Mode
Step 2. Adjust your recording settings, such as system audio, before starting.
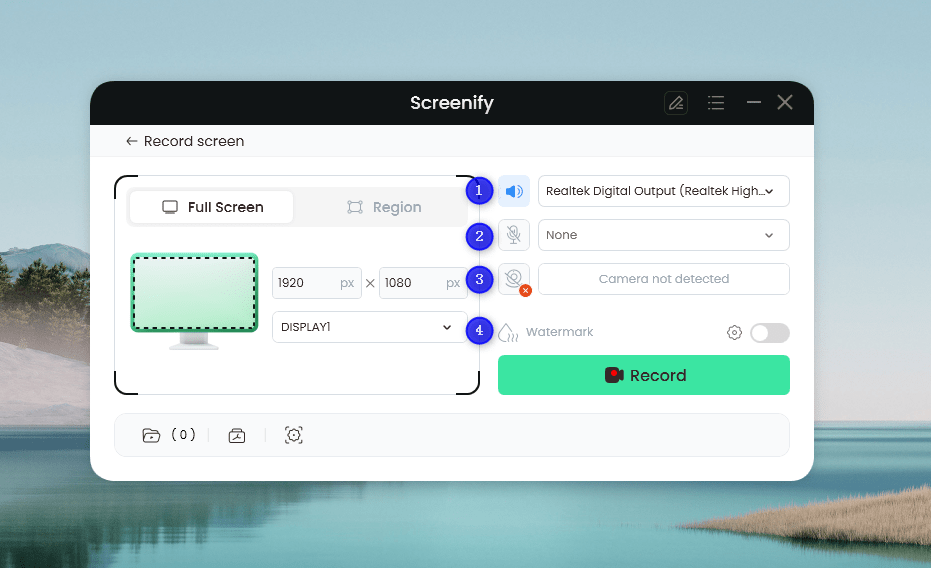
Set Configure Recording Settings
Step 3. Select the recording area—choose “Full Screen” or highlight a specific region. Click “Record” to begin. You can also adjust the area for social media sizes if needed.
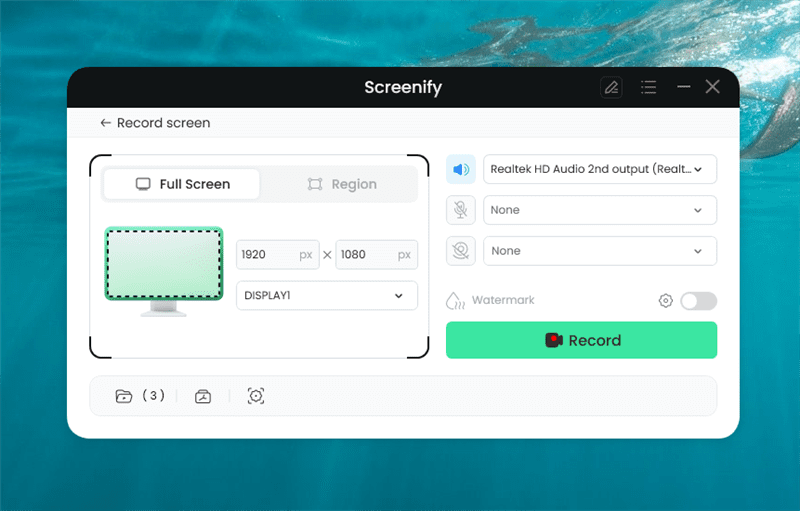
Screenify Full Screen Record
Step 4. Wait for the 3-second countdown to get ready. Recording will start after the countdown. You can add annotations during the capture if you wish.
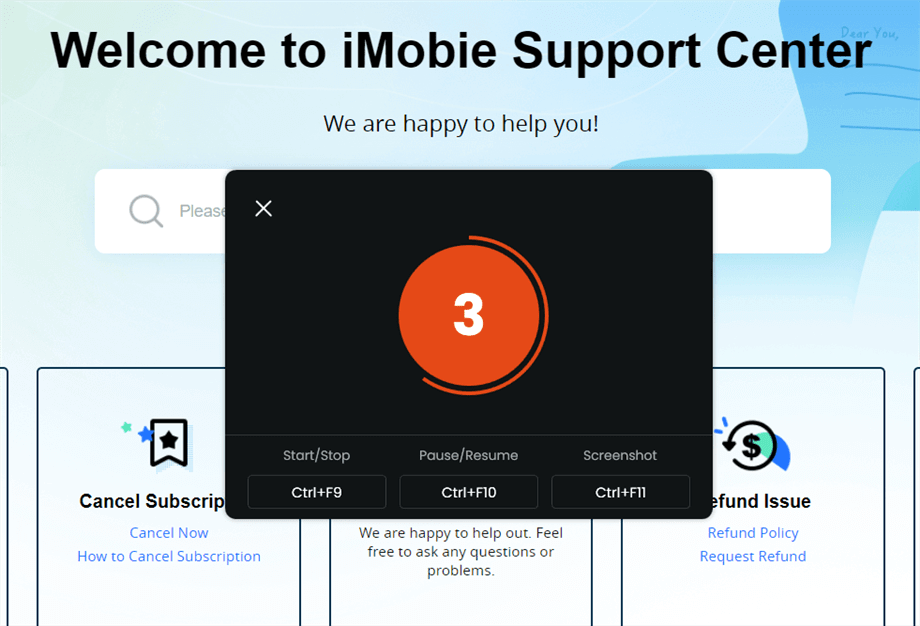
Wait for the Recording Countdown
Step 5. Click the red “Stop” button to finish. Preview and manage your recorded videos afterward.
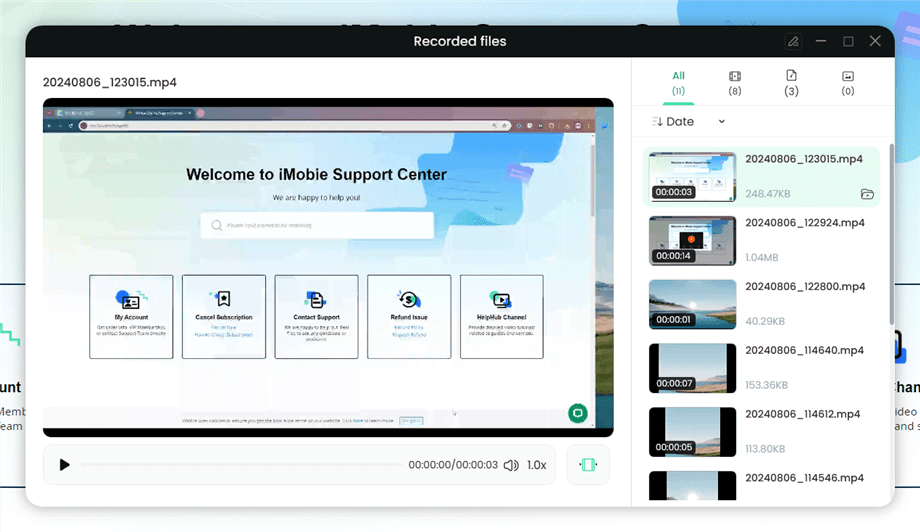
Preview the Recording
FAQs on OBS Black Screen
Q1. Why is the preview black in OBS but my stream/recording works fine?
This might be a settings issue. Try adjusting the preview settings by right-clicking the preview area and selecting “Enable Preview.”
Q2. Why is OBS showing a black screen only for specific windows?
This may happen if OBS isn’t configured to capture the specific application. Go to “Window Capture” or “Game Capture,” then choose the specific window or application.
Part 4: Conclusion
OBS Studio is a trustworthy screen recording and streaming tool with a brilliant 4K screen recording capability. However, sometimes, OBS Studio can have black screen issues, ruining the overall experience. We have compiled all the solutions to fix the OBS black screen problem above. You can also utilize Screenify— the best OBS alternative to record screen in 4K at 60 FPS without any time limits or watermarks.
Product-related questions? Contact Our Support Team to Get Quick Solution >

