How to Screen Record on Windows 7 PC or Laptop [2025]
This article, will explore five methods of how to screen record on Windows 7. All the methods come with step-by-step guidelines. Just keep reading!
Ever wished you could record your Windows 7 screen? Maybe you just want to record a gaming moment, a tutorial you want to share, or a video call with a loved one. Whatever it is, this guide is going to help you!
We will explore various methods for how to screen record on Windows 7. From built-in features you don’t know about to online tools, we will cover everything. So grab your Windows 7 PC, and let’s get started!
How to Screen Record on Windows 7 via Built-in Tool Free?
Windows 7 doesn’t offer an official screen recorder. However, it has a hidden built-in tool that you can use to record what’s happening on your screen. This tool is not ideal for recording detailed videos. You can just use it for recording basic actions and demonstrations.
Here is how to screen record on Windows 7 using the built-in tool:
Step 1: Click the “Start Menu” and search for “Problem Steps Recorder.” Open the program. A small window will appear.
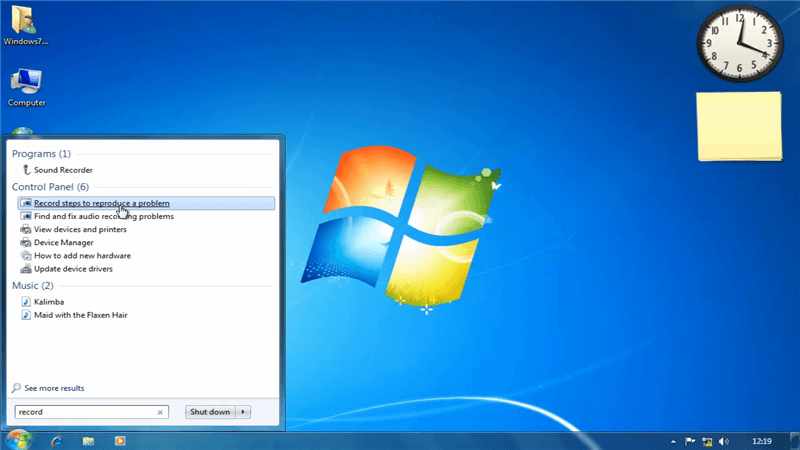
Open the Problem Step Recorder
Step 2: Click “Start Record” to begin capturing your screen activity. Remember, this records your actions, not a full video.
Step 3: Perform the steps you want to record on your screen. Click, drag, type – everything you do will be captured. Once finished, click “Stop Record.”
You can also add comments or annotations to explain your actions. Save the recording as an “.MHT file.” This file can be opened in most web browsers and will replay your screen actions with your comments. However, keep in mind that this recording is just screenshots of what you do on your screen. It is not a proper video.
If you want to know how to screen record on Windows 7 with audio, read the next part.
How to Screen Record on Windows 7 with Audio via PowerPoint?
Let us tell you that PowerPoint can do more than presentations. You can also use it to screen record on Windows 7, and this hidden feature of PowerPoint is underrated. Most users don’t know about this feature of PowerPoint.
However, it is a simple way to record your screen with audio. You can record the tutorials, demonstrations, and even your video calls with the audio.
Here is how to screen record on Windows 7 with audio:
Step 1: Open Microsoft PowerPoint and click the “Insert” tab on the top ribbon. Look for the “Screen Recording” button on the far right side and click it.
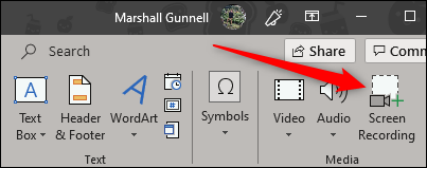
Find Screen Recording Option in the Toolbar
Step 2: Choose the area you want to record (the entire screen or specific window). You can also enable microphone recording here.
Step 3: Click “Record” to begin capturing your screen and audio. When finished, press the “Windows Key + Shift + Q” keys to stop recording.
Your recording will be inserted as a video clip on your slide. You can trim or edit the clip within PowerPoint. Save your presentation as a video file to keep your recording.
Not everyone has PowerPoint on their PC/laptop, but fear not! Online screen recorders are here to save the day. These web-based tools are just as simple to use, and the best part? No downloads are required! Let’s explore how to record PC screen Windows 7 online!
How to Record PC Screen Windows 7 Online
Ditch the downloads! We’ll explore online screen recorders – web tools to capture your screen directly in the browser. These are perfect for a clutter-free approach and often come with editing tools and cloud storage for easy access. Keep in mind that some free options might limit recording time or quality, so choose wisely!
Here is how to screen record in laptop Windows 7 using an online tool:
Step 1: Search for a reputable online screen recorder using your web browser. There are many options available, so explore features and reviews before choosing one. We are using Flex Clip as an example.
Step 2: Click the “Start Recording” button to start capturing your screen activity. A pop-up window will appear, asking you to choose your recording mode.
Here, you can decide to record your screen only, webcam, or both screen and webcam. Select your desired recording mode and click “Next Step.”
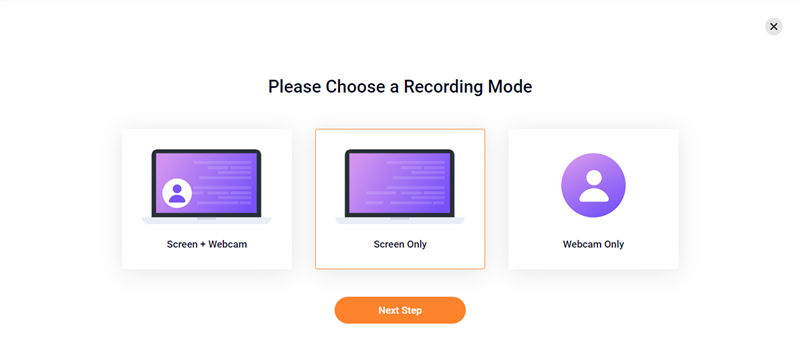
Choose Your Recording Mode
Step 3: Next, choose your desired recording settings and click the “Start Recording” button.
Step 4: Now, you can choose what part of your screen to record. Click on “Entire Screen” to capture everything, or choose “Application Window” or “Chrome Tab” to record a specific program or browser window.
Step 5: A short countdown will appear, and then Flexclip will start capturing your screen. Remember to perform the actions you want to record during this time.
Step 6: When finished, click the stop recording button (a square red icon) in the middle of your screen.
Flexclip will offer you options to download your recording or edit it directly in their online editor. You can choose the format (MP4 or WebM) and download quality before saving the recording to your computer.
So, this is how to screen record on Windows 7 using an online tool. However, if you prefer to record the Windows 7 screen directly from your Windows, without using a browser, we have another handy option for you!
Let’s explore it together!
How to Record PC Screen Windows 7 with Xbox Game Bar
The Xbox Game Bar is a built-in feature on Windows. It allows you to record your screen activity with ease. This tool is also perfect for recording gameplay moments, creating tutorials, or recording video calls. This method is quick and doesn’t require any additional software downloads.
Here’s how to record PC screen Windows 7 using Xbox Gamer Bar:
Step 1: Press the “Windows logo key + G” on your keyboard. This shortcut opens the Xbox Game Bar overlay.
Step 2: In the capture widget, click the “Start Recording” button. You can also use the shortcut key “Windows + Alt + R.”
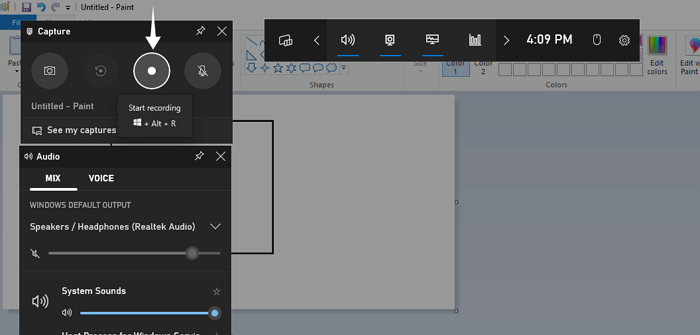
Start Recording with Xbox Game Bar
Step 3: Now, if you want to stop recording, click the “Stop Recording” button in the capture widget. Or, use the shortcut keys “Windows + Alt + R” again.
Although this method is handy, it has its own drawbacks. You can only use it to record your gameplay. The capture widget features will only be enabled if you are in game mode. Therefore, this method is only limited to recording what’s happening in the game.
How to Screen Record on Windows 7 via Screenify
Ever wished for a screen recording tool that’s both awesome and free? Well, hold onto your hats! Screenify is on the way for Windows and Mac users, and it looks like a total game-changer.
Why the Hype?
- Crystal Clear Recordings: Capture your screen in impressive quality without any watermarks spoiling the view.
- Record Your Way: Choose to record specific programs, your entire desktop, or even add your camera feed for a more personal touch.
- Talk it Out: Record your voice alongside your screen activity, perfect for creating video tutorials or explaining things step-by-step.
FAQs on How to Screen Record on Windows 7
Q1. Does Windows 7 have a screen recorder?
While Windows 7 itself doesn’t have a built-in screen recorder like newer versions, this guide offered a few solutions! If you need to capture basic screen actions for a quick tutorial, the Problem Steps Recorder can be a handy tool. But for capturing your screen with audio, like for a video presentation, PowerPoint’s screen recording feature might be a better fit.
Q2. How to record video with a webcam on Windows 7?
This guide focused on screen recording, but capturing webcam video on Windows 7 is easy! Many video chat applications like Skype or Zoom allow you to record yourself or your video call directly within the program. Moreover, free software options like ManyCam or YouCam offer webcam recording features.
Final Thought
This guide has explored various methods for how to screen records on Windows 7. Whether you need basic tutorials or record video calls with audio, there’s a solution! Built-in Problem Steps Recorder captures simple actions. For more features and audio, explore PowerPoint’s hidden screen recording tool. Web-based recorders offer convenience but with limitations. Furthermore, keep an eye out for the upcoming Screenify software. It is free and offers a feature-rich experience for Windows and Mac users. Now you can do screen recording on Windows 7 and share your creations with others!
Free Download * 100% Clean & Safe

Senior writer of the iMobie team as well as an Apple fan, love to help more users solve various types of iOS & Android-related issues.
Product-related questions? Contact Our Support Team to Get Quick Solution >
