How to Screen Record on ThinkPad: Quick and Easy Steps!
Learn how to record the screen on your ThinkPad. Discover easy methods and tools to record your screen.
Try Screenify for free to record screen on Windows or Mac. Whether full-screen or partial-screen recording, recording with sound or with camera, Screenify can do it with ease.
Screen recording ThinkPad laptops can be useful in different situations. Whether you’re looking to record a game process, a training video, how to use a software functionality or more, you can use screen recording to execute the task without any hassle. But if you don’t know how to go about it, don’t panic. We’ve prepared this guide to help you out.
Here, we’ll introduce you to the various ways to screen record ThinkPad using built-in tools or third-party software. So, without wasting much time, let’s dive into the article to find out more.
PART 1: How to Screen Record on a Lenovo ThinkPad
It’s easy to record Lenovo Thinkpad screen activities. In this part, we’ve discussed three free methods that you can use using built-in tools.
Method 1: Via Windows Xbox Game Bar
Just like other Windows laptops, the Lenovo Thinkpad has a built-in Xbox Game Bar that allows you to record your on-screen activities with or without audio.
Although Xbox Game Bar was originally designed for gamers to record their gameplay, it’s now one of the most effective tools for performing simple screen recording tasks for presentations, tutorials, instruction guides, etc.
Here is a step-by-step guide to using Windows Xbox Game Bar to screen record Lenovo Thinkpad;
Step 1: Click the “Windows” button on your keyboard and select “Settings”.
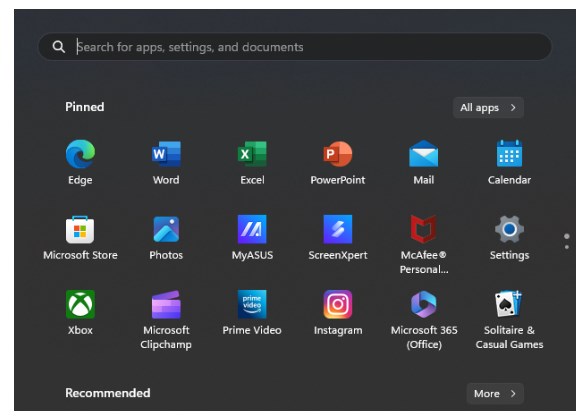
Click the “Windows” button
Step 2: Click on “Gaming” from the left bar and select “Game Mode”. Turn on the toggle next to “Game Mode”.
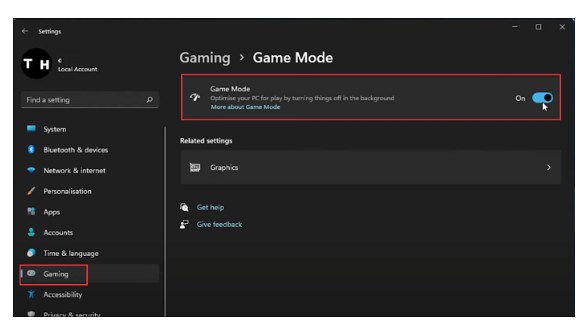
select “Game Mode”
Step 3: Simultaneously press the “Windows + G” buttons to initiate the Xbox Game Bar.
Step 4: Navigate to the Xbox Game Bar widgets in the top navigation and select “Capture” to start screen recording your Lenovo Thinkpad screen.
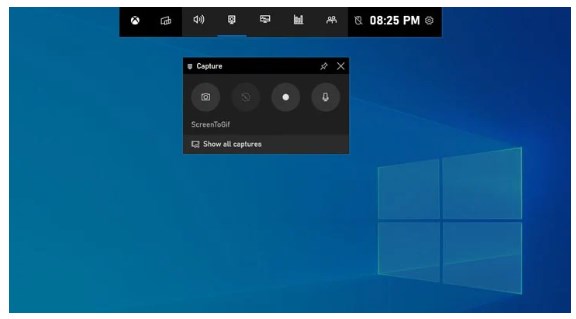
select “Capture”
Method 2: Use Snipping Tool
While it’s primarily used for taking screenshots on Windows computers, the Snipping tool also offers a basic screen recorder that allows you to record your computer’s screen activities within a few clicks.
See the steps to use the Windows Snipping tool to screen record on Thinkpad below;
Step 1: Simultaneously press the following combination on your keyboard; “Windows + Shift + S”.
Step 2: Click on the “Video Recorder” icon.
Step 3: Drag the “Cross icon” to highlight the part of your screen you want to record and click on the “Start” button to start screen recording your activity.
Step 4: Once you finish recording your screen, click the “Red stop icon” to end the process.
Method 3: Through Lenovo Vantage
Lenovo Vantage is a comprehensive suite of tools pre-installed on all Lenovo PCs. This tool allows you to manage different system settings, update drivers, and do much more, including screen recording. Here is how it works;
Step 1: Click on the “Windows Start button” and search “Lenovo Vantage” on your Thinkpad laptop.
Step 2: Click on the app icon to launch it. Then, navigate to “My Device Settings” tab.
Step 3: Click on “Display & Camera”. Then, scroll to the “Screen Recording” option and click on it to start recording your computer screen.
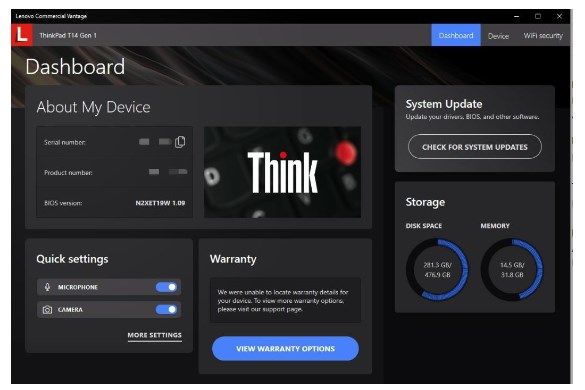
Lenovo Vantage
PART2: Alternative Solution: Record Your Screen with Screenify
While the above techniques allow you to record your screen on Lenovo Thinkpad for free, they do not get the job done with high quality.
A more effective way to screen record on Thinkpad is via Screenify screen recorder software. This software allows you to screen-record presentations, product demonstrations, game videos, and lots more in 4k quality using advanced features.
Also, Screenify offers different types of recording modes, including lock window recording, camera recording, and more. Plus, it allows you to brand your screen record with a watermark,
Key Features
- Completely free: Screenify is a free screen recording software for Windows and macOS platforms.
- Users can record the screen for unlimited time without worrying about time limits.
- Support 4K 60FPS video recording: Provide high-quality video recording experience to meet professional needs.
- Support full-screen recording, area recording, locked window recording and camera recording to meet the needs of different scenarios.
- Users can freely set text watermarks to protect video copyrights.
- Built-in toolbar noise reduction function can reduce noise in audio and video files.
How to Record Your Screen with Screenify:
Step 1.Download and Install Screenify on Computer.
Step 2.Launch Screenify on your computer, and select Record screen mode.
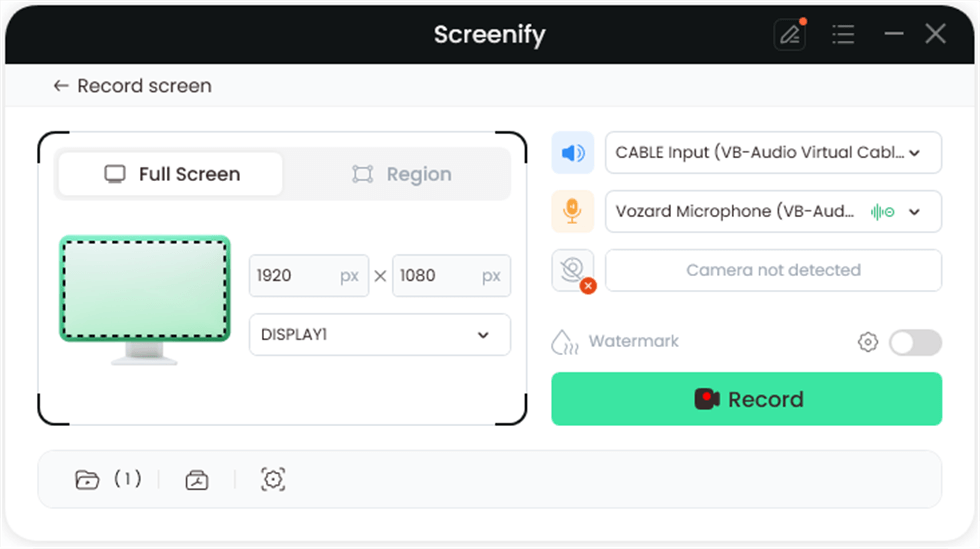
Select Record Screen Mode
Step 3.Configure Recording Settings aims to configure settings like system audio before recording.
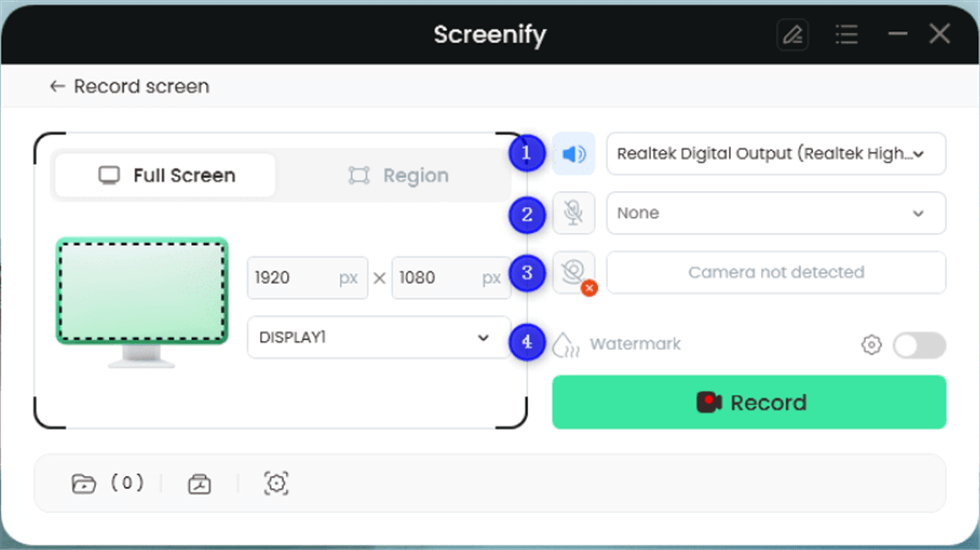
Record Setting
Step 4.Select Recording Screen.
The screen mode offers two recording options: you can either record the entire screen or select a specific region to record.
Option 1. Full Screen Record
Please select Full Screen mode and choose the display you need to record. Hit Record button to initiate recording.
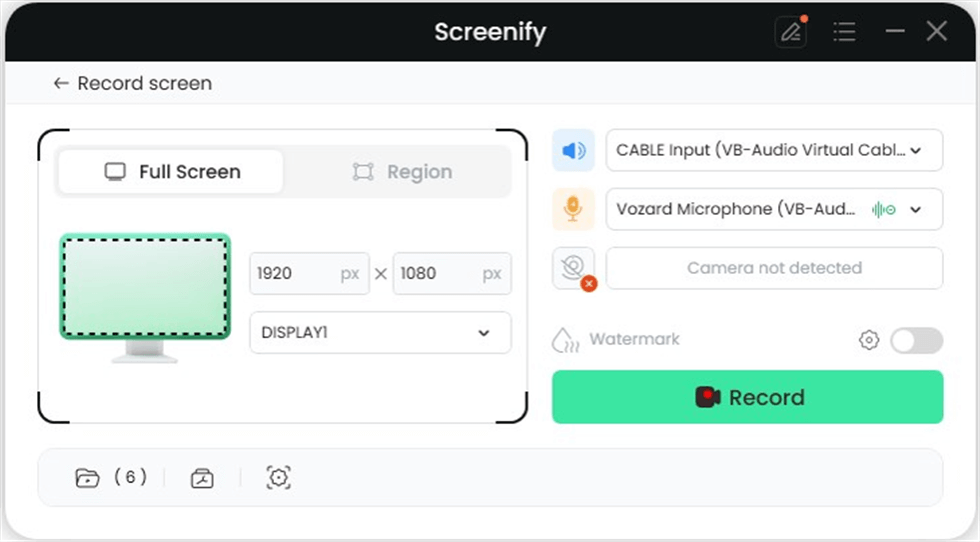
Full Screen
Option 2. Region Record
To record region, you need to manually select the recording area. After selection, you can still adjust the selected area. It supports customize selection, full screen, and proportional selection based on common social media dimensions.
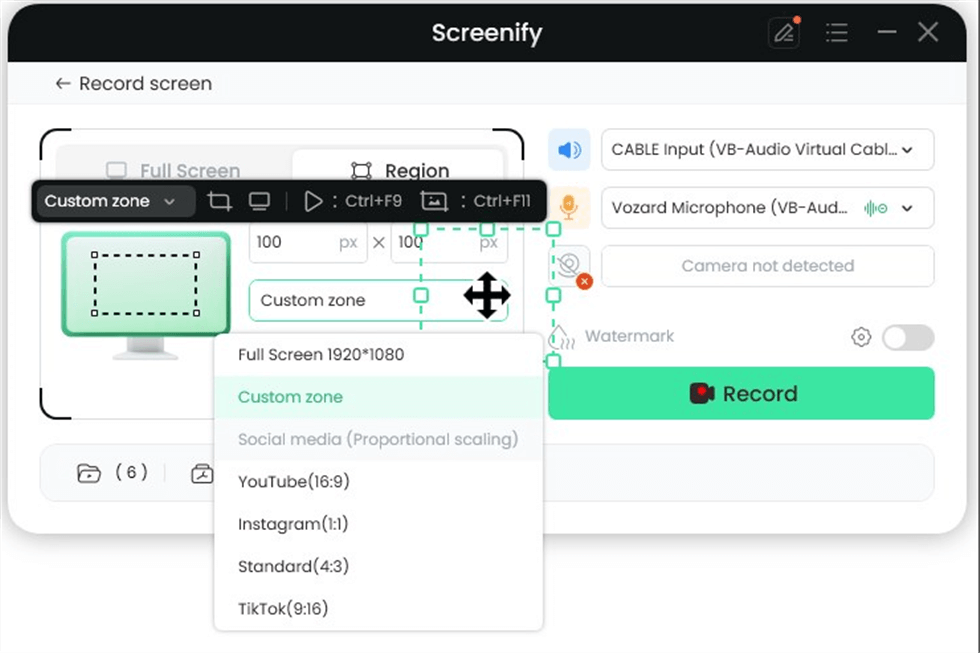
Record Region
Step 5.Wait for the Recording Countdown.
There is a 3-second countdown to help you prepare the recording after you are ready to start recording.
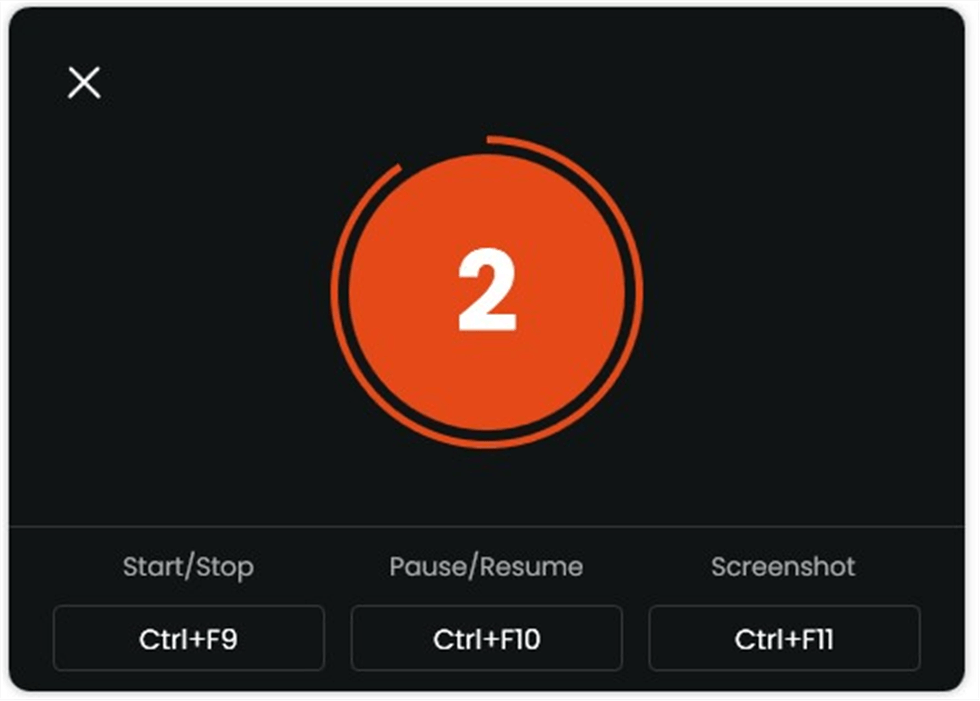
Start recording countdown
If you would like to see a recording countdown before your recording starts, you can enable the countdown option. Or you can tap it off. View this post to know how to set the countdown option.
Step 6.Start Recording.
The recording will begin after a 3-second countdown. You can make annotations on the recording interface during the recording.
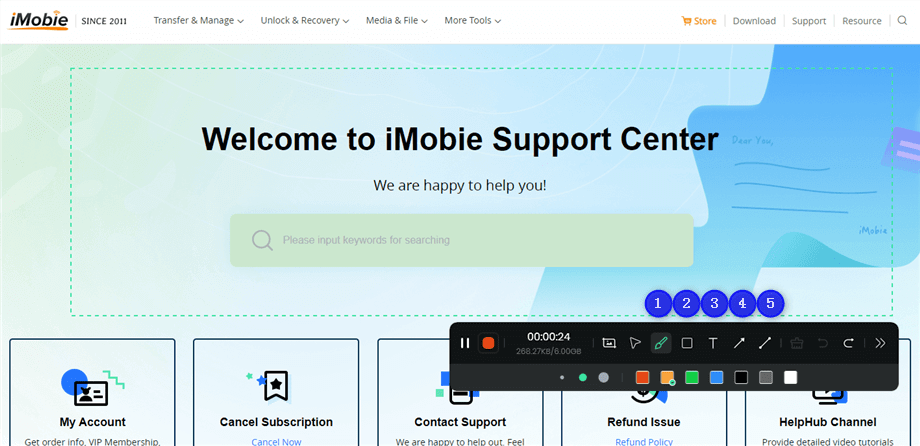
Annotate the Screen during Recording
Step 7.Record Screen Process Completed.
When the recording is completed, you can click the red Stop button to end the recording. Your recorded files will be displayed. From here, you can preview and manage the recorded content as needed.
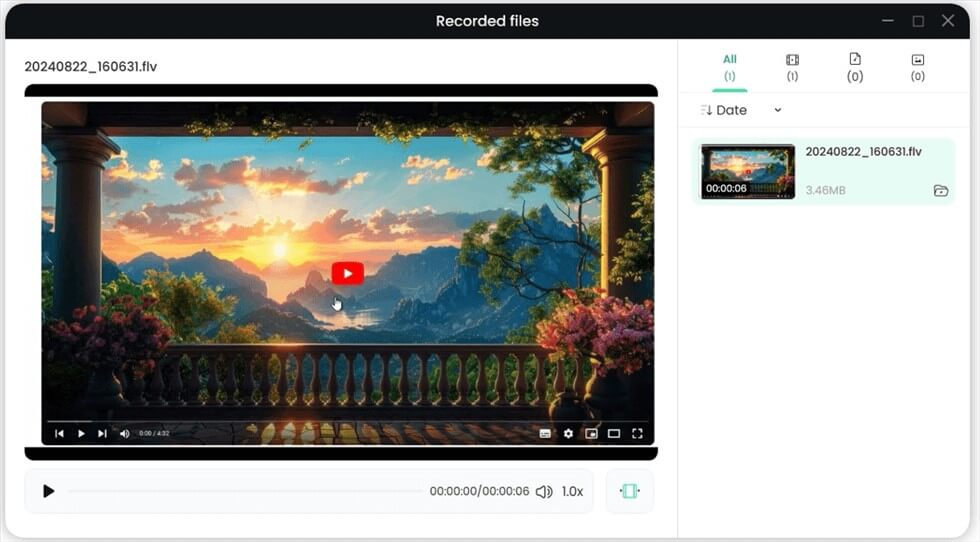
Record Screen Process Completed
PART3: Faq about Screen Record on Thinkpad
1. How do I Record audio on my Lenovo Thinkpad?
You can record audio on your Lenovo Thinkpad laptop by using either the Windows audio recorder tool or Screenify Screen Recorder.
2. How can I screen record on my Thinkpad laptop?
There are different ways to screen record on a Thinkpad laptop. You can either use built-in tools like the Xbox Game Bar, Windows Snipping tool, and Lenovo Vantage or third-party apps like Screenify Screen Recorder.
3. Do all laptops have screen recording?
Yes, most of modern laptops, including Mac and Windows have screen recording. They usually have built-in tools to screen-record your activities without even requiring the installation of a third-party app.
Conclusion
You don’t need to be tech-savvy to be able to screen record on ThinkPad. In the article above, we’ve explored how to screen record on Thinkpad using built-in tools. All you just need is to follow the steps provided accordingly.
However, if you need an alternative solution to screen record Thinkpad with better quality, Screenify Screen Recorder is the best solution.

Joy Taylor


Senior writer of the iMobie team as well as an Apple fan, love to help more users solve various types of iOS & Android-related issues.
Screenify
AnyEnhancer
FocuSee
Vozard
AnyMiro
AnyMirror

