4 Free Ways to Record Screen on Acer Laptop
If you are searching for free ways to record screen on Acer laptop, this article is what you need. There are 4 methods available for Acer laptop screen record. Check them out now!
Try Screenify for free to record screen on Windows or Mac. Whether full-screen or partial-screen recording, recording with sound or with camera, Screenify can do it with ease.
Have you ever been in a video conference or an online class and wanted to record everything you see on your computer screen? From recording tutorials to online gaming, screen recording is now an almost indispensable element of our lives.
If you have an Acer laptop, this article will walk you through the best ways to record your screen. Let’s also look into some add-on tools for how to screen record on Acer laptops. By the end of this article, you should be ready to begin capturing your screen without difficulty. So, without further ado, let’s dig in!
Why Do You Need to Screen Capture on Acer Laptops?
In today’s world, screen recording has become a necessity. For those who use computers excessively, screen recording is a blessing in disguise.
Here are some incredibly versatile scenarios where you might need to screen capture your laptop screen.
Why Do You Need to Screen Record?
- Live Streaming Games: To share your gaming streaks and strategies online with friends and audiences.
- Record Presentations/Tutorials: Record screen in real-time to create video guides or explain a topic.
- Record Video Calls: Don’t miss a point from an important meeting by screen recording the conversations.
- Saving Online Content: Save videos and stories that are available for a limited time online.
- Video Record Webinar: Record a conference or a lecture to follow up on the details later.
Screen recording is helpful in more ways than one. In the tech world, leaning on these hacks improves productivity and efficiency.
Preparing Your Acer Device for Screen Recording
Before we move on to the tutorial on screen recording on Acer laptops, you must note some prerequisites. You need to prepare your Acer laptop for things like storage and battery.
Here are the boxes you need to check for unbuffered sound screen recording.
Getting the Acer Laptop for Screen Capture:
- Set up your camera and audio device. Test your in-built webcam and microphone and assess their quality. Or, connect external devices for camera and audio functionality.
- Your Acer laptop should have sufficient storage to store your files. The disk should have at least 1GB of space.
- Ensure 4GB RAM on your laptop for good processing speed.
- Keep your Acer laptop charged or plug it in. A low battery activates ‘battery optimization mode,’ which might hinder the screen recording function.
- Acer laptop should have a Windows 10 operating system.
- Microsoft PowerPoint should be installed and functional on your PC.
Now that our device is completely set up let’s take you on a guide on how to screen record on Acer.
Using Built-in Tools to Screen Record on Acer
If you have followed our above-listed instructions keenly, you are ready to move to the tutorial on screen recording. Acer laptops with Windows 10 and PowerPoint can record screens without third-party software.
1. Use Xbox Game Bar to Screen Record on Acer Laptop
Easily record the screen of your Acer laptop with Windows built-in game box button. Microsoft introduced this feature for gamers in its Windows 10 version. If you do not favor third-party applications, effortlessly capture the screen with the Game bar.
How To Screen Record on Acer with Windows 10 Game Bar:
Here is how to record the screen with the Windows 10 Gamebox button.
1. Open the screen or website you want to screen record.
2. Press the Windows + G button on the keyboard simultaneously to open the Game Bar.
3. From the menu panel that opens, choose Capture.

Window Game Bar feature
Alt+text: Window Game Bar feature
4. Click on the Recording button to Start recording.
alt+text: Start recording screen
5. Press the red circle to Stop the recording.
And the recording will be automatically saved in a folder on your Acer laptop. Game Bar has a simple recording feature with decent functionality. Capture your screen in just five simple steps.
2. Screen Record on Acer Laptop with Microsoft PowerPoint
For presentations, PowerPoint has a special screen recording feature. If you want to capture your presentation without any third-party interference, this is your go-to option to try!
How To Screen Record on Acer with Microsoft PowerPoint:
Follow the steps to record your presentation on Powerpoint.
1. Open your presentation on Microsoft PowerPoint. Open the slide you want to record.
2. From the ribbon, click to open the Record tab. Click the Record button and select ‘From beginning’ or ‘Current Slide.’
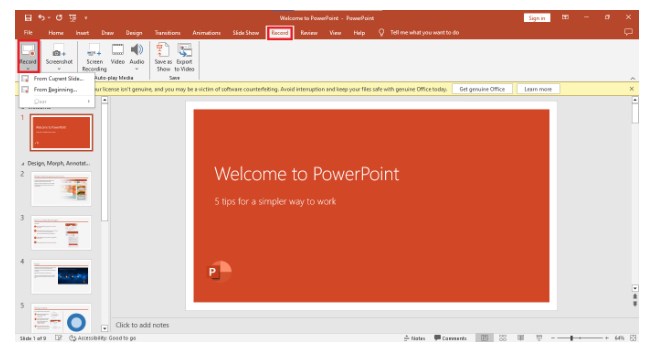
Powerpoint record featuure
3. Next, the recording feature will open on the chosen slide. Click the Record button to start and use the markup tools to annotate.
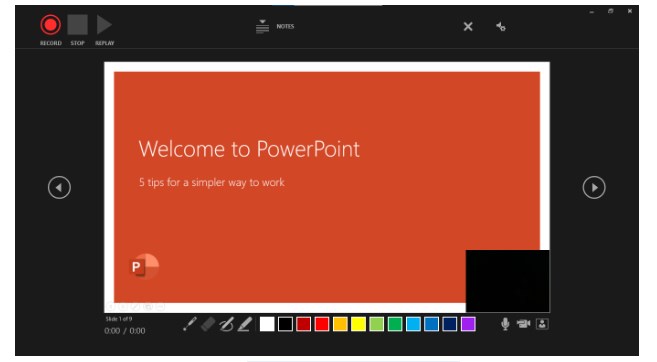
record slide with screen recorder
4. Click Stop to end the recording. The video will automatically be added to the corner of the slide.
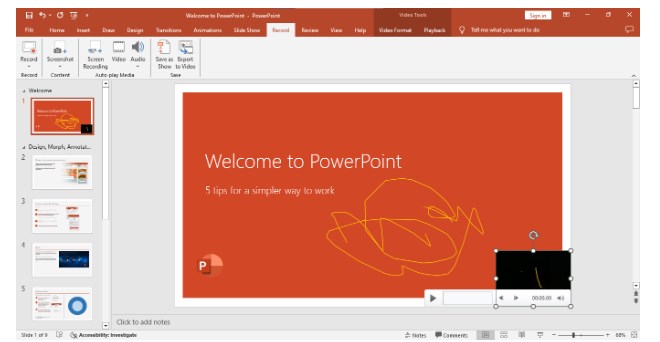
screen recording added to the slide
And that is how you can easily capture the screen and add it to your slides.
The above methods are handy for recording a screen instantly or adding video notes to a presentation. For advanced video recording functionality, third-party applications do the job well. Find out our choice for screen recording with specialized features.
Using Third-Party Software to Screen Record on Acer
The built-in features have limited ease of use and performance. Here are our two top picks from a crowd of third-party recording software.
1. Record Screen on Acer with Free Screen Recorder
Screenify is an upcoming screen-recording software for MacOS and Windows. It is a versatile, professional recorder that offers multiple recording modes. With a large set of features, it is a highly functional tool with excellent output.
The interface is extremely simple and intuitive, perfect for beginners and professionals. Screenify offers 4K, 60fps recording for a clear, sharp result.
It offers in-app cropping tools and free text watermarking on videos. You can mark up the video to highlight a specific point. However, OBS doesn’t natively provide in-app markup or editing tools. Its overwhelming interface is also trickier than Screenify.
Key Features of Screenify:
- Free software with 4K, 60fps screen recording.
- Multiple recording modes.
- Lock Window recording.
- Compatible with various file formats.
- Video Trimming and Watermarking Tools.
- Noise reduction for audio and video files
Use Screenify to Screen Record on Acer:
Step 1. Download and Install Screenify on the Computer.
Step 2. Launch Screenify on your computer, and select Record Screen mode.
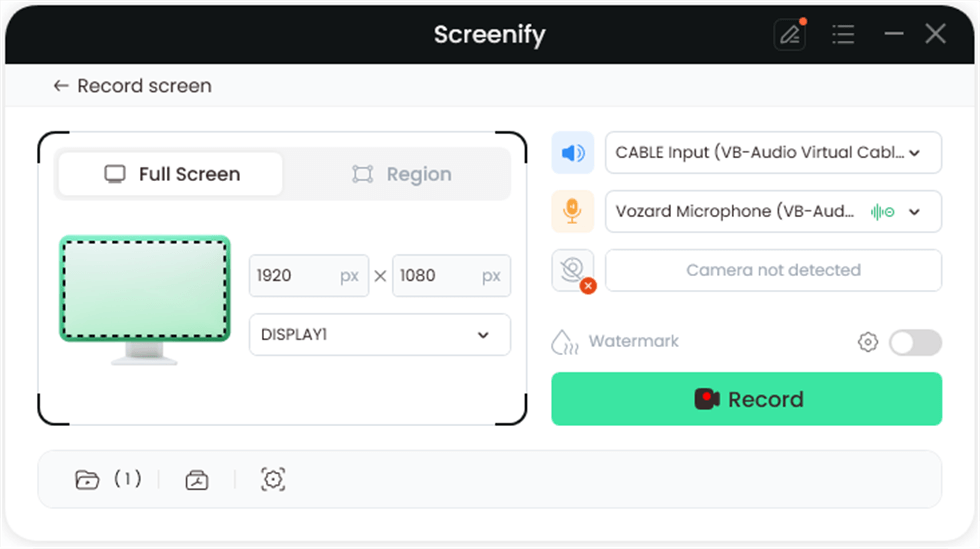
Select Record Screen Mode
Step 3. Configure Recording Settings aims to configure settings like system audio before recording.
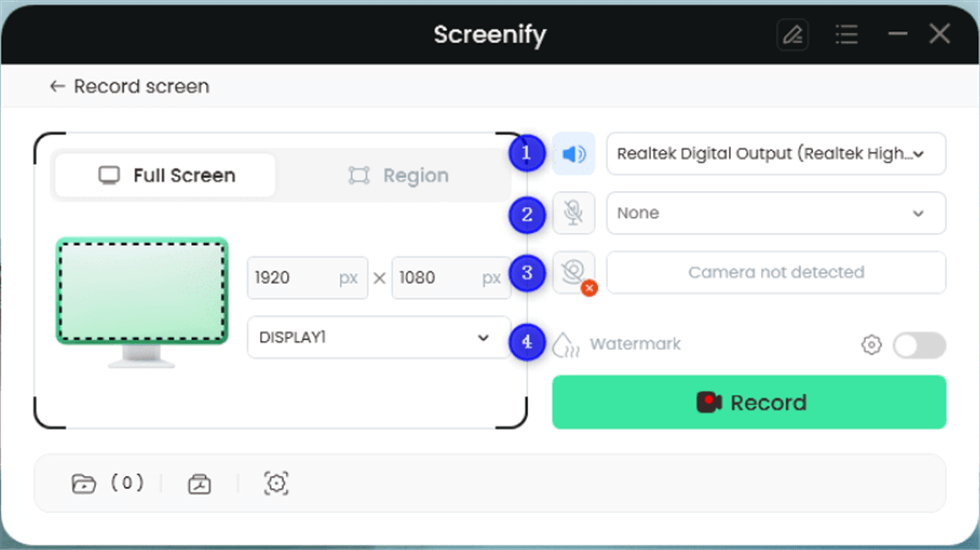
Record Setting
In this setting menu, you can:
1 Choose the System audio.
2 Choose the Microphone you want to record.
3 Choose the Camera you want to use.
4 Choose whether to add a watermark.
Step 4. Select Recording Screen.
The screen mode offers two recording options: you can either record the entire screen or select a specific region to record.
Option 1. Full-Screen Record
Please select Full-Screen mode and choose the display you need to record. Hit the Record button to initiate recording.
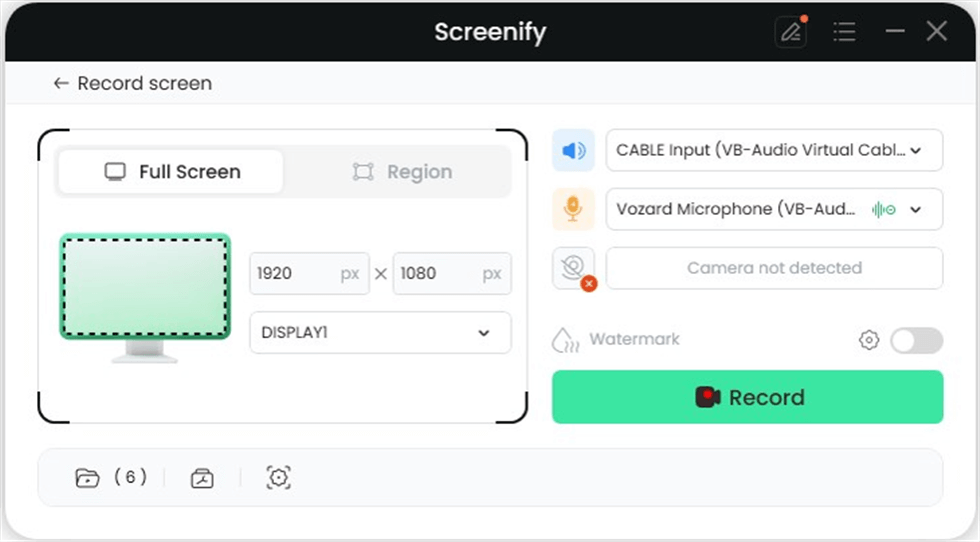
Full Screen
Option 2. Region Record
To record the region, you need to manually select the recording area. After selection, you can still adjust the selected area. It supports customized selection, full screen, and proportional selection based on common social media dimensions.
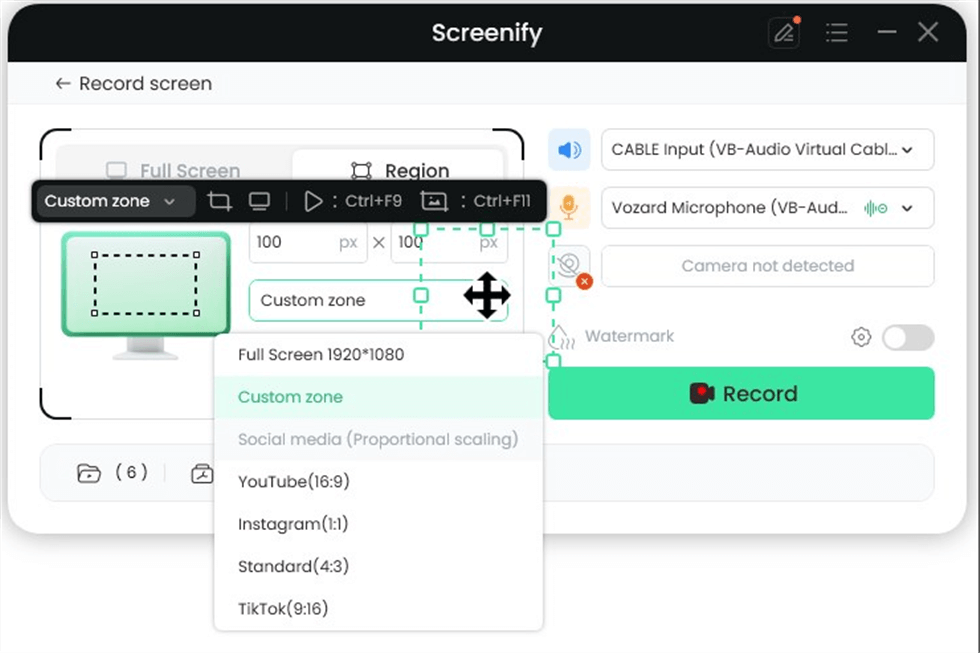
Record Region
Step 5. Wait for the Recording Countdown.
There is a 3-second countdown to help you prepare the recording after you are ready to start recording.
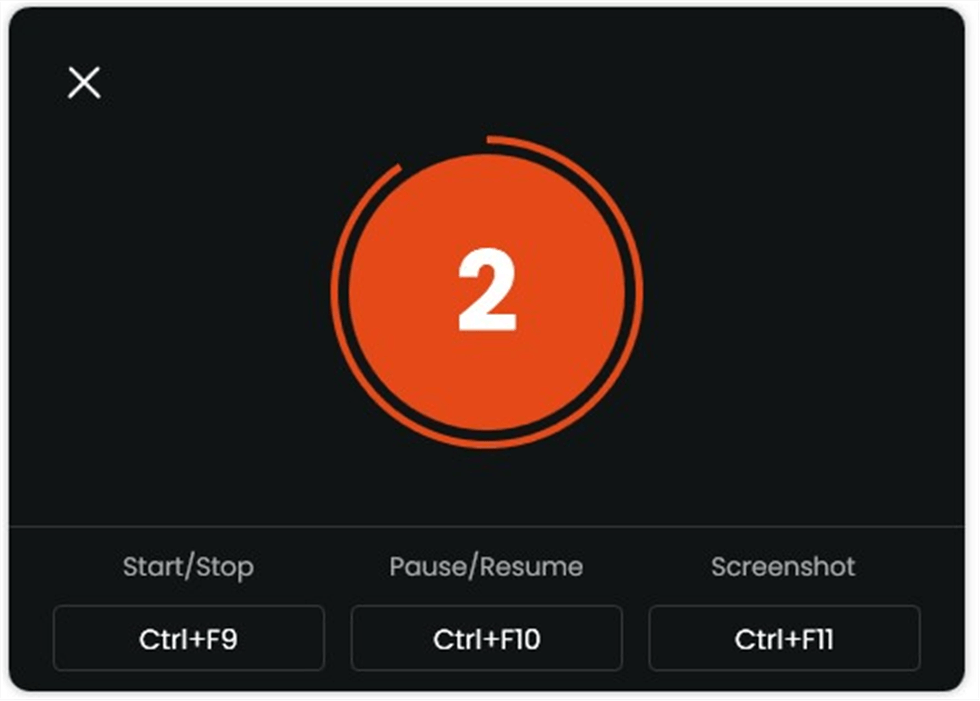
Start recording countdown
Step 6. Start Recording.
The recording will begin after a 3-second countdown. You can make annotations on the recording interface during the recording.
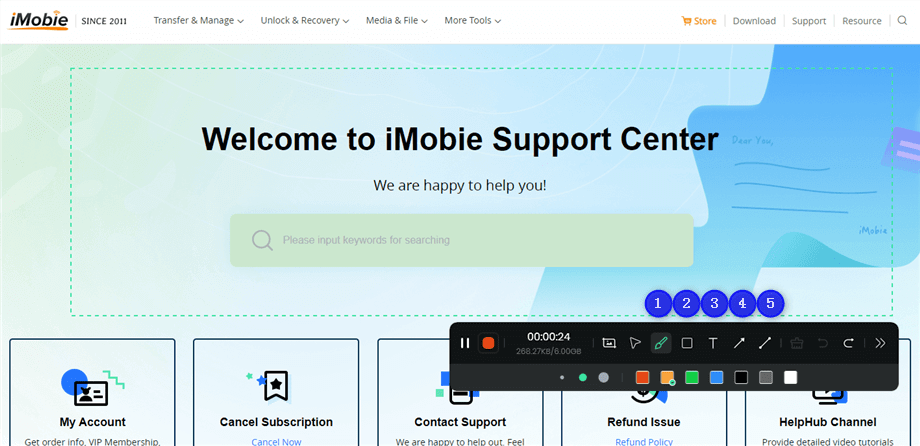
Annotate the Screen during Recording
With the toolbar, you can add the annotation in the screen:
1 Brush: Draw freehand on the screen recording interface to highlight or illustrate specific areas during the recording.
2 Rectangle: Draw rectangular shapes on the screen recording interface.
3 Text: Add written notes or labels directly onto the screen recording interface.
4 Arrow: Draw arrows on the screen recording interface to point out and emphasize specific areas.
5 Line: Draw straight lines on the screen recording interface to underline or connect specific points.
The toolbar can be expanded or collapsed. This feature allows you to access various tools and options when needed, and hide them to keep the workspace uncluttered when they are not in use.
Step 7. Record Screen Process Completed.
When the recording is completed, you can click the red Stop button to end the recording. Your recorded files will be displayed. From here, you can preview and manage the recorded content as needed.
Compared to a recording giant like OBS, Screenify easily clean sweeps it. Screenify is sure to be a tough competitor offering the same quality as OBS.
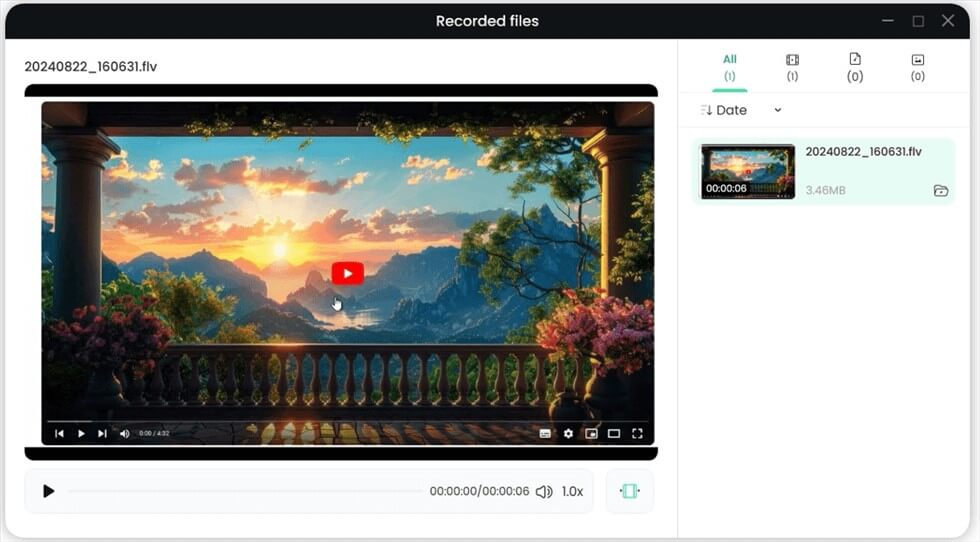
Record Screen Process Completed
4. Record Screen on Acer Laptop Using OBS Studio
OBS Studio is a standout performer in the screen recording business. Its professional suite of features and adaptability to various scenarios make it popular among gamers. Although the interface could be more beginner-friendly, its exceptional output convinces users to try it.
How To Screen Record on Acer with OBS Studio:
Here is a step-by-step guide on how to use OBS studio for recording.
1. From the OBS studio website, download the application for free. Install and set up the program.
2. Open OBS. In the Scenes section, click the + icon to add a new scene.
3. In the Source tab, click the + icon to adjust your audio and camera sources. To capture the entire window screen, click Display Capture. To record on 3D game visuals, choose Game Capture.
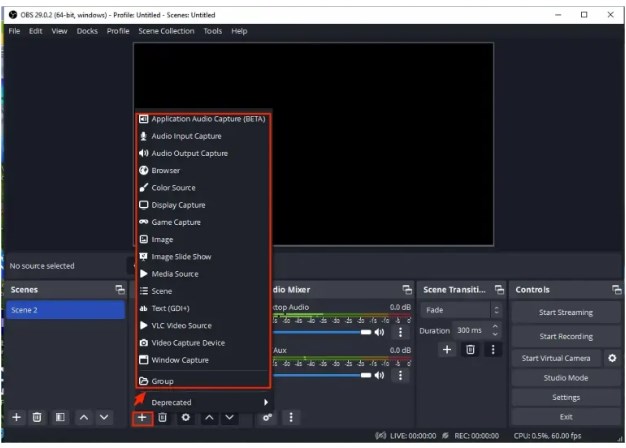
OBS Studio source menu
4. Next, set up the output settings. Go to Settings and click Output. Choose a file format and a destination for the output.
5. When ready, click the Start Recording button to capture the screen. Click Stop to terminate it and save it to your PC.
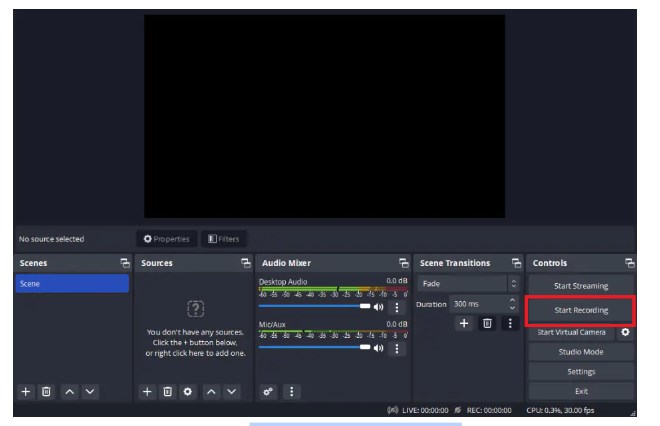
start recording with OBS Studio
OBS is a powerful screen recorder with professional features. Offering different recording modes ensures versatility and quality.
Tips for High-Quality Screen Recording on Acer
Technical errors during screen recording might cause trouble in the saved file. Here are some tips for a smooth and high-quality video capture.
- Screen Resolution: Set the screen recording resolution to maximum for better video quality. This ensures a sharp and clear output file.
- Storage Space: Ensure your laptop has sufficient storage space to save the recording. Lack of space can result in poor video or no output at all.
- Keep Device Charged: Make sure that your device is charged or plugged in. Battery optimization modes automatically turn off screen recorders when charging is low.
- External Audio Device: Connect an external audio device instead of using the laptop’s built-in mic. These devices have better audio quality and less noise.
- Notifications: Turn off the notifications from other apps and websites for undistracted recordings.
- Test the recorder: Before the final recording session, give your laptop a test trial to fix issues.
Following our tips, you can quickly improve the functionality and output of the screen recorder.
FAQs about Screen Record on Acer
1. Can I record the screen on my Acer without installing any software?
Yes. Acer laptop users can record screens without installing software via two built-in methods: using the Windows 10 Game bar button or recording presentations with Microsoft PowerPoint.
2. How do I record the screen and audio on my Acer device?
Use the Windows built-in game bar button to screen record on an Acer laptop. A free, third-party application like Screenify is also a better alternative.
Here is how to record screen on Acer laptop with an Xbox game bar.
- Press the Windows +G button and select Capture.
- Press Record to start.
- Click Stop to end the recording.
3. What should I do if my screen recording lags?
Ensure a fast internet connection for stable online video recording. Turn off notifications from other websites and apps. Moreover, close any heavy applications for a smooth screen recording. Use an external audio device for clear and sharp audio notes.
Conclusion
This guide has shown that screen recording on an Acer laptop is much simpler than you would probably expect. We have solved how to screen record on Acer once and for all. Use Windows 10 Game Bar, which records the screen with a single click. There is also a quick way to capture your screen using PowerPoint as a shortcut. However, for users seeking added functionality, there is a myriad of applications like OBS Studio and Screenify. While OBS is a gamer’s favorite, Screenify is just in the pipeline with even better functionality. Its user-friendly interface and comprehensive options are sure to wow everyone. Try Screenify for a versatile recording experience!

Joy Taylor


Senior writer of the iMobie team as well as an Apple fan, love to help more users solve various types of iOS & Android-related issues.
Screenify
AnyEnhancer
FocuSee
Vozard
AnyMiro
AnyMirror

