How to Screen Record Disney Plus
This post will guide you about how to screen record Disney Plus so you will not have to deal with a black screen. It has direct, detailed instructions for Windows PCs, Macs, iPhones, and Android devices and includes an account of why the black screen occurs. You’ll also learn about using Screenify to record and get answers to common questions. Follow these tips to capture your favorite Disney Plus shows quickly.
Disney Plus, a streaming service hosting movies and shows, has quickly emerged as an admired option for viewers. Many people face a persistent issue whenever they need to record their desired Disney Plus content for offline usage or to share with others: the recorded videos are typically black-screened. In this post, we will guide you on how to screen record Disney Plus without encountering the black screen problem. We will also introduce Screenify, a tool that simplifies the recording process. Keep reading to discover these helpful tips and solutions to make recording Disney Plus content smooth and hassle-free.
Part 1: Why does a black screen appear when recording Disney Plus
Recording Disney Plus content often results in a black screen due to various protection measures. The following are some typical causes of the black screen:
1. Digital Rights Management (DRM):
Disney Plus employs DRM technology to prevent content piracy. DRM makes it impossible for recording equipment to capture the video stream, resulting in recordings that have a black screen.
2. Limitations on Screen Recording:
Some programs and devices have preset restrictions, and you will not be able to capture DRM-restricted content on your screen. This security measure of the content checks the distribution of the content by unauthorized individuals and is also in compliance with copyright laws.
3. Problems with Software Compatibility:
Not all screen recording software can handle DRM-protected streams properly. If your recording tool is incompatible with Disney Plus, it might result in a black screen during playback.
Next, this article will introduce you to several recording tools to help you record the Disney Plus screen [without black screen].
Part 2: Use Screenify to Record Disney Plus on Win & Mac [4K & 100% Free]
If you are looking for a simple and effective way to record Disney Plus content on Windows and Mac, Screenify is the perfect tool. Screenify supports a wide range of file formats and allows recording of your favorite movies in high-quality 4K resolution at 60 frames per second. During use, no users reported a black screen, and it is 100% free.
Regarding audio, Screenify captures microphone and system audio while reducing noise and controlling volume without adding any watermarks.
Key Features and Advantages
- With Screenify, you can record unlimited Disney Plus content at no cost, taking full advantage of its advanced features.
- Capture your Disney Plus videos in stunning 4K quality at 60 frames per second for smooth and clear playback.
- Customize and brand your recordings by adding personalized text watermarks to your Disney Plus content.
- Save your Disney Plus recordings in multiple formats to ensure they are compatible with various devices and applications.
- Easily crop your Disney Plus videos to focus on specific sections and enhance the overall viewing experience.
- No watermark is added.
To use this tool for recording Disney Plus, follow these simple and easy steps:
Step 1. Download and install Screenify on your computer. Open Screenify and choose the “Record Screen” option.
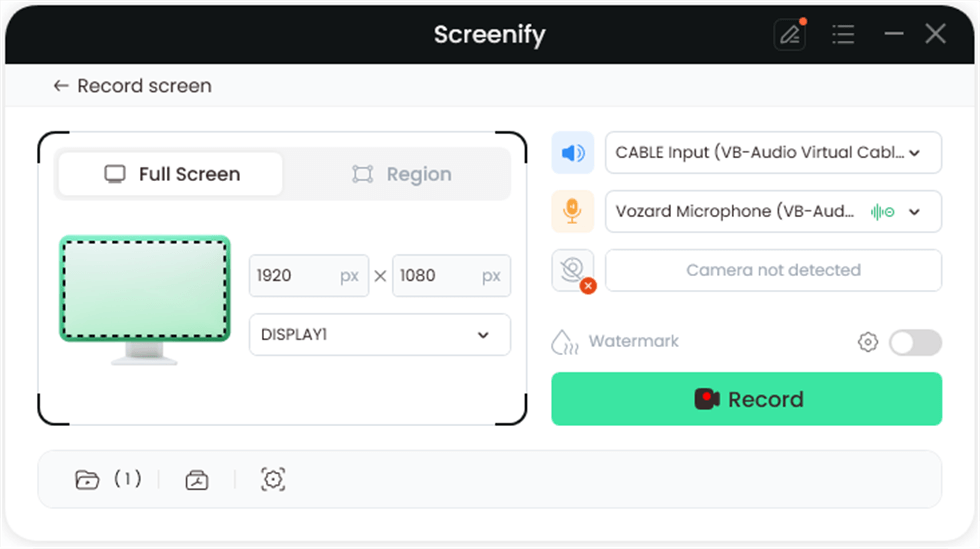
Select Record Screen Mode
Step 2. Adjust your recording settings, such as system audio, before starting.
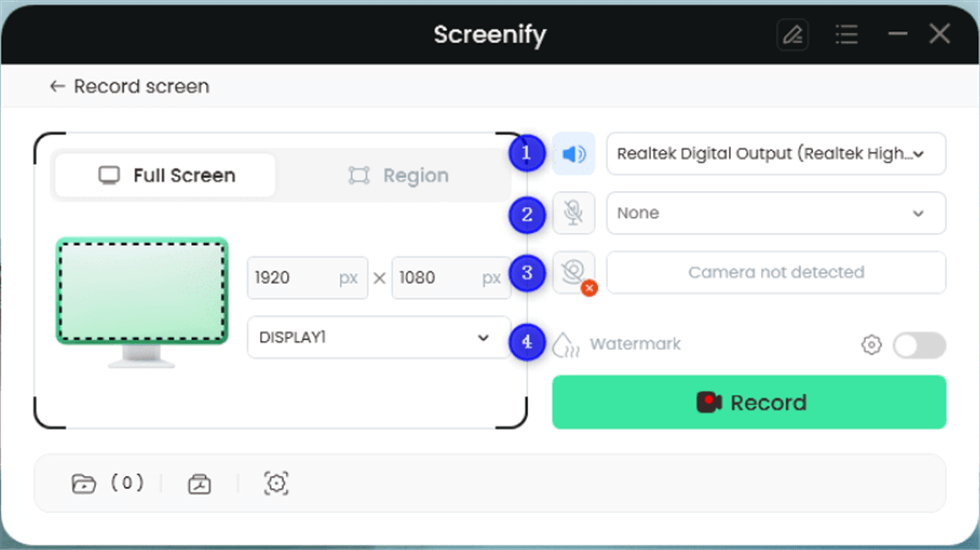
Record Setting
Step 3. Select the recording area—choose “Full Screen” or highlight a specific region. Click “Record” to begin. You can also adjust the area for social media sizes if needed.
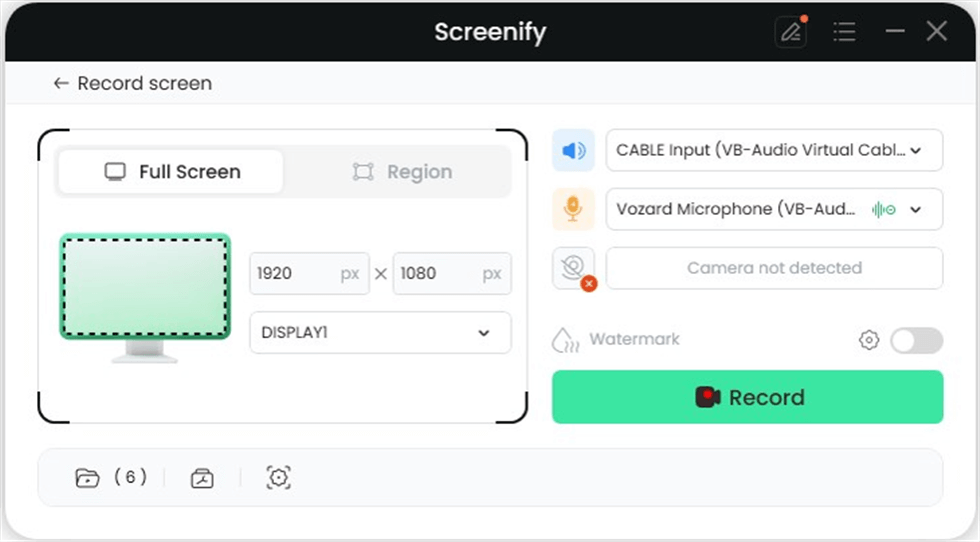
Full Screen
Step 4. Wait for the 3-second countdown to get ready. Recording will start after the countdown. You can add annotations during the capture if you wish.
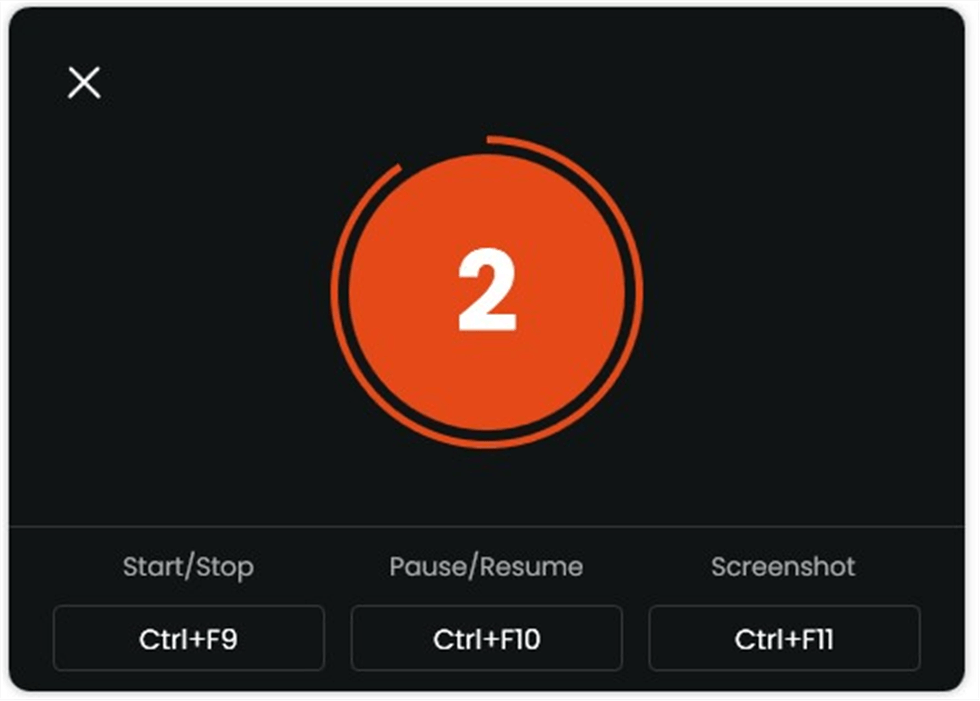
Start recording countdown
Step 5. Click the red “Stop” button to finish. Preview and manage your recorded videos afterward.
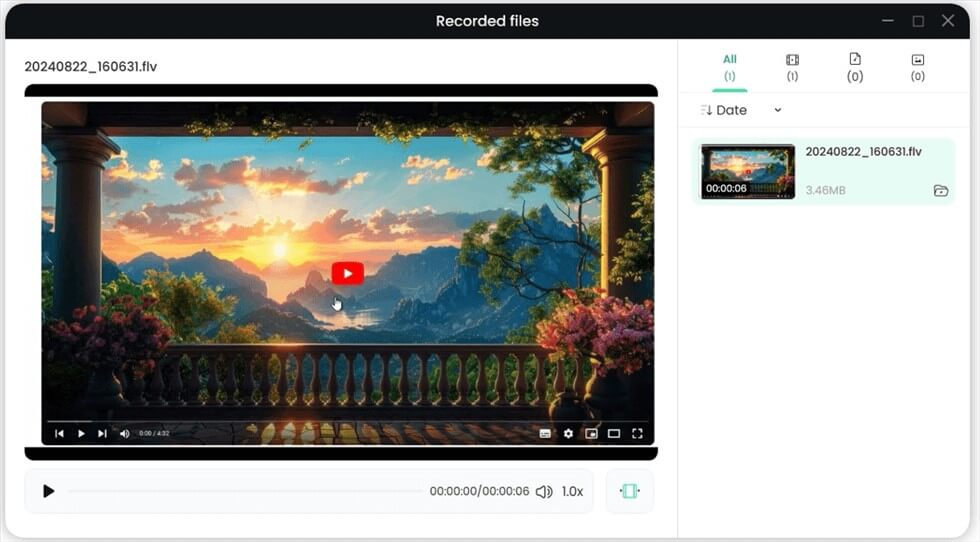
Record Screen Process Completed
Part 3: How to record Disney Plus screen on Windows PC
Disney Plus recording on a Windows PC can be difficult because of the black screen problem brought on by the DRM protections. However, using the correct techniques and resources, you may easily record your favorite shows without issues.
Method 1: Using PlayOn to record Disney Plus
For Windows, PlayOn Desktop is an excellent choice for Disney Plus recording. You can use it as a streaming video recorder to save your preferred Disney Plus shows to your PC. PlayOn ensures high-quality recordings that are free from the black screen problem by recording content while streaming. To use this tool:
Step 1. Download and install PlayOn from the official website on your Windows PC. Then, create your PlayOn account.
Step 2. Open PlayOn, select “Disney+,” and log in to your Disney+ account. Find the video you want to record.
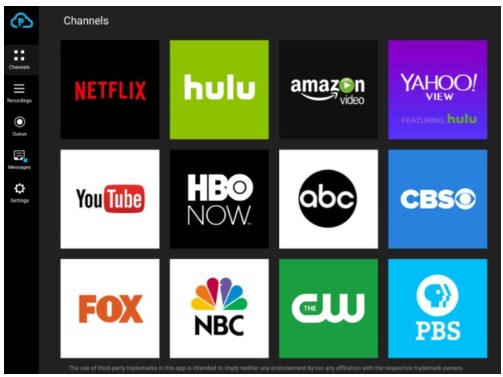
select “Disney+,” and log in
Step 3. Click “Record” to capture the video, or choose “Record All” for an entire series.
Step 4. Once the recording is finished, go to the “Recordings” tab to watch your saved videos offline anytime.
This tool requires a subscription to use
Method 2: Using Xbox Game Bar to Record Disney Plus
Disney Plus screen recording is possible with the Xbox Game Bar, an integrated function for Windows 10 above. Although this free program is intended for game capture, it may also be effectively used to record Disney Plus. Here are some simple steps to use this tool:
Step 1. First, go to Windows settings, find “Gaming,” and turn on “Game Mode.”
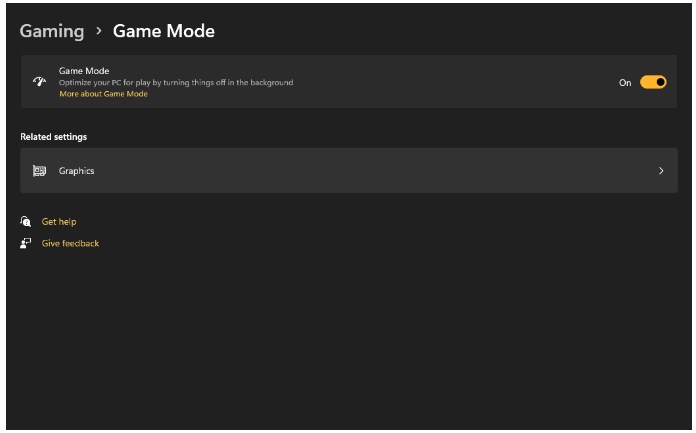
turn on “Game Mode
Step 2. Then, open the Disney Plus window you want to record. Press “Windows” + “G” to launch the Xbox Game Bar.
Step 3. Click the camera icon to start recording. When you’re done, click the stop button in the recording bar or press “Windows” + “ALT” + “R” to finish the recording.
This tool is free and can meet simple recording needs. However, you cannot edit recorded videos and cannot set file size limits. If you need to edit recorded videos, you can use Screenify, which is also a free tool with more complete functions.
Part 4: How to Record Disney Plus on Mac
Disney Plus recording on a Mac might be challenging but achievable with the correct tools. In this section, you’ll learn to record your preferred Disney Plus episodes on your Mac correctly.
Method 1: Using QuickTime Player
If you’re using a Mac, QuickTime Player can be an excellent tool for recording a Disney Plus stream in no time. QuickTime, with support for all Mac versions, makes it easy to capture your favorite TV episodes and videos.
Step 1. Open QuickTime Player, go to the top menu, select “File,” then choose “New Screen Recording.”
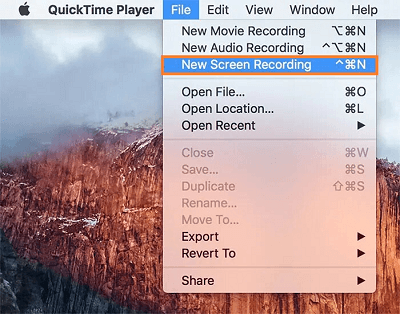
Click New Screen Recording
Step 2. Open Disney Plus in your browser or app and navigate to the movie or show you want to record.
Step 3. Click the red “Record” button in QuickTime Player to capture your Disney Plus content.
Step 4. When you’re finished, click the “Stop” button. Preview your recording and edit it using QuickTime’s tools if needed. For saving, choose “File” and then choose “Save.”
This tool is built into all Macs, no additional software is needed. However, the recording function is limited and cannot record system audio. And Firefox browser is required.
Method 2: Using OBS Studio
OBS Studio is another powerful option for recording Disney Plus on a Mac. This free and open-source program is a fantastic option for recording Disney Plus material since it lets you take clear screen captures. For this:
Step 1. Download, install, and open OBS on your Mac. Go to disneyplus.com, login, and open the video you want to record.
Step 2. In OBS, click the “+” icon under “Sources” and choose “Window Capture.”
Step 3. Select the browser window where Disney Plus is playing.
Step 4. Adjust the red-bordered area to focus on the part of the screen you want to record, excluding the browser toolbar.
Step 5. Click “Settings” at the bottom to choose your video format, save location, and quality.
Step 6. Start the Disney Plus video and click “Start Recording” in OBS. You can end it by clicking “Stop Recording.”
This tool offers custom settings, but has a higher learning curve and requires a complex configuration and setup process. Recommended further reading: Why is my obs recording low quality
Part 5: How to record Disney Plus on iPhone/Android
If you use Disney Plus on your smartphone to enjoy movies or TV shows, you might need help to record them directly. Built-in screen recorders often result in a black screen due to restrictions. You can use a third-party tool like PlayOn Cloud to get around this. This app works well with various streaming services, including Disney Plus, and can record content that might be region-locked.
Step 1. Install PlayOn Cloud from the App Store on iPhone or Google Play on Android, then open the app.
Step 2. Choose Disney Plus from the channels list and find the show or movie you want to record.
Step 3. Start streaming the selected content and use PlayOn Cloud’s built-in recorder to capture it.
Part 6: How to Record Disney Plus Faqs
1. Does Disney Plus allow screen recording?
No, Disney Plus does not allow screen recording. It has built-in restrictions to prevent users from recording content directly from the app or website.
2. Why can’t I record Disney Plus?
You can’t record Disney Plus because the service uses technology that blocks screen recording to protect its content from unauthorized distribution.
3. Can Disney Plus detect when I’m recording?
Yes, Disney Plus can detect attempts to record its content. The service has measures to prevent and block recording activities to ensure content security.
Part 7: Conclusion
Recording Disney+ content can be challenging due to built-in restrictions and black screens on various devices. While methods like using Xbox Game Bar for Windows, PlayOn Cloud for smartphones, and QuickTime Player or OBS for Mac offer viable solutions, they come with their advantages and limitations. We suggest using Screenify as a more flexible and easy-to-use option. This program includes features like configurable text watermarks, compatibility for many file formats, and high-quality 4K recording.

Joy Taylor


Senior writer of the iMobie team as well as an Apple fan, love to help more users solve various types of iOS & Android-related issues.
Screenify
AnyEnhancer
FocuSee
Vozard
AnyMiro
AnyMirror


