How to Record Zoom Meeting without Permisson [Windows/Mac/Phone]
Can you record a Zoom meeting without permission? This article uncovers the go-to solution for recording a Zoom Meeting without the host’s permission. We will also explore ways of recording a Zoom Meeting on Windows Mac and Phone.
Post-covid, Zoom meetings have become an important means of communication for personal and professional interactions. Recording meetings becomes imperative for summarizing meeting key points and materials.
Zoom allows participants to record videos with the host’s permission. However, do you know the art of recording a meeting without anyone knowing? Don’t worry; this article will guide you in detail on how to record Zoom meetings without permission. So, without further ado, let’s delve in!
Can You Record Zoom Meeting?
Well, yes! However, you can only do this autonomously if you are the meeting’s host. Zoom allows certain exclusive features for meeting hosts, like- recording. Zoom has in-built screen recorders that will save the entire meeting for you.
But can you record a Zoom meeting as a participant?
You can! When you start the recording, zoom notifies the host and asks for permission. On approval, all participants are notified when you start or stop the recording.
As a participant, you can only use Zoom’s in-built recording feature if the host grants access. However, this can be a challenge in critical meetings. A workaround is to use a handy third-party application like Gemoo Recorder Lite. Let’s dig into its details.
How To Record Zoom Meetings without Permission on Windows/Mac
Screenify is a free screen recording tool for those who are looking for an alternative to Zoom’s recording function.
Screenify has other advantages:
- Free use: Screenify provides full recording functions without paying extra fees.
- Easy to operate: The interface is simple, user-friendly, and easy to use.
- Multiple recording options: Supports full-screen recording, window recording, and area recording.
- High-quality recording: Able to record the content on the screen in HD quality.
- Basic editing functions: Provides simple clipping and annotation functions.
Free Download* 100% Clean & Safe
Record Mac/Win with Screenify
Step 1.Download and Install Screenify on Computer.
Step 2.Launch Screenify on your computer, and select Record screen mode.
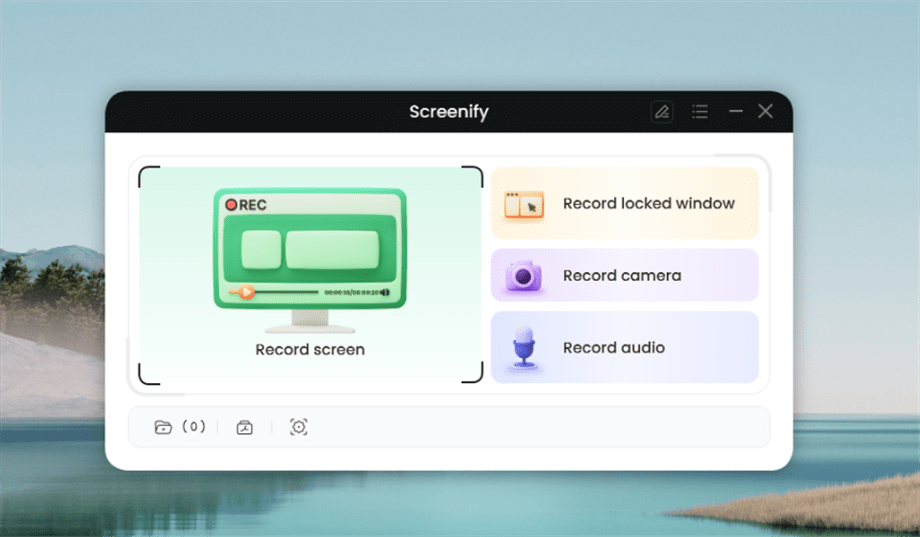
Select Record Screen Mode
Step 3.Configure Recording Settings aims to configure settings like system audio before recording.
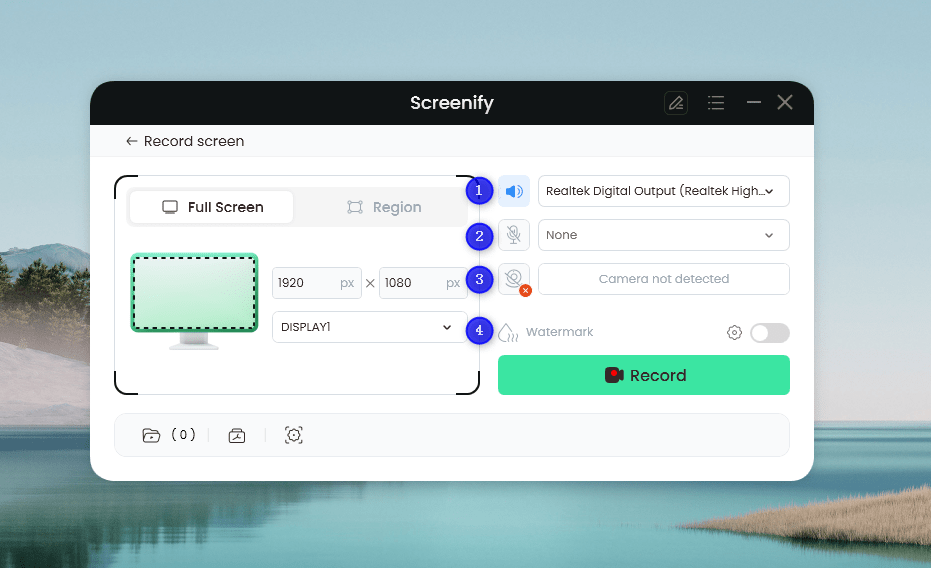
Set Configure Recording Settings
In this setting menu, you can:
1 Choose the System audio.
2 Choose the Microphone you want to record.
3 Choose the Camera you want to use.
4 Choose whether to add a watermark.
Step 4.Select Recording Screen.
Option 1. Full Screen Record
Please select Full Screen mode and choose the display you need to record. Hit Record button to initiate recording.
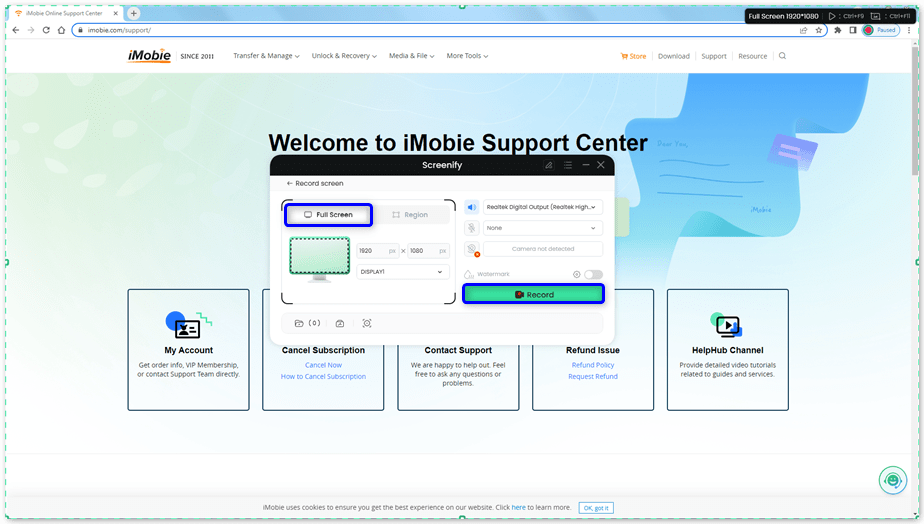
Select Full Screen
Option 2. Region Record
To record region, you need to manually select the recording area. After selection, you can still adjust the selected area. It supports customize selection, full screen, and proportional selection based on common social media dimensions.
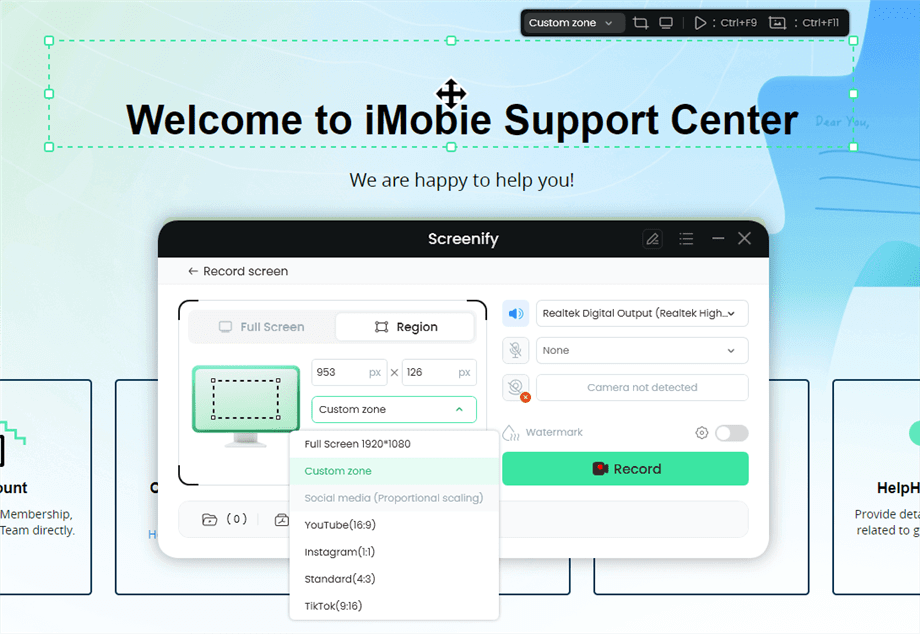
Record Region
Step 5.Wait for the Recording Countdown.
There is a 3-second countdown to help you prepare the recording after you are ready to start recording.
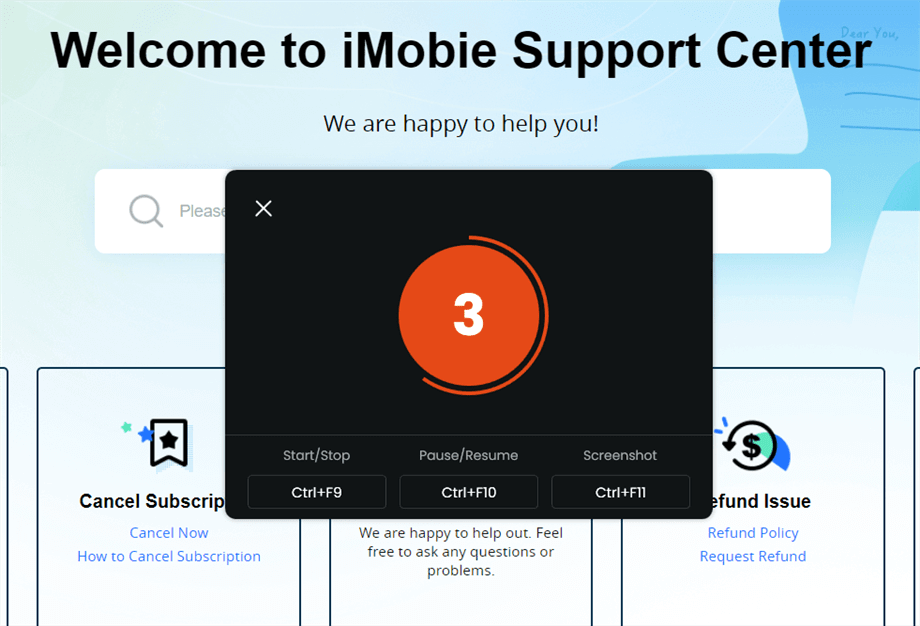
Wait for the Recording Countdown
If you would like to see a recording countdown before your recording starts, you can enable the countdown option. Or you can tap it off. View this post to know how to set the countdown option.
Step 6.Start Recording.
The recording will begin after a 3-second countdown. You can make annotations on the recording interface during the recording.
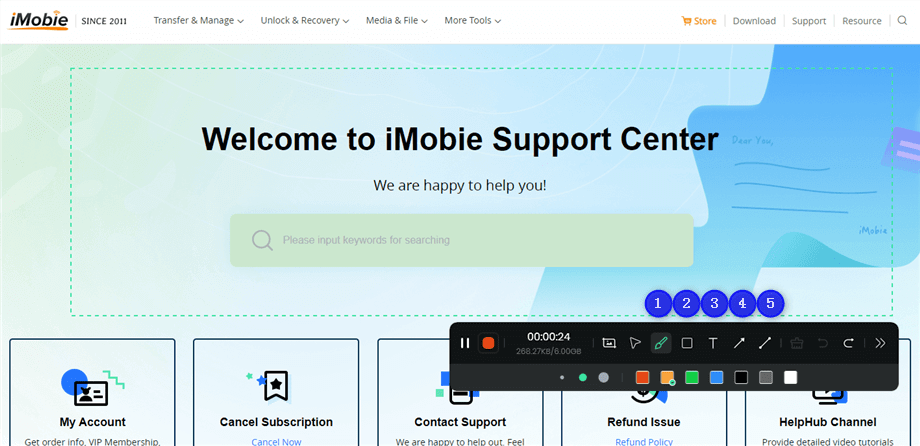
Annotate the Screen during Recording
With the toolbar, you can add the annotation in the screen:
1 Brush: Draw freehand on the screen recording interface to highlight or illustrate specific areas during the recording.
2 Rectangle: Draw rectangular shapes on the screen recording interface.
3 Text: Add written notes or labels directly onto the screen recording interface.
4 Arrow: Draw arrows on the screen recording interface to point out and emphasize specific areas.
5 Line: Draw straight lines on the screen recording interface to underline or connect specific points.
Step 7.Record Screen Process Completed.
When the recording is completed, you can click the red Stop button to end the recording. Your recorded files will be displayed. From here, you can preview and manage the recorded content as needed.
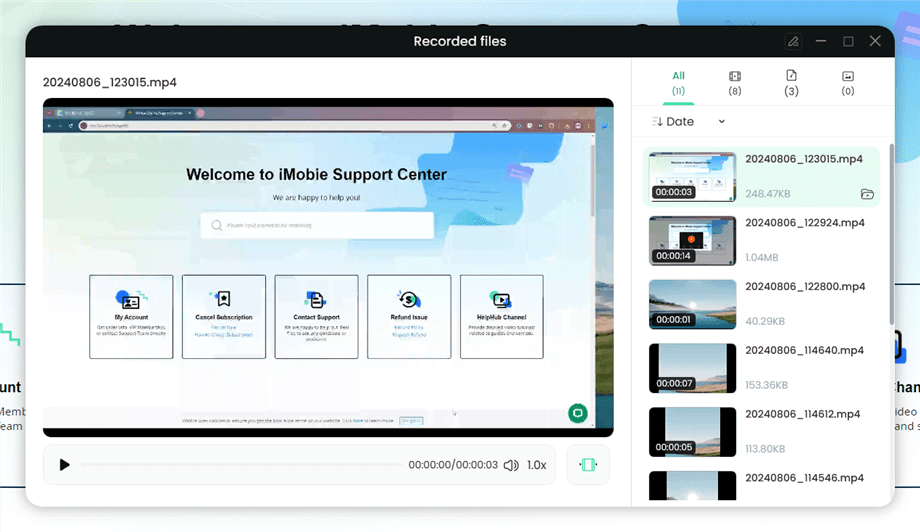
Preview the Recording
How to Record Zoom Meetings without Permission Online
While downloading the software offers exclusive features and offline access, the online operation is more convenient. You can secretly record Zoom meetings without downloading anything with Gemoo Online Recorder.
The online recorder is a free tool that offers a seamless way to capture high-quality screen recordings. It is a go-to solution for an instant need to record a video.
Here is how to record Zoom meetings online without permission:
Step 1. Open the Gemoo Recorder website. From the menu, select Online Tools > Online Screen Record > Start Recording.
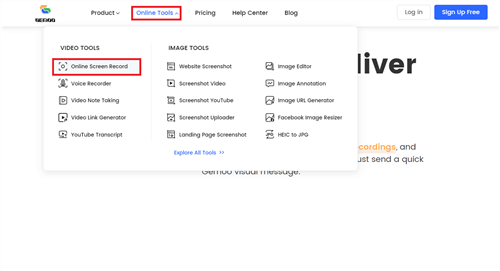
Gemoo Online Screen Recorder
Step 2. Click on Screen Only to select the Recording Mode. You can also tap More Settings to adjust the Audio Visual effects of the recorded clip. And you can select a resolution and add a name for your video as well.
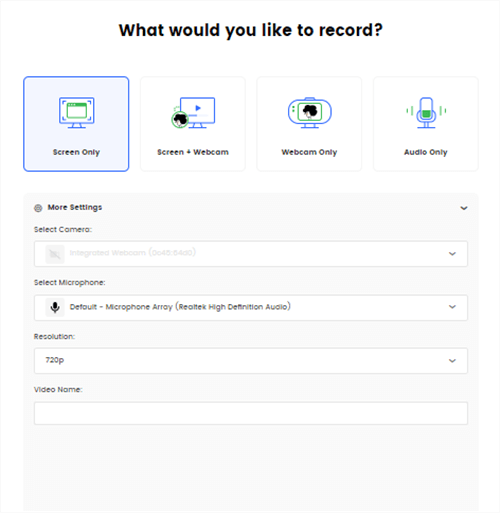
Select the Recording Mode
Step 3. Next, hit the Start Recording button to begin the screen recording.
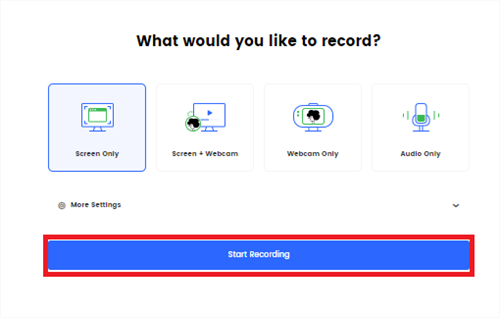
Start the Online Recording
Step 4. Choose the screen you want to record. You can select a specific tab or the entire Window. After a 3-second countdown, the recording will start. Using the controls on the left side tab, play/pause/resume the recording.
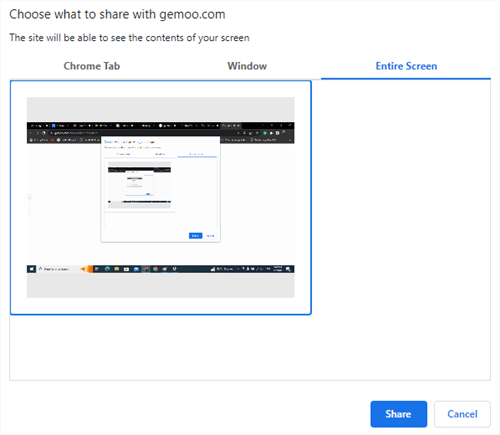
Choose the Recording Screen
Step 5. Tap on the red button to Stop the recording. The video will instantly open in the tab for downloading or uploading.
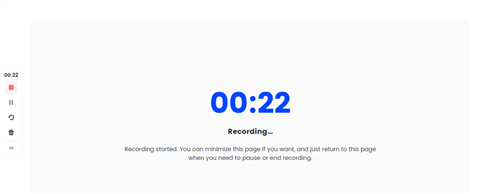
Screen Recording Controls
Screen recording with Gemoo Online Recorder is super fun and easy. It empowers individuals to record Zoom meetings without permission effortlessly.
How to Record Zoom Meetings from the Desktop App as a Host
The host can record Zoom meetings with the application’s in-built recorder system. However, the local recording is not supported on Android or iOS apps.
Here are the steps to easily record the meetings via the Zoom desktop app.
Step 1. Download the Zoom Client Desktop app. Click on the files to install the software.
Step 2. Set up your account and sign in to the Zoom portal.
Step 3. In the navigation menu, click Settings > Recording tab. Click on the Local Recording toggle to enable it.
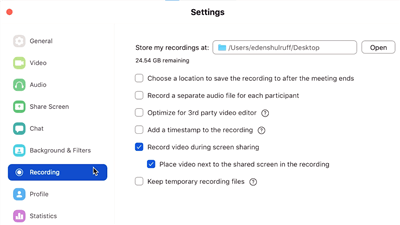
Zoom Recording Tab
Step 4. Next, start your Zoom meeting as the host. Click the grey Record button to initiate recording. All participants will be informed that the meeting is being recorded, and a sign will appear in the top-left corner.
Step 5. The recording controls are displayed at the bottom of the screen. Use them to stop/pause/resume the recording.
Step 6. Hit the Stop button to end the recording session. Zoom will convert it into an MP4 file and automatically locally save it on your PC.
Zoom allows hosts to record and save meetings. Designed with simplicity, the application only offers basic recording features. You can either record it locally or to iCloud.
How to Record Zoom Meetings on Laptop
While Zoom offers an in-built recording system for desktop apps, it is limited to hosts only. Instead of downloading a third-party app, you can take advantage of built-in recorders. Here is how you can record Zoom Meetings on a Laptop with system recorders.
How to Record Zoom Meetings on Laptop Windows 10/11
Windows 10 and 11 are equipped with a screen-recording tool designed for gameplay specifically. Here is a quick walkthrough on how to use the Xbox Game Bar recorder to record your meetings.
- Go to Settings > Gaming. A window for gaming settings will open.
- Open the Capture Settings. These are the basic settings for the screen recorder. Adjust the audio and video settings according to preference.
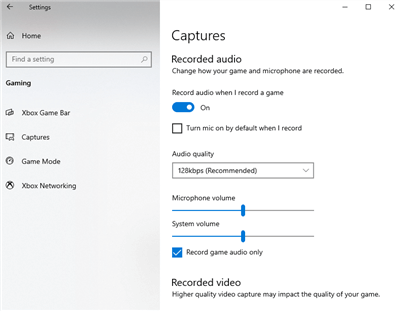
Captures Settings for Screen Recording
- Once done, press the default keyboard shortcut Windows Key + G to launch the Xbox Game Bar.
- Join the Zoom Meeting and click the Capture icon to open the recorder. Click on the recording button to initiate the recording.
- In the Capture Status, click the blue icon to stop the recording. Alternatively, you can press Windows Key +Alt+ R to stop it. Once done, the video will be saved to a local folder on your PC.
How to Record Zoom Meetings on Laptop Mac
Macbooks have a built-in application Quick Time Player that assists users to screen-record their device. Here is how to use it to record your Zoom Meetings:
- Join your Zoom Meeting and launch the Quick Time Player app from the Application folder.
- Go to File and select New Screen Recording.
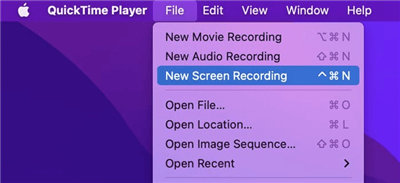
Select New Screen Recording
- Click the drop-down arrow next to the Record button to record the screen with or without the microphone.
- Tap on the Record button to begin the recording process. Drag and select a specific area to record or tap anywhere on the screen to record full-screen.
- Hit the Stop button to terminate the screen recorder. Quick Time Player automatically opens the recorded file to edit or save it.
How to Record Zoom Meetings on iPhone/Android
Zoom client is not compatible with local recording on iPhone/Android phones. You need to have a Zoom Pro account subscription to start. If you don’t have a subscription, you can sign up at the website. Once you have a registered subscription, follow these steps to enjoy this exclusive feature:
Step 1. Download the Zoom mobile application from App Store/ Play Store. Sign in with your Zoom Pro account credentials.
Step 2. Start the meeting as the host. Tap the three dots in the screen’s bottom left corner to open More Controls.
Step 3. Select Record to Cloud for iPhone or Record if you have an Android device. All participants will be informed that the meeting is being recorded, and a recording prompt will appear on the screen.
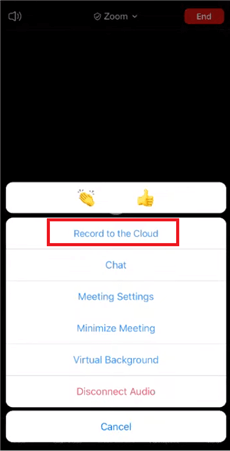
Record Meeting to Cloud
Step 4. To Stop/Pause/Resume the recording, tap More and choose respectively.
Step 5. Once you stop the video, the video will automatically be saved to Cloud for iOS devices or locally to your gallery on Android.
Zoom mobile app screen recording is exclusive to individuals with a subscription. Cloud recordings can be viewed, downloaded, and even shared from your account.
More related articles recommended: How to screen record netflix
Frequently Asked Questions
Before concluding the article, here are the answers to frequently asked questions.
1. Can I record a Zoom meeting with audio only?
Zoom Client’s built-in recorders record audio and video. To only record the audio file, you need a third-party application like Gemoo Recorder Lite. The application has an Audio Only mode to record the mp3 files.
2. Can I record a Zoom meeting without showing participants?
Recording a meeting through the in-built Zoom recorder informs all participants. However, a third-party tool like Gemoo Recorder Lite runs in the background and records meeting without informing the participants.
The Bottom line
There can be reasons to record a Zoom meeting. However, the go-to solution to this problem is a versatile and intuitive tool like Screenify[100% free]/Gemoo Recorder Lite. It can effortlessly screen record without the host’s permission or letting all the participants know. With no time limit or watermark, it is recommended for long business meetings. Besides, the availability of an online interface makes it accessible anytime. Free download the Screenify or use the online recorder to test it today.
Free Download * 100% Clean & Safe
Product-related questions? Contact Our Support Team to Get Quick Solution >

