How to Record Video Conference – 3 Easy Ways
In this article, we will learn how to record video conferences. First, we will examine how the inbuilt options within software can be used. Then, we will discuss Screenify as an effective tool for recording a video conference. Lastly, we will cover how to use hardware equipment to achieve the same.
Imagine giving the critical details and insights regarding the project, only to realize afterward that the call wasn’t recorded. It could ruin everything, especially if some team members were absent.
That is why knowing how to record video conferences is crucial. It helps save data for later consultation, allows absent members to catch up, and saves time and energy when onboarding new team members.
This article will guide you through various methods to record a video conference. It will cover built-in options, third-party tools, and hardware options that are available. Gear up to learn it through this comprehensive guide!
Why do you need to record a conference?
There are various reasons that can compel a person to have a recording of a video conference. It can help to:
- Capture Key Details: Record crucial points and decisions.
- Help Absent Members: Enable easy catch-up for those who missed the meeting.
- Ease Onboarding: New hires can quickly get up to speed.
- Prevent Errors: Reduce misunderstandings by revisiting recordings.
- Ensure Compliance: Keep a regulatory record.
- Boost Focus: No need for extensive note-taking.
- Enhance Accountability: Track responsibilities and decisions.
How to Record Video Conference
When it comes to recording a video conference, there are ample options available. First of all, most conference software has built-in options to do so. Some third-party software and hardware can do the same for you.
Now, we will discuss each of these options one by one.
1. Using Built-in Tools
Most video conference softwares offers built-in recording options for capturing video conferences. Usually, only the host or organizer has the ability to start and manage recordings.
However, he can give permission to other participants as well. The section below provides some commonly used software and the steps to record video conferences using its built-in tool.
#1. Zoom
Zoom is a commonly used software for video conferences. This software allows the host to record the virtual meetings. To record a Zoom meeting, follow the steps below:
Step 1: During a Zoom meeting, you can find the Record icon at the bottom of the Zoom window. Click it.
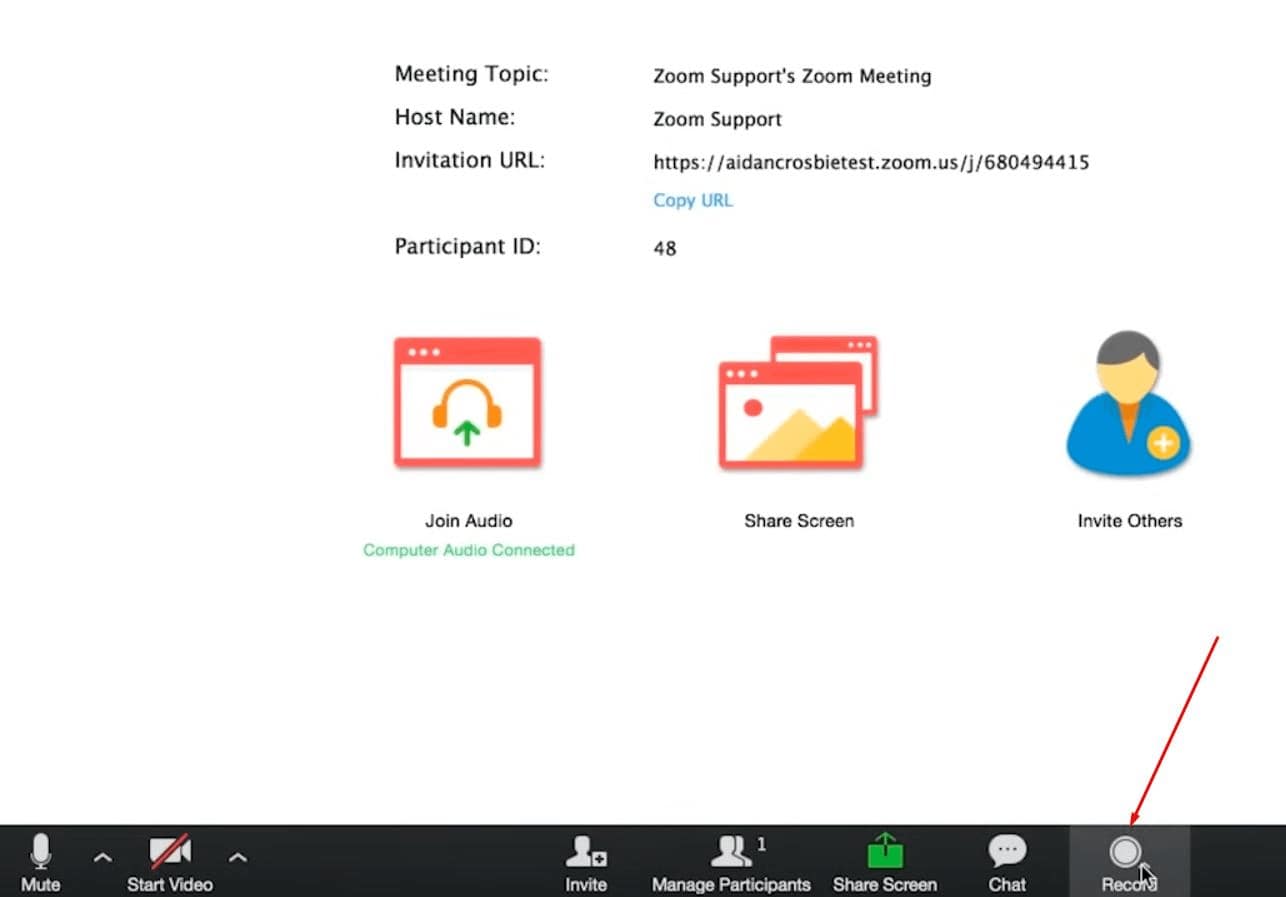
Click the Record Icon
Step 2: Choose to record on this computer or to the cloud. Use the Pause or Stop buttons during the meeting as needed.
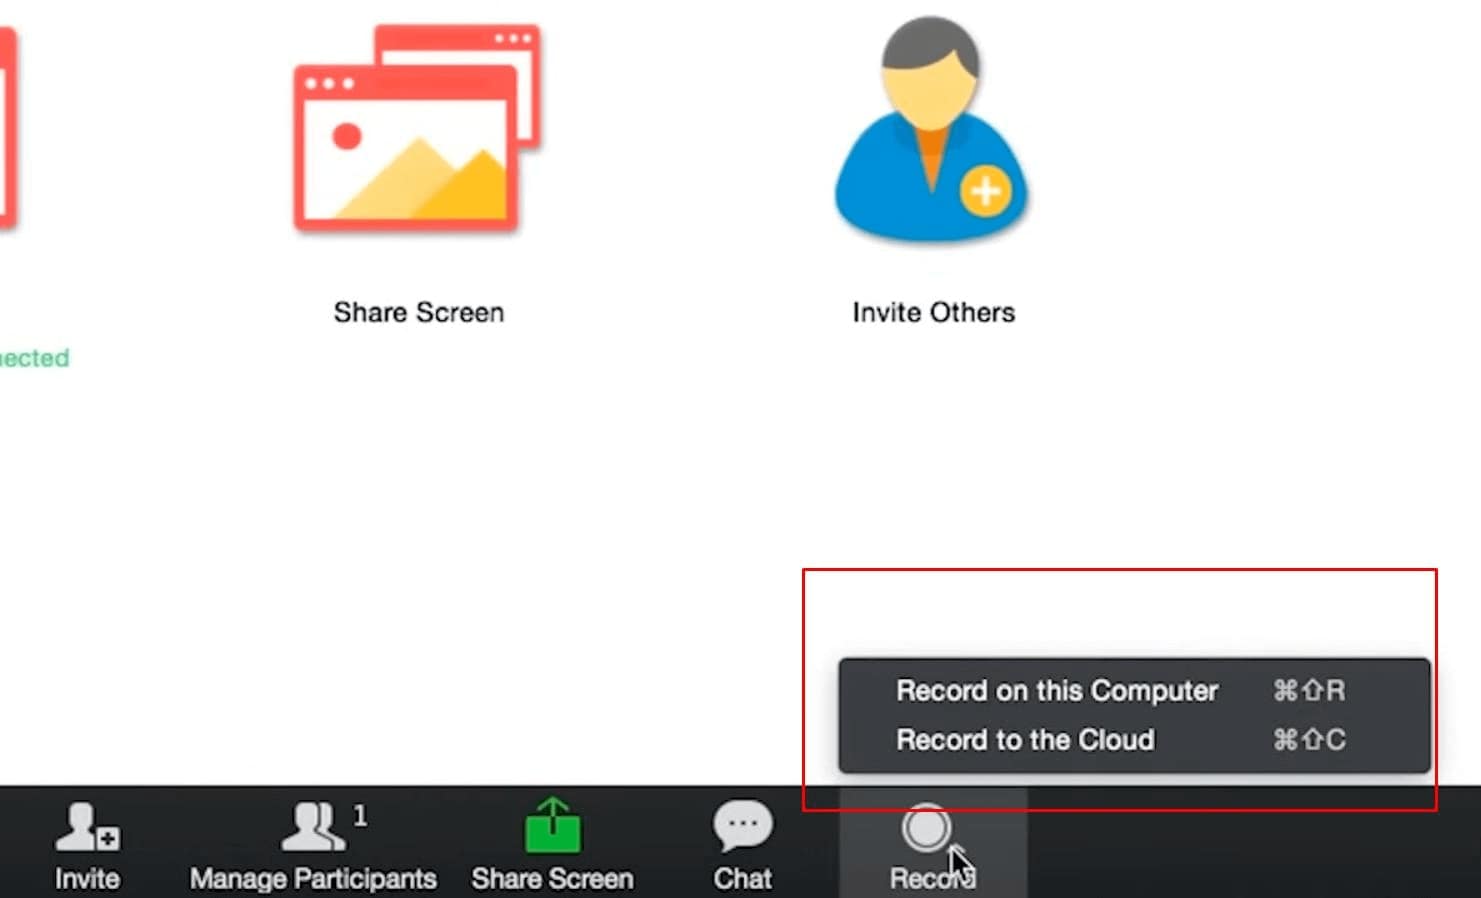
Choose to Record on This Computer or to the Cloud
Step 3: After the session ends, Zoom will perform a short conversion process to finalize the recording.
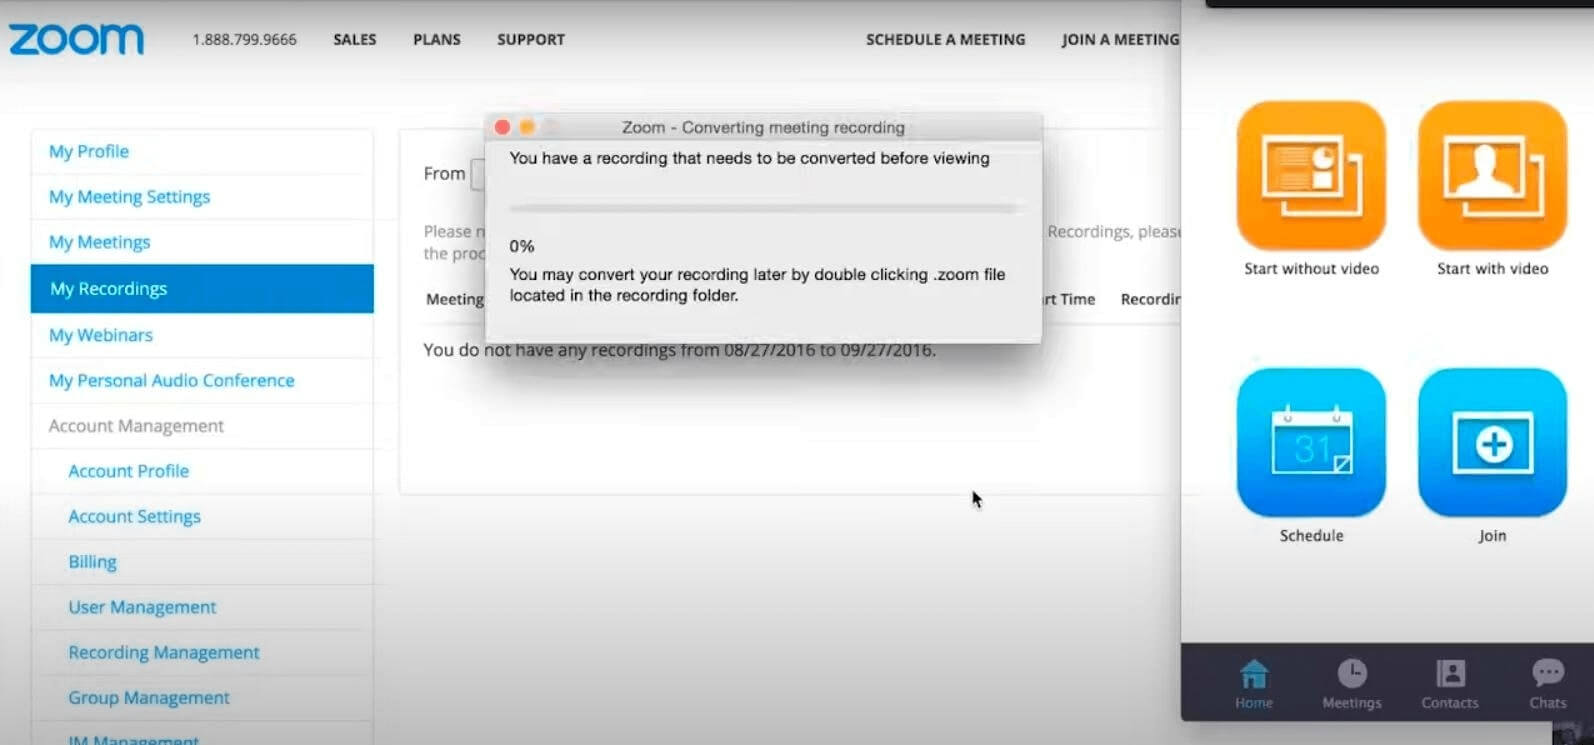
Zoom Recording Interface
Find the recorded files in your Documents folder, which is located within a folder called Zoom, to access Local Recordings.
While to access Cloud Recordings
- Open the Zoom desktop application.
- Go to Meetings and then select Recorded.
- Here, you can play video, play audio, and open or delete the recordings.
#2. Google Meet
The next conferencing tool is Google Meet. It works well with Google Workspace. It enables users to host and join online meetings. The following steps can help you record a meeting in Google Meet:
Step 1: Start a Meeting on Google Meet. Click the Activities button in the lower right corner.
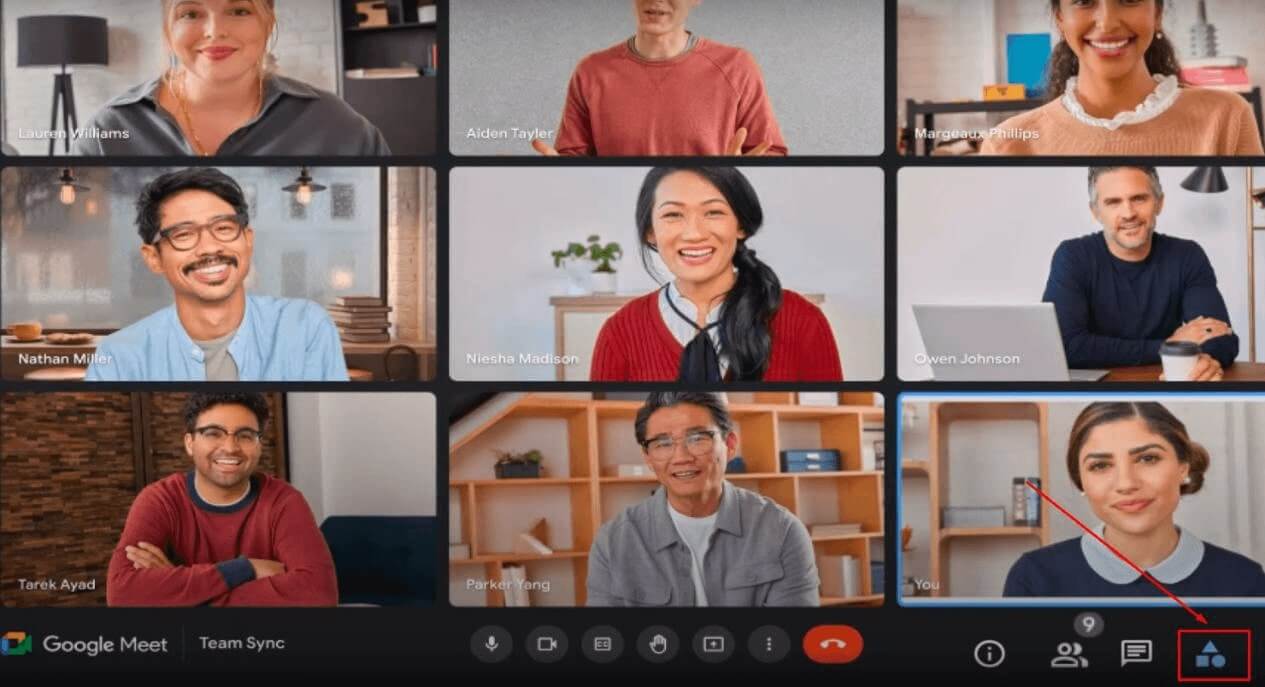
Click the Activities Button in the Lower Right Corner
Step 2: Select Recording and then Start Recording. However, to stop, click Activities, select Recording, and choose Stop Recording.
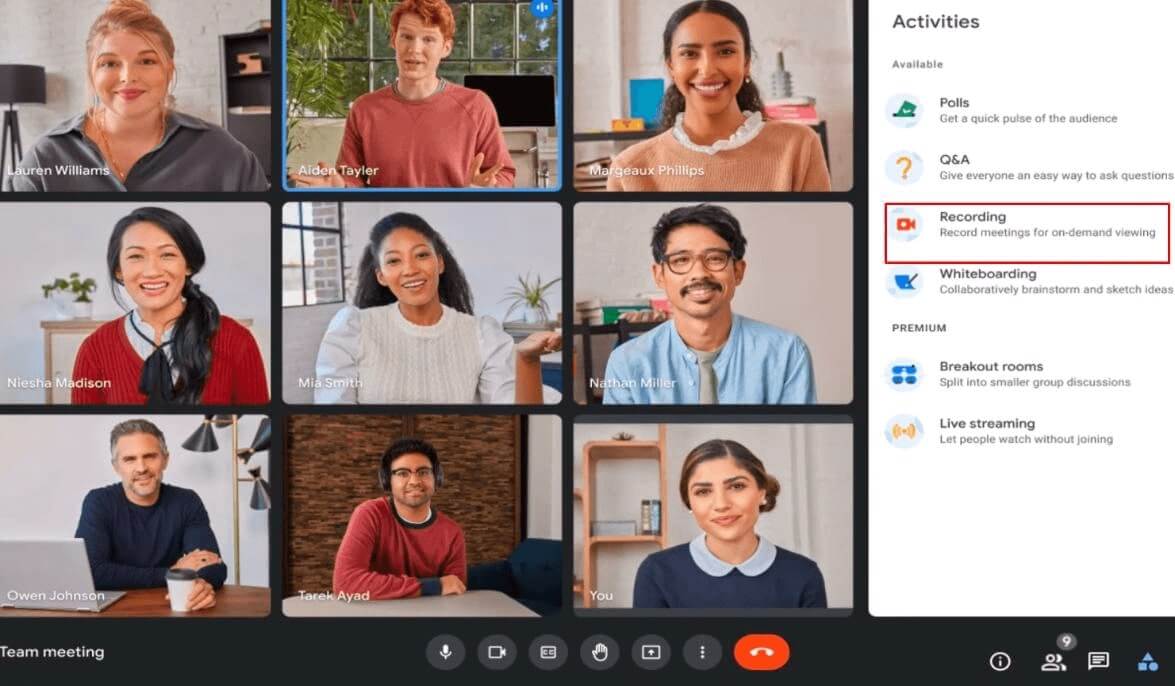
Click on Recording
The recording is saved to Google Drive in the organizer’s account.
#3. Microsoft Teams
Microsoft Teams is another widely used tool for online meetings in both educational and corporate settings.
This, too, allows the recording of the meetings. To do so, follow the steps below:
Step 1: Join or Start a Meeting in Microsoft Teams. Click the More actions (three dots) icon in the meeting controls.
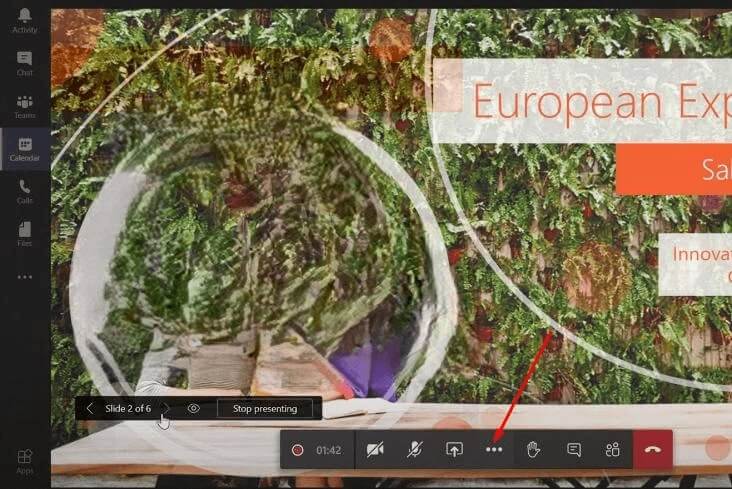
Click the More Actions
Step 2: Select Start Recording from the options. To stop, click More Actions again and choose Stop recording, or simply end the meeting.
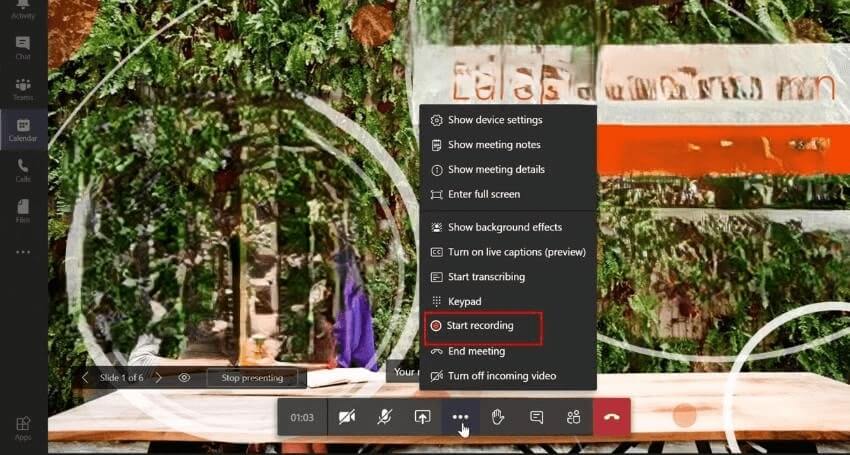
Select Start Recording from the Options
There are also various other software for conducting video conferences. You can visit their official websites to learn how they allow you to record an online session.
2. Using Third-Party Tools:Screenify
In most software, the built-in options allow the host or organizer to record the meeting. To record the video conference as a participant one can use a third party tools. One such tool is Screenify.
Screenify allows you to record the meeting, capture screen, windows, and webcam with high-resolution recording and noise reduction. It’s free to use with no time limits or watermarks.
To use Screenify to record:
Step 1: Download & Install
First, you need to download and install Screenify on your computer. Go to Screenify and click the green Free Download button in the top right corner.
Step 2: Open Screenify
Open Screenify and choose the ‘Record Screen’ mode.
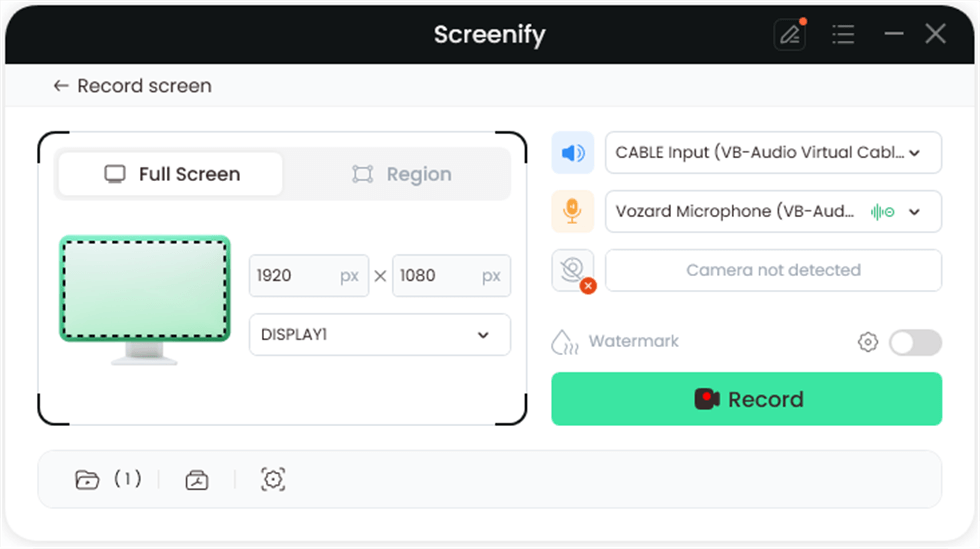
Select Record Screen Mode
Step 3: Adjust Settings
Adjust settings such as system audio, microphone, camera, and watermark preferences.
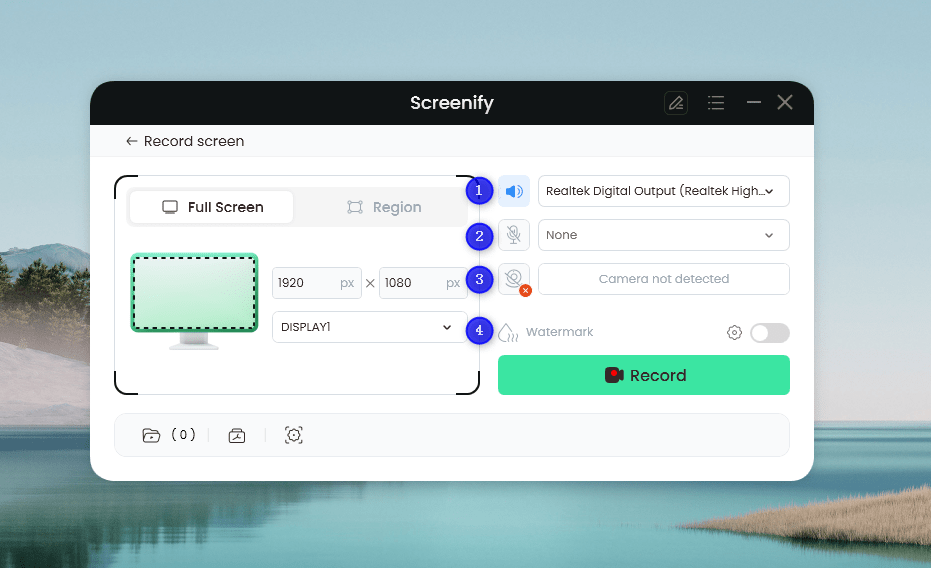
Set Configure Recording Settings
Step 4: Select Recording Area
When using the screen mode, you can choose between two recording options: recording the entire screen or selecting a specific region to capture.
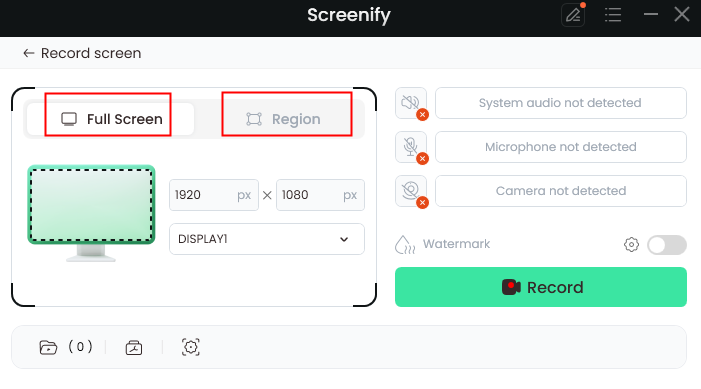
Choose Full or Region
- Option 1: Full-Screen Recording: Select the Full-Screen mode to record the entire screen. Choose the display you want to capture, then click the Record button to start the recording.
- Option 2: Region Recording: For region-specific recording, manually select the area you want to capture. You can adjust the selected area as needed. This option allows for customized selections, full-screen capture, or proportional selections based on common social media dimensions.
Step 5: Prepare for Recording
Before the recording begins, a 3-second countdown will appear to help you get ready.
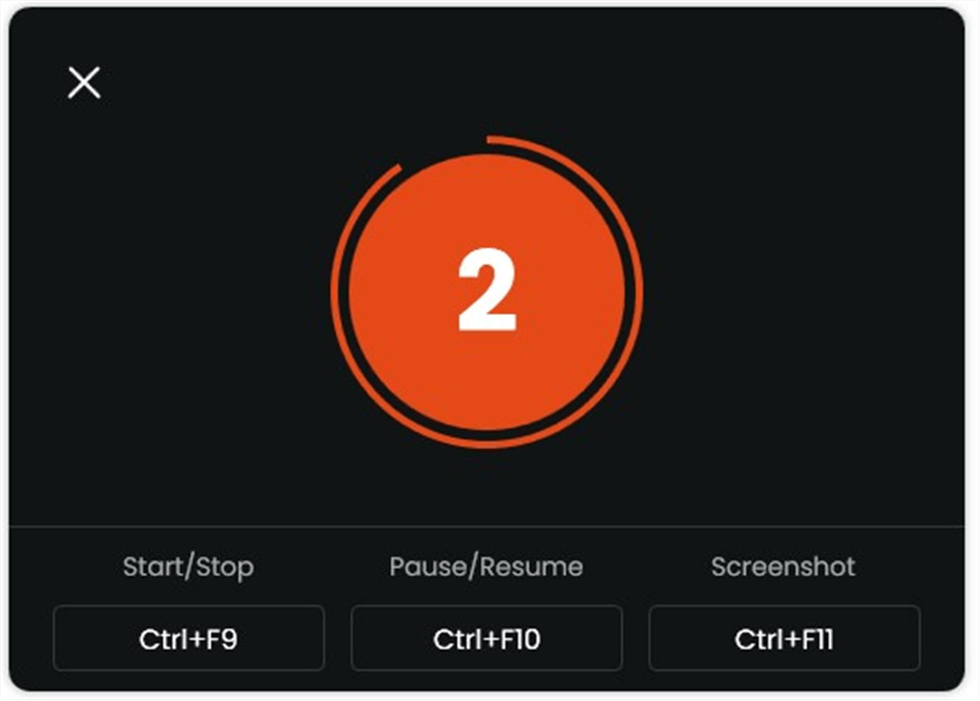
Recording Countdown
Step 6: Begin Recording
Once the countdown finishes, your recording will start automatically. During the recording, you can make annotations directly on the screen using the provided tools.
Step 7: Finalize Recording
After finishing the recording, click the red Stop button to end the session. Your recorded files will be displayed, allowing you to preview and manage them as needed.
3. Using Video Conferencing Equipment
The third option for recording video conferences involves using equipment specifically designed for this purpose. This equipment typically includes audio and video devices. Key components of these setups include:
- Speakerphone
- Camera
- Microphones
- Other hardware (supporting screen sharing, whiteboard functionality, etc.)
This specialized equipment enhances the quality of recordings and provides additional features like screen sharing and whiteboarding to make your video conferencing experience more comprehensive.
Step 1: Set Up Equipment
Connect the speakerphone, camera, and microphones to the conferencing system. Ensure all devices are positioned correctly to capture both audio and video effectively.
Step 2: Connect to Software
Install and configure the conferencing software on your device. Ensure that all connected hardware is recognized and functioning properly within the software.
Step 3: Enable Features
Set up screen sharing, whiteboarding, and any other necessary features. Test these features and make adjustments as necessary to ensure smooth operation during the conference.
Step 4: Start Conference & Recording
Launch the meeting within the conferencing software. Use either the software or hardware controls to begin recording the session.
Step 5: Monitor During Conference
Keep an eye on the conference, ensuring that features like speaker tracking and auto-framing are working correctly if supported by your hardware.
Step 6: End & Save Recording
Once the conference is over, stop the recording and save the file to your preferred location for future reference.
FAQs
1. Which video conference software should you use?
The use of a particular software largely depends on your needs. Popular choices include Zoom, Microsoft Teams, and Google Meet. You can assess their features to choose the one that suits you best.
2. What are the things to do before recording?
Things to do before recording a video conference are below:
- Step 1: Obtain consent from all participants, as recording without permission may violate privacy laws.
- Step 2: Test your audio and video settings to ensure clarity and quality during the recording.
- Step 3: Make sure your storage space is sufficient to save the entire recording.
3. Is It Legal to Record Audio from a Video Conference?
There is nothing wrong with recording a video conference if the participants present in it have no issue recording it.
Final Thoughts
Recording a video conference is very important for preserving details and ensuring accurate information retention. Some software provides hosts with built-in features to do so, while participants can use third-party software such as Screenify. Additionally, hardware equipment options are available to record a video conference.

Joy Taylor


Senior writer of the iMobie team as well as an Apple fan, love to help more users solve various types of iOS & Android-related issues.
Screenify
AnyEnhancer
FocuSee
Vozard
AnyMiro
AnyMirror


