How to Record Teams Meeting: 5 Ways
If you have a Microsoft Teams meeting coming up that you won’t be able to attend or want to keep it for future reference, you can simply record it. In this article, we will tell you how to record Teams meeting in 5 ways.
Do you ever find yourself struggling to keep track of important discussions during your Microsoft Teams meetings? You’re not alone! The truth is, nobody can remember every point discussed during a meeting. This calls for recording the meetings!
Whether you’re a professional looking to capture important business conversations or an educator preserving virtual classes, we’ll discuss the 5 easy ways how to record Teams meeting effectively.
So, let’s get started!
How to Record Teams Meeting with Microsoft Teams
The first option to record Teams meetings is via the Microsoft Teams platform itself.
Microsoft Teams has a built-in recording feature that makes it easy to record and share your meetings. Here are some highlights of this feature:
- Easy to use
With just a few clicks, you can start and stop recording a meeting. - Cloud Storage
Recordings are automatically saved to the cloud so that you can access them from anywhere. - Automatic Transcription
Teams can automatically transcribe your recordings so you can easily find the information you need. - Sharing
You can easily share your recordings with others by sending them a link or adding them to a Teams channel.
Steps to Record Meetings Directly With Microsoft Teams
Follow these steps to record Teams meetings with Microsoft Teams’ built-in recording feature:
Step 1. Launch Microsoft Teams, log in using your Microsoft account, and click on “Meet Now” to start a meeting.
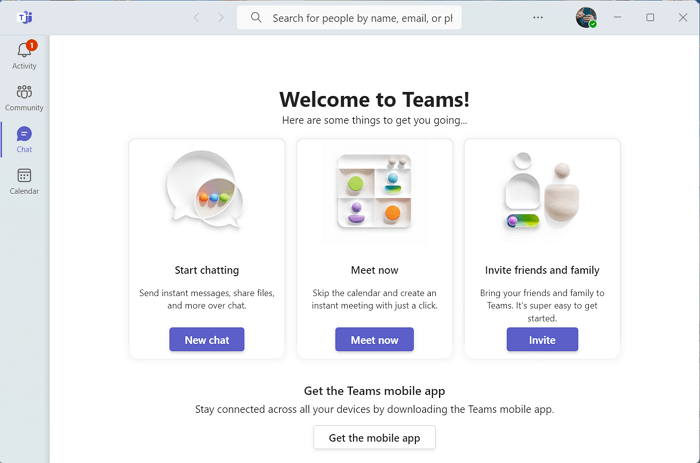
Launch Microsoft Teams and Click Meet Now
Step 2. In the pop-up window, set a name for the meeting, and click “Get a Link to Share” to send to other participants. Now click “Start Meeting” to start it.
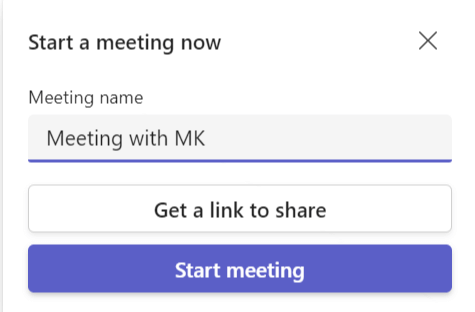
Start Meeting in Teams
Step 3. Click on the “More” option with the 3 dots, and select “Start Recording.” All the participants will be notified that the meeting is being recorded.
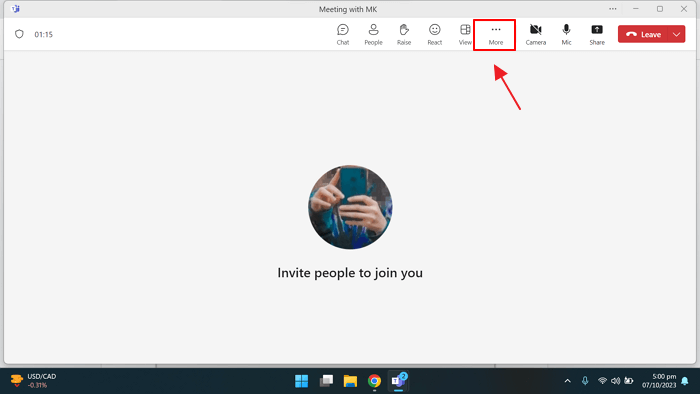
Choose Start Recording in the More Option
Step 4. Go about the meeting as required, and click on “Stop Recording” from the menu to stop the recording.
And that’s how to record Teams meeting using the built-in recorder in Microsoft Teams.
How to Record Teams Meeting Using Screenify
Another way to record Teams meetings is by using a third-party screen recorder like Screenify.
Screenify is a screen recording tool that lets you record your screen and audio simultaneously with ease. With this tool, you can easily export your recordings to popular video formats like MP4, AVI, and MKV.
So, whether you’re recording a Microsoft Teams meeting, a PowerPoint presentation, an online lecture, a tutorial, or even gameplay, Screenify is the perfect choice for you.
Features of Screenify
Let’s have a look at some of the key features of Screenify:
- User-Friendly Interface
Screenify has a simple and intuitive interface, and it is easy to get started with. - Free
Screenify is free and has no time limit or watermark. - Simultaneous Screen And Audio Recording
With Screenify, you can record your screen and audio simultaneously. - Webcam Recording
Screenify supports screen recording as well as webcam recording. - Annotations and Effects
Screenify lets you add annotations and effects to your recordings, such as text, arrows, shapes, and highlights. - Video Formats
You can export your recordings to a variety of video formats, including MP4, AVI, MKV, and WMV, and upload them directly to YouTube and Vimeo.
Steps to Record Team Meetings with Screenify
Here’s how to record Teams meeting with Screenify:
Step 1. Download, install, and launch Screenify on your computer.
Free Download * 100% Clean & Safe
Step 2. Now choose the mode you want to use in your recording.
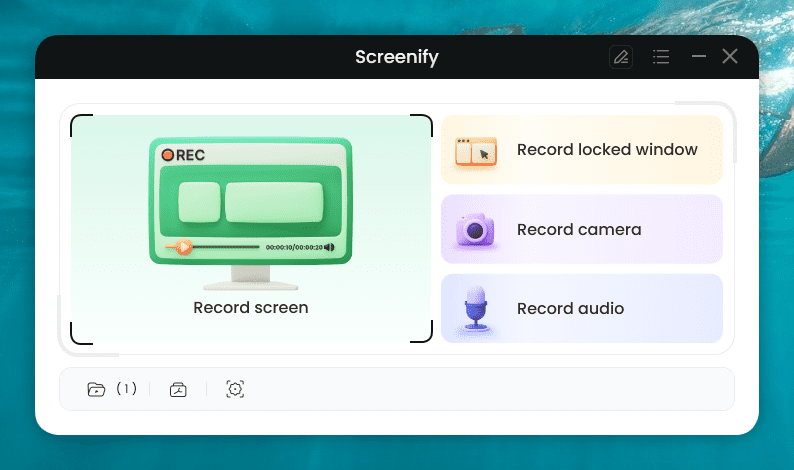
Choose the Mode You want to use
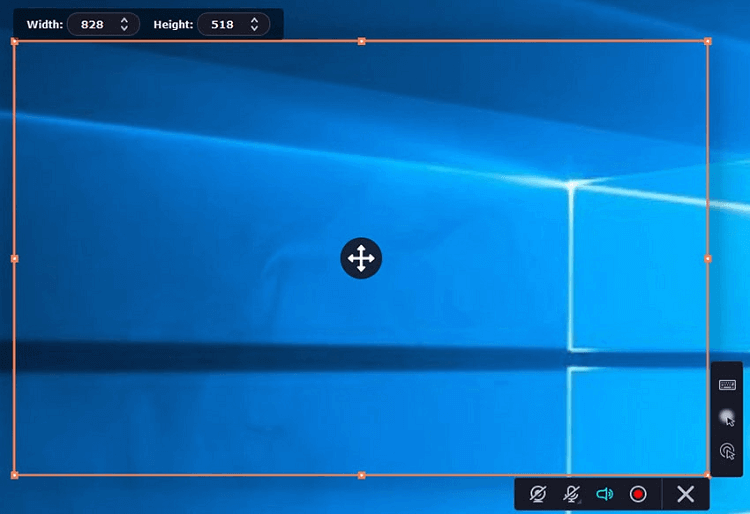
Step 3. Configure the settings before recording. Then, choose the recording screen. It has two options: either record full screen or a specific region. Select your preferred mode and hit “Record.” Then, there will be a three-second timer. After this countdown, the recording will start.
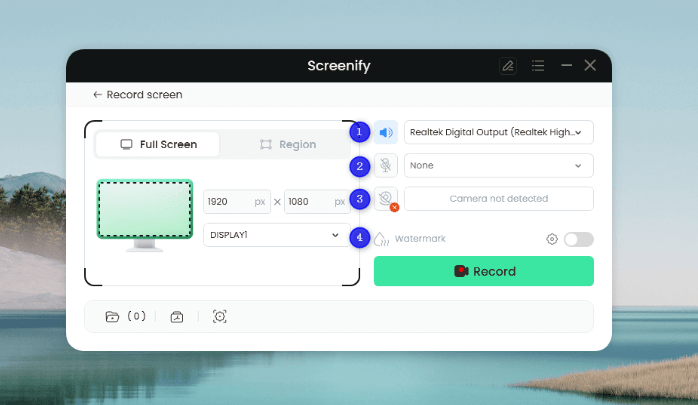
Configure the Settings and Hit the Record Button
Step 4. You can add annotations while recording the screen. You have brush, shape, text, arrow, and line options here.
Step 5. After you have finished recording, click on the Red “Stop” button. Your video will be displayed, and now you can preview and edit it.
Record Teams Meeting with OBS Studio
The third screen recording and broadcasting tool that we recommend is OBS Studio.
It’s a great free software that works on Windows, macOS, and Linux and is super easy to use, even if you’re a complete beginner! With OBS, you can record your screen, webcam, and microphone all at once and even mix multiple audio and video sources to make your videos look and sound amazing.
Steps to use OBS Studio to Record Teams Meetings
Here are the detailed steps on how to use OBS Studio to record a Teams meeting:
Step 1. Download and install OBS Studio, and open the auto-configuration wizard from “Tools” in the top menu.
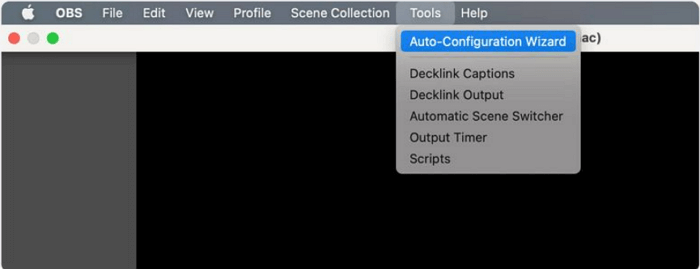
Run Auto-Configuration Wizard
Step 2. Go to “Settings > Audio” to adjust the audio settings to capture desktop or microphone audio.

Adjust Audio Settings in OBS to Capture Microphone Audio
Step 3. Now click on “+” at the bottom of the screen under “Sources” to set your video sources. Choose “Display Capture” to record everything visible on your desktop.
Step 4. Click “Start Recording” to initiate screen recording.
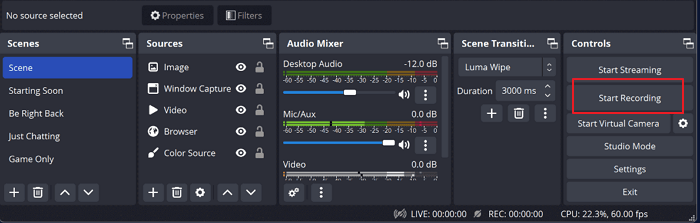
Start Recording in OBS
Record Teams Meeting with EaseUS RecExperts
If you are looking for an easy-to-use screen recording software, we suggest giving EaseUS RecExperts a try. It is your go-to tool for capturing both your screen activity and webcam feed.
This tool is loaded with a variety of features and functions that make it perfect for creating tutorials, recording meetings, capturing gameplay, and so much more.
Steps to Record Teams Meetings using EaseUS RecExperts
Here are the steps on how to record Teams meeting with EaseUS RecExperts:
Step 1. Download on your PC, launch the app, and select “Full Screen” or “Region” from the interface.
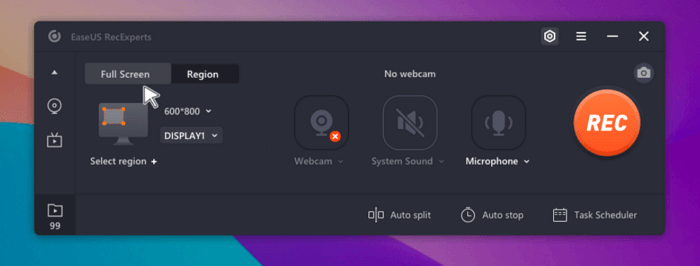
Select the recording area
Step 2. Once you have adjusted all the settings, click on the “Record” button on the right.
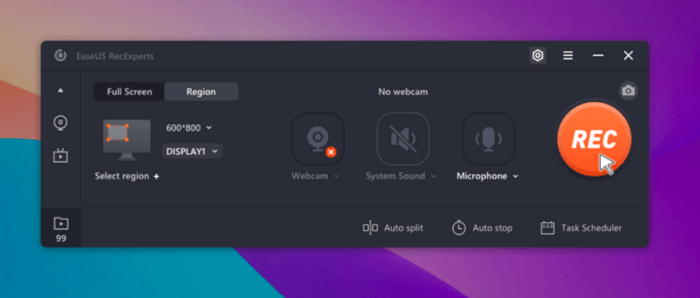
Click on the “Rec” button
Step 3. Conduct your meeting as planned, and once it’s over, click the red button again to stop the recording.
Step 4. The recording will be saved to your PC in your desired format, and you can access it later.
Record Teams Meeting with Movavi Screen Recorder
Movavi Screen Recorder is a powerful and user-friendly screen recording software designed for capturing various activities on your computer screen. Whether you want to create instructional videos, record gameplay, capture meetings, or make tutorials, Movavi Screen Recorder offers a comprehensive set of features to help you easily create high-quality screen recordings.
How to Record Teams Meetings using Movavi
If you want to record a Microsoft Teams meeting using Movavi, follow these steps:
Step 1. Download Movavi on your PC and open Movavi Screen Recorder.
Step 2. On the interface, select “Full Screen” or “Custom Screen” under “Capture Area” to select the screen you want to record.
Adjust Screen to Record in Movavi
Step 3. Now adjust the system audio and microphone settings and click “Record” to start recording the screen.
Step 4. Once your meeting is over, click “Stop Recording” and save the recording to your PC in any supported format.
Now that you know the 5 top ways how to record Teams meeting, let’s answer some common user queries regarding this topic.
Frequently Asked Questions (FAQs)
Q. Is there a way to record a Teams meeting?
Yes, there are several ways to record a Teams meeting. For starters, you can record a Teams meeting directly from the Microsoft Teams platform by selecting the “Start Recording” option. However, this feature has limited options; therefore, if you’re looking for a wider range of recording options, complete with annotations and editing, we suggest using a third-party screen recorder like Screenify.
Q. How do you record a Microsoft Teams meeting secretly?
When you record a meeting directly via Microsoft Teams, all the participants are notified about it. Therefore, it’s no secret! However, if you want to record a meeting secretly, without anyone finding out, you can use a third-party screen recorder app like Movavi, etc.
Q. Can I record a Teams meeting if I am not the host?
That would be a no. The right to record a meeting lies with the host only; however, you will get notified if the meeting is being recorded.
Conclusion
Recording a Teams meeting is a common practice, as the participants can play it again if they forget a point or want to refer to something discussed during the meeting.
While Microsoft Teams has a built-in screen recorder, it has its limitations. Therefore, if you’re looking for a screen recorder with advanced features and more options, we have listed 5 screen recorder apps in this article.
So, if you’re looking for easy and versatile ways how to record Teams meeting, this guide is surely going to come in handy!
Free Download * 100% Clean & Safe

Senior writer of the iMobie team as well as an Apple fan, love to help more users solve various types of iOS & Android-related issues.
Product-related questions? Contact Our Support Team to Get Quick Solution >
