How to Record Steam Gameplay
How do I record a video on Steam? Here you will get the best game recorder and what button is record video on Steam.
Roger Smith | Last Updated: Aug. 21, 2024
1744 words|5minute
You’re knee-deep in an intense battle on Steam. You are pulling off jaw-dropping moves and nailing that impossible shot. Your friends are missing out on this epic showdown, and you want to relive the moment later or show off your skills. What do you do? That’s where we come in.
In this article, we’re your gaming sidekicks. We are ready to spill the beans on the best game screen recording software on how to record on Steam. We’re talking about the tools that’ll help you immortalize your gaming glory. So, grab your energy drink, put on your headset, and let’s dive into the world of game recording!
Top 5 Screen Recorders for Steam Recording
Welcome to the main event, where we introduce you to the five champions of game recording. Ready to capture your Steam gaming adventures, let’s dive right in!
OBS Studio
OBS Studio, also known as the Open Broadcaster Software. It is a heavyweight contender in the world of game recording. This open-source gem is beloved by gamers and streamers alike for its versatility.
Key Features
- Multi-Platform: OBS Studio is your go-to whether you’re on Windows, Mac, or Linux.
- Live Streaming: It’s not just for recording. You can live-stream your gameplay to platforms like Twitch or YouTube.
- Customizable: Real-time video/audio capturing and mixing.
- Audio Mixer: Instinctive audio mixer with filters such as noise gate, gain, and noise suppression.
Limitations
- Steep Learning Curve: For beginners, OBS Studio might take a little time to master.
- Resource Intensive: It can be demanding on your system, so ensure you have a powerful setup.
Step-by-Step Guide
- Download and Install OBS Studio on your computer. Once installed, launch the application.
- Upon launching OBS, you’ll see that a scene is already added by default in the bottom left corner of the screen.
- To start recording, you need to add a source inside this scene. Click the “+” button at the bottom of the sources panel, then select “Screen Capture” on Linux or “Display Capture” on Mac and Windows.

Add Source
- Continue clicking “OK” on the pop-up windows that appear.
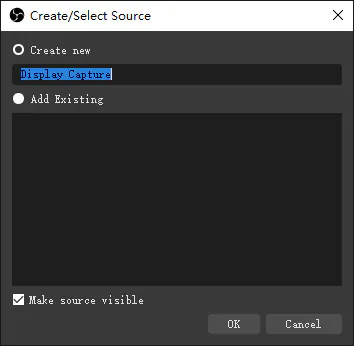
Click OK
- Now, select the “Settings” button located at the bottom right of the interface. In the menu on the left, choose “Output,” and take note of the “Recording Path” field, which specifies where your recorded file will be saved.
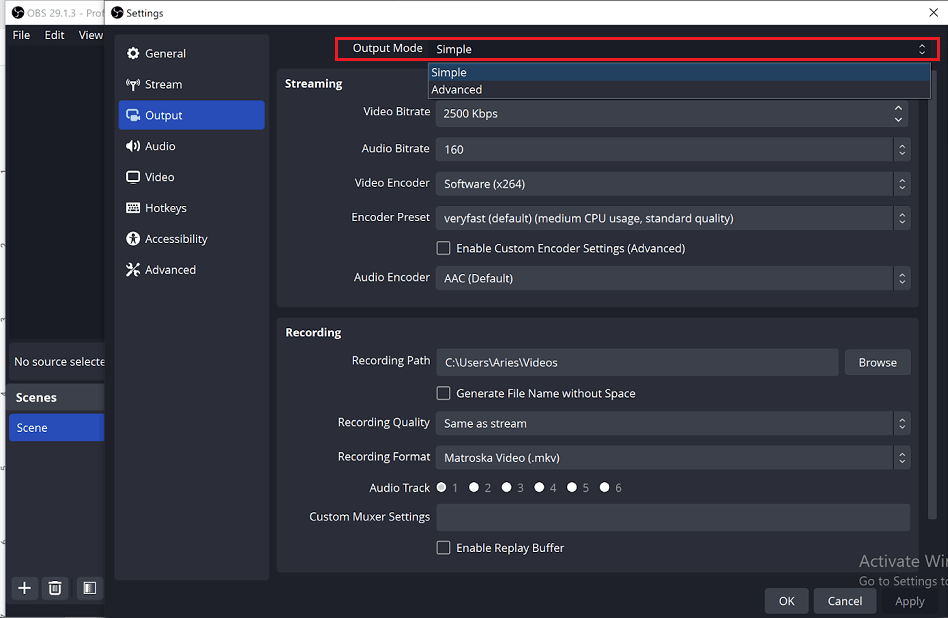
Change Output Settings
- To begin recording, click on the “Start Recording” button.
- When you’re finished recording, click “Stop Recording,” and the video will be saved to the folder you specified in the settings.
Recommended Articles: Fix OBS Recording Lagging >
2. Movavi Screen Recorder
Movavi is your go-to solution for capturing any on-screen action in stunning quality. It records up to a blazing 60 frames per second. Whether it’s tutorials, online videos, or heartfelt video chats with loved ones. This software has you covered. With ready-made capture modes or customizable settings, it’s easy to create your masterpiece. Plus, you can snap and edit screenshots on the fly.
Key Features
- Intuitive Interface: Movavi’s interface is a breeze to navigate.
- Editing Tools: It offers basic editing options, allowing you to refine your recordings.
- Customized Screen Recording: Screen recording with Movavi is incredibly easy, even for beginners.
- Frame Rate: You can record recordings with a casing pace of 5 to 60 frames/second.
- Scheduled Recording: Set it up to record your Steam sessions automatically.
Limitations
- Costly: Somewhat costly in terms of feature availability
- Requires updated PCs: Movavi shines on updated PCs but might not be as snappy on older machines.
- Customer Support: Some users have reported less-than-ideal customer support experiences.
- Mac and Windows: It’s available for both, but Linux users are out of luck.
Step-by-Step Guide
- Install and launch Movavi Screen Recorder. For full-screen recording, hit the spacebar.
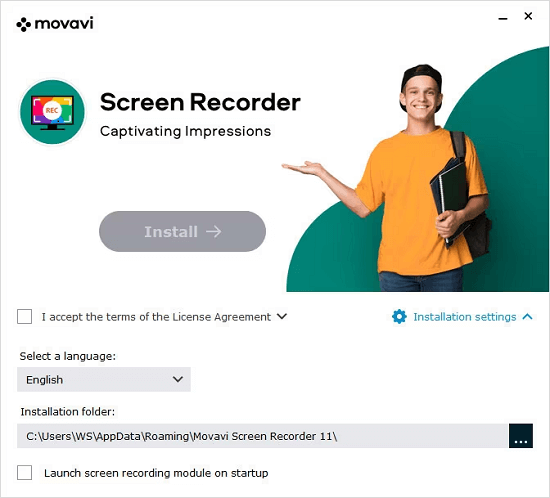
Installing Movavi
- Movavi Screen Recorder is your versatile ally. Schedule recordings set durations, and even automate post-recording actions. Choose where your webcam appears on the screen.
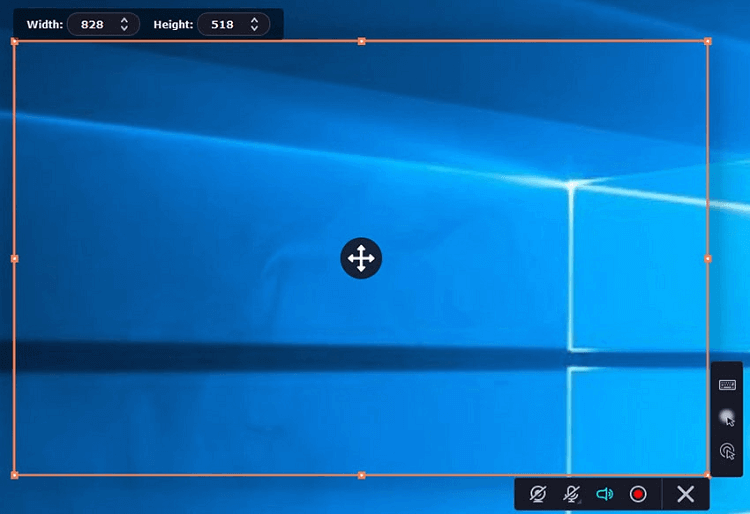
Adjust Screen to Record
- Press the red circle to begin recording. Capture audio and enable your webcam if needed. After recording, pause and stop as desired. Movavi Screen Recorder offers various output formats.
3. Camtasia
- Meet Camtasia, the powerhouse of video editing available for Windows and macOS. It combines user-friendliness with unparalleled control, making it a top choice for creators.
- Camtasia makes sharing a breeze with direct links to YouTube, Vimeo, Google, and Drive.
Key Features
- Recording: Capture your screen and webcam effortlessly.
- Templates: Craft video tutorials, how-tos, software demos, presentations, and training videos with ease.
- Presets and Transitions: Elevate your video’s quality with presets and transitions.
- PowerPoint Integration: Transform PowerPoint slides into videos in seconds.
- Annotations and Interactivity: Engage your audience with interactive elements.
- Audio and Cursor Effects: Fine-tune audio and add cursor flair with a wealth of effects.
Limitations
- Pricey: Camtasia’s excellence comes at a price, making it a high-end investment.
- Lack of functions: It may not have the same compression functionality as its pricier counterparts.
Step-by-Step Guide
- Open Camtasia, start a new project, and log into your Camtasia account.
- Click on the ‘New Recording’ option to start recording your screen.
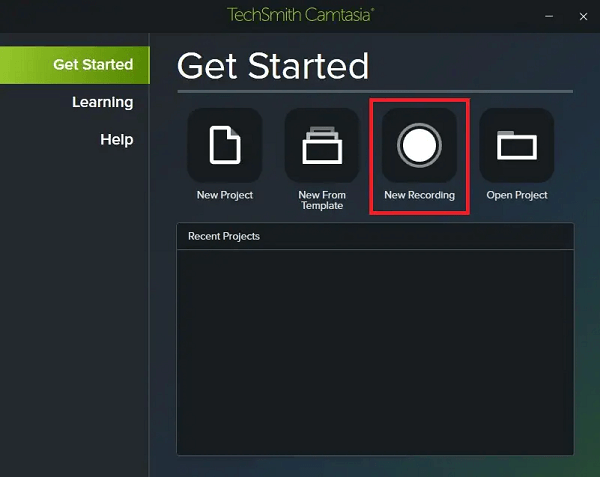
Click New Recording
- A widget will appear, prompting you to choose your screen for capturing. You also have the option to select an external webcam and microphone. When you’re prepared to commence recording, simply click on the red “rec” button.
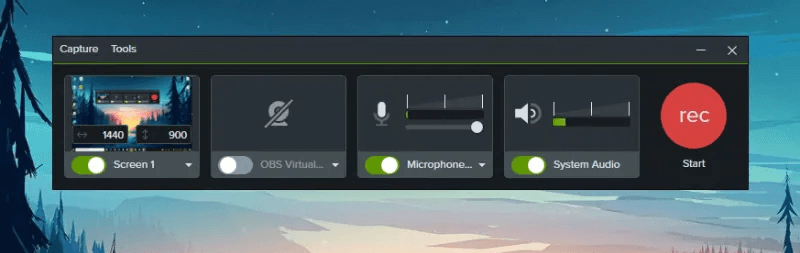
Click Rec Button to Record
4. Loom
Loom, the asynchronous video communication platform for work, redefines how we connect professionally. With a focus on simplicity and speed. Loom empowers users to record, share, and engage through video messages. All to supercharge productivity.
Key Features
- Recording Canvas and Virtual Backgrounds: Blur out backgrounds or replace them with images or videos during webcam recording.
- Interactivity Galore: Timestamped comments, emojis, video transcription, and closed captioning enhance collaboration.
- Seamless Integrations: Loom seamlessly connects with Slack, Jira, GitHub, Gmail, Salesforce, and more.
Limitations
- Free Version Limitations: The free version restricts video duration to only 5 minutes.
- Default Public Videos: Be cautious; your videos are public by default.
- Quality for Full-Screen Videos: Recordings of the entire screen may exhibit lower quality.
Step-by-Step Guide
- Launch Loom Application.
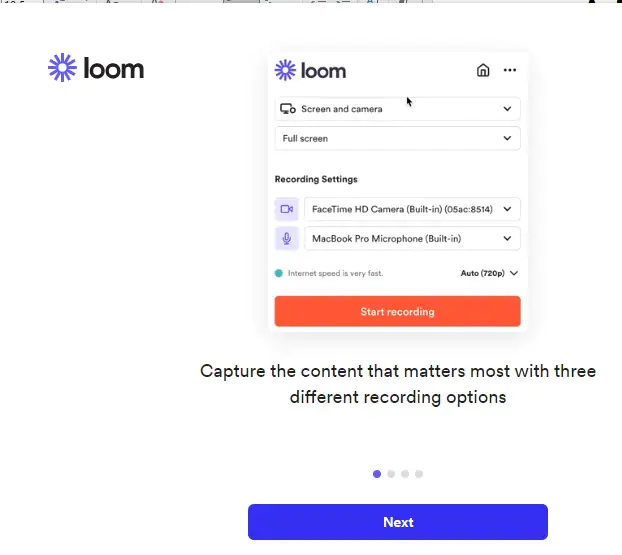
Open Loom
- Choose between “Screen + Cam” for combined screen and camera recording. “Screen Only” for full or partial screen, or “Cam Only” for webcam recording.
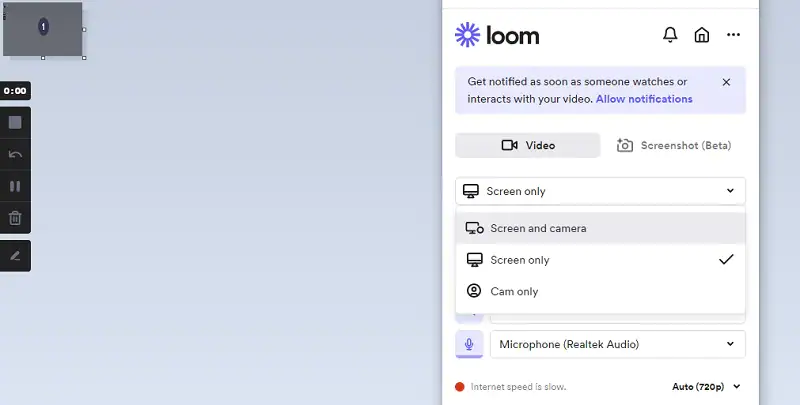
Select Recording Options
- Decide between Full Screen, Window, or Custom Size recording options.
- Start your session using the countdown timer. Access options like Pause, Delete, or Drawing.
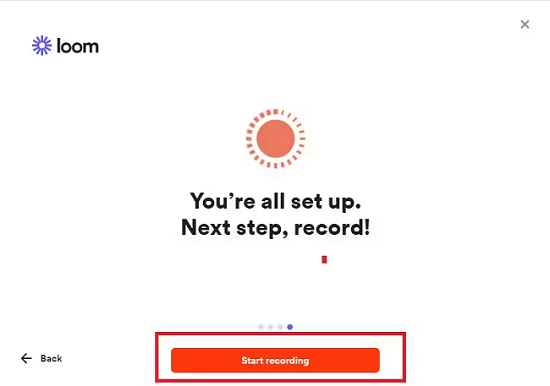
Start Recording
- Stop/Share Recording: Click “Stop Recording” when you’re finished. Your masterpiece is ready to be shared.
5. Wondershare DemoCreator
Meet DemoCreator, the lightweight screen recorder designed for Windows and Mac users. It excels in capturing and sharing anything noteworthy happening on your screen with ease.
This unassuming tool packs quite a punch with its powerful recording features, offering a plethora of screen drawing tools, scheduled recording, game capture, and support for dual monitors, all designed to simplify screen recording for everyone.
Key Features
- High FPS Support: It offers recording options up to 120fps guaranteeing smooth, high-definition screen recording without interruptions.
- Custom Capture Area: Record any part of your computer screen. Whether it’s the entire display, a specific window, or a customized area of your choosing.
- Personalized Recording Shortcuts: Customize recording shortcut keys for the most convenient screen video creation experience.
- Screen Drawing Tools: Express your ideas in real-time with DemoCreator’s intuitive screen drawing tools.
- Scheduled Recording: Plan your recordings easily by scheduling start and end times.
- Multi-Monitor Magic: Capture dual or multiple monitors effortlessly with DemoCreator.
Limitations
- Watermark in Free Version: The free version of DemoCreator adds a watermark to the final output.
Step-by-Step Guide
- Begin your game recording journey by launching DemoCreator. Select the “Game Recording” mode, tailored to capture your game screen, audio, and camera.
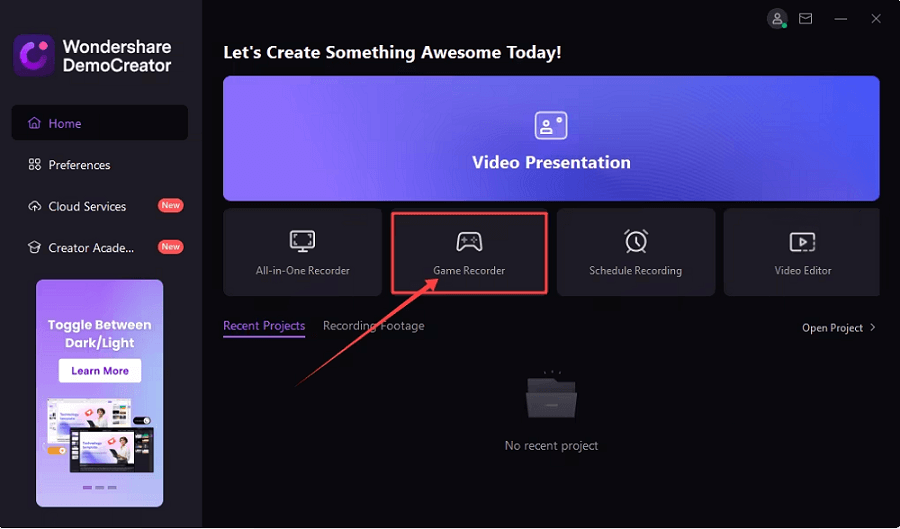
Click Game Recorder Mode
- Prepare your recording environment by selecting additional inputs. Options include microphone audio, webcam, and system audio.
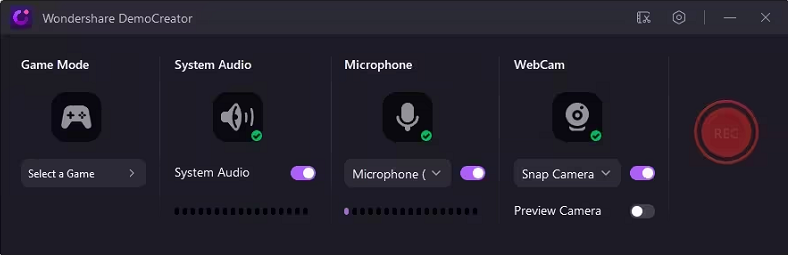
Select Additional Inputs
- Click the prominent red “REC” button or press the F9 key to initiate the recording process.
- Once you’ve successfully captured your gaming masterpiece, head over to the DemoCreator Recorder in your taskbar. Here, you’ll find the option to conclude your recording. Click the “End Recording” button to wrap up your session.
Remember that you can press F10 to swiftly halt a recording. F9 to start, pause, or resume a recording at your convenience.
Q&A: How do I record the last 30 seconds on my computer?
Recording the last 30 seconds of your computer screen can be achieved through various screen recording software. One popular method is by using the built-in Game Bar on Windows 10 or 11. It will help save 30 seconds of your screen activity.
Alternatively, you can use the dedicated screen recording software mentioned above.
Q&A: How do you upload a video to Steam?
Uploading a video to Steam requires a few simple steps:
- Open the Steam client on your computer.
- Click on your profile name in the top right corner and select “Videos.”
- Click on the “Upload a Video” button.
- Pick the video file you want to upload, and add a title, description, and any necessary tags. Select the privacy settings for your video (public, friends only, or private), and then click “Upload.” Steam will process the video, and once it’s ready, you can share it with your Steam friends or the Steam community.
Conclusion
Choosing the right game recording software is crucial for preserving your gaming triumphs. With our guide, you’re well-equipped to make an informed decision and start recording your Steam gameplay like a pro. So, grab your controller, fire up your favorite game, and let the recording begin!
Roger Smith
Work for iMobie team for 5 years as well as an Apple fan, love to help more users solve various types of iOS or Android related issues.
 Screenify
 AnyEnhancer
 FocuSee
 Vozard
 AnyMiro
 AnyMirror
