Best Ways to Record Anything on YouTube TV
YouTube TV is a great platform you can visit to enjoy endless streaming services, such as live TV shows and on-demand content. However, many users are skeptical about the platform and ask if you can record on YouTube TV. Well, this article is structured to answer the question, and also provide you with the various ways to capture your YouTube TV screen easily and quickly.
Hi,
I don’t have so much time to stream my favorite live shows on YouTube TV, so I decided I would record them for later viewing. However, unfortunately, all efforts to do this were futile. Is there anyone with a guide on how to record YouTube TV? Please, kindly share!
Obviously, recording YouTube TV is the best way to save those fascinating clips you find online for later viewing. This action helps you view specific video content as many times as you like in offline mode, which means you no longer have to turn on your data to stream the clip.
Several techniques have been devised to successfully record YouTube TV, however, not everyone knows how it’s done. Many folks still struggle to capture their YouTube TV. If you are experiencing a similar issue, this post should help you out, as we look at how to record YouTube TV easily.
How Does YouTube TV Work?
The YouTube TV app is a popular streaming service that lets you view or watch various video content from different niches, such as entertainment, NEWS, sports, and more. You also get to see astonishing TV series, and movies via this platform.
With YouTube TV at your fingertip, you can now watch your desired video content from the comfort of your home using any device. This platform integrates with Android, iOS, Mac, Windows, Roku TV, and many other devices.
Due to the flexible streaming services, YouTube TV is considered the best choice when compared to its competitors. With a single subscription account, you can stream videos on 5+ devices.
What Can You Record on YouTube TV?
YouTube TV is no doubt the home for entertainment. This platform supports over 70 channels that you can visit to stream live shows and also watch your favorite movie series.
Alongside the streaming/viewing services, YouTube TV also allows you to record your favorite shows and movie series from the corresponding channels displaying them.
How to Record on YouTube TV
Recording YouTube TV is easy. There are several techniques you can select from to record your favorite YouTube TV shows or series. No third-party tool is needed. All you need is the built-in screen recorder. Find below the different techniques to use, and apply the one that suits you:
Add Video to Library
- Run the YouTube TV app on your mobile device. Otherwise, you visit the official website via your favorite browser on your PC/Mac. However, if you don’t use a mobile or computer system but Smart TV, just install the corresponding app.
- Sign in to your profile by simply clicking on the appropriate icon. Once you’ve successfully accessed our profile, navigate your cursor to where you have the Live button, and click on it.
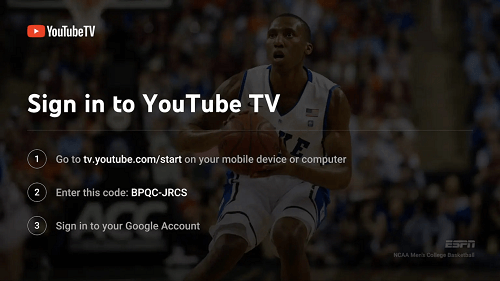
Sign in to YouTube TV
- A new screen showing all the ongoing live streams will immediately show.
- Locate the Magnifying glass button at the upper right corner of the page, then click on it.
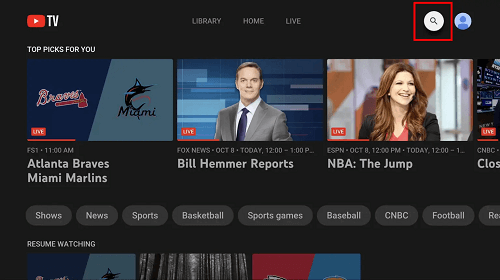
Locate the Magnifying glass button
- Now proceed to enter the name of the show or series you want to record in the search field, and then click on the tile that corresponds with it.
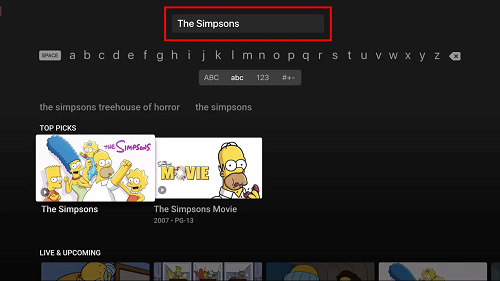
Enter the Name of The Show You Want to Record
- YouTube TV will direct you to another screen just like the one displayed down here:
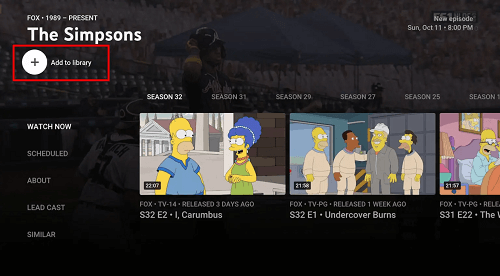
YouTube TV Will Direct You to Add to Library
- Tap on the + Add Library icon underneath the show/series name. Once done, YouTube will quickly add the show/series to your DVR library, and a notification confirming that upcoming episodes of the selected show/series will be recorded will immediately pop up at the top of your screen.
Record Live Streams While Watching
Instead of going through the stress of searching for each YouTube TV series or show, you can record the current on-screen event you are viewing. Here’s how that’s done:
- Open the YouTube TV app or website on your device, then sign in to your YouTube TV profile. Ensure your details are correct to avoid sign-in failure.
- Go to the Live tab, and select a show or series you will like to stream on YouTube TV.
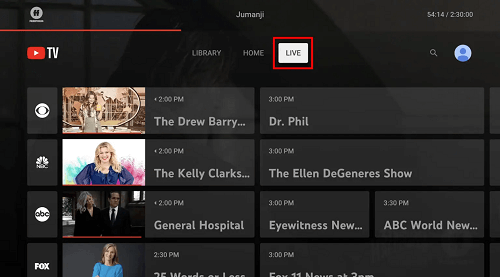
Go to the Live Tab
- Next, the show or series will start playing in no time. Kindly pause the show by pressing the corresponding icon.
- Now click on the + icon underneath the show/series name, and the response page below will come up.
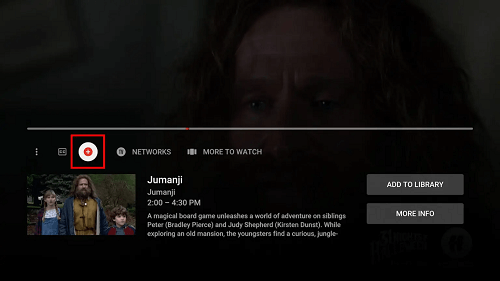
Select ADD TO LIBRARY
- Select ADD TO LIBRARY, and YouTube TV will start recording from the current streaming time till the end. Also, all reruns and upcoming airings will be added to the recordings.
How to DVR on YouTube TV on Mobile Devices
Use the steps below to download your recorded YouTube TV series and shows on your mobile device, whether Android or iOS:
- Open the YouTube TV app on your mobile phone.
- Click on the Search button at the upper right corner of the screen, and then search for the TV series or show you would like to record.
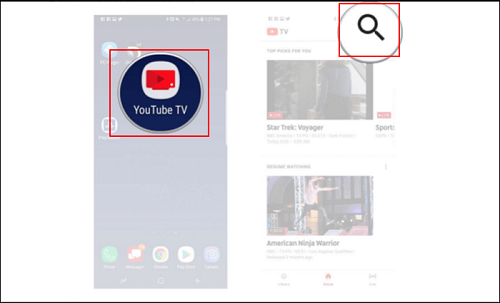
Click on the Search button
- A screen with shows or series that corresponds with your search entry will come up. Kindly select one of them, and then click on the + icon to add it to your DVR list.
click on The + Icon to Add It to Your DVR List
- Now check the show in Library when the recording is over.
Free YouTube Video Recording Tool – Screenify
Screenify is a versatile and completely free screen recording tool designed for Windows and macOS users, especially those involved in YouTube content creation. It allows unlimited recording time, which is perfect for long videos such as tutorials and game sessions.
Main Features:
- Completely free: No need to pay, suitable for all users.
- Unlimited recording time: No limit on the length of recording time, suitable for long video creation.
- 4K 60FPS recording: Supports high-resolution and high-frame rate video recording with excellent picture quality.
- Cross-platform support: Compatible with Windows and macOS systems, with wide applicability.
While Screenify stands out for its simplicity and cross-platform availability, it may not be suitable for users who need advanced video editing features because it lacks these features. However, for online educators, remote workers, and content creators who are looking for a reliable, free, high-quality screen recording option, Screenify is an excellent choice.
Free Download * 100% Clean & Safe
Record Mac/Win with Screenify
Step 1.Download and Install Screenify on Computer.
Step 2.Launch Screenify on your computer, and select Record screen mode.
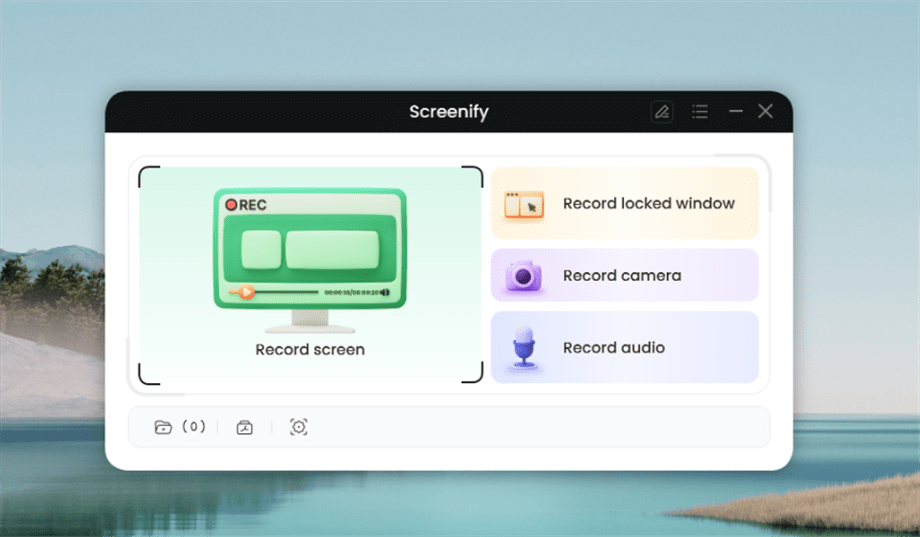
Select Record Screen Mode
Step 3.Configure Recording Settings aims to configure settings like system audio before recording.
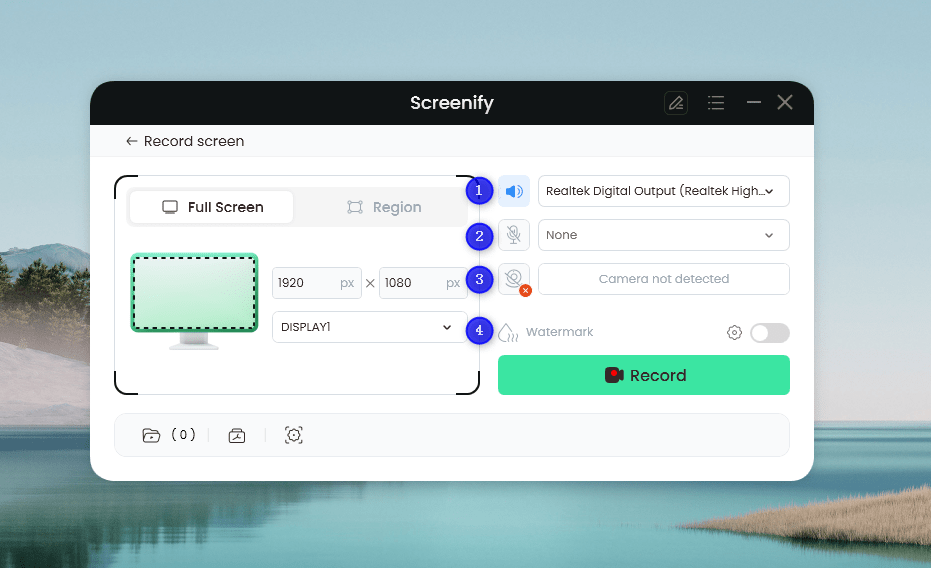
Set Configure Recording Settings
In this setting menu, you can:
1 Choose the System audio.
2 Choose the Microphone you want to record.
3 Choose the Camera you want to use.
4 Choose whether to add a watermark.
Step 4.Select Recording Screen.
Option 1. Full Screen Record
Please select Full Screen mode and choose the display you need to record. Hit Record button to initiate recording.
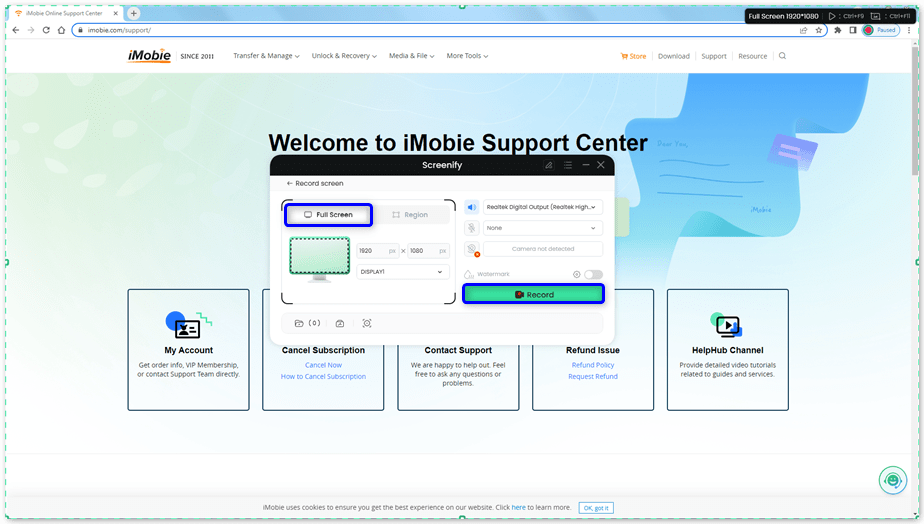
Select Full Screen
Option 2. Region Record
To record region, you need to manually select the recording area. After selection, you can still adjust the selected area. It supports customize selection, full screen, and proportional selection based on common social media dimensions.
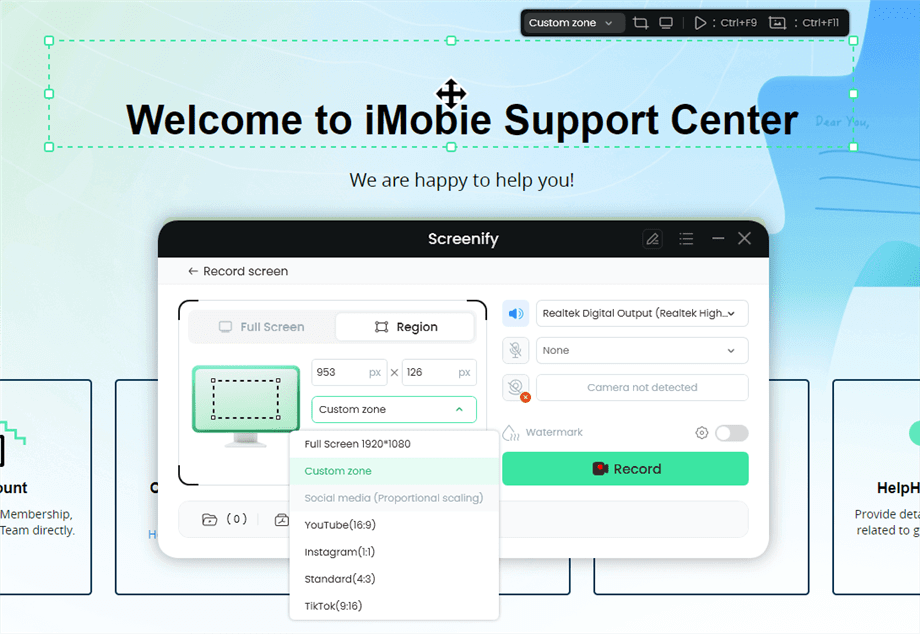
Record Region
Step 5.Wait for the Recording Countdown.
There is a 3-second countdown to help you prepare the recording after you are ready to start recording.
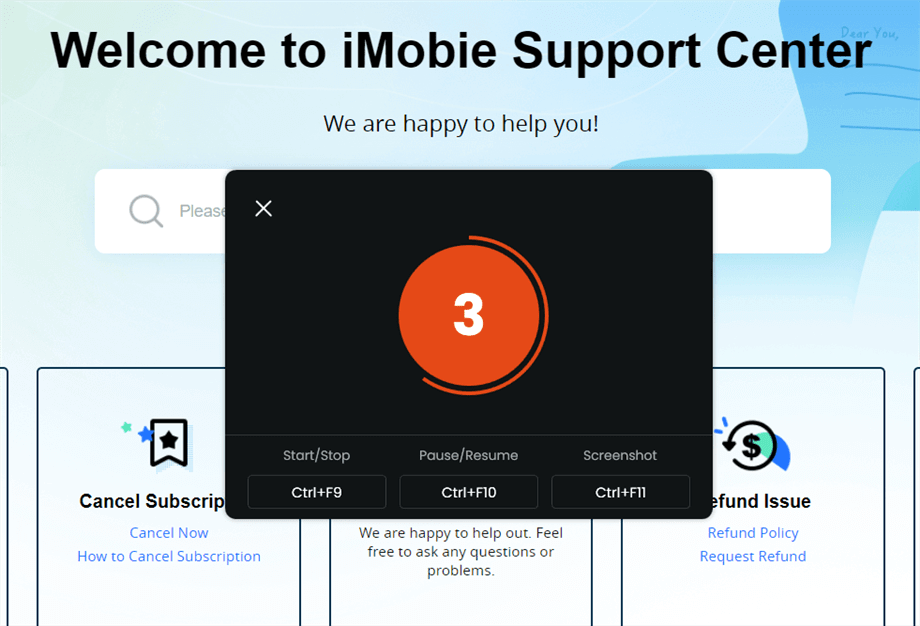
Wait for the Recording Countdown
If you would like to see a recording countdown before your recording starts, you can enable the countdown option. Or you can tap it off. View this post to know how to set the countdown option.
Step 6.Start Recording.
The recording will begin after a 3-second countdown. You can make annotations on the recording interface during the recording.
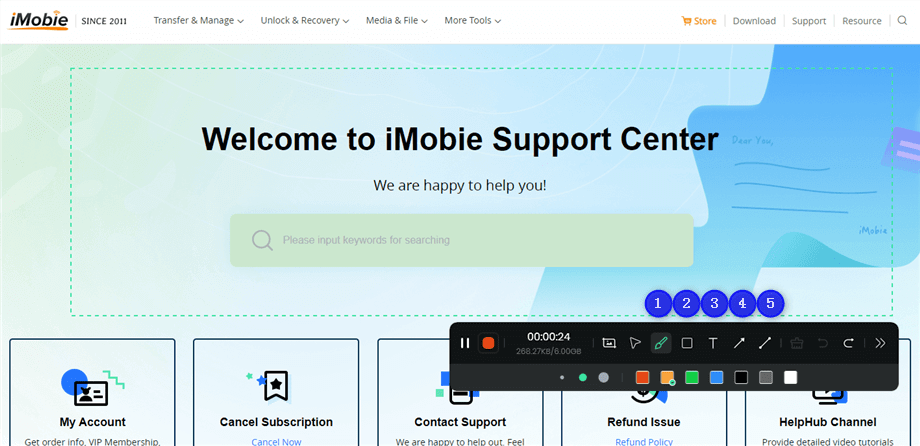
Annotate the Screen during Recording
With the toolbar, you can add the annotation in the screen:
1 Brush: Draw freehand on the screen recording interface to highlight or illustrate specific areas during the recording.
2 Rectangle: Draw rectangular shapes on the screen recording interface.
3 Text: Add written notes or labels directly onto the screen recording interface.
4 Arrow: Draw arrows on the screen recording interface to point out and emphasize specific areas.
5 Line: Draw straight lines on the screen recording interface to underline or connect specific points.
Step 7.Record Screen Process Completed.
When the recording is completed, you can click the red Stop button to end the recording. Your recorded files will be displayed. From here, you can preview and manage the recorded content as needed.
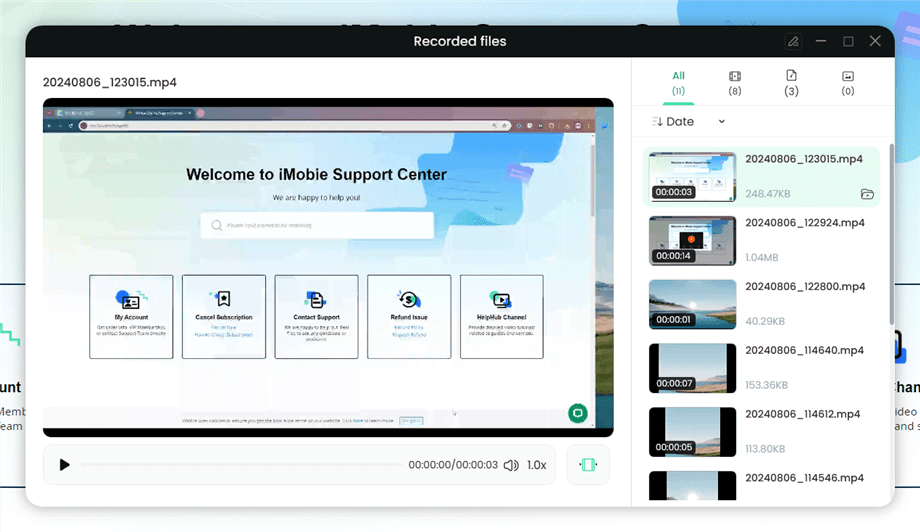
Preview the Recording
FAQs on How to Record on YouTube TV Easily
Q1. How Does YouTube TV Recording Work?
YouTube TV has a built-in recorder (popularly known as DVR) that lets you record those mind-blowing videos you find while streaming online. The recorder has a unique recording model, as it helps you capture all airings pertaining to a program. What this means in essence is that YouTube TV automatically records both upcoming and reruns episodes of a program.
You might be worried about how much storage you need to save these recordings. Well, all YouTube TV recordings are usually stored directly in the YouTube cloud where they stay for 9 months. After this time, the recordings will be cleared from YouTube cloud storage.
With the above, you can see you don’t need any storage to keep your recordings. However, mind you, a reliable data connection is crucial for you to successfully record your favorite YouTube TV program.
Q2. How can I play YouTube TV recordings?
Streaming recorded YouTube TV shows or series isn’t a challenge. Just apply the steps down here and you are good to start watching your recordings:
- Launch the YouTube TV app or go to the official website. Log in to your profile by entering the right credentials.
- Next, open the Library panel by clicking on the LIBRARY tile at the top of your screen.
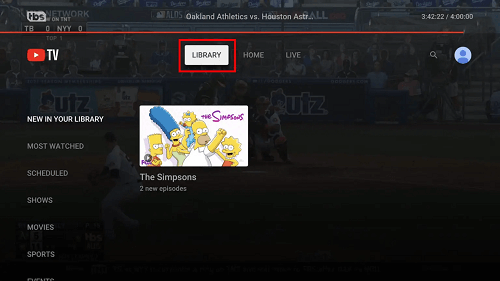
Open the Library Panel
- On the left sidebar, you will find the different categories of shows or series you’ve recorded in the past. Select any one of them to proceed.
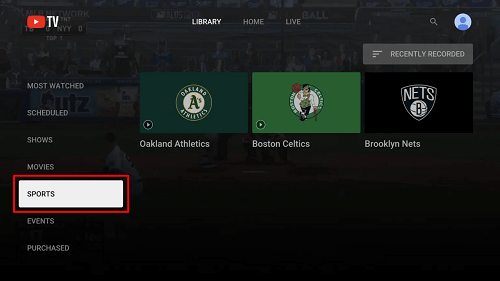
Select Categories of Shows to Proceed
- A new screen displaying shows or series underneath the category you chose will load up. Click on your desired show and YouTube TV will start playing immediately.
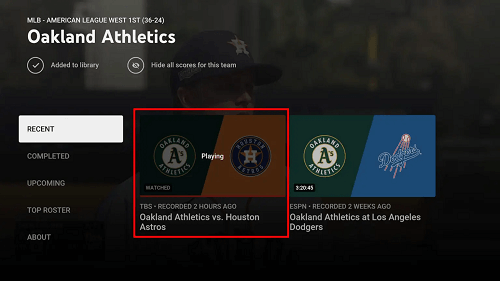
YouTube TV Will Start Playing Immediately
Final Words
Ultimately, recording YouTube TV isn’t a stressful task anymore now that you have the guide above at hand. You can now record any series or show of your choice for later viewing on the YouTube TV streaming service.
Product-related questions? Contact Our Support Team to Get Quick Solution >

