How to Record Minecraft Gameplay Step by Step
Capture the joy of playing Minecraft by recording your gameplay. This article contains various methods for both Windows and Mac users to record Minecraft, from built-in tools like Xbox Game Bar & QuickTime Player to third-party applications.
I know Minecraft is fun! Who doesn’t love building structures or going on adventures in Minecraft? With all the fun stuff you can do, it’s surprising if you don’t want to record those moments on video.
So, do you also want to record Minecraft gameplay?
In this article, we’ll walk you through the steps to record Minecraft. We’ll cover methods that make use of built-in features of Windows and Mac. Additionally, we’ll also show you how to do it using some third-party tools.
So let’s start without any further delay!
Table of ContentsHide
Can you Record Minecraft Gameplay?
Yes, you can easily record Minecraft gameplay! In fact, capturing the Minecraft moments is quite simple.
For Windows users, the Xbox Game Bar is a built-in feature that can do this job. Just like its name, this Game Bar is specially made to help out in your gameplay.
On the Mac side, QuickTime Player provides similar functionality.
Besides, if you want to add annotations or other special features during recording, in that case, third-party software like Awesome Screenshot and Recorder can come in handy.
How to Record Minecraft on PC Windows 11/10
There are various methods you can use to record Minecraft gameplay on a Windows 10/11 PC. We’ll now introduce each tool and provide a step-by-step guide to use it.
Method 1: Using Awesome Screenshot & Screen Recorder
Awesome Screenshot & Recorder is a free tool designed as a Google Chrome extension. It lets you take screenshots & record videos with ease right from your browser. Since Awesome Screenshot & Recorder is a Chrome extension, you might think that it’s only limited to Chrome recording. But no!!!
You can also use it to record Minecraft gameplay. Once you’ve captured your gameplay, you can easily share it via email. You can also integrate it with platforms like Slack, Asana, and Trello.
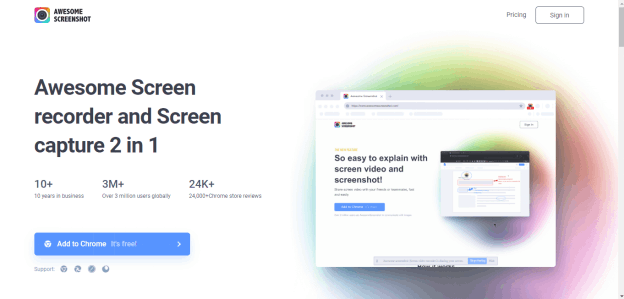
Awesome Screenshot and Screen Recorder
Awesome Screenshot and Recorder provides both free and paid versions. Here are its key features.
Key Features
Free Version
- Capture up to 100 screenshots.
- Basic annotation tools.
- Record up to 20 videos.
- Unlimited recording time (up to 720p resolution.)
- Edit videos with basic tools.
Professional Version ($6-$8/month)
- Unlimited screenshots with advanced annotation tools.
- Unlimited video recording time, with up to 4K resolution.
- More extensive editing options.
- Priority MP4 conversion.
Steps to Record Minecraft with Awesome Screenshot & Recorder
Step 1. Open your Google Chrome browser and head to the Chrome Web Store. Search for “Awesome Screenshot & Recorder” and install the extension.

Install Awesome Screenshot & Recorder
Step 2. Open Minecraft and get to the point where you want to start recording. This could be at the beginning of an adventure or any other moment you find worth capturing.
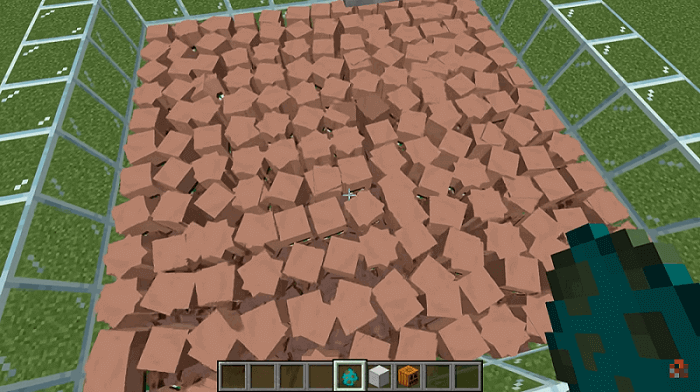
Play Minecraft on your PC
Step 3. Click on the Awesome Screenshot & Recorder extension icon in the Chrome toolbar to bring up its menu.
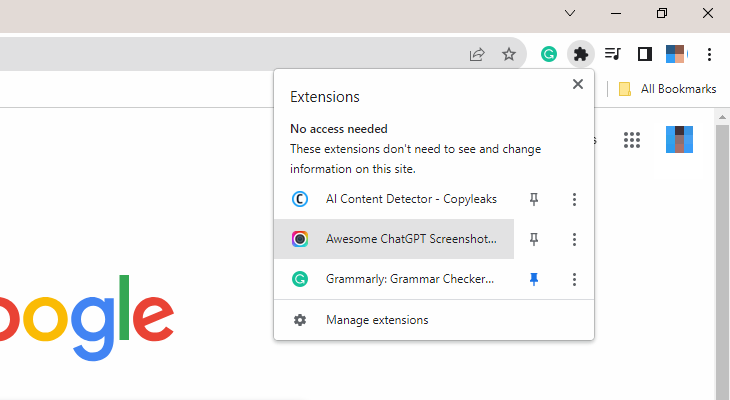
Open the Awesome Screenshot extension
Step 4. In the menu, click on the “Record” section. A settings window for your recording will appear. Once you’ve selected the settings, hit “Start Recording.”
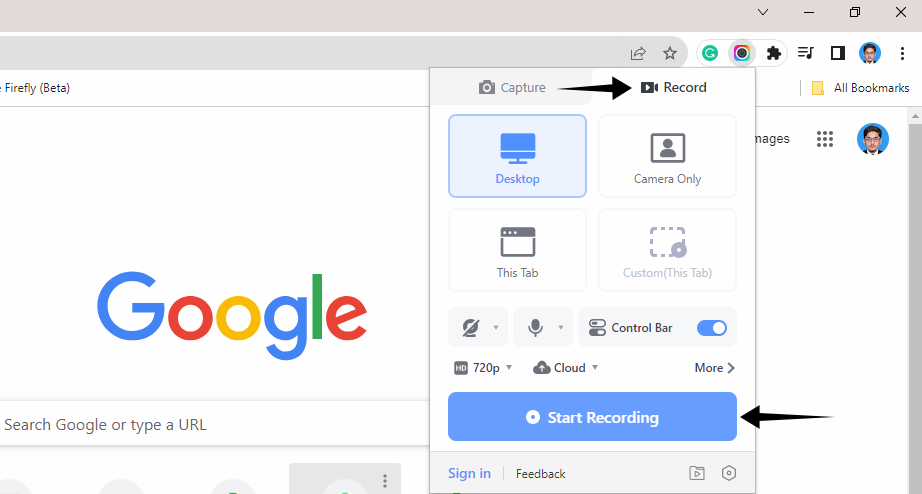
Set Up your Recording Settings
Step 5. Now, Awesome Screenshot will ask you to share your screen. Go to the “Window” section and select your Minecraft window as the recording screen.
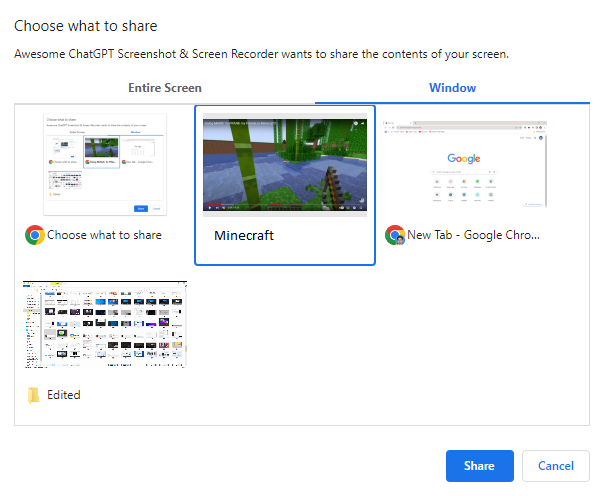
Choose Minecraft Window to Record
If you’re using the Professional version, you’ll have the ability to annotate your video while recording. This can include adding text or shapes.
Step 6. To stop recording, click on the “Stop sharing” button. The recording will then be opened on a new window in your browser. You’ll have options to edit it further or share it via different platforms.
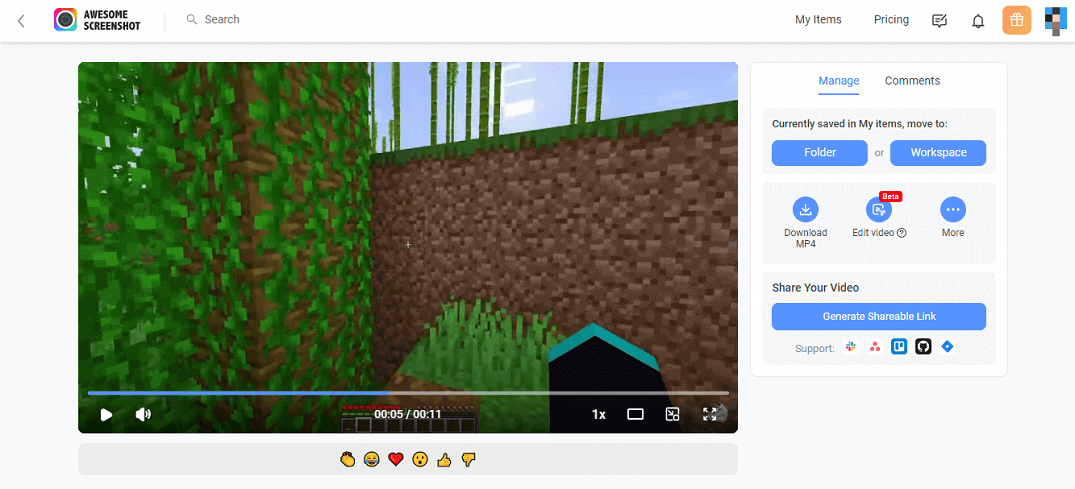
Minecraft video recorded by Awesome Screenshot
Method 2: Using Bandicam
Bandicam is a powerful screen recording software that is available for Windows. It not only allows you to record your PC screen but also offers specialized modes for game and webcam recording.
In short, you get high-quality videos with a range of other features. If you use Bandicam to record Minecraft, you can:
Key Features
- Annotate your video or take screenshots as you record.
- Add a webcam overlay to the video you’re recording.
- Set up recordings to start at specific times.
- Mix in your voice while recording system audio.
- Add click effects and animations during recording.
- Capture only the audio without the video.
Steps to Record Minecraft with Bandicam
Step 1. Download Bandicam from its official website. Then, install it on your Windows computer.
Download and Install Bandicam
Step 2. Launch Bandicam and select the game recording mode.
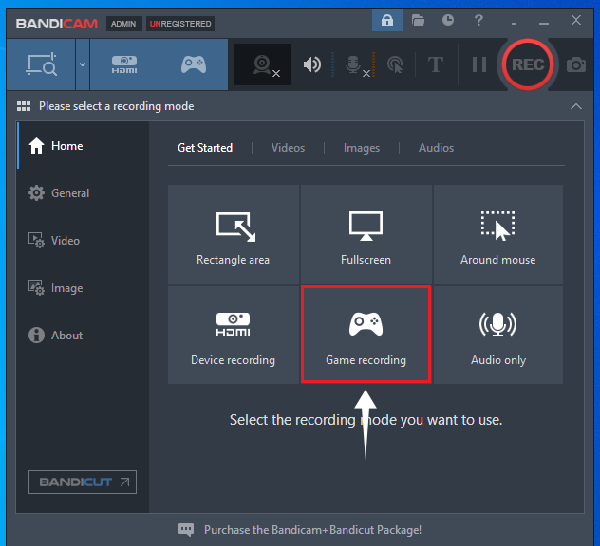
Select the Game Recording Mode
Step 3. Within Bandicam, adjust the settings according to your needs. You can change resolution, FPS, and audio settings.
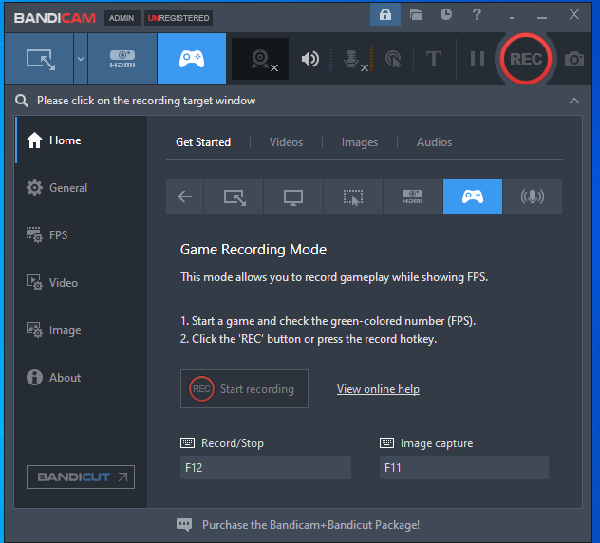
Set Record Settings
Step 4. Now, launch Minecraft and start playing. A green number will appear on Minecraft. It shows that Bandicam has detected your game.
Step 5. Press the record button on Bandicam or F12 key to start recording your Minecraft gameplay. A red number on your Minecraft indicates that the recording has started.
If you wish, use the real-time drawing feature to annotate your video as you play.
Step 6. You can pause the recording at any time. To end it, click the stop button in Bandicam.
Once you’re done, review your video. Bandicam offers basic editing options if you want to make quick changes before saving the file.
That’s all about third-party tools. Now, let’s move on to the built-in recorder of Windows.
Method 3: Using Windows Game Bar
Windows Game Bar is a built-in feature for Windows 10 and 11. It is designed for recording gameplay without the need for any additional software.
Xbox Game Bar is a simple tool that is convenient to use and easily accessible. You can get all the basic features like simple screen recording, taking screenshots, and recording audio.
Key Features
Using Xbox Game Bar, you can:
- Record game audio and, optionally, your voice.
- Create clips of various lengths, up to 2 hours.
- View real-time performance metrics while gaming.
- Take screenshots during your gameplay.
- Quickly start and stop recording with keyboard shortcuts.
Steps to Record Minecraft with Xbox Game Bar
- Make sure you’re running Windows 10 or 11. Now start Minecraft and press the Windows key + G to open the Game Bar overlay.
- Click on the settings icon to change your recording options.
- Click on the start recording icon, which is represented as a circle. You can also use the keyboard shortcut Win+Alt+R to begin recording.
- Play Minecraft as you normally would. The Game Bar will capture everything in the background. You’ll see the recording widget at the top right corner of your screen.
- To end the recording, click on the “Stop” icon. You can use the keyboard shortcut Win+Alt+R again to end the recording.
- Close the Game Bar and go to the “Captures” folder within the “Videos” directory. You can find your recorded gameplay in this folder.
Now, a lot of Minecraft players are also on the Mac devices. So we can’t leave them out, can we?
Record Minecraft on Mac with QuickTime Player
QuickTime Player is a media application that comes pre-installed on macOS. But this is not your ordinary media player. It’s a media player with built-in recording features.
QuickTime player is a convenient option for Mac users who are looking to record Minecraft. It offers a simple interface and all the basic tools you need for screen recording. Although it may not have as many features as some third-party options, QuickTime Player still gets the job done.
Key Features:
- Record the entire screen or a selected portion.
- Choose between system audio, microphone audio, or both.
- Save recordings in various formats like MOV, MP4, etc.
- View your recordings instantly with QuickTime’s built-in player.
- Record Minecraft without any downloads or installations.
Steps to Record Minecraft with QuickTime Player
- Open QuickTime Player from your Applications folder.
- Go to “File” in the menu bar and choose “New Screen Recording” to prepare for recording.
- Click on the arrow next to the “Record” button. Now adjust the settings like audio source and recording quality.
- Start your Minecraft game in the mode you wish to record.
- Go back to QuickTime Player and click the “Record” button to start recording.
- Play Minecraft as you usually do. QuickTime Player will record everything on your screen.
- To end the recording, click the stop button in the menu bar. You can also press Command+Control+Esc to end your recording.
You’ll then be prompted to save your recording in a location of your choice.
That’s how you record Minecraft on Windows and Mac. Now, let’s move on to some frequently asked questions about recording Minecraft.
How to Record Minecraft for YouTube?
If you’re looking to share your Minecraft gameplay on YouTube, use some software with high-quality recording & editing features. For Windows users, Bandicam or OBS Studio are good choices. Mac users can opt for QuickTime Player for simpler needs.
You can get the stepwise guide for using this software in the article above.
Can I Record Myself Playing Minecraft on iPad?
Yes, you can record Minecraft gameplay on your iPad using the built-in screen recording feature. To activate this:
- Go to “Settings,” then “Control Center,” and add the “Screen Recording” option > After setting this up, you’ll see a record button in your Control Center > Simply swipe down from the upper-right corner of the screen to access the Control Center > Tap the record button to start or stop the recording > These recordings get saved to your Photos app, from where you can edit or share them.
How to Record Minecraft in the 3rd Person?
Recording Minecraft gameplay in the 3rd person view can add a different perspective to your videos. To switch to the 3rd person in Minecraft:
Press the F5 key on your keyboard. It might be a different key, depending on your control setup. Once you’re in the 3rd person view, you can proceed to record just like you would in the 1st person view. You can toggle between different angles by pressing F5 again to get the best shots for your recording.
Conclusion
What’s even better than playing Minecraft is that you can save all those special moments.
In this article, we’ve shown you various ways to record Minecraft gameplay on Windows & Mac. Whether you want to use built-in options like the Xbox Game Bar or go for third-party tools like Bandicam, the choice is yours. Select the method based on what you need and record your Minecraft moments with ease.
Product-related questions? Contact Our Support Team to Get Quick Solution >

