How to Record Google Meet on Computer or Phone [Solved]
This article tells you all you need to know about how to record Google Meet. Whether you are on a computer or a phone, we have provided you with simple step-by-step guides. You can either use built-in recorders or third-party apps. Just give this article a read, and you are good to go.
Tired of missing out on information during Google Meet sessions? Have you ever wished you could rewind the discussion? Well, you’re not alone! Recording Google Meet sessions can be incredibly valuable. Whether you do it for educational purposes, team collaborations, or personal reference, it can be a great help.
But how exactly can you record these meetings? We have just the answer for you! In this article, we will discuss how to record Google Meet on both computers and phones. From the simplest methods to advanced techniques, we’ve got you covered. So, let’s dive in!
Can You Record Google Meet?
One of the best video conferencing platforms available in the market is Google Meet. It has many features, along with a built-in screen recorder. It allows you to record audio, videos, presentations, and chat messages.
Basic Requirements of In-built Recorder:
Although the recording feature is quite useful, it has two basic requirements. Without them, you will not be able to use it.
Specific Google Workspace Membership:
The recording feature is only available for accounts with a specific Google Workspace membership plan type. These plans include Essentials, Business Standards, Business Plans, and many more.
Proper Role in the Meeting:
You need to have the right role in the meeting to use this feature. You can only record if you are one of the following people:
- The host of the meeting
- Co-host from outside of the host’s organization
- A member of the host’s organization when Host Management is off
- A teacher or co-teacher in the Google Classroom
However, if you are unable to fulfill these requirements, there are alternatives present as well. These apps not only provide more features but also offer high-quality recordings.
Among many options, one third-party app for recording Google Meet is Gemoo Recorder Lite. We will explore more about it later.
So now let’s take a look at how to record Google Meet in HD on Windows or Mac.
How to Record Google Meet in HD Easily [Windows/Mac]
If you want to record Google Meet in HD on Windows or Mac, you can use Screenify. It is a simple tool that is perfect for recording your meetings.
What is Screenify? Screenify is a free screen recorder with four different modes. You can use it to record audio and video as well as webcam. Moreover, you can record Google Meet without any watermark and time limit. After recording, you can save it with just one click. The best part is that Screenify works on both Windows and Mac.
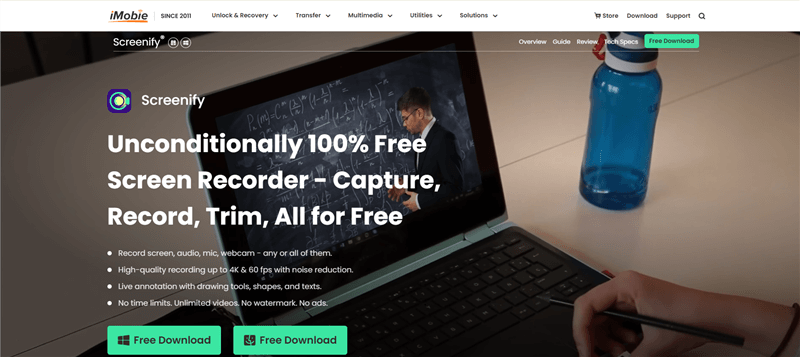
Screenify Website Interface
Product Features:
- Free to use: Completely free, no subscription or purchase required.
- Easy to use: Intuitive interface, lowers the barrier to entry.
- Multiple recording options: Supports full screen recording, window recording, and custom area recording to meet different recording needs.
- High-quality recording: Capable of recording clear videos to ensure the quality of recorded content.
- Basic editing functions: Provides simple editing and annotation tools for easy post-processing.
Free Download * 100% Clean & Safe
Step 1.Download and Install Screenify on Computer.
Step 2.Launch Screenify on your computer, and select Record screen mode.
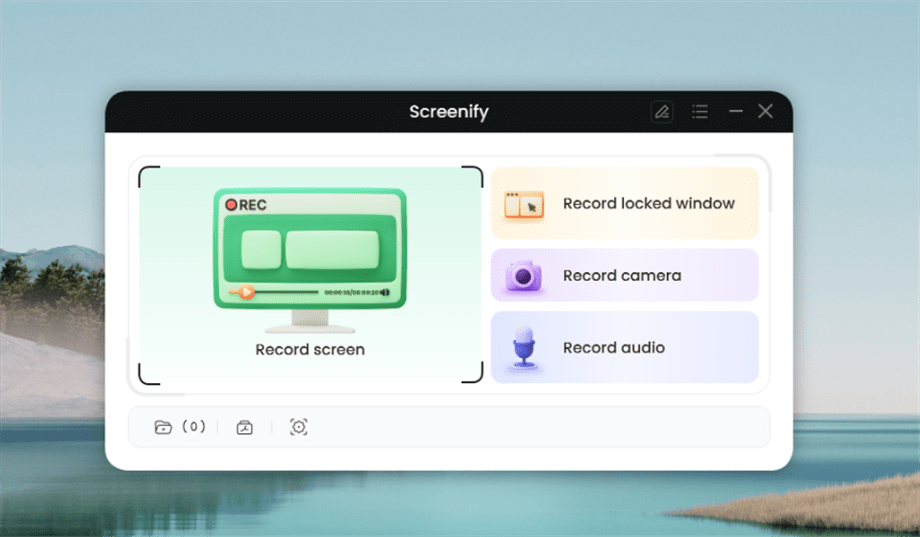
Select Record Screen Mode
Step 3.Configure Recording Settings aims to configure settings like system audio before recording.
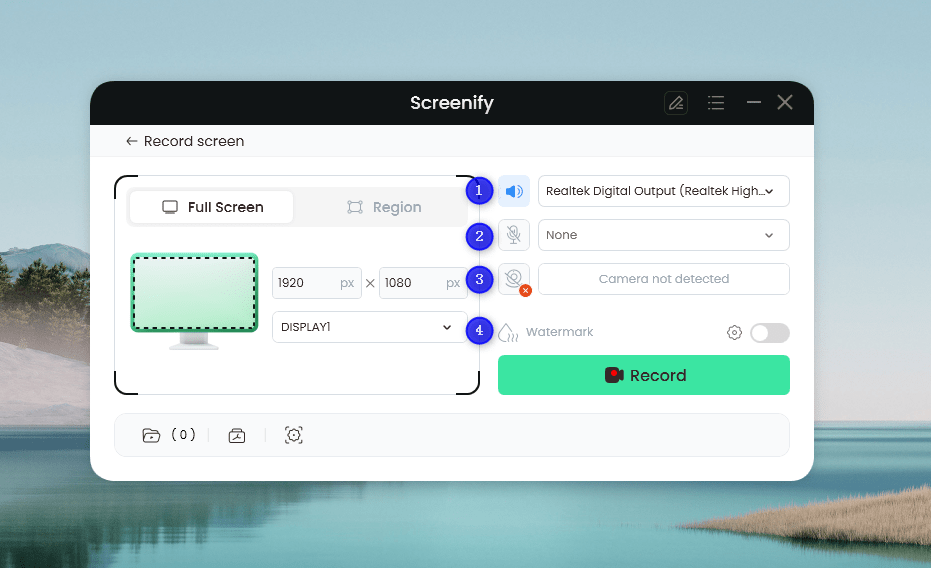
Set Configure Recording Settings
In this setting menu, you can:
1 Choose the System audio.
2 Choose the Microphone you want to record.
3 Choose the Camera you want to use.
4 Choose whether to add a watermark.
Step 4.Select Recording Screen.
Option 1. Full Screen Record
Please select Full Screen mode and choose the display you need to record. Hit Record button to initiate recording.
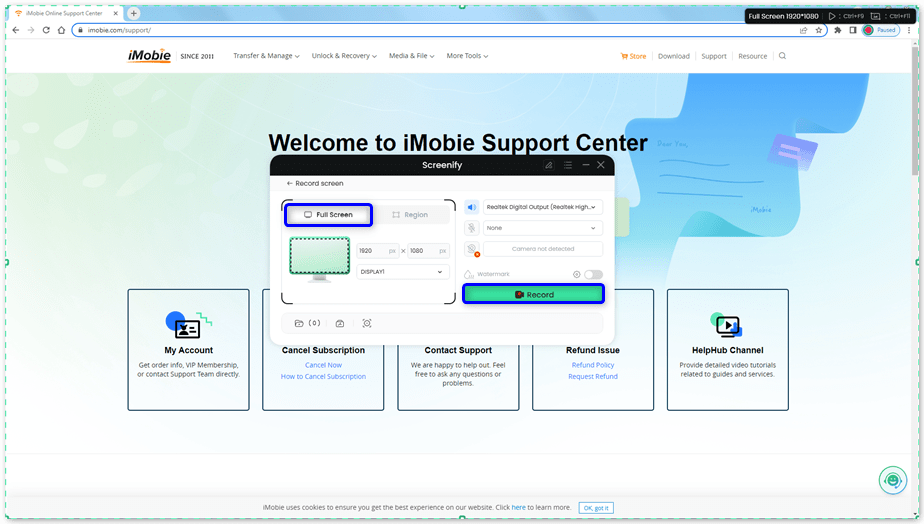
Select Full Screen
Option 2. Region Record
To record region, you need to manually select the recording area. After selection, you can still adjust the selected area. It supports customize selection, full screen, and proportional selection based on common social media dimensions.
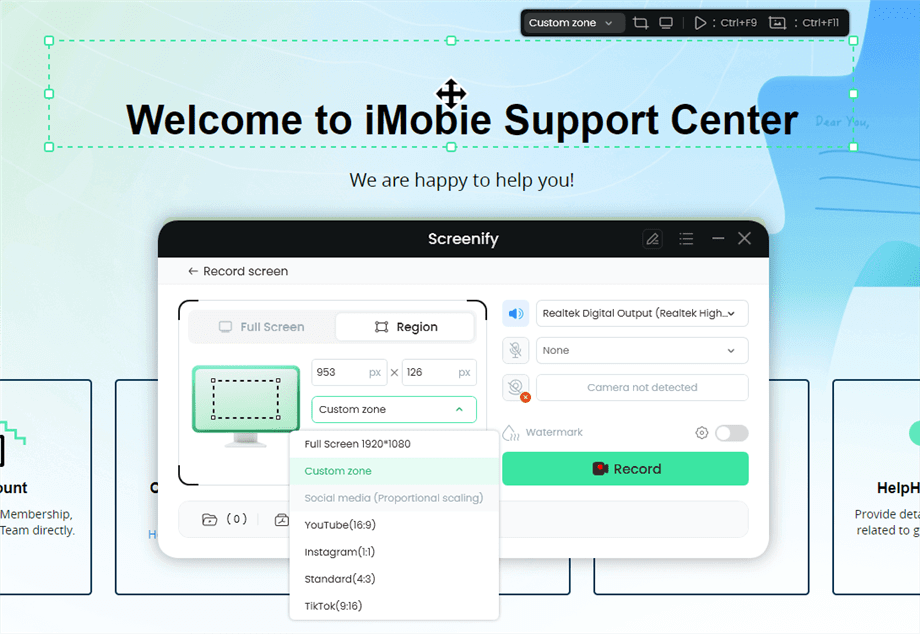
Record Region
Step 5.Wait for the Recording Countdown.
There is a 3-second countdown to help you prepare the recording after you are ready to start recording.
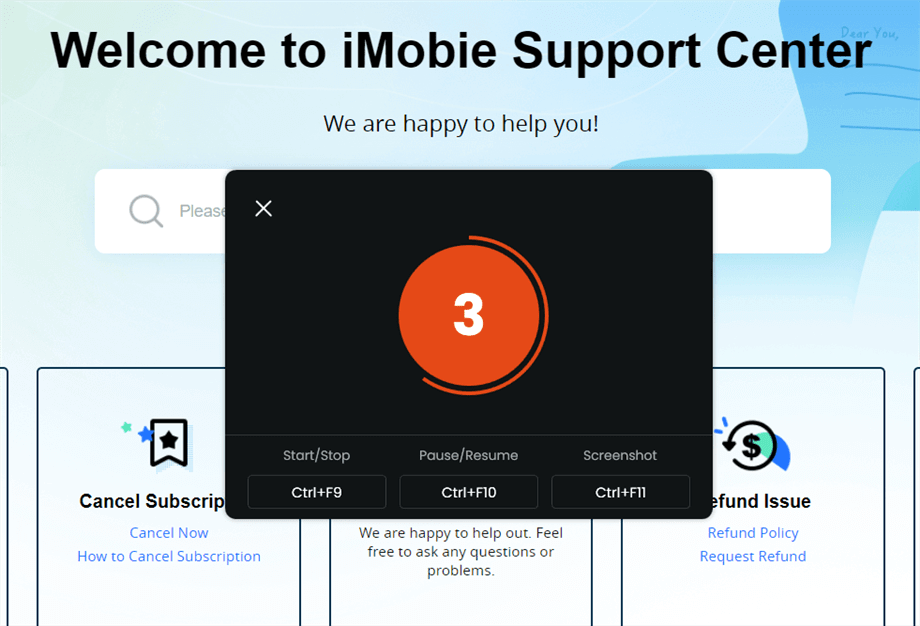
Wait for the Recording Countdown
If you would like to see a recording countdown before your recording starts, you can enable the countdown option. Or you can tap it off. View this post to know how to set the countdown option.
Step 6.Start Recording.
The recording will begin after a 3-second countdown. You can make annotations on the recording interface during the recording.
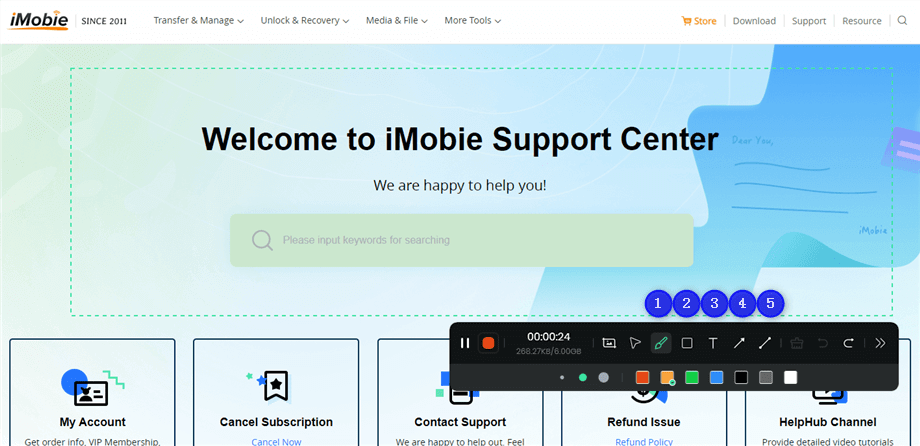
Annotate the Screen during Recording
With the toolbar, you can add the annotation in the screen:
1 Brush: Draw freehand on the screen recording interface to highlight or illustrate specific areas during the recording.
2 Rectangle: Draw rectangular shapes on the screen recording interface.
3 Text: Add written notes or labels directly onto the screen recording interface.
4 Arrow: Draw arrows on the screen recording interface to point out and emphasize specific areas.
5 Line: Draw straight lines on the screen recording interface to underline or connect specific points.
Step 7.Record Screen Process Completed.
When the recording is completed, you can click the red Stop button to end the recording. Your recorded files will be displayed. From here, you can preview and manage the recorded content as needed.
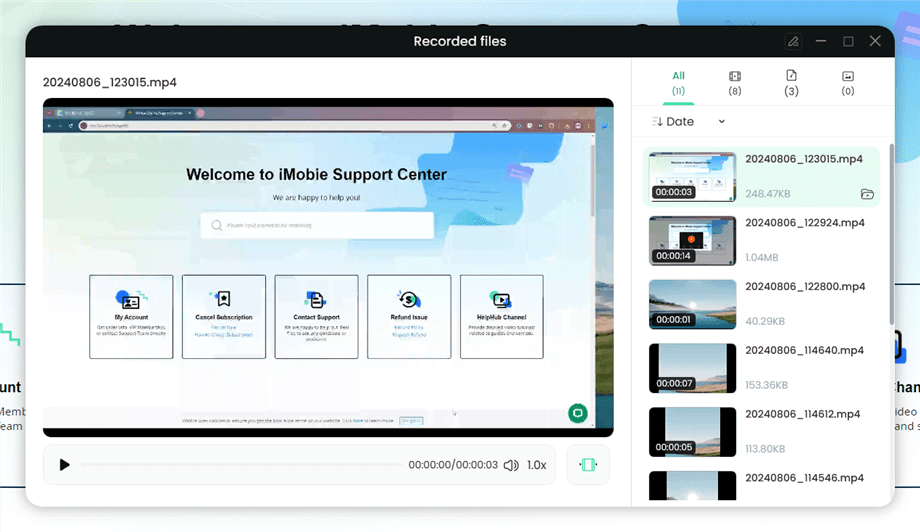
Preview the Recording
How to Record Google Meet as a Host or Participant
If you are a Host or a Participant in a meeting, you can simply record the Google Meet sessions by using the built-in recording feature. Note that as a participant, you can only access this feature if the host allows you to do so. Following is a step-by-step guide for you. Follow these simple steps to record Google Meet as a host or participant.
Step 1: Join or start a Google Meet session.
Step 2: Click on the Activities panel in the bottom right corner.

Click on the Activities Panel
Step 3: Click on “Recording” in the Activities panel.
Step 4: Click on “Start recording.” All the attendees will be notified about the recording.
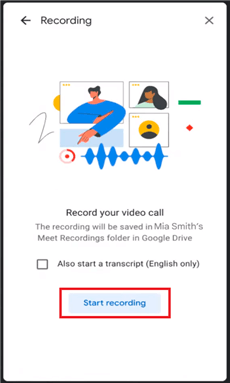
Click on Start Recording
Step 5: After you are done recording, click on the “Stop recording” button in the Activities panel.
Step 6: You can view the recording in the meeting organizers’ drive.
How to Record Google Meet on Phone [Android/iPhone]
Whether you have an Android or an iPhone, you can easily record Google Meet. There are two ways of doing so. You can either use the built-in Google Meet recorder if you have permission. However, if you don’t have permission, you can use your phone’s screen recorder to do so.
Record with Google Meet’s Recorder
If you want to record with Google Meet’s built-in recorder, make sure you are recording to the cloud. Here is the step-by-step guide for you.
Step 1: Go to Google Meet and set your account to cloud recording.
Step 2: Join or start the meeting. Tap the three dots at the bottom. Select “Record Meeting.”
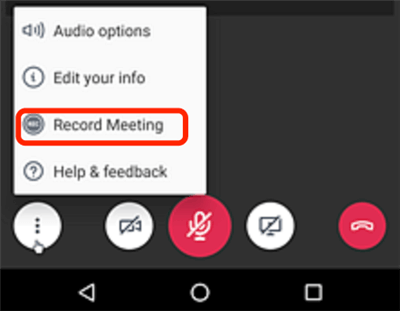
Select Record Meeting
Step 3: Once you are done recording, you can tap on “Pause Recording.”
Step 4: You can view the saved video in the “Meeting History” tab after the meeting ends.
However, if you do not have the “Record Meeting” option in your Google Meet, then you can simply record with your phone’s recorder.
Record with your Phone’s Recorder
All phones nowadays have a built-in screen recorder, be it Android or iPhone. You can use it to record your Google Meet session. Follow the steps below.
Step 1: Join or start your Google Meet session.
Step 2: Go to the control panel on your phone and tap on the screen recorder.
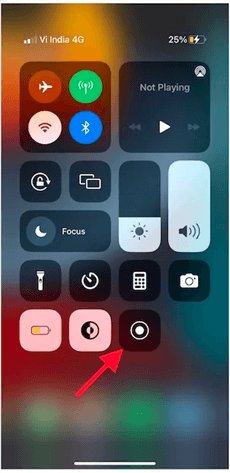
Tap on the Screen Recorder
Step 3: Hit the red button to stop the recording.
Step 4: You can view the saved recording in your Gallery.
Next up is recording Google Meet on your laptop.
How to Record Google Meet on Laptop
If you wish to record a Google Meet session on your laptop, you must get a helpful third-party screen recorder. You can also use a browser extension. We recommend Awesome Screen Recorder. This is best used if you are either using a free Google Meet account or are a participant who does not have permission to record. To record a Google Meet on your laptop, simply follow the steps outlined below.
Step 1: Open your laptop’s browser.
Step 2: Head to the official website of Awesome Screen Recorder.
Step 3: Click on “Add to [browser].” It is available for Chrome, Edge, Firefox, and Safari.
Step 4: To join the Google Meet session, open a new tab or window in the same browser.
Step 5: Click on the Awesome Screen Recorder icon in the extension menu.
Step 6: Go to the Record tab and click on “Start Recording.” You can adjust the parameters as per your requirement.
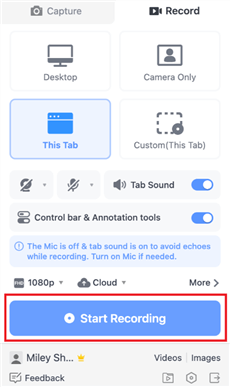
Click on Start Recording
Step 7: When you want to end the recording, click on the Pause button. Then press the Stop button to stop it.
Step 8: You can then view your recorded Google Meet. You can also download it or share it.
It is a simple method that does not require downloading any heavy software or app on your computer. You can simply get a browser extension.
How to Record Google Meet without Permission
There may be instances where you do not have permission to record Google Meet. It may be because you don’t have the right plan, or you might not have been allowed by the Admin or the Host. In such a case, you can record Google Meet using different methods.
For Computers – Use Third-Party Apps
If you are a computer user, getting a reliable third-party app for recording your Google Meet sessions without permission is best. For this purpose, you can either use our recommended apps, such as Gemoo Recorder Lite and Awesome Screen Recorder, or you can check out other apps that suit you.
However, if you are using a phone, then it’s another story.
For Phones – Use Built-in Screen Recorders
If you want to record your Google Meet without permission on your phone, then the best solution is to use the built-in screen recorder. This is a simple and quick method to record all types of meetings on Google Meet. You do not require any additional app. It not only saves you a lot of time and hassle but is also free to use.
With these simple methods, recording Google Meet without permission becomes extremely easy.
However, you may still have some questions. We have answered some of the FAQs in the next section.
Frequently Asked Questions
Here are some of the most common questions asked by Google Meet users.
1. Why can’t I record my Google Meet?
You may not have the right Google Workspace membership plan, or you may not have permission from the meeting host.
2. Who can record Google Meet?
Anyone can record Google Meet with third-party apps. However, without third-party apps, only the following people can record: hosts, co-hosts from other organizations, members of the host’s organization when Host Management is off, and a teacher or co-teacher in the Google Classroom.
3. What can you record in a Google Meet recording?
You can capture meeting audio and video along with chat messages (if chat is enabled) and any content shared on the screen during the meeting.
The Bottom Line
Recording Google Meet sessions can improve your virtual experience significantly. Whether you use built-in tools with the right permissions or opt for reliable third-party apps, capturing important meetings has never been easier. You may consider using screen recording software like Screenify for crisp and high-quality recordings. From all the different ways mentioned above, choose the one that best suits you. So, what are you waiting for? Get to recording now!
Free Download * 100% Clean & Safe
Product-related questions? Contact Our Support Team to Get Quick Solution >

