How to Record Gaming Videos for YouTube [Detailed Steps]
Learn how to record gaming videos for YouTube in this article. You will read about popular tools like Screenify or Xbox Game Bar here. Choose from a variety of tools and explore their settings.
Try Screenify for free to record screen on Windows or Mac. Whether full-screen or partial-screen recording, recording with sound or with camera, Screenify can do it with ease.
Do you want to screen-record your videos while gaming? Or do you want to know some tools to use? In this article, you will learn how to record gaming videos for YouTube. We will go through detailed steps on their usage.
Now, you can easily record and share your videos online on YouTube. Share your tips, skills, and gaming ideas with other gamers online. Let’s get started!
1- Recording Gaming Videos for YouTube on PC with Screenify
Screenify is a top free laptop screen recorder available for Windows and macOS. It allows 4K recording at 60FPS without any watermarks. You can record unlimited time, making it perfect for detailed tutorials and high-quality gameplay.
Using different recording modes, you can capture the entire screen, specific areas, or individual windows. Screenify also supports camera and audio recording, including noise reduction.
After recording, you can easily add text watermarks and trim videos. It is suitable for online education, content creation, and technical support.
Now, we will discuss the main features of the Screenify screen recorder.
Features:
- It offers HD-resolution recording.
- It is available on both Mac and Windows.
- It allows 4K recording at 60FPS.
- It supports camera and audio recording.
- Users can also edit videos after editing.
Advantages of Screenify:
- It is free of cost.
- It is easy to use.
- It does not add a watermark to your videos.
- It has an unlimited recording time for users.
- It has a noise reduction option for audio.
After discussing its features and advantages, let’s see why it is the best tool for gamers to record their videos using Screenify.
Screenify
Why use Screenify for recording game videos?
Screenify is the ideal solution for gamers looking to capture their gameplay with ease and precision. But why should you choose Screenify for recording game videos? Let’s explore the key reasons.
- Showcasing gaming skills:
Are you a Pro gamer? Are your gaming skills unmatched? Screenify allows you to record your gaming video as you showcase your exceptional gaming skills on various social platforms. It is effortless to use; just hit record and let other gamers and people get a glance at your adventures, strategies, and empire.
- Share your tips with other gamers:
Record your gaming video on Screenify so other gamers can learn from it. Gamers love learning from fellow gamers and sharing their tricks and strategies online.
Recording Gaming Videos for YouTube on PC with Screenify:
Step 1.Download and Install Screenify on Computer.
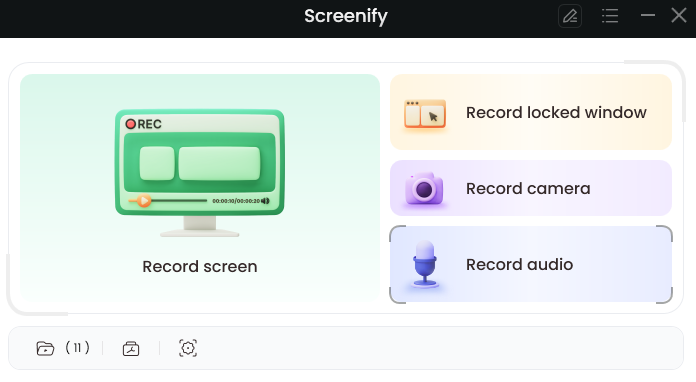
Step 2.Launch Screenify on your computer, and select Record screen mode.
Select Record Screen Mode
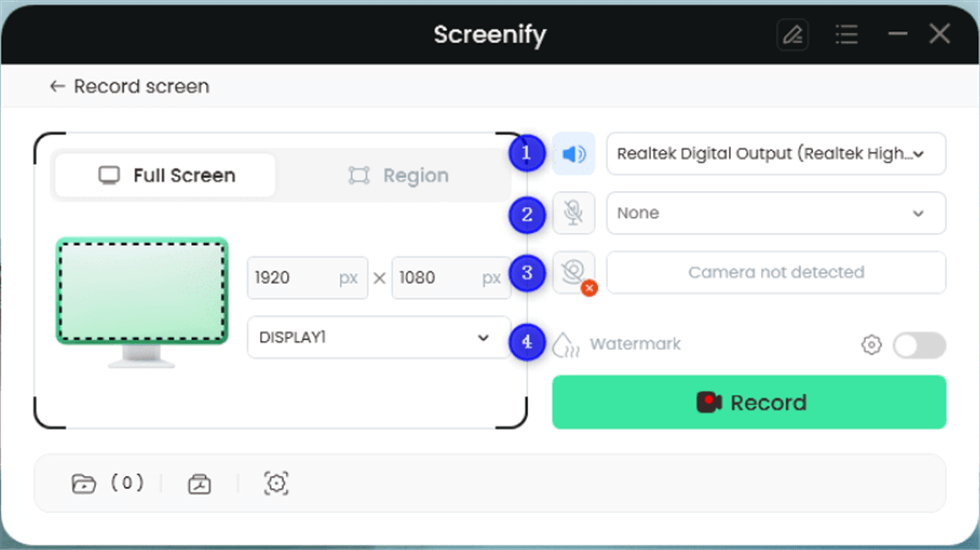
Step 3.Configure Recording Settings aims to configure settings like system audio before recording.
Record Setting
In this setting menu, you can:
1 Choose the System audio.
2 Choose the Microphone you want to record.
3 Choose the Camera you want to use.
4 Choose whether to add a watermark.
Step 4.Select Recording Screen.
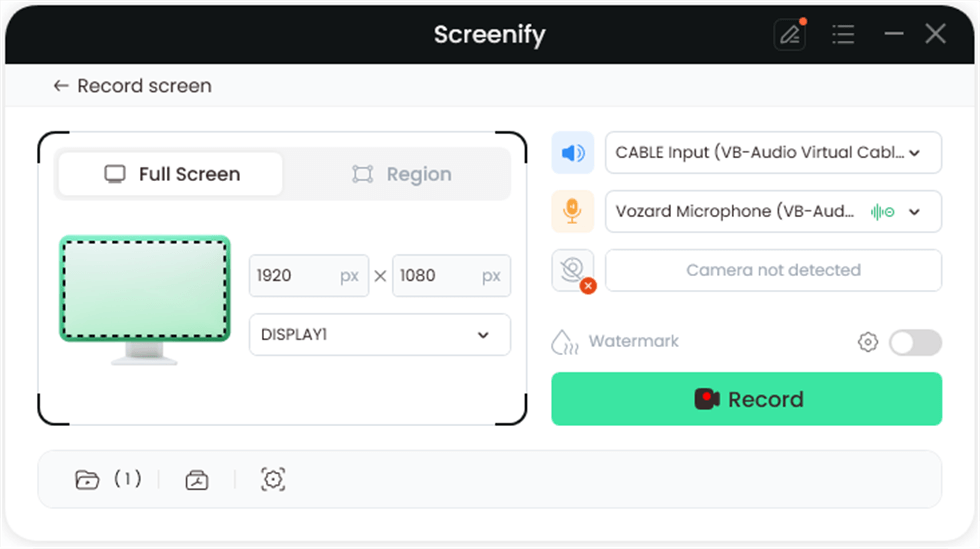
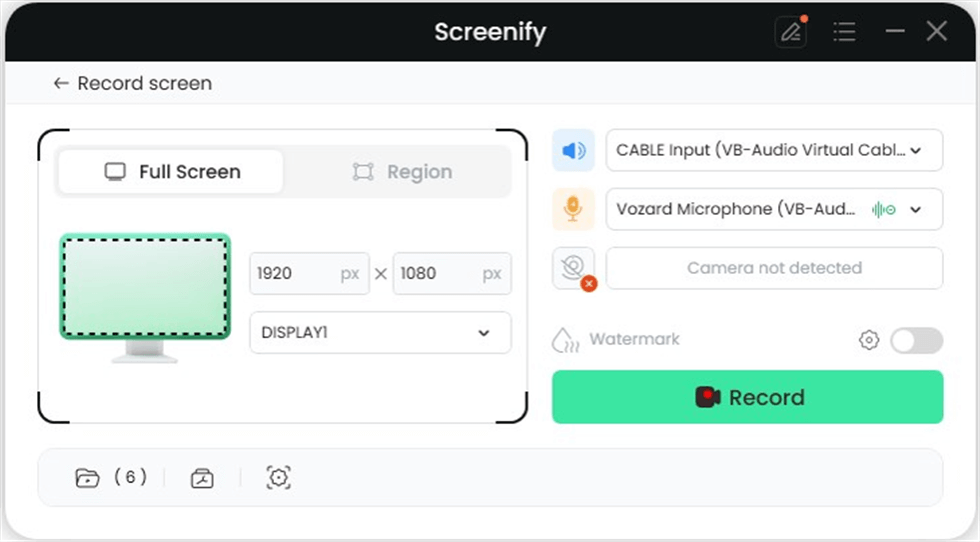
The screen mode offers two recording options: you can either record the entire screen or select a specific region to record.
Option 1. Full Screen Record
Please select Full Screen mode and choose the display you need to record. Hit Record button to initiate recording.
Full Screen
Option 2. Region Record
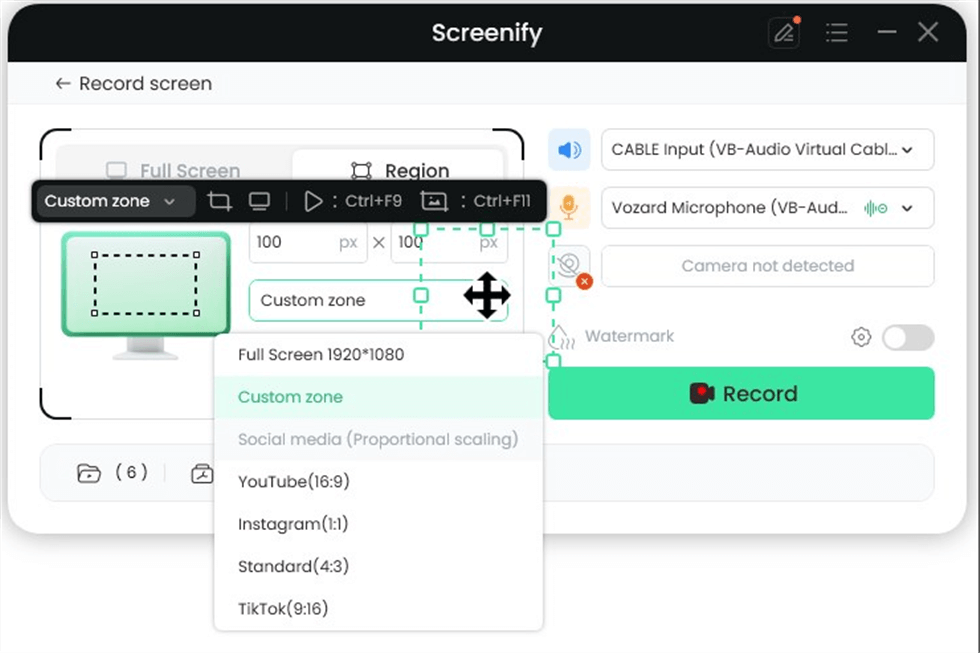
To record region, you need to manually select the recording area. After selection, you can still adjust the selected area. It supports customize selection, full screen, and proportional selection based on common social media dimensions.
Record Region
Step 5.Wait for the Recording Countdown.
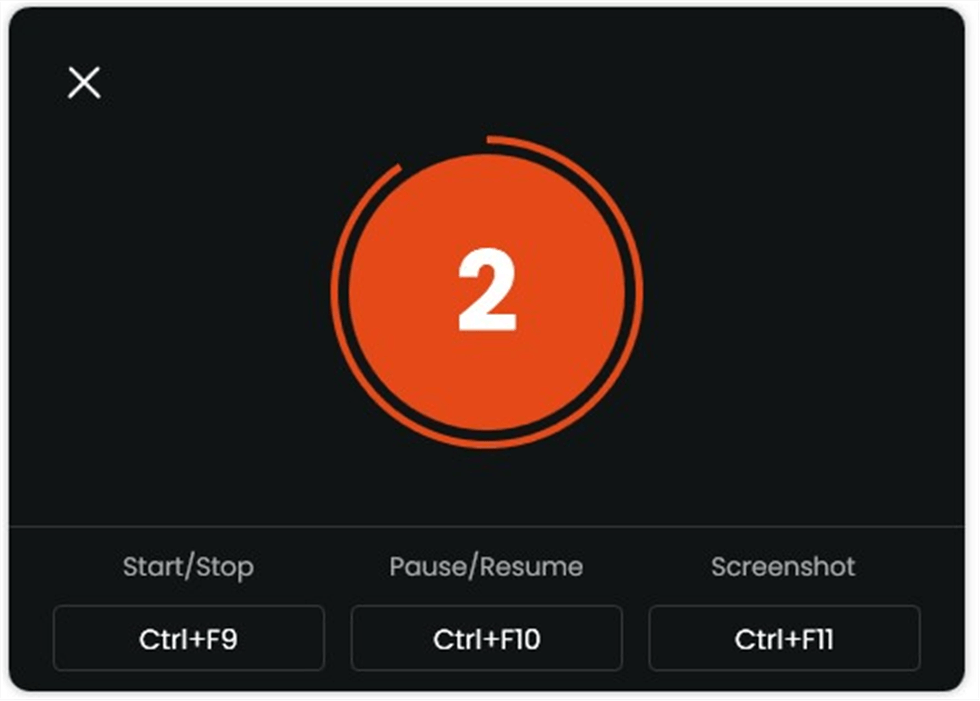
There is a 3-second countdown to help you prepare the recording after you are ready to start recording.
Start recording countdown
If you would like to see a recording countdown before your recording starts, you can enable the countdown option. Or you can tap it off. View this post to know how to set the countdown option.
Step 6.Start Recording.
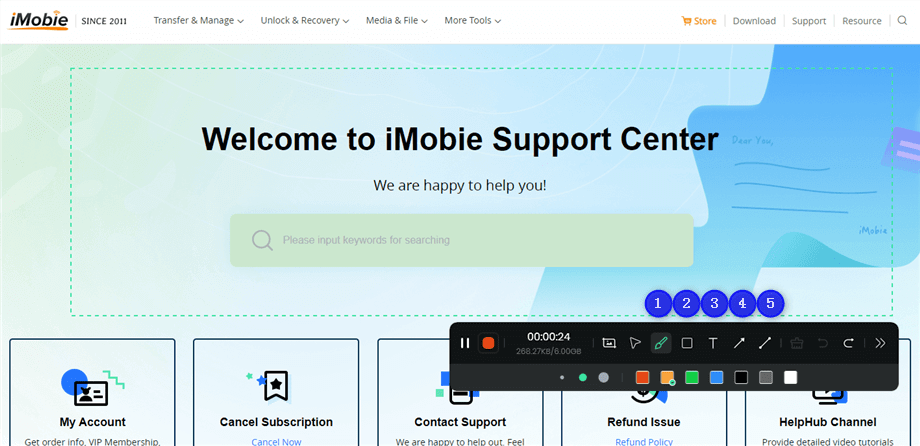
The recording will begin after a 3-second countdown. You can make annotations on the recording interface during the recording.
Annotate the Screen during Recording
With the toolbar, you can add the annotation in the screen:
1 Brush: Draw freehand on the screen recording interface to highlight or illustrate specific areas during the recording.
2 Rectangle: Draw rectangular shapes on the screen recording interface.
3 Text: Add written notes or labels directly onto the screen recording interface.
4 Arrow: Draw arrows on the screen recording interface to point out and emphasize specific areas.
5 Line: Draw straight lines on the screen recording interface to underline or connect specific points.
The toolbar can be expanded or collapsed. This feature allows you to access various tools and options when needed, and hide them to keep the workspace uncluttered when they are not in use.
Step 7.Record Screen Process Completed.
When the recording is completed, you can click the red Stop button to end the recording. Your recorded files will be displayed. From here, you can preview and manage the recorded content as needed.
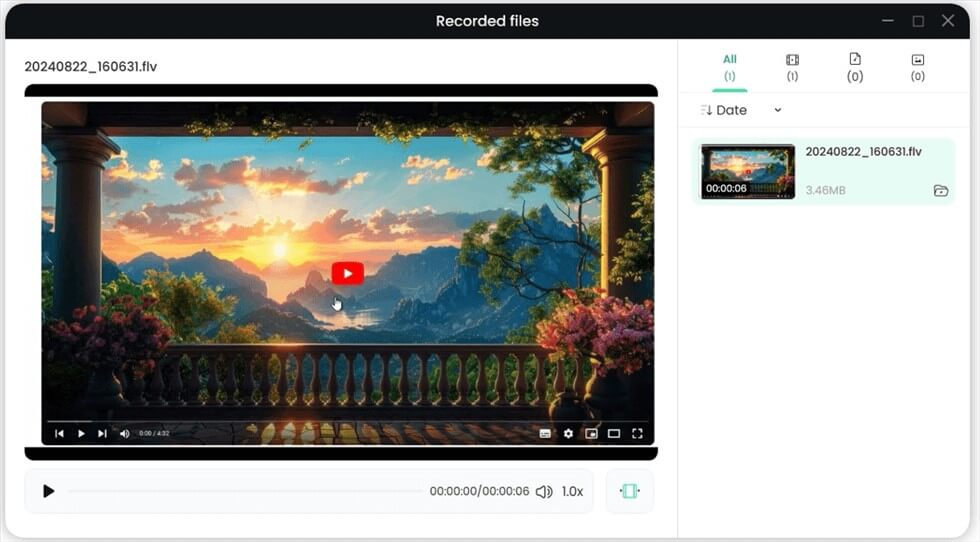
Record Screen Process Completed
Now, we will discuss the Xbox Game Bar.
2- How to Record Gaming Videos for YouTube on PC with Xbox Game Bar
Xbox Game Bar is a tool for recording gaming videos. It is a built-in tool in Windows 10 and requires no installation. This tool maintains your video resolution high without affecting your system performance. It also allows you to screen-record your videos and activities.
Now, we will discuss the main features of the Xbox Game Bar.
Features:
Here are the main features of Xbox Game Bar:
- It is easy to use and launch by pressing the Windows key + G.
- It allows microphone input and will enable you to record gaming audio.
- It offers keyboard shortcuts to start and stop and screenshots during the recording process.
- You can adjust the video frame rate and resolution.
Advantages of Xbox Game Bar:
- It is an easy-to-use and built-in tool.
- It has all basic recording options and screenshot options.
- There is no need to download external apps.
- It can connect with Xbox Live and other platforms.
Disadvantages of Xbox Game Bar:
- It only has essential editing tools and lacks advanced tools and customization.
- It is of low quality compared to dedicated screen recorder software.
- It does not provide high-quality gaming audio.
How to Record Gaming Videos for YouTube on PC with Xbox Game Bar:
Here are the steps to record your videos using Xbox Game Bar:
1. Open Windows Settings > Gaming > Xbox Game Bar. Enable the Open Xbox Game Bar using this button as a controller option.
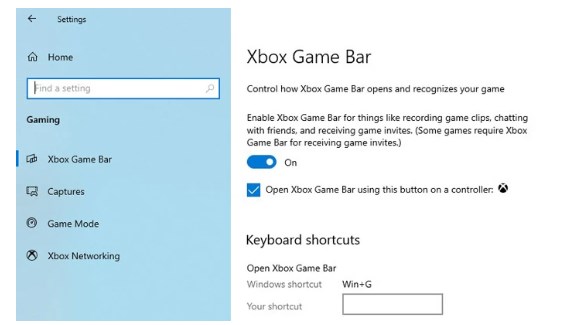
enable xbox game bar in the settings
2. Set your gaming setup and open the game/screen you want to record.
3. Now activate the Xbox Game Bar by pressing the Windows key + G. The panel box will appear.

activate xbox game bar panel
4. Adjust the audio settings.
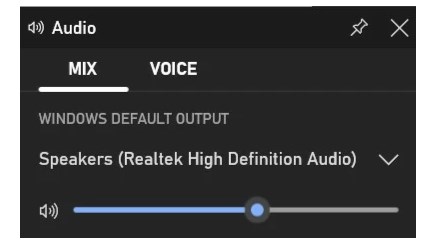
adjust audio in xbox game bar
5. Hit the record button or press the Windows key + Alt +R to start recording.
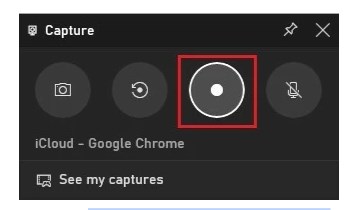
start recording in the xbox game bar
6. After recording your gaming video, hit the stop button or press the Windows key + Alt + R to stop recording.
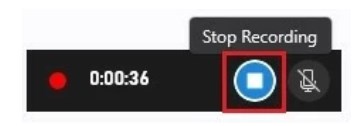
stop recording in the xbox game bar
7. Now, you can view your video in the gallery and share it on YouTube.
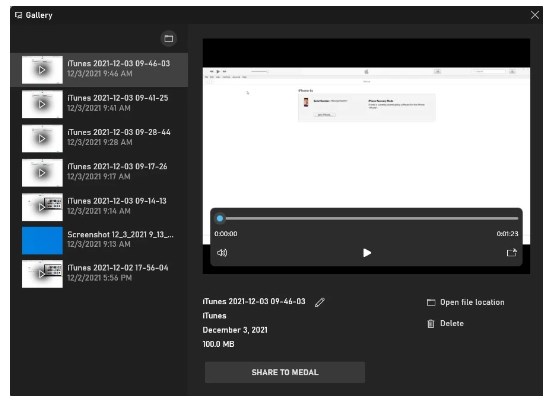
view xbox game bar video in the gallery
Now we will discuss the QuickTime Player screen recorder for Mac.
3- How to Record Gaming Videos for YouTube with QuickTime
QuickTime Player is a screen recorder for Mac. It allows you to record your videos with the gaming audio. You can also add your voice-over or commentary by turning on the microphone. Simply put, it screen records your gaming videos on MAC without any external software.
Now, we will discuss the main features of the QuickTime Player.
Features:
Here are the main features of QuickTime Player
- It supports various video formats and audio formats.
- It has basic trim, cut, and editing options.
- It can capture still images from video files.
Advantages of QuickTime Player:
Now let’s look into its advantages:
- It requires no installation.
- It records your screen activity with audio.
- It has a user-friendly interface that is easy to use.
Disadvantages of QuickTime Player:
Now let’s look into its disadvantages:
- It lacks effects like transitions and color correction in editing.
- It can struggle with high-resolution and heavy files.
- It is only compatible with Mac.
How to Record Gaming Videos with QuickTime for YouTube:
Here are the steps to record your videos using QuickTime Player:
1. Run QuickTime Player and go to File > New screen recording in the menu.
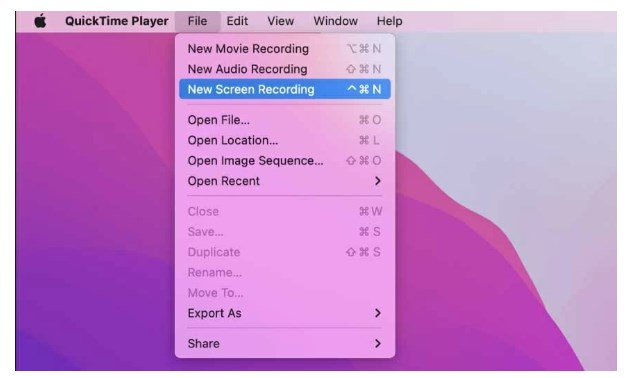
new screen recording menu option in quicktime
2. To record your gaming video with its audio, click the dropdown next to the Record button and select Internal Microphone.
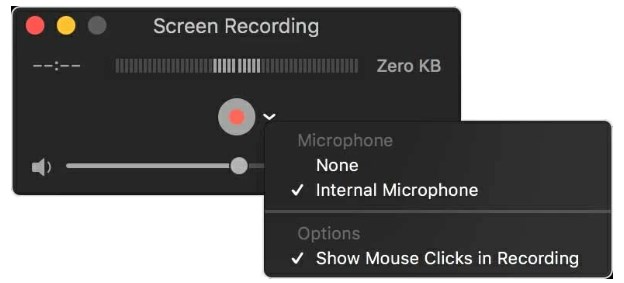
select the internal microphone in the quicktime player
3. Drag and adjust volume.
4. Set up your game, click the Record button, and select the screen area to start recording. You can click on the game area to choose the entire screen or drag the mouse to select a specific portion.
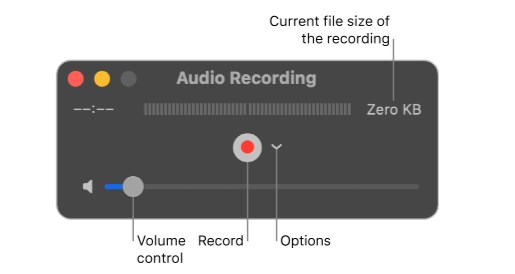
record in quicktime player
FAQs about Record Gaming Videos for YouTube
Q1: What do gaming YouTubers use to record their videos?
Gaming YouTubers use various professional screen recording apps to record their gaming videos. They use built-in free screen recorders like Screenify or softwares like OBS Studio. If playing on consoles, they use a capture card to record videos.
Q2: How do you record a gaming video?
Many softwares like OBS screen record your videos are available. Online tools like Screenify Chrome extensions can also record videos. Users also use Windows Xbox Game Bar or Mac-compatible Quick Time Player to record their videos.
Conclusion
Now, we have learned how to record gaming videos for YouTube using online tools like Screenify. We have also learned how to record gameplay on PC for YouTube for gamers using Windows’ Xbox Game Bar. We also discussed Mac’s tool, QuickTime Player. While discussing their usage, we went through their benefits and cons as well.
While many tools and apps are available to record gaming videos, Screenify is the easiest and free-of-cost tool. Get Screenify and level up your gaming adventures. Play, record, edit, and share on YouTube and connect with people worldwide.

Joy Taylor


Senior writer of the iMobie team as well as an Apple fan, love to help more users solve various types of iOS & Android-related issues.
Screenify
AnyEnhancer
FocuSee
Vozard
AnyMiro
AnyMirror

