How to Record Desktop Audio with Audacity
This article explains how to record desktop audio with Audacity using a step-by-step guide. It also introduces Screenify as a user-friendly alternative to Audacity, highlighting its advantages. You’ll learn tips for better audio recording and discover why Screenify might be a better choice. Try it and explore the difference!
Have you ever wanted to record the podcast you are listening to, a song, or even a video game being played on your PC? Thankfully, Audacity is a fundamental audio recording and free audio editing tool for this purpose. This article will guide you through the Audacity desktop audio recording process in a simplistic manner. We’ll also introduce you to Screenify, a more user-friendly replacement. Once you’re done reading about how to record desktop audio with Audacity, you will have all the information required to record any sound from your computer.
Part 1: How to Record Desktop Audio with Audacity? [Step by Step]
Best known for including a wide array of features, Audacity is a powerful and versatile audio editor that can efficiently record and boost sound quality. Recording from the computer’s sound card is one of the unique features that can easily be accessed when using Audacity. This means you can easily record several sources of sound, including system sounds, program sounds, and the sound from the microphone.
Noise reduction and one-click removal tools improve audio clarity, making your recordings sound cleaner. Recording desktop audio in Audacity is straightforward but depends on your operating system. Voice, acoustic, and instrumental can be captured from several sources. So, for those who want to make desktop audio recordings and edits, the choice would be obvious – Audacity has to be used because of its simplicity and versatility.
Key Features and Advantages
- Supports various formats, including WAV, MP3, and AIFF, offering versatile saving options.
- You can precisely manipulate your audio files using editing options like cut, copy, paste, and delete.
- The audio quality of your recordings is easily improved with built-in effects, including reverb, compression, and equalization.
- Multi-track recording enables simultaneous management of multiple audio sources for flexible project control.
Below are some simple steps to use Audacity to record desktop audio:
Step 1. Download and install the latest Audacity version from the official website.
Step 2. Open Audacity and select “Windows WASAPI” as your audio host from “Audio Setup”.
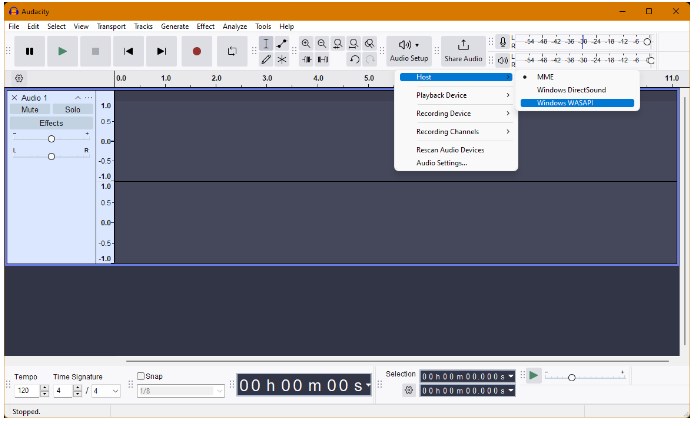
Windows WASAPI
Step 3. In the Audio Setup, choose your “Recording Device” as the input source. Look for the “Speakers (loopback)” option.
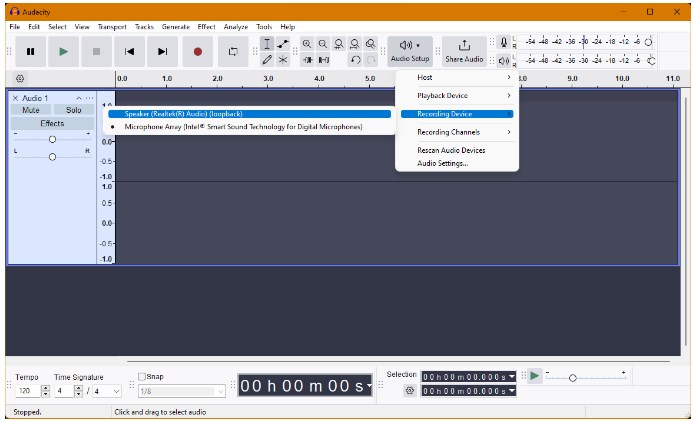
Audio Setup
Step 4. Using the default MME device, you may see a virtual microphone like “Stereo Mix” or “What You Hear” for recording.
Step 5. Play the audio you want to capture. Click the “Record” button in Audacity to start recording.
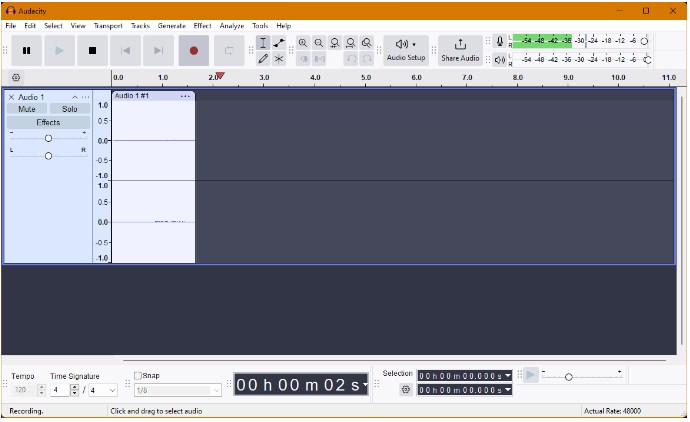
Click the “Record” button in Audacity
Step 6. When done, click the “Stop” button or press the spacebar. Audacity will show your recording, which is ready for review and editing.
Part 2: Best Alternative to Audacity: Screenify[4K & 100% Free]
Looking for the best alternative to Audacity? Screenify perfectly serves the purpose! Screenify is easy to use and makes audio and screen recording simple. You can capture microphone and system sounds, adjust the volume, and reduce background noise. Unlike other tools, Screenify doesn’t add watermarks to your recordings, giving you a clean output.
Screenify is entirely free and available for both Windows and Mac. You won’t need to be concerned about time limits because it offers an infinite recording duration. Furthermore, you may use the integrated noise reduction function on both audio and video files to improve your recordings by reducing background noise. Screenify is an excellent option for your audio recording needs because of its solid features and ease of use.
Additionally, there is no need to record blurry screens. Screenify offers a brilliant 4K quality screen recording at 60 frames rate per second. The tool cares about the privacy needs of customers with its lock window recording feature. This means that only the content visible in a window or opened application can be recorded.
Key Features and Advantages
- Screenify records system and microphone audio, making it easy to capture all desktop sounds.
- The recording volume can be changed to guarantee that your audio is balanced and crystal clear.
- To eliminate undesirable background noise from your desktop recordings, use the tool’s noise reduction option.
- Your recordings have no watermarks, providing a clean and professional output.
- Screenify allows unlimited recording time, so you can capture as much desktop audio as needed.
Check out the simple steps below to use Screenify to record desktop audio:
Step 1. Download and install Screenify on your computer. You must have a strong internet connection for this process.
Step 2. Open Screenify after installation and select the “Record audio” mode from the main menu.
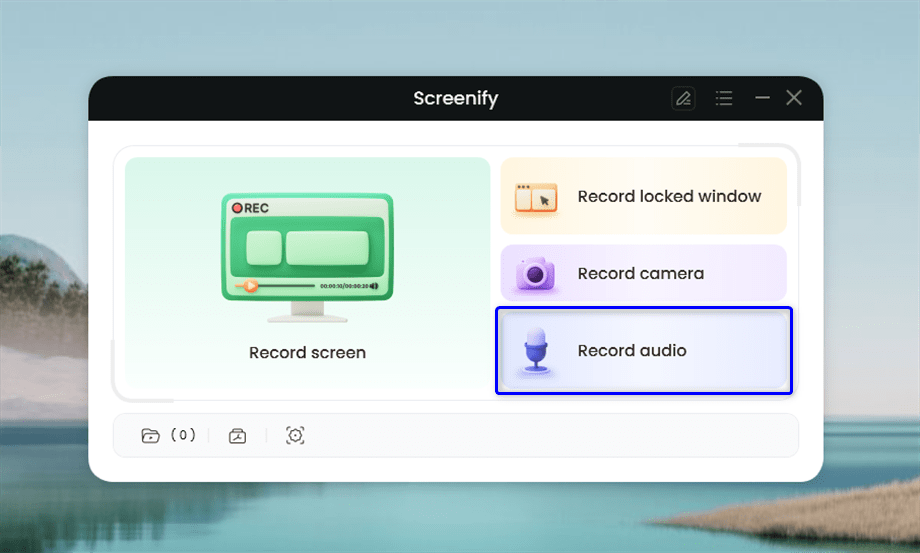
Choose the Record Audio Mode
1. If your macOS version is higher than 10.14, you will be required to allow microphone access to record audio because of the privacy policy of macOS.
2. If you’re using a Mac computer, you’ll need to install an audio driver to record system sounds due to permission restrictions.
Step 3. Choose the speaker or microphone you want to use in the audio recording interface.
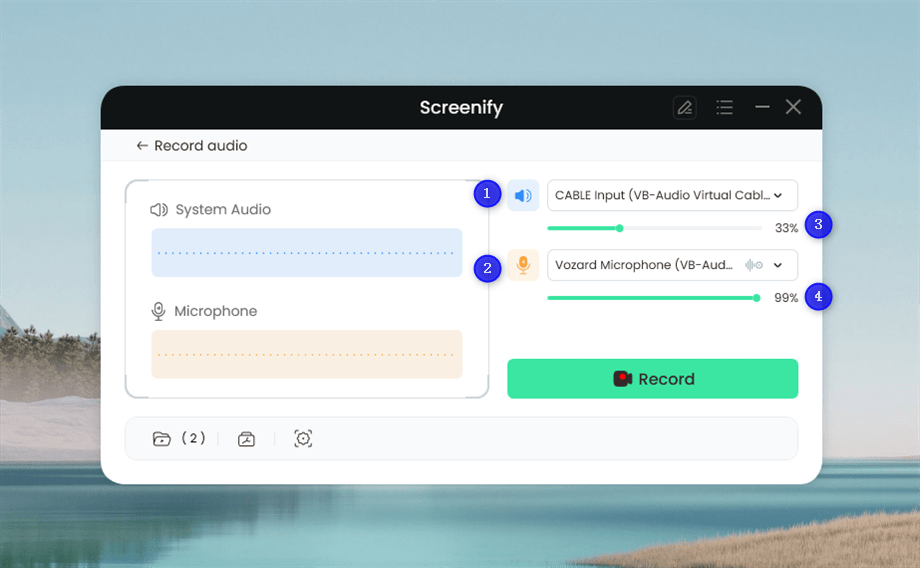
Select the Speaker or Microphone
In this interface, you can:
1 Choose system audio.
2 Choose microphone audio.
3 Adjust the volume of system audio.
4 Adjust the volume of microphone audio.
Step 4. After choosing the record audio device, please hit the Record button to initiate recording.
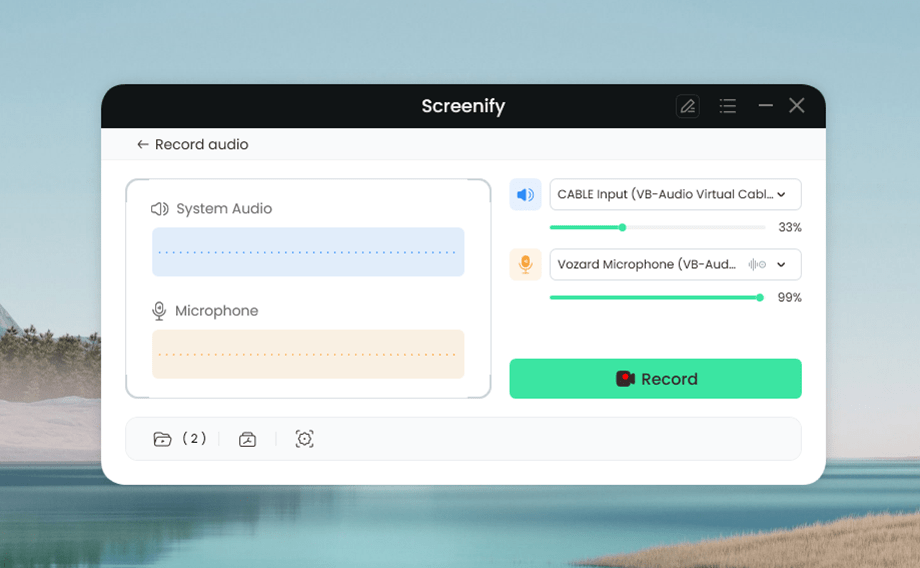
Click the Record Button
Step 5. A countdown will appear to give you a moment to prepare before recording begins.
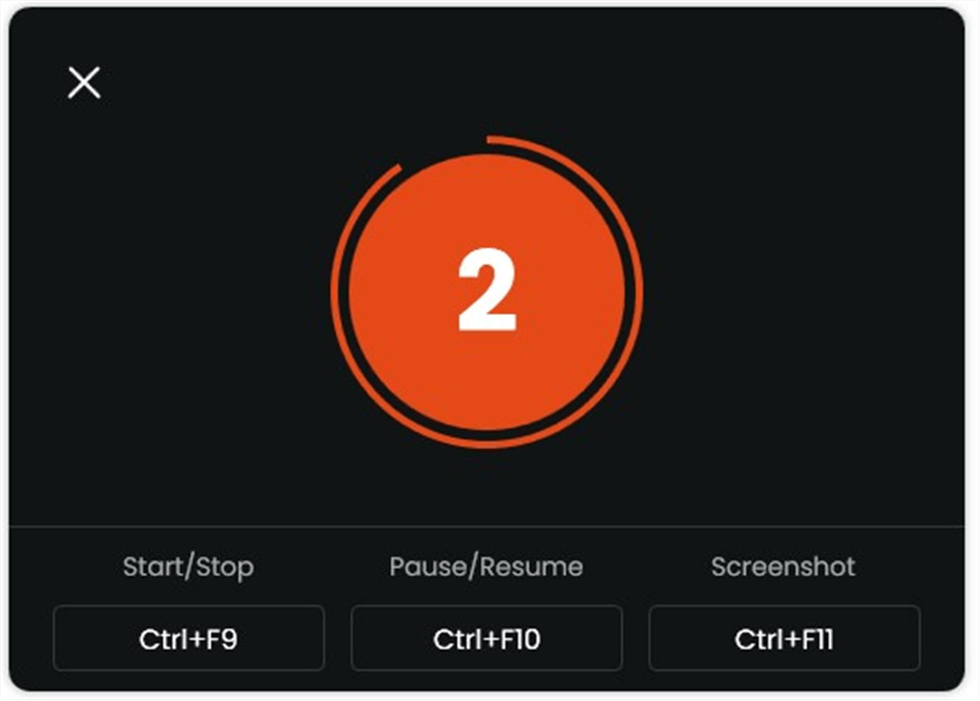
Recording Countdown
Step 6. After the 3-second countdown, the recording will start. The interface will show your progress in recording.
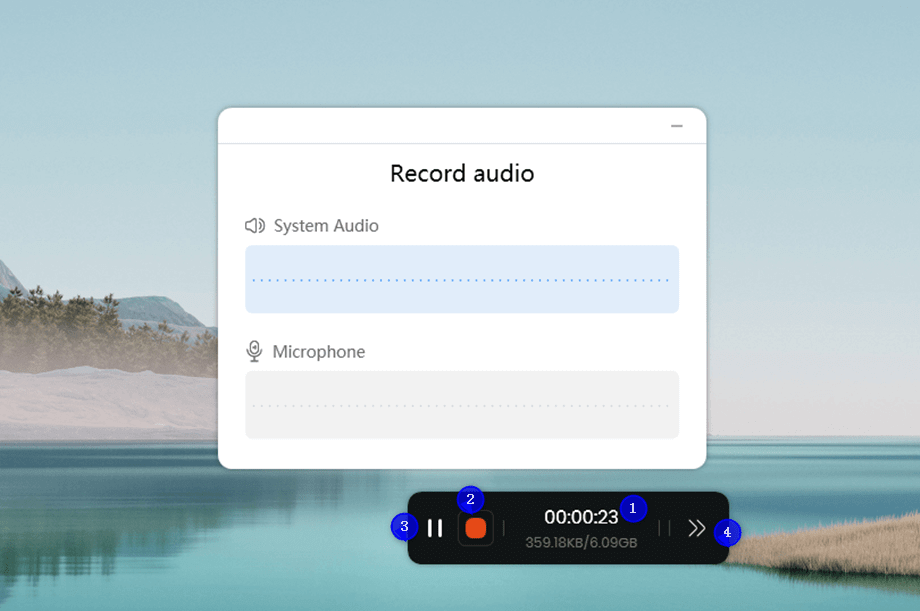
Start recording audio
In the bottom sidebar, you can:
1 View recording consuming time.
2 Stop recording.
3 Pause or resume recording.
4 Collapse or unfold the sidebar.
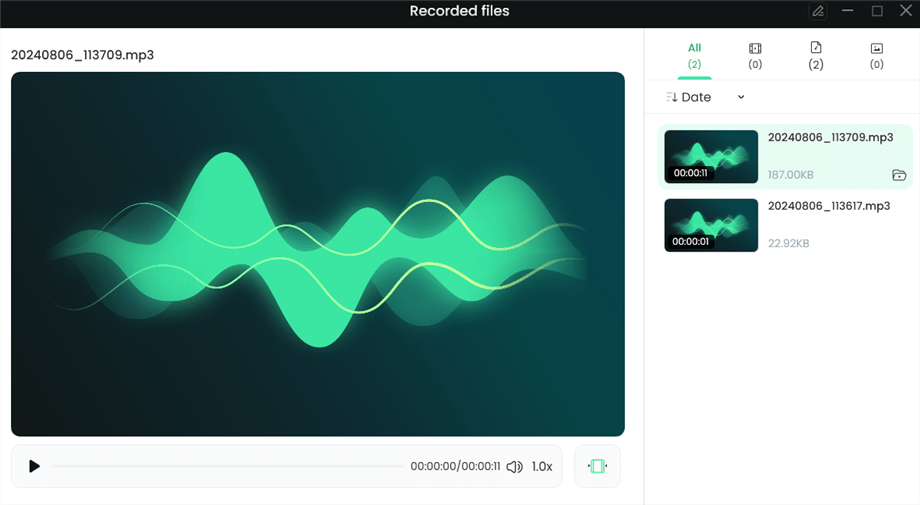
Step 7. When the audio recording is complete, click “Stop” to end the recording. You can then preview your recorded file.
Click the Stop Button
Part 3: Useful Tips to Record Desktop Audio
Recording desktop audio can be easy with a few simple tips. These tips help you get clear and professional recordings, whether for a podcast or a game. Proper setup and settings ensure your audio is recorded in the best quality.
- Choose the Right Software: Choose software that’s easy to use and fits your needs. Programs like Screenify and Audacity are great for recording desktop audio. Ensure it supports the file types you want and delivers good sound quality.
- Check Your Audio Settings: Before recording, double-check your audio settings. Make sure the correct input and output devices are selected. Adjust the volume so it’s not too loud or too soft. This helps you get a clear and balanced recording.
- Reduce Background Noise: To improve your audio quality, reduce background noise. Close any extra apps and mute notifications. Use your software’s noise reduction tools to remove unwanted sounds from your recording.
- Do a Test Run: Always record a short test clip first. This lets you check if everything works properly and adjust settings if needed. It helps you avoid problems during your main recording session.
- Save and Backup Your Files: Once you’re done recording, save your files in a safe place and back them up. This prevents losing your work if something goes wrong. Regular backups make sure you keep essential recordings.
Part 4: Conclusion
In conclusion, Audacity is a vital tool for recording desktop audio with its effects, multi-track support, and format compatibility. It’s reliable for capturing clear sound. However, if you want an alternative that is easier to use, Screenify is an excellent choice. It offers noise reduction, unlimited recording time, and easy volume control, making recording more straightforward. Screenify doesn’t add watermarks to your recordings, ensuring a clean final product. For a concise and effective way to record desktop audio, we recommend trying Screenify.

Joy Taylor


Senior writer of the iMobie team as well as an Apple fan, love to help more users solve various types of iOS & Android-related issues.
Screenify
AnyEnhancer
FocuSee
Vozard
AnyMiro
AnyMirror


