How to Record Calls with Google Voice on Phone/PC
This article serves as a step-by-step guide on how to record calls with Google Voice on iPhone, Android, and PC/Mac. It covers enabling call recording on mobile and desktop devices, with bonus tips for proper setup. We recommend using Screenify for a more reliable and efficient call recording experience on Windows and Mac systems.
Want to learn how to record calls with Google Voice? Recording calls are extremely useful since they may be for your own needs regarding work or to have some important data. Most people use Google Voice, a VoIP service in many regions that provides a number to text or call and even call recording functionality.
However, not everyone knows how to record calls with Google Voice. This guide will guide you through some simple steps to record calls on Android and iPhone through Google Voice. We also can record calls if you’re on a Mac or Windows computer via Screenify. Let’s get started!
Part 1: How to Record Calls with Google Voice on iPhone
The ability to record calls is one of Google Voice’s greatest advantages for iPhone users. This capability is found in Google Voice, which is easy to use and records incoming calls. However, to make this happen, you must activate the option in the settings before you begin recording. Some users prefer using third-party apps to add more customization, but Google Voice provides an easy choice for basic call recording. Whether for business or personal use, this built-in tool makes it convenient to save important conversations on your iPhone.
Key Features
- You can manually record calls or enable automatic recording for incoming or outgoing calls (for Google Voice Premier subscribers).
- Get a dedicated phone number for making and receiving calls.
- Forward calls to your personal number or other devices.
- Get voicemail transcripts and access them through the Google Voice app.
Here’s how to record a call with Google Voice on iPhone:
Step 1. Open the Google Voice app and navigate to the main homepage.
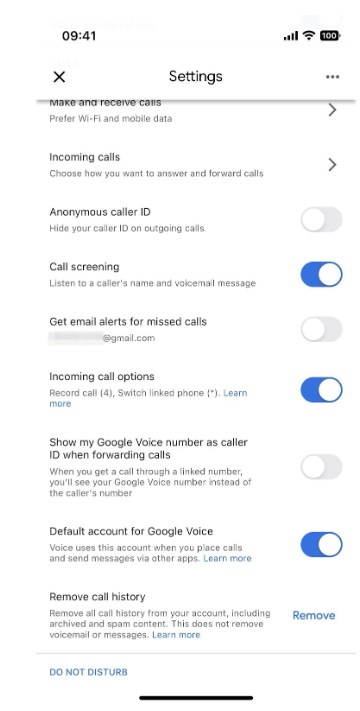
Step 2. Tap the menu icon in the upper left corner, then select “Settings.”

Tap the menu icon in the upper left corner, then select “Settings.”
Step 3. In the settings menu, find and select the “Calls” option.
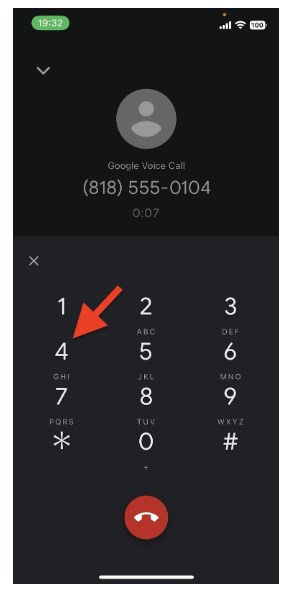
Step 4. Scroll down until you see “Incoming call options,” then switch it on. Once enabled, press the number 4 during a call to start recording.
press the number 4 during a call to start recording
Part 2: How to Record a Google Voice Call on Android
Recording Google Voice calls on Android follows the same method as recording an iPhone call. Here are few key features of Google Voice for Android users:
Key Features
- Easily manage calls with features like manual or automatic recording, call forwarding, and voicemail.
- Control Google Voice using your voice through Google Assistant.
- Integrate Google Voice with other Google apps for a unified communication experience.
Here’s how to record calls with Google Voice on an Android:
Step 1. Launch Google Voice app.
Step 2. Once done, tap the menu in the upper left corner and select “Settings.”
Step 3. In the settings menu, find and select the “Calls” option. Scroll down and turn ON “Incoming call options,”. Once enabled, press the number 4 during a call to start recording.
turn ON “Incoming call options
Via Third Party Apps
While Google Voice can record incoming calls on Android, most of us opt for third-party apps to obtain optimal flexibility. One of them is the Automatic Call Recorder third-party application. This application’s user interface enables users to record a call without being guided by the set procedures. After the recording, you can forward the multimedia and listen to it anytime convenient. To use this tool:
Step 1. Launch the Automatic Call Recorder app. Once done, tap the “Voice Recorder” option in the left menu.
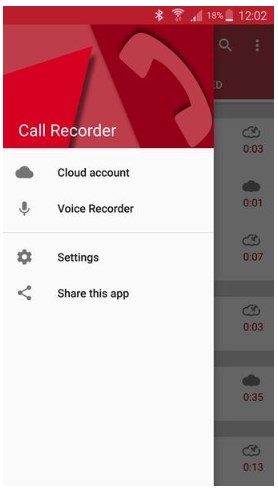
tap the “Voice Recorder” option
Step 2. If you prefer to record every call, tap the three-dot icon. Then select “Settings,” followed by “Record calls,” and turn it “ON“
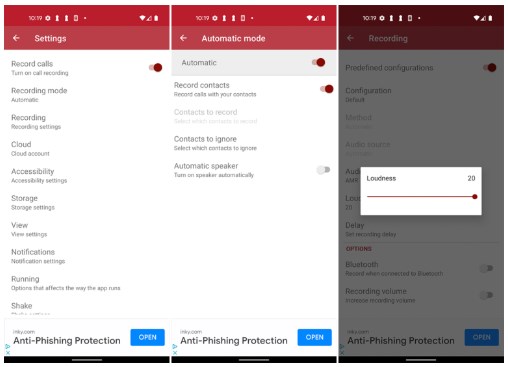
select “Settings
Step 3. To share a recorded audio file, tap the “Share” icon and choose the social media platform or app you want to use.
Part 3: How to record Google Voice calls with Screenify Screen Recorder -Win/Mac
For recording Google Voice calls seamlessly and in high quality, Screenify Screen Recorder is a top choice for Windows and MacOS users. Recordings at 60 frames per second in 4K quality are managed by this powerful video capture tool, and one can be assured that minute details are properly recorded. Screenify offers features like unlimited recording time, making it ideal for long conversations. You can also add a personal touch with customizable watermarks and choose from different recording modes, including full-screen and specific windows. This flexibility makes it perfect for recording Google Voice calls easily and precisely.
Key Features:
- It allows recording for unlimited time, including a full conversation, without the restrictions of time limits.
- Screenify allows you to capture videos at 4k at 60 fps, making them very clear and detailed.
- You can set your watermarks for your recordings, which can be nice and personal.
- Choose how to record: full screen, specific windows, or a part of your screen.
- You can save recordings in different file types, making them easy to share or use.
Here are the steps to record Google Voice calls with Screenify Screen Recorder for Windows and Mac:
Step 1. Start downloading and installing Screenify on your device to record Google Voice calls.
Step 2. Open Screenify and select the “Record Screen” option to begin capturing your Google Voice call.

Select Record Screen Mode
Step 3. Adjust your recording settings, including audio preferences, to ensure you capture both sides of the conversation.
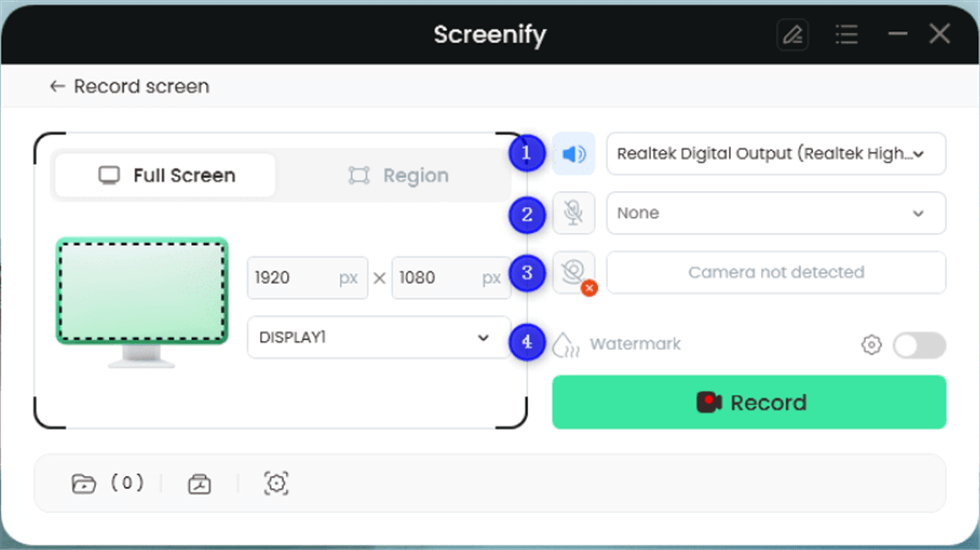
Record Setting
Step 4. Choose the area you want to record. Select “Full Screen” to capture the call interface or drag to specify a particular section. If necessary, adjust the size for social media, then click “Record” to start.
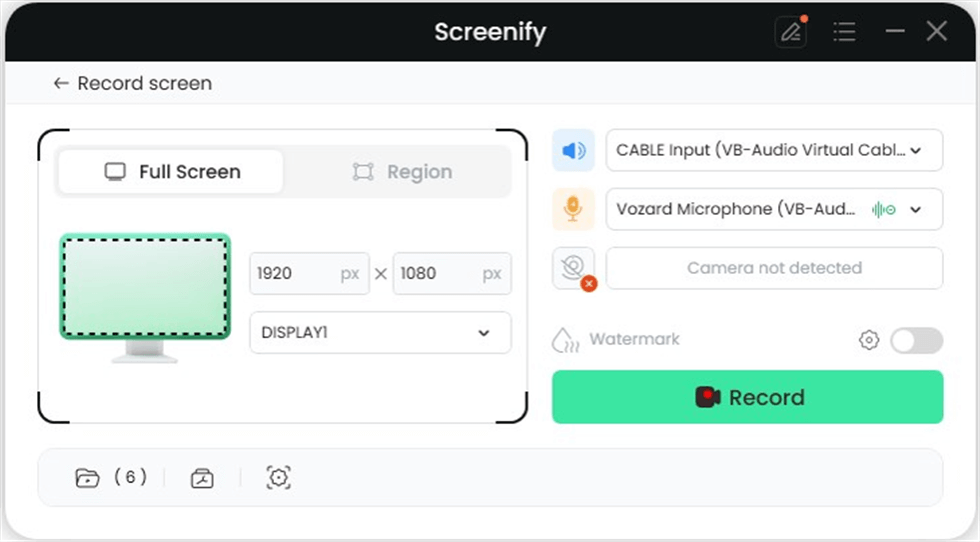
Full Screen
Step 5. A 3-second countdown timer will appear, giving you a moment to prepare for the call.
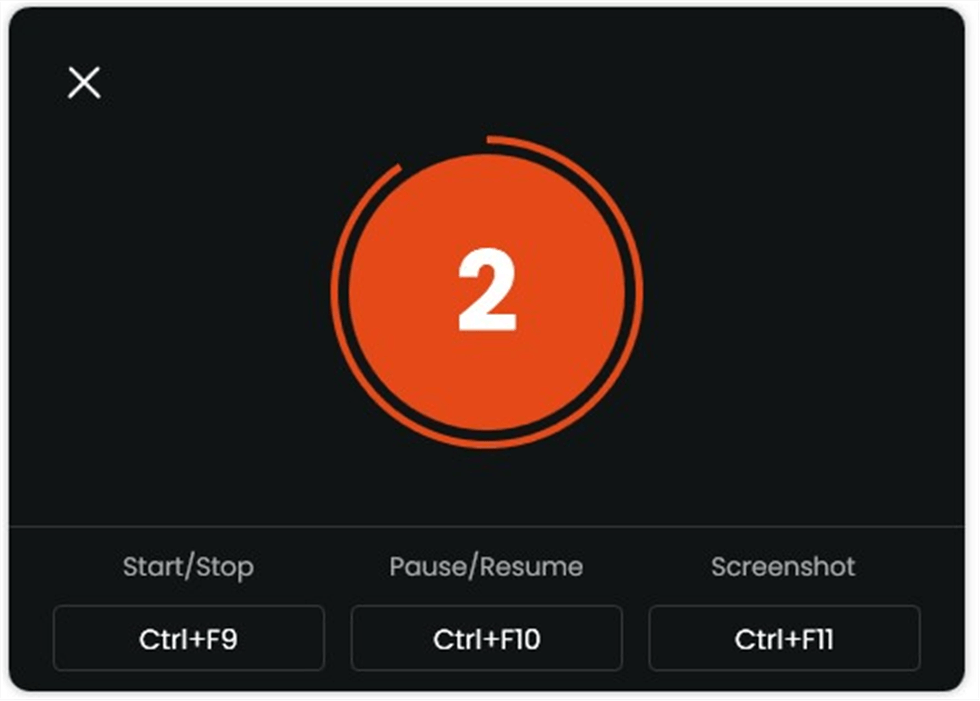
Start recording countdown
Step 6. When the timer ends, the recording will start. If needed, you can add annotations or notes during the call.
Step 7. Click “Stop” when you finish the call. You can then review, edit, and save your recording for future reference.

Record Screen Process Completed
Part 4: Bonus Tips: How to Set up Google Voice Recording?
You must set up the feature properly if you mainly want to record calls through Google Voice. This allows you to capture important conversations so that the details become easier to review later. This section provides some bonus tips on getting Google Voice set up to record calls. With these simple steps, you will be ready to record calls whenever you want, be it business or personal use. Let’s begin now!
Step 1. Open the Google Voice app on your phone or visit the Google Voice website on your computer.
Step 2. Sign in to your Google account if you haven’t already done so.
Step 3. Go to the “Settings” menu. You can find it by clicking the gear icon in the upper right corner.
Step 4. In the Settings menu, look for “Calls” or “Call Settings.”
Step 5. Find the “Incoming call options” and enable it. This allows you to record incoming calls.
Step 6. To record a call, press 4 during the call. You’ll hear a message confirming that the recording has started.
Part 5: Summary
There are numerous ways to start recording Google Voice calls. This can be done through the built-in recording function installed on the iPhone or by using some third-party apps on Android. For users seeking high-quality recordings with additional editing capabilities, Screenify is a standout choice. It offers flexibility, unlimited recording time, and options for customizing your recordings. For a more professional and user-friendly experience, we recommend using Screenify for all your Google Voice recording needs.
Part 6: How to Record Calls with Google Voice FAQs
Does Google Voice record everything?
Yes, Google Voice can automatically record all calls if set up by the administrator. Alternatively, you can manually activate the recording by pressing 4 during the call to start and stop recording.
Does Google Phone have a voice recorder?
Yes, the Google Phone app includes a built-in voice recorder. This feature allows you to record phone calls but operates separately from Google Voice.
How do I enable Google recording?
Click Settings to enable call recording in Google Voice and find Incoming call options. Turn it on and press 4 during a call to start recording.
Does Google keep recording audio?
Yes, Google stores your recorded calls in your Google Voice account. You can access and manage these recordings through your account at any time.
Is Google Voice free?
Yes, Google Voice is free for personal calls made within the U.S. and Canada. However, some international calls and additional features may require payment.

Joy Taylor


Senior writer of the iMobie team as well as an Apple fan, love to help more users solve various types of iOS & Android-related issues.
 Screenify
 AnyEnhancer
 FocuSee
 Vozard
 AnyMiro
 AnyMirror