What’s the Top Full Screen Recorder in 2024?
Whether you’re a content creator who wants to share something or a professional who needs to create an instructional video for its employees— recording full screen is a must. Our guide to top free full screen recorders covers tools to cater to everyone’s needs.
Try Screenify for free to record screen on Windows or Mac. Whether full-screen or partial-screen recording, recording with sound or with camera, Screenify can do it with ease.
Part 1. Introduction
Whether you’re looking to record an instructional video, product demonstration guide, or step-by-step how-to video, recording your PC’s screen is the first step. Writing descriptions and product guides can take longer and are even less understandable for most of the audience. In contrast, screen recordings offer better comprehension and a clear-cut view of everything.
Full Screen Recorder
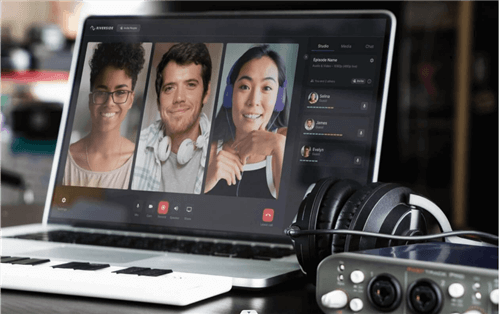
Choosing full screen recorders can be overwhelming due to the number of screen recorders available on the market. Each full-screen recorder comes with its distinct features, pros, and cons. Our detailed guide will explore the 8 best full screen recorders in 2024 that will help you capture your screen seamlessly. Let’s delve into further details and make an informed decision:
Part 2. The Best Full Screen Recorder
Choosing the best full screen recorder can be tricky. You’ll need to define your needs and requirements before deciding. Whether you’re a gamer who wants to record screens at a high frame rate per second or a content creator who loves making tutorials in 4K resolution, whatever your needs are, we have the top 8 best full screen recorders to cater to.
#1. Screenify
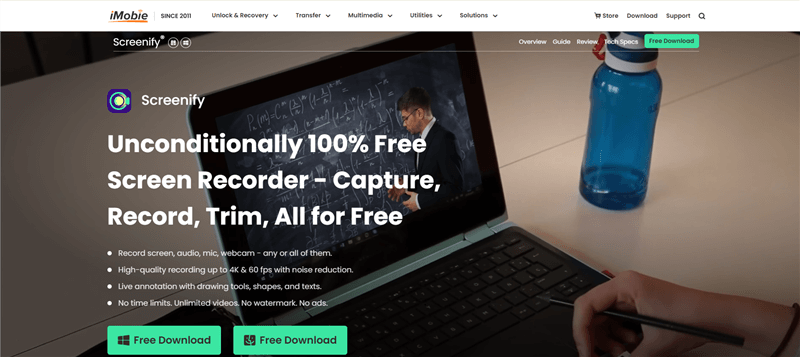
Are you looking for an all-in-one screen recorder that lets you capture what’s happening on your PC/laptop’s screen in 4K at 60 FPS? Screenify is the one! This full screen recorder offers two screen recording modes where you can either record an entire screen or a specific region, offering flexibility and freedom to content creators. Moreover, users can utilize the Lock Window Recording feature to ensure that only the active window content or currently opened application is being recorded. This feature ensures privacy and protection of personal details from accidentally being recorded.
Screenify Website Interface
If you want to record your gameplay session with webcam integration, Screenify will help you do that! You can choose to record the webcam and screen simultaneously or both individually. The camera preview can be mirrored horizontally or even zoomed as needed.
| Key Features |
Pros |
Cons
|
| Record full screen or a region of screen in brilliant 4K quality with no blurriness and distortion without any time limits. |
Multiple screen recording modes |
Window recording does not support camera recording |
| You can capture the screen at 60 frames per second to prevent lags, and it is suitable for gameplay or online meetings. |
4K screen and webcam recording |
|
| It offers multiple recording modes, simple cropping, and a lock window feature. |
No watermarks and time limits |
|
| Record system audio and microphone while recording screen and webcam without any watermarks. |
|
|
Stepwise Guide on Record Full Screen
Step 1.Download and Install Screenify on Computer.
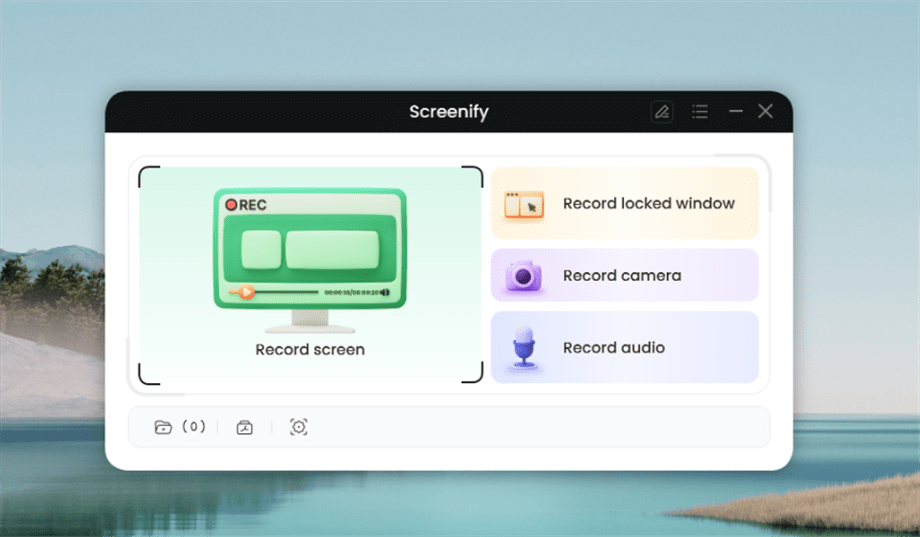
Step 2.Launch Screenify on your computer, and select Record screen mode.
Select Record Screen Mode
Step 3. Configure Recording Settings aims to configure settings like system audio before recording.
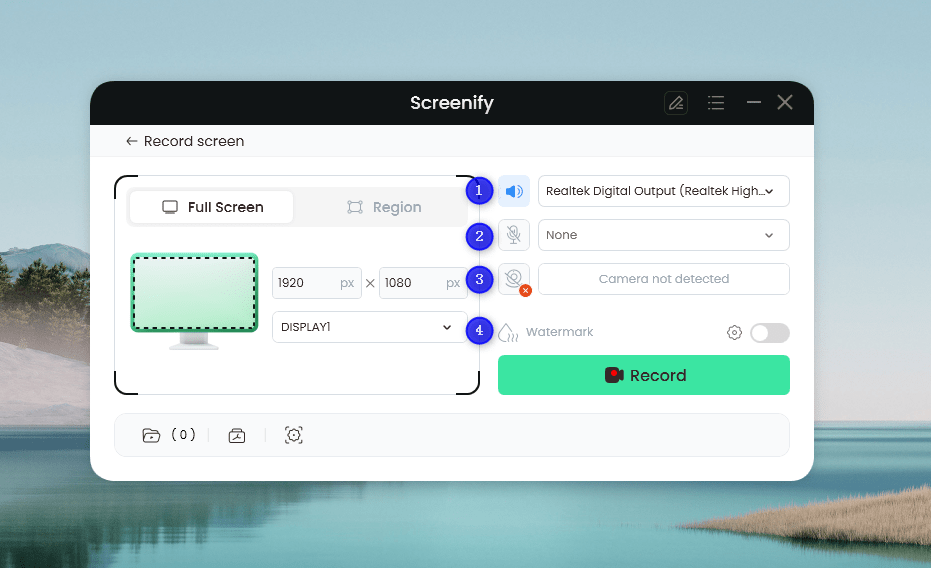
Set Configure Recording Settings
In this setting menu, you can:
1 Choose the System audio.
2 Choose the Microphone you want to record.
3 Choose the Camera you want to use.
4 Choose whether to add a watermark.
Step 4. Select Recording Screen. Please select Full Screen mode and choose the display you need to record. Hit Record button to initiate recording.
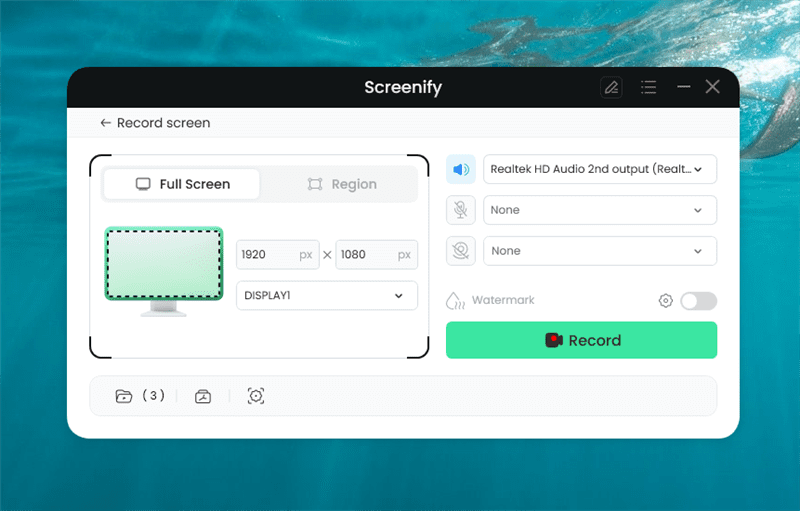
Screenify Full Screen Record
The screen mode offers two recording options: you can either record the entire screen or select a specific region to record.
Step 5. Wait for the Recording Countdown.
There is a 3-second countdown to help you prepare the recording after you are ready to start recording.

Recording Countdown
#2. OBS Studio
Are you looking for a professional and advanced-level open-source video recorder? OBS (Open Broadcaster Software) Studio serves the purpose at its best! OBS Studio offers multiple creative features for content creators to manipulate or customize according to their needs. It offers real-time audio and video mixing effects and perfectly stable synchronization. Additionally, what content creators and gamers love about this full screen recorder tool is its ability to add multiple scenes.
Furthermore, you can capture your laptop’s screen in 1080p UHD quality at 60 frames per second, recording any videos/animations played on the screen. Multiple user-friendly features include hotkeys for scene switching, recording start/stop, mute, push to talk, and more.
| Key Features |
Pros |
Cons |
| OBS is a free, open-source, full screen recorder offering multi-platform support for Windows, Mac, and Linux. |
1080p screen recording with audio |
Difficult for some users |
| OBS Studio supports multiple plugins to add additional creativity capabilities. |
Multiple customizable controls |
|
| Record from multiple sources and create scenes using window capture, images, and a webcam. |
Pre-set filters |
|
| Record audio with pre-set filters such as noise suppression, noise reduction, and noise gate. |
|
|
Steps to Record Screen & Audio using OBS Studio
Here’s how to record screen and audio via OBS Studio:
Step 1. To record screen and audio, Launch OBS Studio on your PC.
Step 2. Create a “Scene” by clicking the “+” button in the Scene box. Then click “+” in the Sources box and add a “Display Capture”.
Step 3. Adjust the Volume from the “Audio Mixer” section. Once done, click the “Start Recording” button from the right pane.
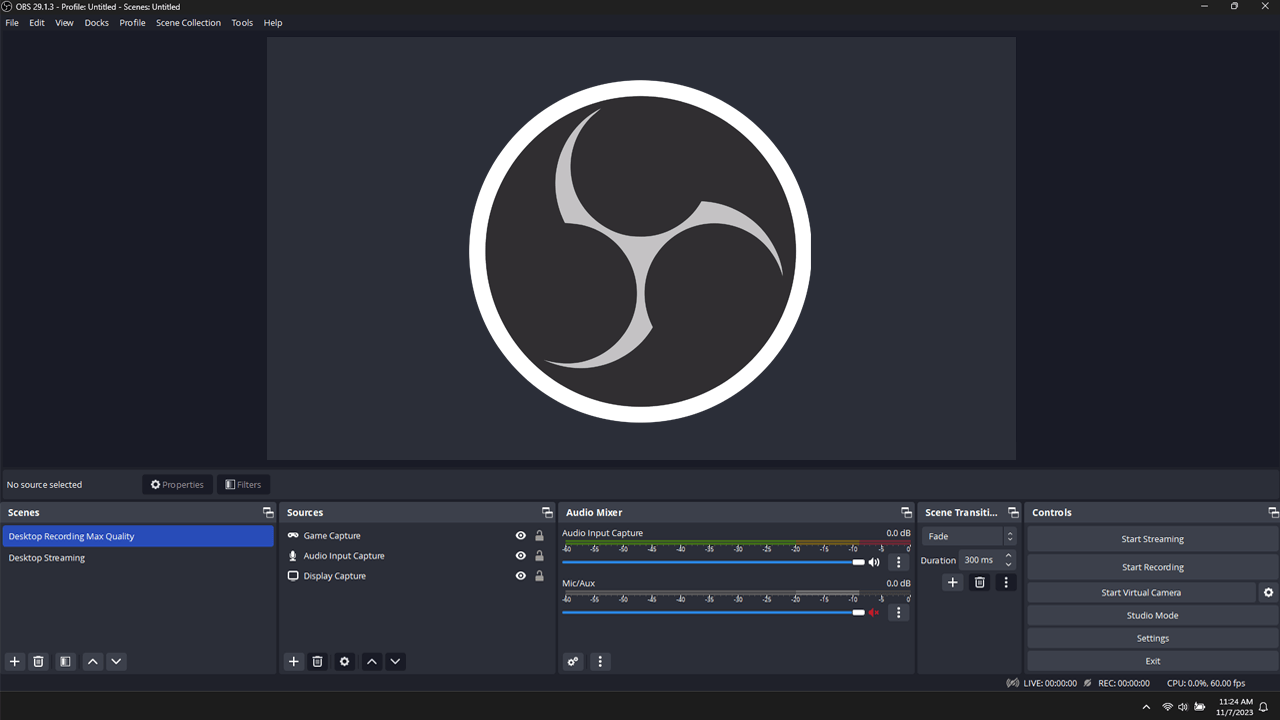
OBS Studio
#3. Debut Video Capture
When it comes to the list of full screen recorders, it is incomplete without the Debut Video Capture. This free full screen recorder enables you to capture what’s happening on the screen with a customized screen recording area. You can either record full screen or a region to ensure privacy. Powered by NCH, this versatile screen recorder can record videos in multiple formats such as WMV, MP4, MOV, MPG, and AVI.
Additionally, you can use the screen, webcam, the network IP Camera, or any video input device seamlessly. Debut Video Capture has additional options to demonstrate a product or record a step-by-step guide, such as mouse/cursor highlighting, visible keystrokes, captions, and more.
| Key Features |
Pros |
Cons |
| Record screen in 720p and HD quality webcam with flexible output settings. |
Record any video input device |
No trim or crop feature |
| Add captions, highlight the mouse or cursor, and show keystrokes while recording the PC screen. |
Handy video filters |
|
| The tool offers advanced yet handy video color adjustments to add crispness to the recorded videos. |
Green screen tool |
|
| You can add logos or watermarks as needed. |
|
|
Steps to Record Screen & Audio using Debut Video Capture
Here’s how to record screen and audio via Debut Video Capture:
Step 1. Launch Debut Video Capture on your PC.
Step 2. Choose the recording source such as “entire virtual desktop, window, or a region.”
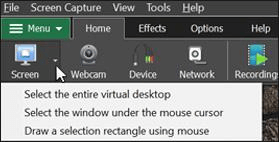
Choose Recording Source
Step 3. Click the “Record” button to initiate screen and audio recording.
#4. ShareX
Want a lightweight full screen recorder designed for power users? ShareX is the perfect combination to offer both! This screen recorder offers multiple advanced functionalities such as multiple screen recording modes, GIF recording, Transparent Region, and more. Multiple editing tools such as Image editor, Color picker, Effects, and Thumbnailer enhance the screen recording quality.
This free and open-source screen and audio recorder offers customizability and versatility to the users. You can capture the screen, record GIFs, and even capture text via OCR.
| Key Features |
Pros |
Cons |
| Utilize the Auto Capture option to enable schedule recording for flexibility and convenience. |
Lightweight |
Scrolling window recording is laggy |
| You can record desktop screens or GIFs and even capture screenshots (with a time delay) on your PC. |
Easy to use |
|
| Choose whether to show the cursor or not during the screen recordings. |
Multiple sharing options |
|
| You can customize the video recording settings and set a timer delay for more efficient functioning. |
|
|
Steps to Record Screen & Audio using ShareX
Here’s how to record screen and audio via ShareX:
Step 1. Launch ShareX on your PC.
Step 2. Click on “Capture” from the left-side toolbar. Choose to record a particular window, full screen, or an area.
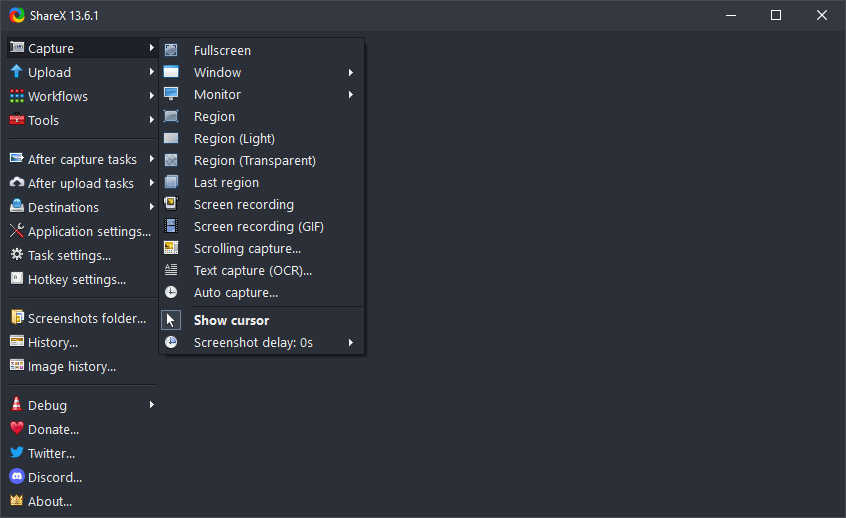
Click Capture
Step 3. Press the “Record” button to start screen recording alongside audio.
#5. ScreenPal
ScreenPal is a simple yet intuitive screen recording tool that offers multiple recording modes alongside brilliant video and audio quality. Record the entire screen on Windows 10 with various customization options to choose from! It lets you capture part of your screen or the whole window in higher resolution without lags. You can even integrate the webcam to record the screen and camera simultaneously. You can customize the size of the webcam overlay to match the screen resolution.
ScreenPal has an exciting background removal feature for webcam recordings where you can remove distractions, blur the background, or even replace it with wallpaper.
| Key Features |
Pros |
Cons |
| Add texts, shapes, or doodles to capture attention. |
Background removal feature |
Low screen resolution (free version) |
| You can remove, cut/trim, or adjust the speed of any part of the recorded video. |
Volume adjustments |
|
| You can remove and add a virtual background to enhance the look of your screen recordings. |
Speech-to-text caption option |
|
Steps to Record Screen & Audio using ScreenPal
Here’s how to record screen and audio via ScreenPal:
Step 1. Launch ScreenPal Screen Recorder on your PC.
Step 2. Select the Screen, Camera, or both to specify the recording mode. Click “Narration” to choose the audio input source for your screen recording.
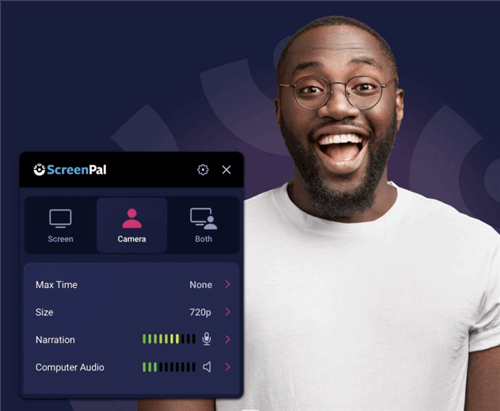
Click Narration Button
Step 3. Click the “Record” button to start the screen recording.
#6. FlashBack Express
FlashBack Express is a free full screen recorder that allows you to capture desktop screens and a webcam simultaneously for a more engaging experience. The tool lets users record in 4K or UHD quality at a higher frame rate per second.
Furthermore, you can add narration or commentary while recording screens to make tutorials or instructional videos.
| Key Features |
Pros |
Cons
|
| Unlimited screen recording time without any watermark. |
No time limits and watermarks |
Only 720p resolution in the free version |
| This tool offers a multi-monitor screen recording for advanced-level quality. |
Easy-to-use user interface |
|
| You can simultaneously capture screen, webcam, microphone, and system sound without lags and interference. |
Record from multiple sources |
|
| Record the entire window or a part of the screen in 4K resolution. |
|
|
Steps to Record Screen & Audio using FlashBack Express
Here’s how to record screen and audio via FlashBack Express
Step 1. Launch FlashBack Express Screen Recorder on your PC.
Step 2. Adjust the parameters such as “Full Screen” in the Record section and enable microphone and system audio.
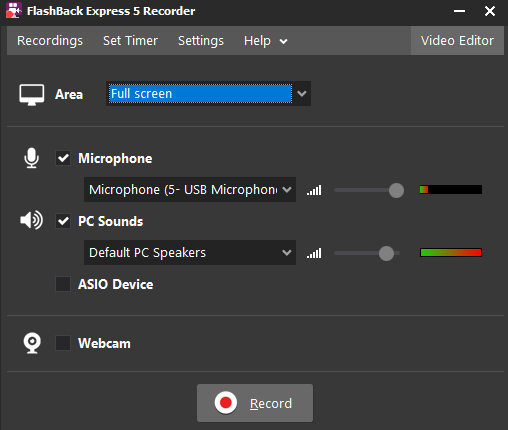
Adjust Screen Area
Step 3. Click the “Record” button to start the screen recording.
#7. QuickTime Player
Do you want a full screen recorder for Mac? QuickTime Player is a built-in Mac screen recording tool that enables users to capture screens in 4K resolution at 120 FPS. You can split, trim, and even rearrange the recorded lectures at the end with its essential editing tools.
One disadvantage of QuickTime Player is that you cannot record the internal audio by default and must install an additional plugin for the audio input source.
| Key Features |
Pros |
Cons |
| QuickTime player can record microphone audio and internal audio seamlessly in high quality. |
Simple user interface |
Needs a plugin for internal/system audio |
| Basic editing functionalities such as trimming, splitting, and rearranging are available. |
Requires no installation |
|
| You can customize the basic settings, such as the audio input source. |
Customizable audio source input |
|
| Record the screen of your MacBook up to 4K with 120 Frames Rate Per Second (FPS). |
|
|
Steps to Record Screen & Audio using QuickTime Player
Here’s how to record screen and audio via QuickTime Player:
Step 1. Launch QuickTime player on your Mac. Click on “File > New Screen Recording.”
Step 2. Click the down arrow to select the audio input, such as “Internal Microphone.”
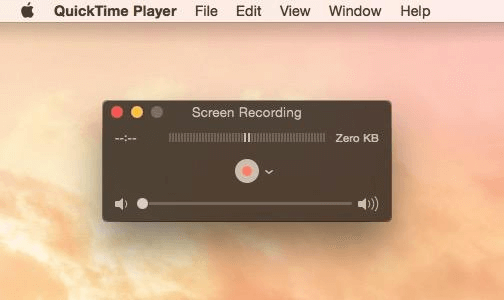
Select the Audio Input
Step 3. Click the “Record” button to start the screen and audio recording on your Mac.
#8. Movavi Screen Recorder
Want to be more productive or boost efficiency? Get the Movavi Screen Recorder— a free full screen recorder for Windows and Mac. Some standout features include scrolling screenshots, adding shapes and annotations, and more. You can even schedule a recording with its automatic recording scheduler option to boost productivity.
| Key Features |
Pros |
Cons
|
| Record in HD or 4K quality at a high frame rate. |
Record mouse and keystrokes |
Not suitable for gamers |
| Add annotations, notes, stickers, or anything in real time. |
Live drawing |
|
| Set a timer for scheduled recording to boost productive routine. |
Basic editing tools |
|
| The tool lets you add a webcam overlay and record two streams simultaneously. |
|
|
Steps to Record Screen & Audio using Movavi Screen Recorder
Here’s how to record screen and audio via Movavi Screen Recorder:
Step 1. Launch Movavi Screen Recorder on your PC.
Step 2. Adjust the settings for screen resolution and audio input sources.
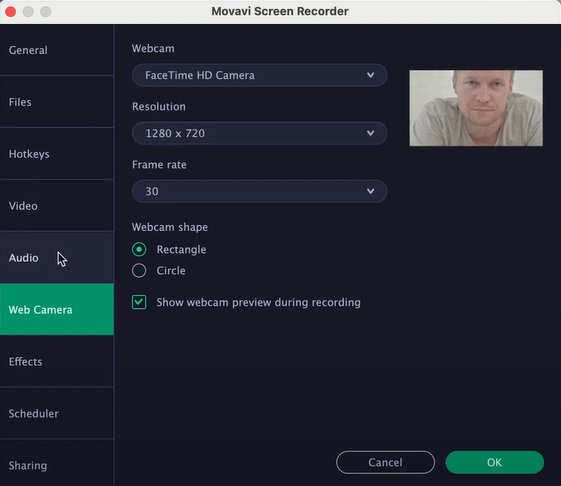
Movavi Adjust the Settings
Step 3. Click the “Record” button to start recording.
Part 3. Frequently Asked Questions
Q1. What are Full screen recorders?
Full screen recorders allow you to record the entire screen of your PC. You can also record webcam and audio (system and internal) with a full screen recorder.
Q2. What is the importance of full screen recording for tasks?
Full-screen recorders enable users to create instructional videos, tutorials, or training guides.
Q3. Can I record multiple monitors with a full screen recorder?
Yes! Recording tools OBS Studio and FlashBack Express support multi-monitor display recording in brilliant quality.
Q4. How to record the entire screen in Windows 10?
You can utilize the built-in Xbox Game Bar for this purpose. For more advanced functionalities, try Screenify— a free 4K screen recorder for Windows 10.
Q5. Can I record on a full screen on a Mac?
Yes, you can use QuickTime Player to record the entire screen on Mac. We recommend using Screenify to capture 4K screens at 60 FPS without any time limitations.
Part 4. Conclusion
Full screen recorders enable users to capture everything happening on the screen. You can record tutorials, instructional videos, gameplay sessions, or more with free full screen recorders. We have compiled top full screen recorders to record the entire Windows 10, 11, or MacOS screen. We recommend using Screenify, a free 4K screen recorder, to capture the entire screen or a part without any watermarks.

Joy Taylor


Senior writer of the iMobie team as well as an Apple fan, love to help more users solve various types of iOS & Android-related issues.
Screenify
AnyEnhancer
FocuSee
Vozard
AnyMiro
AnyMirror

