How to Fix OBS Desktop Audio Not Working [6 Ways]
OBS is the go-to solution for gamers, content creators, educators, or professionals who want to share their content or engage with their audience through live streaming. However, there can be instances where your desktop audio not working OBS. We have put together 6 ways to fix this issue in this article.
Experiencing issues with OBS desktop audio? A silent stream can be frustrating but fret not; we are here to help! This guide will take you through six effective solutions to tackle the problem of desktop audio not working OBS.
We will take you through some easy troubleshooting steps to get your audio up and running. From checking your device settings to troubleshooting driver or system issues, adjusting your audio mixer settings, and verifying hardware connections, we have got you covered! With these simple solutions, you’ll be able to resolve the desktop audio not working OBS and elevate your streaming or recording experience with OBS. Let’s get started!
Why Is OBS Not Recording Desktop Audio?
If you’re going live or trying to broadcast your content to an audience, but OBS is not recording the desktop audio, it could be due to several reasons. For instance:
-
Incorrect Audio Settings
Make sure that you have selected the correct audio device in OBS’s settings. Also, make sure that the audio device is turned on and the volume is turned up.
-
OBS is Muted
Check to see if OBS is muted in the Windows Volume Mixer. If it is, unmute it and try again.
-
Another Program controls your Audio
Some programs, such as audio editing software, can take control of your audio devices. If this is the case, you will need to close these programs before trying to record audio with OBS.
-
Outdated Driver
If your audio driver is outdated, it may not be compatible with OBS. Try updating your audio driver to see if this fixes the problem.
-
OBS Not Installed Properly
If OBS is not properly installed, it may not be able to record audio. Try reinstalling OBS to see if this fixes the problem. Regardless of the reason behind your desktop audio not working OBS, let’s have a look at some solutions to resolve this issue.
Fix 1: Check Your Audio Device Settings
When you notice that the desktop audio not working OBS, the first thing to do is to check your audio device settings.
Here’s what to do:
- On your PC, open “Settings > Sound.”
- Make sure your speakers are set as the default audio output.
- Now restart OBS and try again.
However, even after checking your audio device settings, if the desktop audio is not working in OBS, try the next method.
Fix 2: Check OBS Audio Settings
If your audio device settings are correct, but still desktop audio not working OBS, there might be some issue with the audio settings of OBS. Therefore, it’s time to tweak the settings a bit! Here’s what to do:
Step 1. Open OBS, and go to “File > Settings > Audio.”
Step 2. Click on “Stereo > Global Audio Devices.”
Step 3. Now select the right output option for “Desktop Audio” and “Mic/Auxiliary Audio.” Or simply select “Default.”
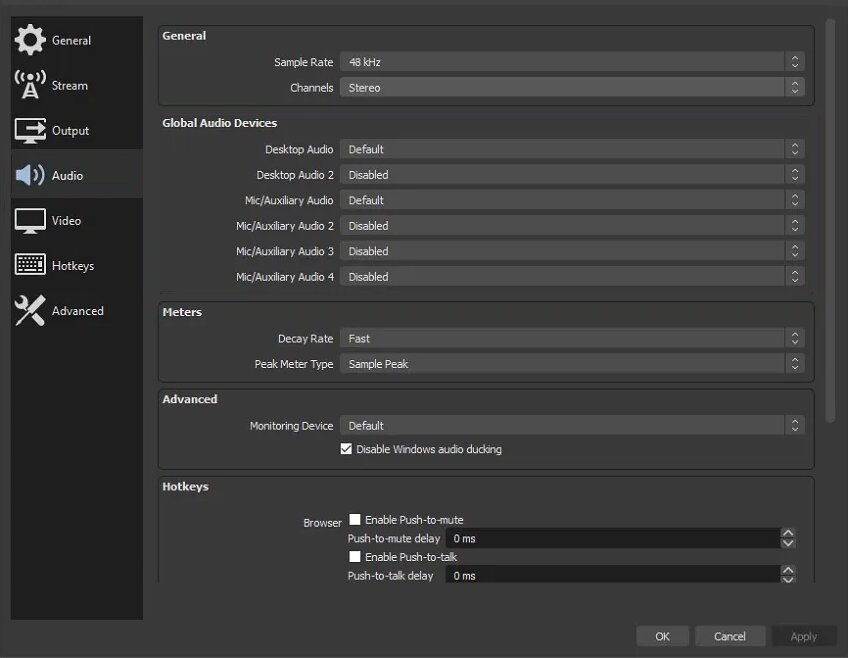
Select the Default Option
Once you set these options, your OBS desktop audio should start working. But in case the issue persists, you can try updating your audio drivers.
Fix 3: Update Your Audio Drivers
It is possible that your audio drivers are out of date, causing them to be incompatible with OBS. The solution? Update your audio drivers!
Step 1. On your PC, go to “Start > Device Manager.”
Step 2. Click on “Audio Inputs and Outputs” and right-click on “Speaker” to update it.
Step 3. You will receive a pop-up notification asking if you want to install the drivers manually or automatically. We suggest going for the “Search Automatically” option.
Windows will search your computer for the required driver and install it if it is out of date. However, if your drivers are already up-to-date but still desktop audio not working OBS, you can try a more technical solution
Fix 4: Adjust OBS Output Encoding Settings
If everything else is on fleek and still the OBS desktop audio is not working, it may be time to dig a bit deeper into the issue. It’s time to adjust the OBS output encoding settings! But let us remind you that this method might be a bit difficult for less tech-savvy people; therefore, let a technoid handle it.
Step 1. Launch OBS, go to “File > Settings > Output,” and set the bitrate to 320.
Step 2. Now click on the “Audio” tab and set the sample rate to 44.1 kHz.
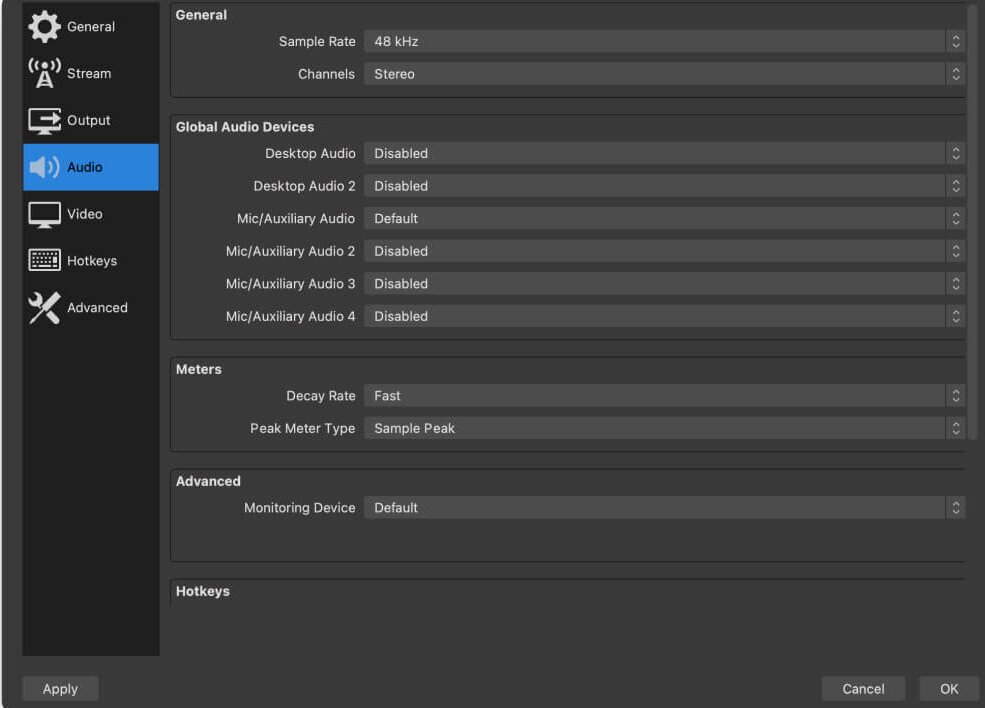
Adjust Sample Rate
Step 3. Click “Ok” to save the settings.
Restart OBS and see whether the desktop audio is working or not. If it’s working, well and good; otherwise, try the next quick fix.
Fix 5: Remove Other Audio Control Programs
There is a possibility that you have other audio control programs installed on your system that might be interfering with OBS desktop audio. Therefore, go to your system’s settings and disable those programs.
If none of these 5 solutions work to resolve the desktop audio not working OBS issue, the problem may be a lot more technical than we imagined. Therefore, you can contact OBS customer support for further guidance.
Fix 6: Record Desktop Audio Using Screen Recorder Alternative
So, your OBS desktop audio is acting up, and you have an important presentation to stream? Don’t just wait around, get Screenify and get streaming! Screenify is a fantastic screen recorder and video editor that’s completely free for both Windows and Mac. With its user-friendly interface, it’s super easy to record your screen, webcam, and audio. Plus, you can edit your recordings, add annotations, and export them in a bunch of different formats. Whether you want to go live, broadcast content to an audience, or record your screen, Screenify is the best alternative to OBS.
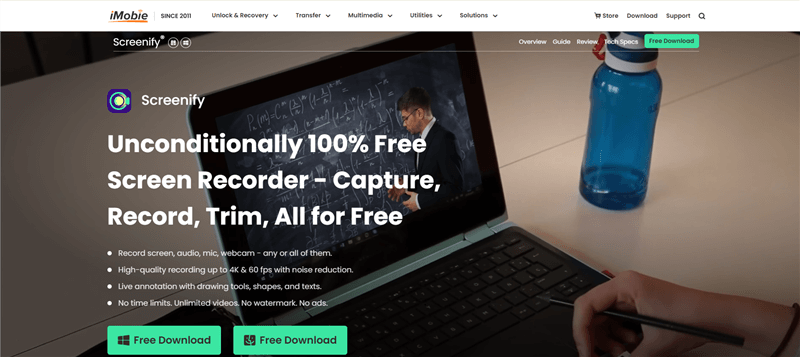
Screenify Website Interface
Steps to Use Screenify
Step 1. Download and Install Screenify on Computer.
Step 2. Launch Screenify on your computer, and select Record screen mode.
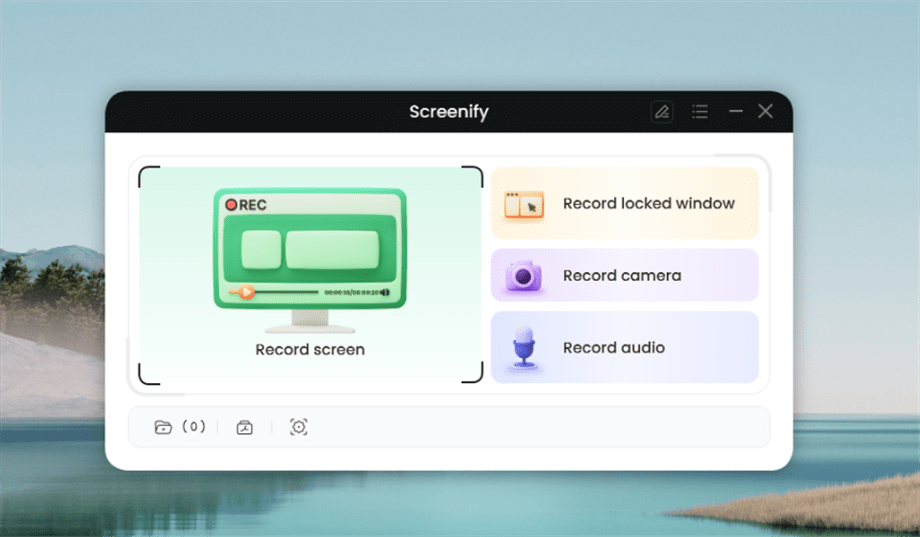
Select Record Screen Mode
Step 3. Configure Recording Settings aims to configure settings like system audio before recording.
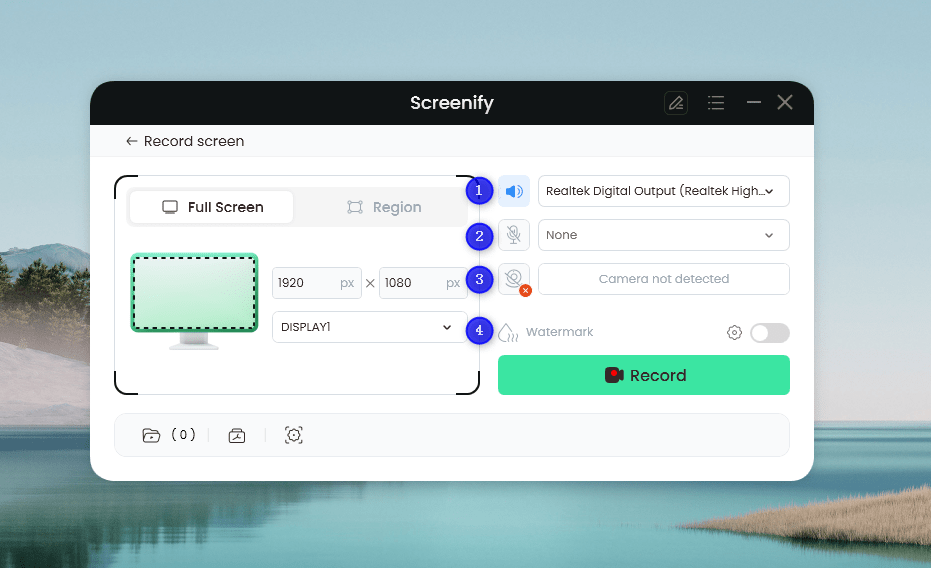
Set Configure Recording Settings
In this setting menu, you can:
1 Choose the System audio.
2 Choose the Microphone you want to record.
3 Choose the Camera you want to use.
4 Choose whether to add a watermark.
Step 4. Select Recording Screen.
Option 1. Full Screen Record
Please select Full Screen mode and choose the display you need to record. Hit Record button to initiate recording.
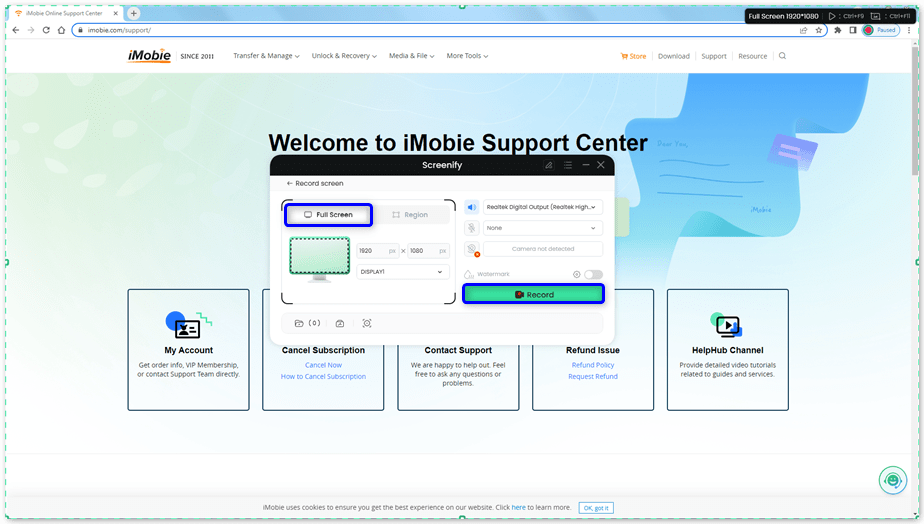
Select Full Screen
Option 2. Region Record
To record region, you need to manually select the recording area. After selection, you can still adjust the selected area. It supports customize selection, full screen, and proportional selection based on common social media dimensions.
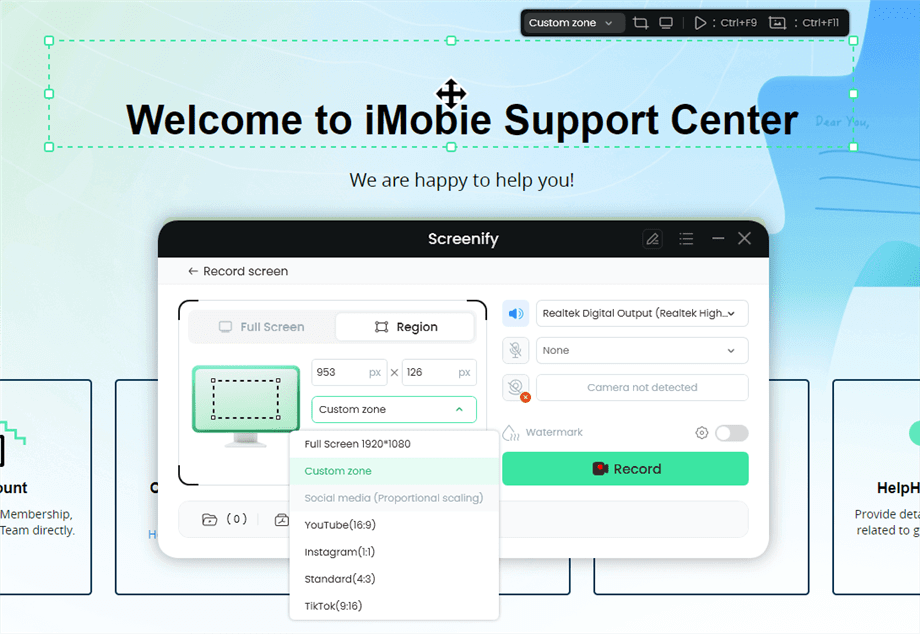
Record Region
Step 5. Wait for the Recording Countdown.
There is a 3-second countdown to help you prepare the recording after you are ready to start recording.
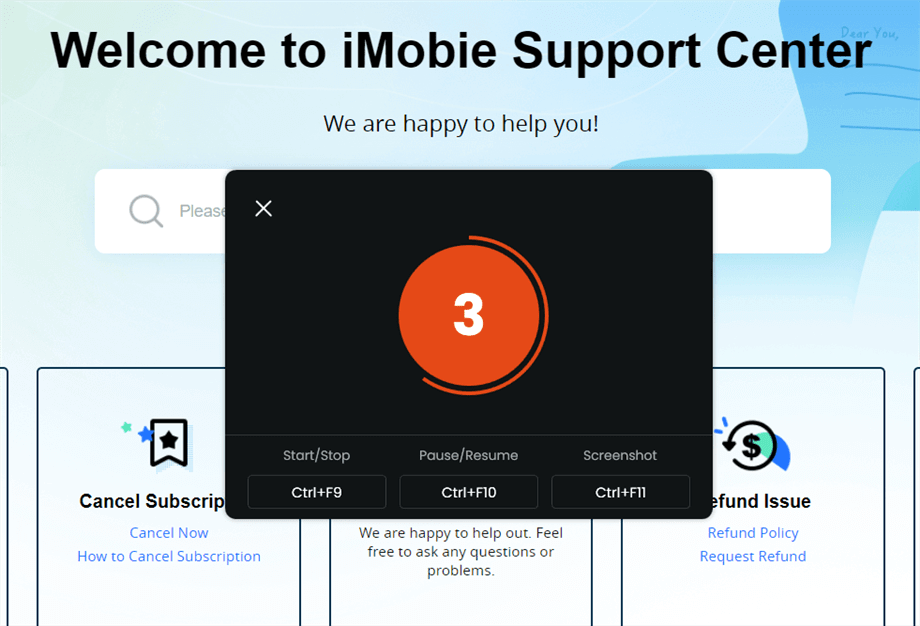
Wait for the Recording Countdown
If you would like to see a recording countdown before your recording starts, you can enable the countdown option. Or you can tap it off. View this post to know how to set the countdown option.
Step 6. Start Recording.
The recording will begin after a 3-second countdown. You can make annotations on the recording interface during the recording.
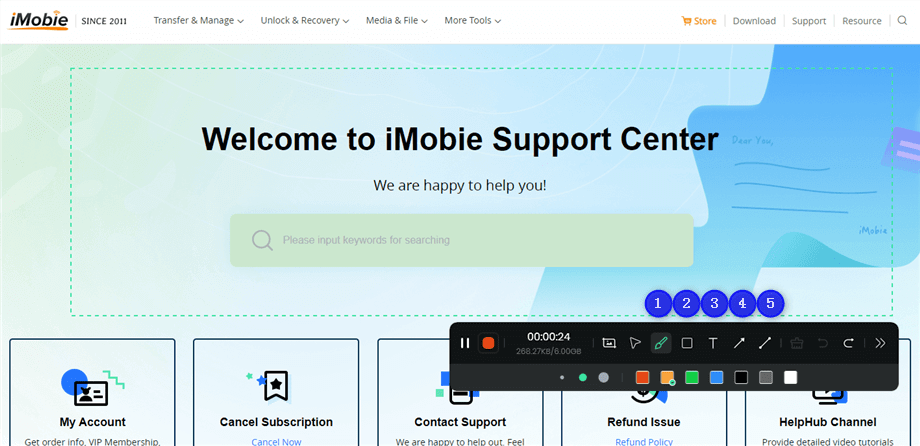
Annotate the Screen during Recording
With the toolbar, you can add the annotation in the screen:
1 Brush: Draw freehand on the screen recording interface to highlight or illustrate specific areas during the recording.
2 Rectangle: Draw rectangular shapes on the screen recording interface.
3 Text: Add written notes or labels directly onto the screen recording interface.
4 Arrow: Draw arrows on the screen recording interface to point out and emphasize specific areas.
5 Line: Draw straight lines on the screen recording interface to underline or connect specific points.
Step 7. Record Screen Process Completed.
When the recording is completed, you can click the red Stop button to end the recording. Your recorded files will be displayed. From here, you can preview and manage the recorded content as needed.
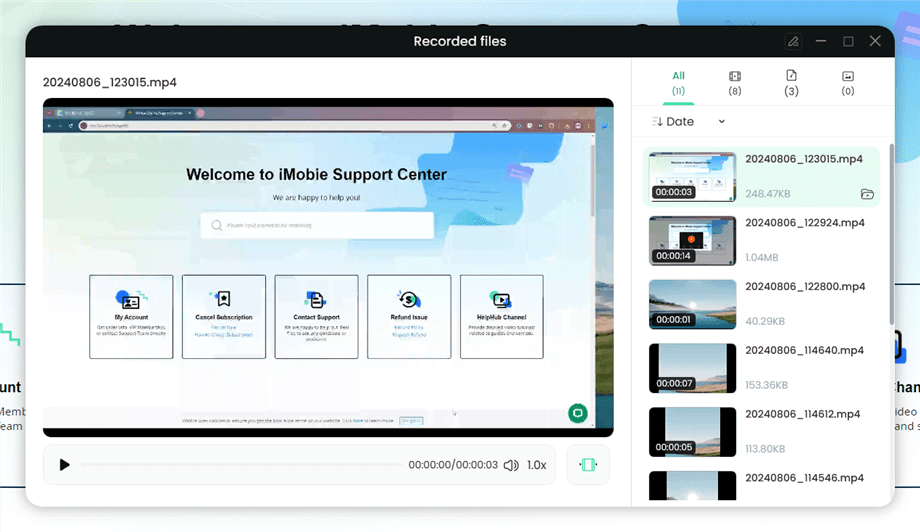
Preview the Recording
You may also want to know: How to screen record protected videos
Video Tutorial on How to Fix OBS Desktop Audio Not Working
Free Download * 100% Clean & Safe
Frequently Asked Questions
Q. How to enable desktop audio on OBS?
To enable desktop audio on OBS, here’s what you must do:
- Launch OBS, and click on “File > Settings > Audio.”
- Click on “Desktop Audio Device” and select the preferred audio device that you want to use to record desktop audio.
- Now click “Ok” to save the settings. Your desktop audio on OBS will be enabled.
Q. How do I reset my OBS audio?
If you want to reset your OBS audio, you will have to reset all the settings during the process. Here’s how to go about it:
- Launch OBS and go to “File > General > Open Settings Folder.”
- Now exit the app and delete all the cached files from the Settings Folder.
Note: This will reset the OBS audio to the default settings.
Final Words
To sum it up, it is really important to get rid of the desktop audio not working OBS glitch if you want to have a smooth streaming and recording experience. Luckily, there are six easy solutions to help you get your audio back on track. You can double-check that you’ve chosen the right audio source, make some adjustments to your mixer settings, or troubleshoot any potential conflicts with drivers and configurations. So go ahead and give them a try! You’ll be able to create awesome content with OBS in no time! And if nothing seems to work, Screenify is there to save the day!
Free Download * 100% Clean & Safe
Product-related questions? Contact Our Support Team to Get Quick Solution >

