7 Free Screen and Audio Recorders for Windows & Mac
Are you looking for free laptop screen recorders for Windows and Mac? This guide will walk you through benefits and features of the 7 best free screen and audio recorders. There must be one perfect for your need. Let’s check the guide now!
Screenify – 100% Free Screen Recorder with Audio
Try Screenify for free to record screen with audio on Windows or Mac. Whether full-screen or partial-screen recording, Screenify can do it with ease. It helps to record videos in 4K without lagging.
100% Clean & Safe
Whether you’re a streamer or gamer who loves to record gameplays for social media sharing or a teacher who wants to record presentations, choosing a free screen recorder with audio is important. The screen recorder lets you record the screen alongside a microphone and system sound without any hassle. However, there are multiple choices available, each with its discrete functionalities. This detailed guide will explore the top 7 free screen recorders with audio that lets you record lectures, tutorial videos, how-to guides, and more. Let’s delve into further details.
Free Screen Recorder With Audio
7 Best Free Screen Recorder with Audio for Windows & Mac
Choosing a screen recorder with audio is not as simple as it looks! There are multiple factors to consider, such as 4K screen recording, system and microphone audio recording, watermark removal, versatility, and more. Let’s explore the top 7 free screen and audio recorders for Windows & Mac:
1. Screenify
Are you looking for a free screen recorder with audio that can make your lecture, tutorial, or gameplay recording easier? Try Screenify— a free screen and audio recorder of all time for both Windows and Mac! Whether you’re a streamer or want to record content for e-learning platforms, Screenify has advanced functionalities to cater to everyone’s needs.
Key Features
- This versatile tool can help you record 4K screen recording with no lags at 60 FPS and a noise reduction functionality for audio and video files.
- The tool comes with unlimited screen recording functionality— no need to record multiple clips now!
- Screenify is completely free to use with no watermark and dual recording modes such as full screen or region.
- Want to add voice commentary to your screen recording? Enjoy the dual audio recording, i.e., microphone and system sound, without any hassle.
- Basic editing options include text, arrow, line, and other marking tools. You can also trim and edit the video at the end.
Pros
- Vibrant and high-quality screen recording (up to 4K).
- Completely free to use.
- No watermark.
Cons
- The V1 version doesn’t support AI editing.
How to record screen with audio for free using Screenify:
Step 1. Free download Screenify on your Windows or Mac computer.
Free Download * 100% Clean & Safe
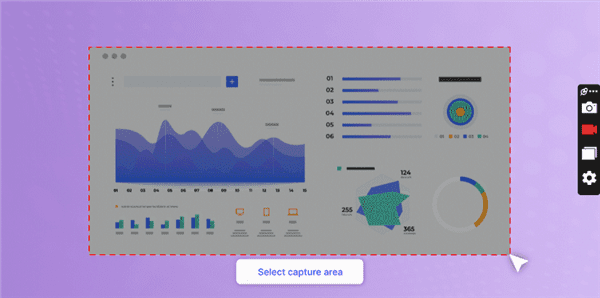
Step 2. Launch Screenify and choose record screen. Here are 3 modes to record screen in Screenify: full-screen, part, or locked-window.
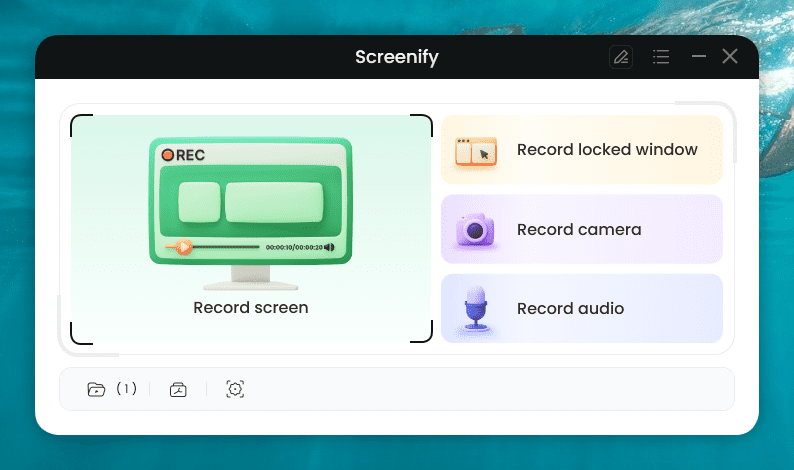
Screenify Record Screen
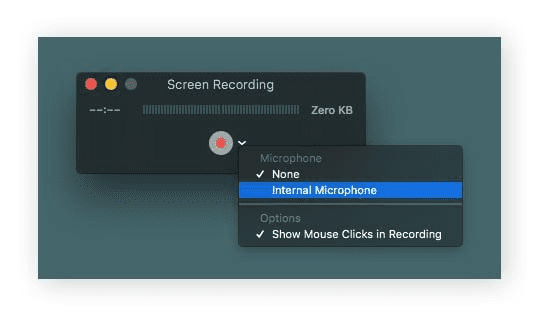
Step 3. Set and confirm the audio settings before recording.
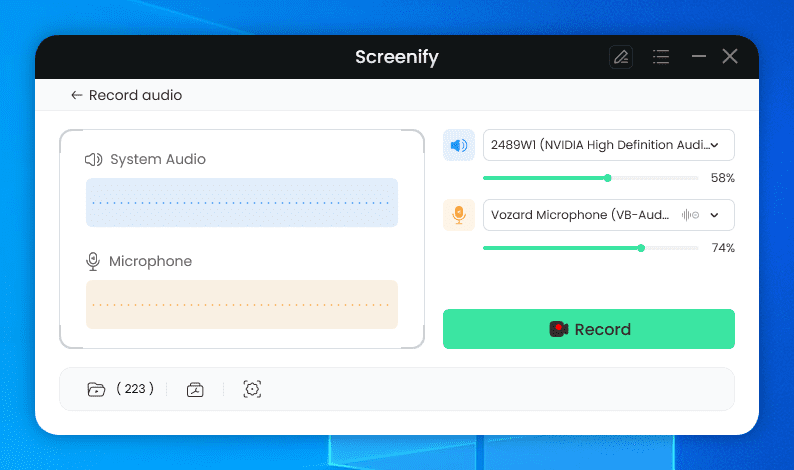
Screenify Audio Settings
Step 4. Start recording screen and audio on your computer. Once finished, you can click the stop icon, then preview and export the recorded video.
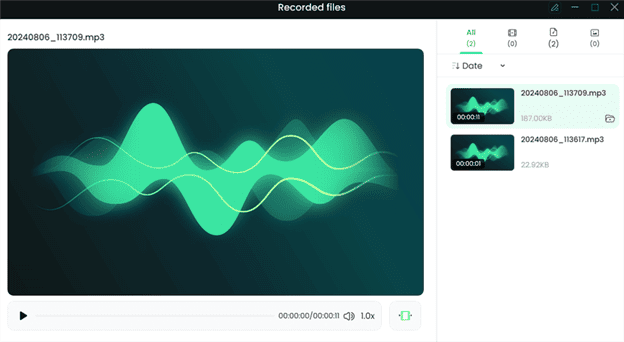
Preview and Export Recorded Files
2. OBS Studio
OBS Studio is an open-source screen recorder with audio that offers real-time audio/video mixing for free. OBS Studio is most popular among streamers and gamers due to its advanced capabilities and seamless integration with other platforms.
Key Features
- This open-source video recorder has an intuitive audio mixer alongside pre-source filters.
- Record high-quality audio with noise gate, noise suppression, and gain filters.
- You can screen record from multiple sources and create different scenes using window capture, text, images, and a webcam.
- Multiple personalization and customization options are available in studio mode for screen recording and streaming.
- Its integration with other platforms makes it easy to share screen recording with audio directly.
How to Use OBS Studio for Screen and Audio Recording?
Here’s how to record screen and audio with OBS Studio:
Step 1. Launch OBS Studio on your PC. It will create a “Scene” on its own.
Step 2. Click on “+” in the Sources box and add a “Display Capture”.
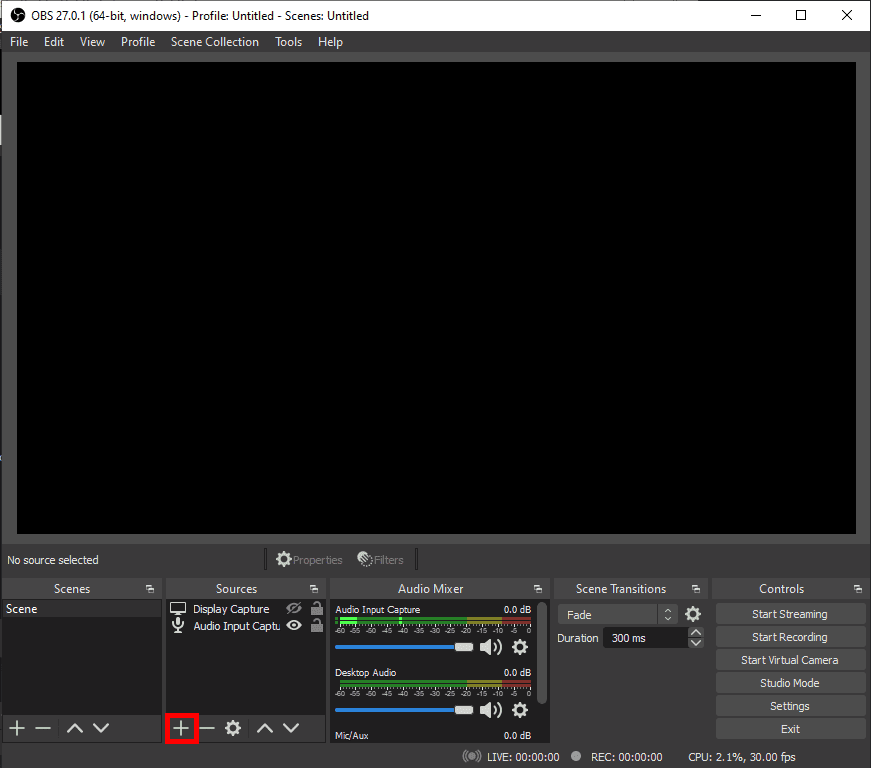
Add Sources in OBS
Step 3. Once done, click the “Start Recording” button at the bottom right of the screen.
Pros
- Open-source code.
- Audio and video mixers.
- Unlimited scene creation.
Cons
- The interface is a bit complex.
- OBS not recording audio sometimes.
3. ShareX
ShareX screen recorder offers customizability when it comes to screen recording, such as recording a window only, full screen, a particular region, or more. Multiple advanced-level functionalities are available in task, workflow, and hotkeys settings to enhance recordings.
Key Features
- This free and open-source screen and audio recorder offers customizability and versatility to the users.
- It comes with an editor to perform basic editing, such as trimming or cropping, and an OCR for texts.
- It is quite simple to create and edit animated GIFs.
- You can set a timer for screen recording delay functionality.
How to Use ShareX for Screen and Audio Recording?
Step 1. Launch ShareX on your PC.
Step 2. Click on “Capture” from the left-side toolbar. Choose whether you want to record a particular window, full screen, or an area.
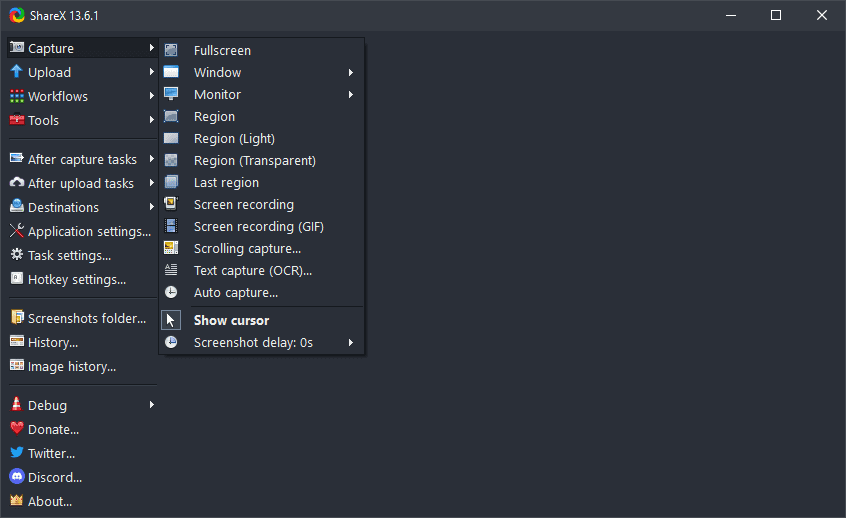
Add Sources to ShareX
Step 3. Press the “Record” button to start screen recording alongside audio.
Pros
- Free screen recorder with audio.
- Multiple sharing options.
- Easy-to-use interface.
Cons
- Lags while recording a scrolling window.
4. Apowersoft
Apowersoft is a fully featured and powerful screen recorder with audio recording capability. Not only does it offer flexible capture modes to help gamers, streamers, and content creators, but it also has multiple editing options to enhance the screen recording.
Key Features
- Advanced screen recording options include full screen, custom area, window capture, and more.
- Record video alongside audio from dual sources, i.e., system sound and microphone.
- Save your recording in multiple formats, such as MP4, WMV, AVI, FLV, MPEG, and more.
- Enhance screen recording with real-time editing tools such as annotations, cursor, text, call out, and more.
- Apart from real-time editing, it offers options like trimming, merging, visual effects, and more with professional editing functionalities.
- Schedule your screen recordings for webinars, daily or weekly lectures, and live streams.
How to Use Apowersoft for Screen and Audio Recording?
Here’s how to use Apowersoft for screen and audio recording on PC:
Step 1. Launch Apowersoft Desktop Screen Recorder on your PC.
Step 2. Click on the arrow next to the “Start” button. Choose the region on your PC screen that you wish to record, such as Full Screen, Around Mouse, a particular region, or Web Camera.
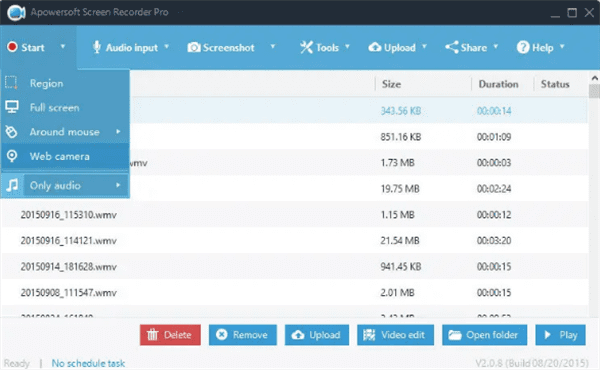
ApowerSoft Screen Recorder
Step 3. Click on the arrow next to “Audio Input” and choose the System Sound and Microphone to record audio. Click the “Start” button to initiate the screen recording alongside audio.
Pros
- Available in both online and desktop versions.
- Scheduled recording.
- Live screen recording editor.
Cons
- Watermark in the free version.
5. ScreenRec
Don’t you want to spend too much time adjusting the settings of the screen recorder tool? No worries! ScreeRec is a professional screen and audio recording software that allows you to capture, annotate, and share the screen recording all in one place.
Key Features
- Capture desktop screen as well as webcam in a single frame.
- Clean and easy-to-use interface, which makes it suitable for beginners or novices in the industry.
- Although editing functionalities are limited, you can still add annotations to the screen recording.
- It allows you to record HD video and excellent audio quality (both system sound and microphone).
How to Use ScreenRec for Screen and Audio Recording?
Follow the steps below to record screen and audio recording with ScreenRec:
Step 1. Launch ScreenRec on your PC. Click on “Settings” and toggle to turn ON the “System Sound” and “Microphone” both to record both audios.
Step 2. Click the “Record” button from the toolbar and select the area that you wish to record.
ScreenRec Screen Recorder
Step 3. Share your recording via an encrypted link over email or social media apps.
Pros
- Encrypted screen recordings.
- Instant sharing on platforms.
- Annotation options are available.
Cons
- Limited editing options.
6. QuickTime Player (For Mac Only)
QuickTime Player is the Mac’s built-in screen and audio recorder software, making the process look like a breeze! Although QuickTime Players offers seamless screen and microphone sound recording ability, it cannot record the internal system sound by default, and you’ll need to install a third-party tool for this purpose.
Key Features
- QuickTime player can record microphone audio and internal audio seamlessly in high quality.
- You can record visuals up to 1080P with 120 Frames Rate Per Second (FPS).
- Basic editing functionalities such as trimming, splitting, and rearranging are available.
How to Use QuickTime Player for Screen and Audio Recording?
Here’s a step-by-step guide to recording screen and audio using QuickTime Player:
Step 1. Launch QuickTime player on your PC.
Step 2. Click on “File > New Screen Recording”.
Step 3. Record QuickTime screen with audio interface will appear on the screen. You can click on the down arrow to select the audio input, such as “Microphone”.
QuickTime Screen Recorder
Step 4. Click the “Record” button to start the screen and audio recording on your Mac.
Pros
- Record high-quality visuals.
- No installation is needed (built-in Mac tool).
- Easy to use.
Cons
- No editing functionality.
7. ScreenPal
The last free screen recorder with audio we recommend is ScreenPal. It is available for both Windows and Mac and lets you capture any area of your screen seamlessly. Customization options, such as removing or blurring a background alongside editing functionalities, make this tool stand out.
- Capture part of your screen or the whole window in higher resolution without any lags.
- No sign-up account is required to use the ScreenPal screen recorder.
- You can record screens and webcams simultaneously for an immersive experience.
- Add a virtual background to enhance the look of your screen recordings.
How to Use ScreenPal for Screen and Audio Recording?
Here’s a step-by-step guide to recording screen and audio using ScreenPal:
Step 1. Launch ScreenPal Screen Recorder on your PC.
Step 2. Select the Screen, Camera, or both to specify the recording mode. Click on “Narration” to choose the audio input source for your screen recording.
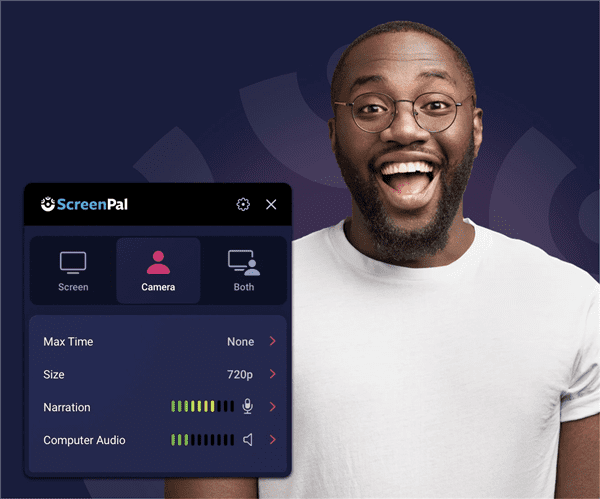
ScreenPal Screen Recorder
Step 3. Click the “Record” button to start the screen recording.
Pros
- Higher screen recording resolution (up to 1080p).
- Background remover.
- Speech-to-text caption option.
Cons
- The free version has a lower screen recording resolution.
Conclusion
No matter if you’re looking for software to record presentation lectures or software tutorials, a reliable screen and audio recorder tool is a must-have! Each free screen and audio recording tool comes with different features and functionalities, including customized screen recording areas, modes, editing capabilities, and resolution. Among all the screen recorders with audio, Screenify is highly recommended to use for the easy-to-use and free features. Download Screenify now and enjoy a wonderful screen recording without paying.
Free Download * 100% Clean & Safe

Senior writer of the iMobie team as well as an Apple fan, love to help more users solve various types of iOS & Android-related issues.
Product-related questions? Contact Our Support Team to Get Quick Solution >
