How to Import Contacts from Google Account to Phone
If you bought a new phone and wondering how to import contacts from Google account to phone. In this article, we’ll provide you with the detailed information you need about importing your contact list from your Google account.
No matter whether you’re using an Android phone or iPhone, you must have a contact list where you’ve stored all the important numbers. Google Cloud is a platform where you can store all of your important information and data. You may use it as a personal database to store your photos, videos, and contacts.
In addition to that, you may require to import your contact details due to many reasons. Whether your current mobile phone is broken and you’re switching to a new phone or you want to reset your old phone. Google cloud storage is the most convenient way for you to change your mobile phone and sync important contacts. In this article, we will discuss how to import contacts from Google account to an Android or iPhone device.
How to Back Up Contacts to Google Drive
Backing up your contact list with Google Drive is as easy as you’re reading this article. Contacts can be imported and exported from your Gmail account with different file formats. Also, you will be able to use that contact list in your Google by simply merging it with your Gmail account.
Android devices are strongly connected with the Google account by default; and in most phones, this is the general setting that every contact you save, will automatically store in your Google database.
You must ensure that backups to Google Drive are enabled and that your contact list has been recently synced with the cloud, by going to Settings > System > Backup. In that scenario, when you open Google Contacts on another device and log in to your Google/Gmail account, you will be able to find your backed-up contacts.
How Do I Transfer Contacts to my New Phone?
Every time you create a Google account, the Google contact list from that account will automatically synchronize to your Android phone. You only need to learn the following methods for adding and synchronizing contacts from your Google account to your Android phone:
1. Navigate to Password & Accounts in your phone’s Settings. Tap it if your Google account is already linked to your phone.
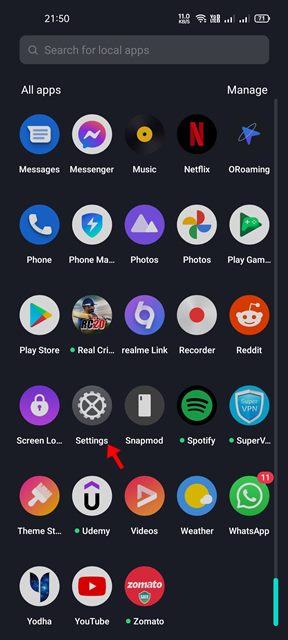
Open Phone Settings
2. Go to Account sync and turn on the Contacts button, and then tap the 3-dot sign at the top and select Sync Now.
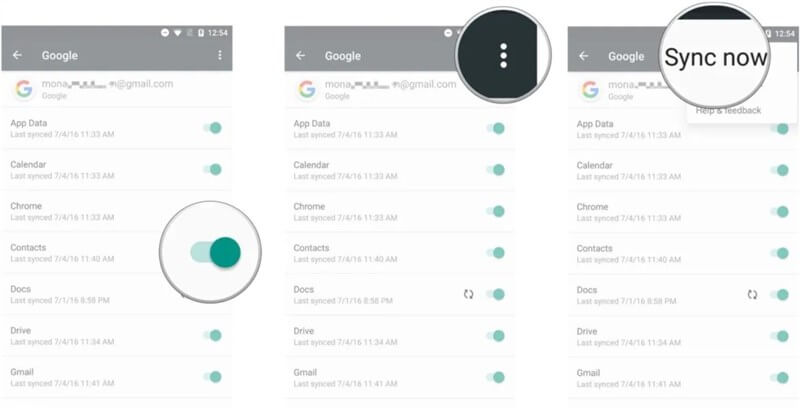
Sync Now
3. Wait for the transferring process to be completed > Scroll down and click Add account > Click Google and sign in Google account.
4. The recently added Google account will be visible. Select it, then select Account sync. Check that the option next to Contacts is turned on.
Import Contacts from Google Gmail to New iPhone
It is entirely untrue that Google services are only meant to be served to Android devices because iPhone users will also receive the same services. The iPhone contacts will synchronize with those in the Google cloud in the same way as Android contacts do. If you’ve moved to an iPhone, understanding the steps precisely will import your contacts.
Sync Google Contacts on iPhone
1. As the first step, in your iPhone’s Settings, go to Contacts.
2. To add an account, go to Accounts and click Add Account. Then use your Google account to log in. Proceed to the next step if the account has been already added.
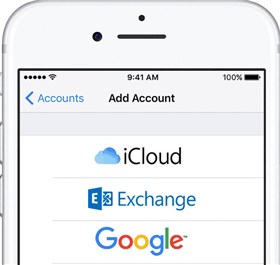
Add Google Account
3. After Gmail has been added, go back to Settings > Contacts > Accounts and push on it. Toggle the Contacts toggle switch to the on position. Your iPhone’s Google contacts should now be synchronized.
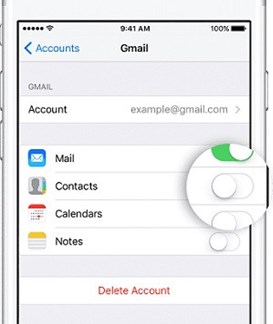
Switch on Contacts to Sync
4. Your Google contacts will appear when you launch the Contacts app on your iPhone.
Sync Contacts to iPhone via Google Web
1. Sign in to your Google account by opening contacts.google.com in a browser on your PC.
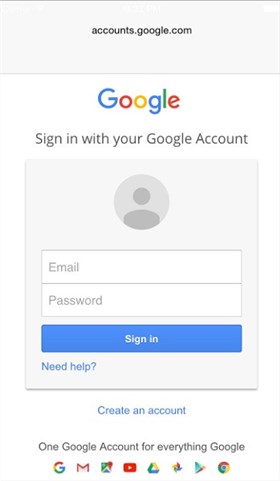
Sign in Google Account
2. In the left sidebar, click the Export button. All of the contacts will be chosen. If you only want to choose a few contacts, return to the previous screen, select the contacts, and then click the Export option.
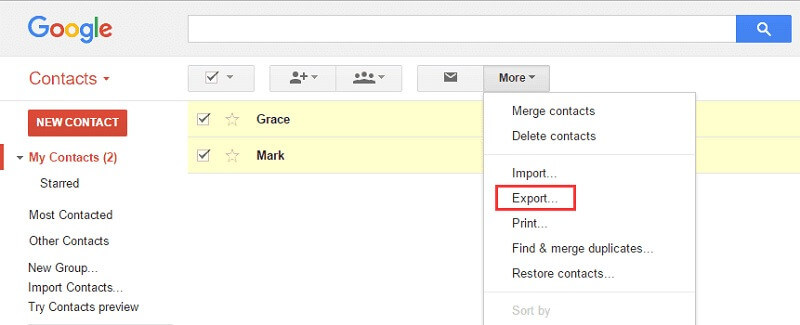
Click on Export
3. The Contacts Export box will appear. If you wish to import to Android, select Google CSV, and for iPhone, select vCard. Select the Export option. The contacts file will be saved to your computer.
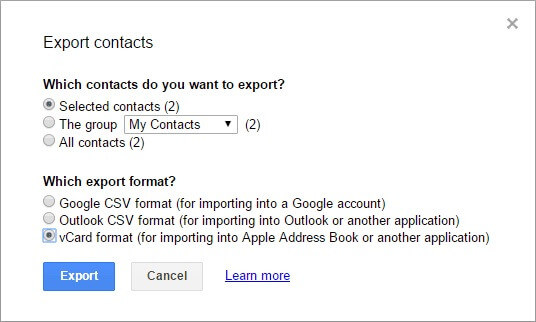
Export Contacts to CSV or Vcard
The Bottom Line
To prevent losing contact information if your device is lost or stolen, several experts recommend syncing your contacts with Gmail. The available Gmail contacts can then be imported into your new phone using the technique mentioned above, whether you have an Android or an iPhone. We hope that the information provided was useful to you and that by utilizing these techniques, if it is, free to share this post with your friends.
Product-related questions? Contact Our Support Team to Get Quick Solution >

