Home
PC Recovery
SSD Data Recovery: Recover Data from Dead, Failed, or Crashed SSD
SSD Data Recovery: Recover Data from Dead, Failed, or Crashed SSD
This article guides you through recovering data from SSDs. Whether you have a dead, failed, or crashed SSD, we have a solution. We’ve covered the importance of TRIM command and data recovery methods in a stepwise manner.
Joy Taylor | Last Updated: Nov. 20, 2024
2180 words|7minute
Solid State Drives (SSDs) have brought a big change in storing data. Unlike the older Hard Disk Drives (HDDs), SSDs work faster and quieter. Many people now prefer SSDs for these benefits.
However, no technology is without flaws. And, SSDs are no exception. Sometimes, SSDs can stop working. This can be due to being too old, being used too much, or if something goes wrong with its parts. When an SSD stops working, it can be hard to get the stored data back.
But still, there are ways to try and get back the lost data. The rest of this article will talk about how to do this. It will give you steps to follow and tips to increase your chances of success. First, let’s discuss some basics.
Is It Possible to Recover Data from the SSD
The simple answer is, YES, it’s possible. Especially if the data is lost due to some corruption of the SSD drive, malware or software glitch. You can easily get back your files with data recovery software. But there is an extremely important thing you need to know to make this possible.
Most computers with SSDs and Windows 7 or newer will have TRIM turned on. TRIM is a command that helps the SSD work better and last longer. It tells the SSD to get rid of data blocks that are not being used anymore. This makes the SSD faster.
But, TRIM can make recovering lost data hard. When TRIM is on, any deleted data gets removed quickly. This means you cannot get it back easily. If your computer loses power suddenly, gets a virus, or has another big problem, and TRIM has not run, you might be able to recover your data.
Increase Your Chances of Getting the Data Back from an SSD
Here’s how you can increase your chances of success in recovering data.
- Check TRIM: To see if TRIM is on, you can use a command on your computer. If TRIM is off, your chances of getting data back are better.
- Avoid writing new data: Do not save new files to the SSD after accidentally deleting data. This can overwrite the lost data, making recovery impossible.
- Use data recovery methods: Try using software designed to get back lost data. Or, you might need help from a professional data recovery service.
To check TRIM, you can do this:
- Press Windows key + X and choose Command Prompt (admin).
- Type “fsutil behavior query DisableDeleteNotify” and press Enter.
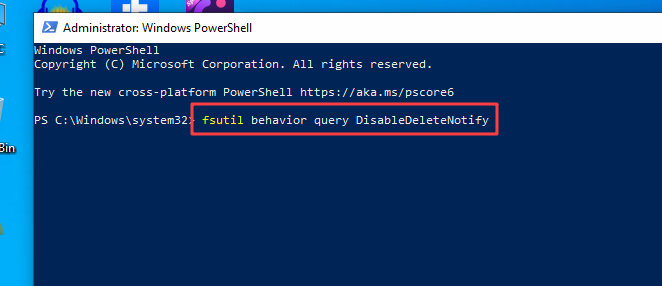
Entering Command to Check TRIM
- A result of zero means TRIM is on. A result of one means it’s off.
Disabling TRIM can help recover data but is not usually recommended because it makes the SSD slower over time.
Now let’s break the suspense and show you how to recover data from an SSD actually.
How to Recover Data from SSD on Windows/Mac
Recovering lost data from an SSD on Windows or Mac is achievable with the right file recovery tool. These specialized tools are designed to delve into your drive’s data layers. Ultimately, they can seek out and restore files that you thought were gone for good. For those in need of such a software, GlarySoft File Recovery stands out as a reliable option.
GlarySoft File Recovery is a versatile tool that simplifies the process of recovering files from SSDs. It doesn’t require deep technicalities and is accessible to users regardless of their technical know-how. This tool is especially useful for retrieving documents, photos, videos, emails, and more. They may be lost due to accidental deletion, corruption, or disk failure.
Key Features of Glarysoft
- Easy-to-Use Interface – Designed for ease, it suits all skill levels. So your data recovery is just a few clicks away.
- Supports Multiple File Systems and Devices – Works across FAT, NTFS, and NTFS+EFS file systems. You can recover from a broad spectrum of storage media.
- Deep Scan Option – Provides an in-depth scanning feature to unearth files that are more challenging to recover. But this feature is available in the Pro version.
- Filter and Search Options – There are options to filter search results and preview files before recovery. So you can restore the exact file you need.
- No Recovery Size Limits – Capable of retrieving large files without imposing any size restrictions in the Pro version.
- Safe Recovery Process – Executes the recovery operation without overwriting existing data. It preserves the integrity of your data throughout the process.
Here are the steps to recover data from an SSD with Glarysoft file recovery.
Step 1. Before initiating the recovery process, disable the TRIM command on your SSD. Type cmd in the Start menu search bar and right-clicking on Command Prompt. Then select “Run as administrator. In the Command Prompt, type fsutil behavior set DisableDeleteNotify 1 and press Enter.
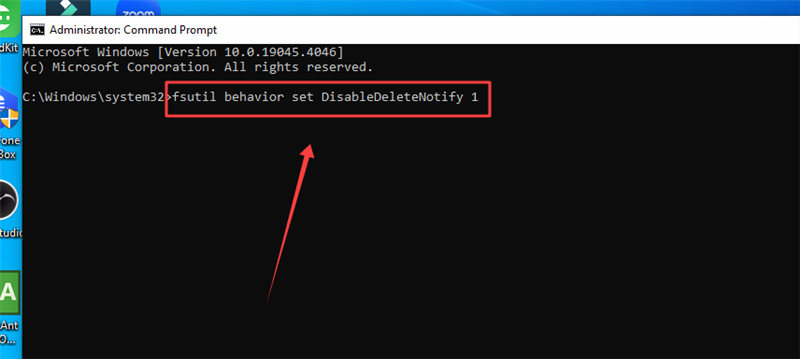
Entering Command to Disable TRIM
Step 2. Download GlarySoft File Recovery and open it. Select your SSD from the list of drives. Then hit the “Scan” button to commence a comprehensive scan of the selected drive.
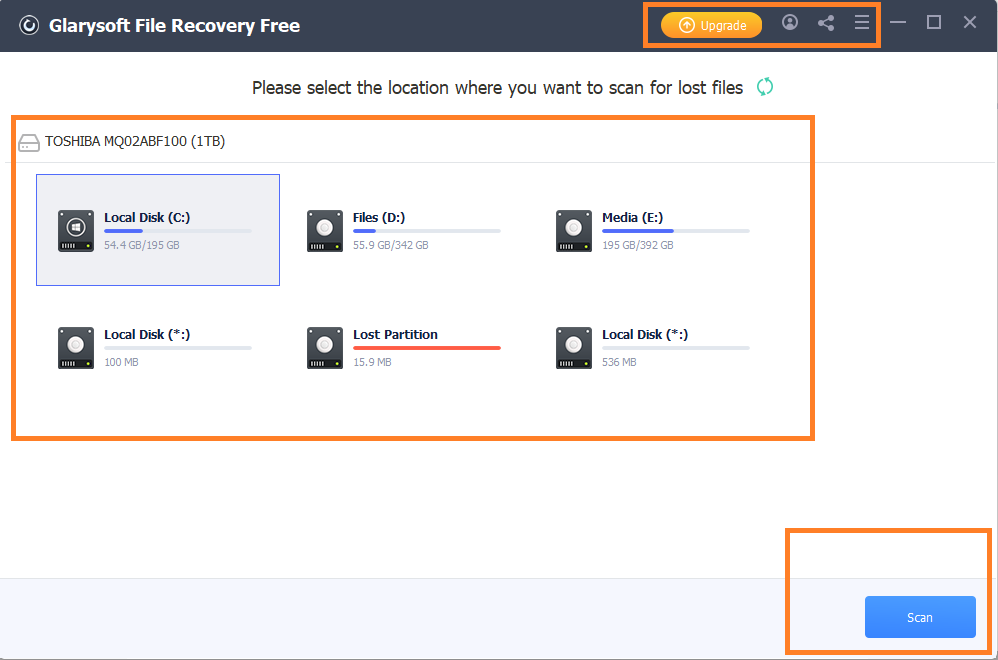
Click the Scan Button
Step 3. Use the filter and preview options to locate and select the files you wish to recover. This ensures you’re recovering exactly what you need.
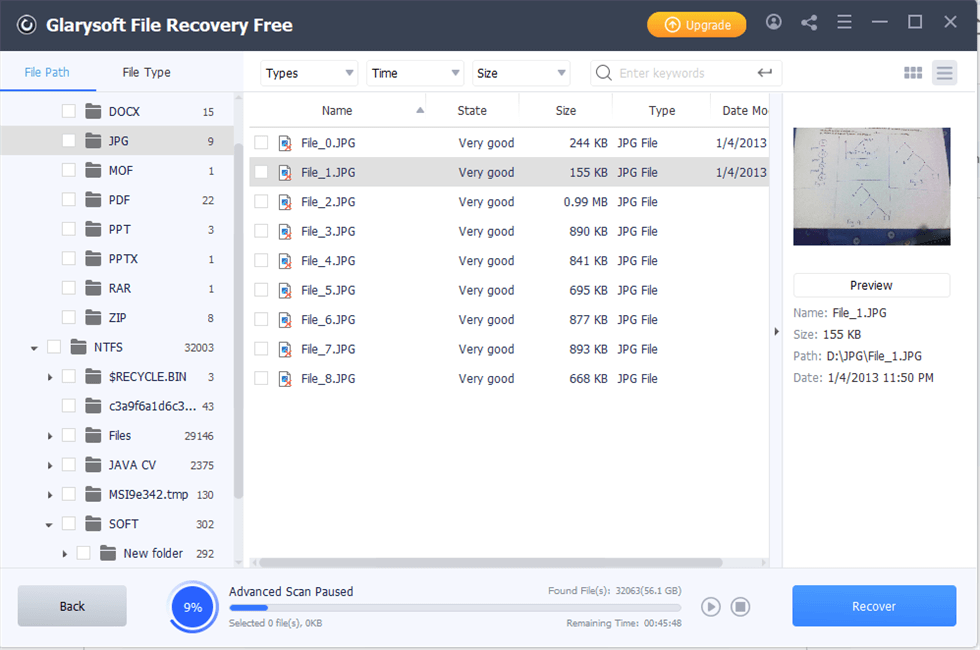
Scanning the Drive
Step 4. After selecting the desired files, click “Recover.” Choose a safe location on a different drive to save the recovered files. This time, save these files on some other drive than your SSD.
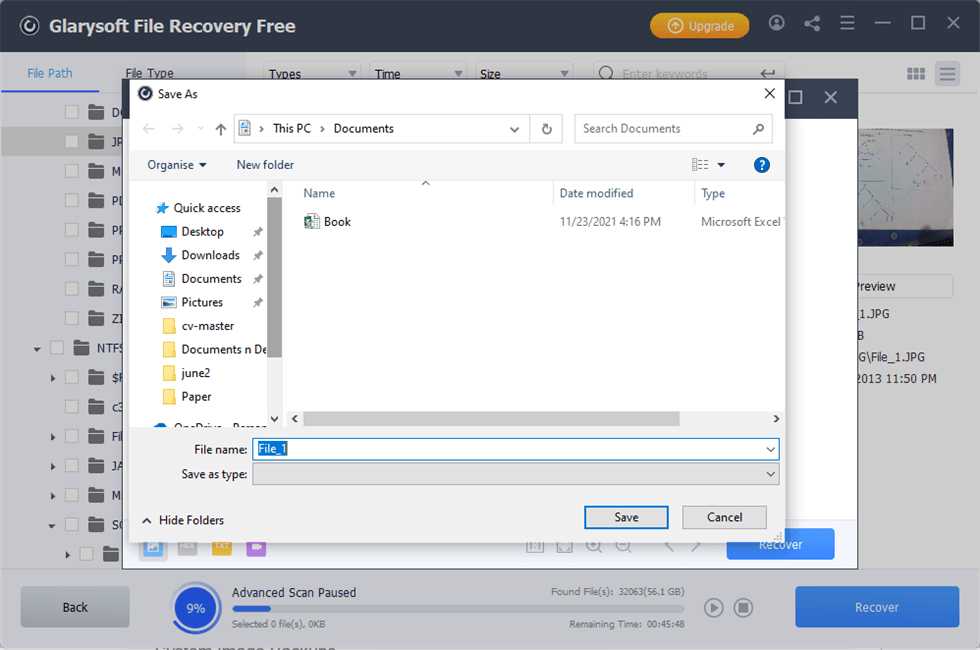
Recovering the Files in the Desired Location
Step 5. Once the recovery process concludes, you’ll receive a notification. You can then view the recovered data in the location you selected.
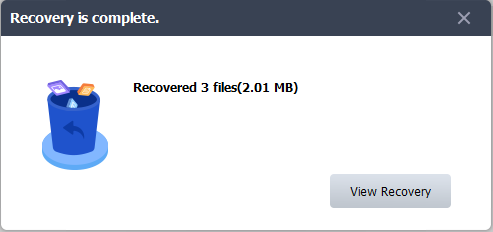
Recovery successful
Tada! You can use the free version of Glarysoft to check your lost files first. If you are successful, then that’s good.
If the SSD is still dead and initial recovery attempts haven’t borne fruit, don’t lose hope. There are still steps you can take to potentially recover your data.
How to Recover Data from Dead or Failed SSD
A crucial action in this case is to remove the SSD from the current system. A different computer might better recognize the SSD and allow recovery software to access the data.
After safely ejecting the SSD from the original computer, connect it to another system. This can be done using a SATA to USB adapter or enclosure. The SSD will act as an external drive for the new computer. This method bypasses issues tied to the original system’s hardware or software conflicts.
Now try again the deep scanning GlarySoft File Recovery Pro in this new computer. It can be particularly effective for SSDs that appear dead or have failed because it examines every sector of the drive for remnants of lost data.
When you are successful in recovering your data, there is still a very important thing you need to do. It’s to fix your SSD so nothing like this happens again. Let’s see how to do it.
How to Fix Failed SSD
Fixing a failed SSD can seem challenging. But, there are several methods you can try even right now. Here are five methods explained simply.
Method 1. Re-plug SATA Data Cable
Loose or faulty connections can sometimes cause an SSD to fail to be recognized by your computer. Re-plugging the SATA data cable can re-establish the connection and potentially resolve the issue.
Step 1. Turn off your computer and unplug the SATA data cable from the SSD.
Step 2. Turn on your computer. Wait for a few minutes, then turn it off again.
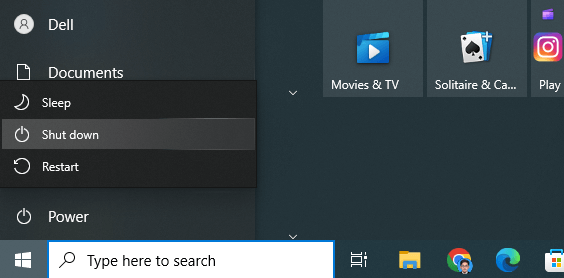
Turning off the Computer
Step 3. Reconnect the SATA data cable to the SSD and turn on your computer. Check if the SSD is recognized.
Method 2. Use the Power Cycle Way
SSDs have a unique way of managing power. Sometimes a disruption in power can cause the drive to become unresponsive. The power cycle method is like performing a hard reset on your SSD. It’s particularly effective in cases where the SSD might have entered a protection mode due to an improper shutdown. Here’s what you do.
Step 1. Unplug the SSD’s data cable but leave the power cable connected.
Step 2. Keep the power on for about 30 minutes, then turn it off for 30 seconds.
Step 3. Repeat the power on for another 30 minutes, then off for 30 seconds. After this, reconnect the data cable.
Method 3. Run CHKDSK
CHKDSK is a Windows utility that scans for and repairs various types of errors on disks. When an SSD fails due to logical errors, CHKDSK can be a lifesaver. This method is particularly beneficial because it addresses the software aspect of SSD failures.
Step 1. Press Win + S, type cmd, and run Command Prompt as an administrator.
Step 2. Type `chkdsk /f c:` (replace “c:” with your SSD’s drive letter) and press Enter.
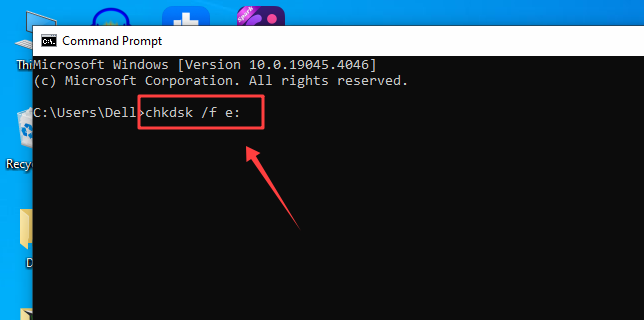
Entering Command to Run CHKDSK
Step 3. After the scan, try accessing your SSD.
Method 4. Update SSD Firmware & Drivers
Firmware is the low-level software that controls the hardware of your SSD. Manufacturers often release firmware updates that fix bugs, improve performance, and sometimes even increase storage reliability. So try updating your SSD firmware like this.
Step 1. Go to your SSD manufacturer’s website and download the firmware update tool. Run the tool and follow the on-screen instructions to update your SSD’s firmware.
Step 2. Press Window Key + X on your computer and select the Device manager option.
Step 3. Now open the Disk Driver dropdown and right click on your SSD disk drive name. After that, update the driver of this disk.
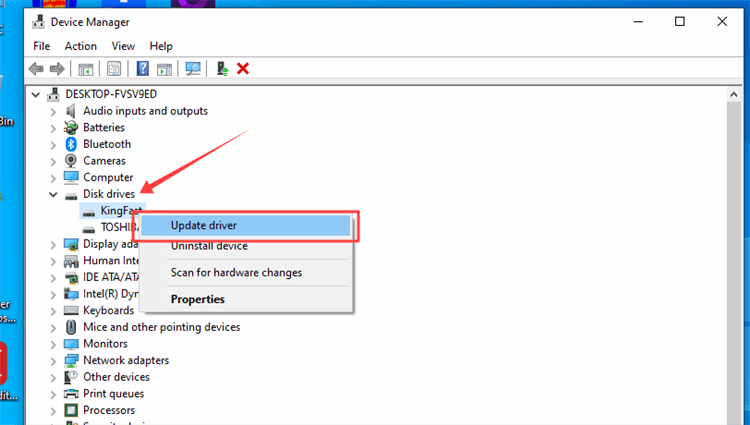
Updating the SSD Driver
Method 5. Format SSD
Formatting is a drastic step but can sometimes be the only way to make an SSD usable again. It erases all the data on the drive. Along with data, it also removes any corrupted files or problematic configurations that could be causing the SSD to fail.
This method is most effective when you’ve determined that the issue with the SSD is firmware-related but rather due to the data it contains.
Step 1. Press Win + S, type Disk Management, and open it.
Step 2. Right-click on your SSD partition and choose Format.
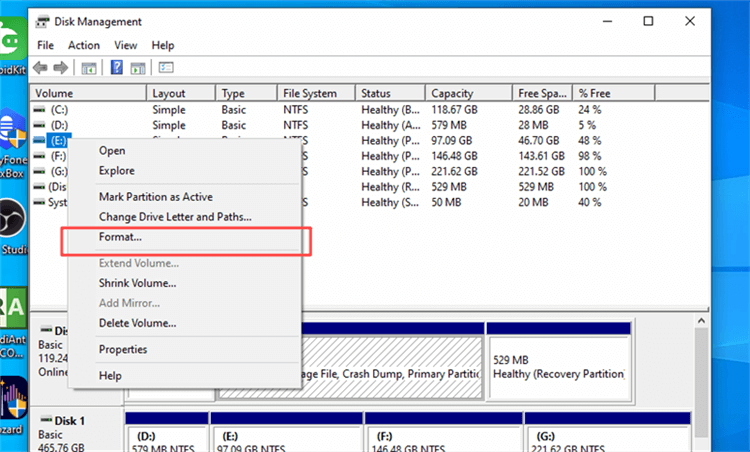
Formatting the SSD Drive
Step 3. Check “Perform a quick format,” then click OK to format the SSD.
Each of these methods has its place, depending on the issue with your SSD. Always try the least invasive method first and back up your data regularly to prevent loss.
Now before we finish, let’s have a look at some FAQs about how to recover data from SSD.
FAQs about SSD Data Recovery
Q1. Can overwritten data be recovered from SSD?
No, once data has been overwritten on an SSD, it cannot be recovered.
SSDs use a process called TRIM, which helps them run faster and last longer. When you delete data from an SSD, TRIM makes sure that the data is actually removed to make space for new data. Once new data takes its place, the old data is gone for good.
That’s why you stop using the SSD immediately if you accidentally delete something important.
Q2. Is it easier to recover data from an SSD or HDD?
Recovering data from HDDs is generally considered easier than from SSDs. This is because HDDs store data in a more simple way, without using the TRIM function that SSDs do.
TRIM automatically clears data that is no longer needed, which can make recovery difficult. Also, SSDs have more complex electronic and software interfaces.
However, both types of drives have their own tools and methods for data recovery. So, the success can often depend on the specific situation and the cause of the data loss.
Final Thought
Data recovery from SSDs presents its unique challenges. But, it’s not impossible. This article has shown that there are reliable methods to recover data from SSDs. We’ve discussed how to recover data from SSD using the Glarysoft File Recovery software. We have also revealed many methods to fix your SSD drive after recovering data from it. If you want the easiest and fastest way to recover your data, just free download Glarysoft File Recovery to do that now. The sooner you act, the higher your chances of recovery.
Joy Taylor
Senior writer of the iMobie team as well as an Apple fan, love to help more users solve various types of iOS & Android-related issues.
Screenify
AnyEnhancer
FocuSee
Vozard
AnyMiro
AnyMirror


